|
|
|
|
Home - Location - Timetable - Facilities - FAQs - Events - Stately Trains
News - Photogalleries - Digital Archive - History - Shops - Departments Stocklist - Projects - Signalling - Membership - Volunteering - Links
|

|
The walk started at Ilkley station, with this board giving details of where and when it took place.
(c) YDRMT collection.
|

|
The first photograph shows Ilkley station boasting 4 platforms and the 'hole in the wall' where the line to Skipton headed
off. The area formerly occupied by the Skipton platforms (3 and 4) is now the carpark for the station.
(c) YDRMT collection.
|
|
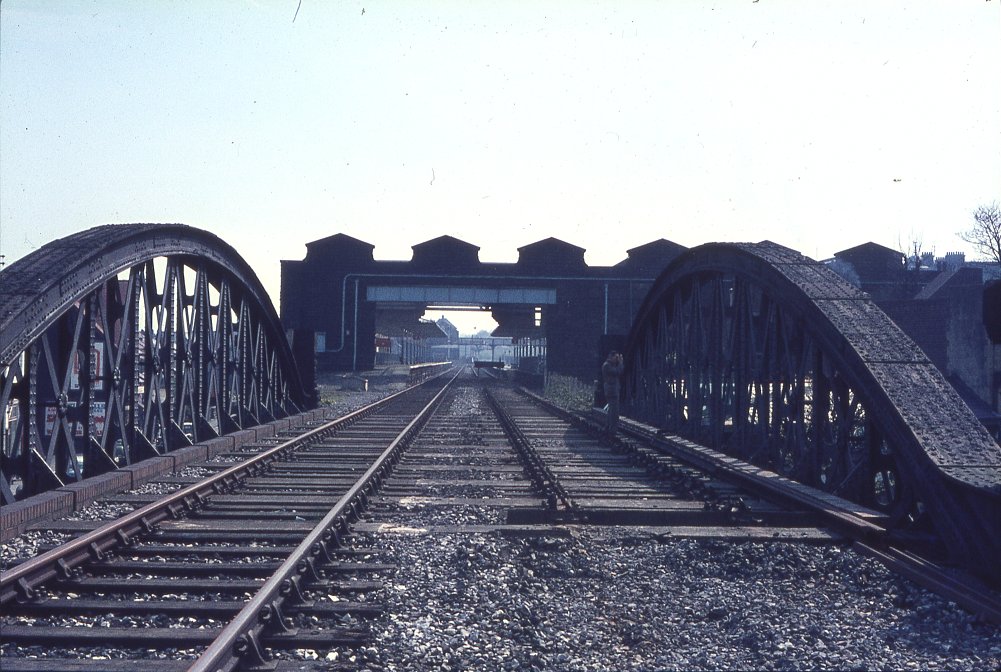
Immediately outside the station lay Brook Street Bridge, seen here looking back through the 'hole in the wall' into Ilkley
station.
(c) YDRMT collection.
|
|
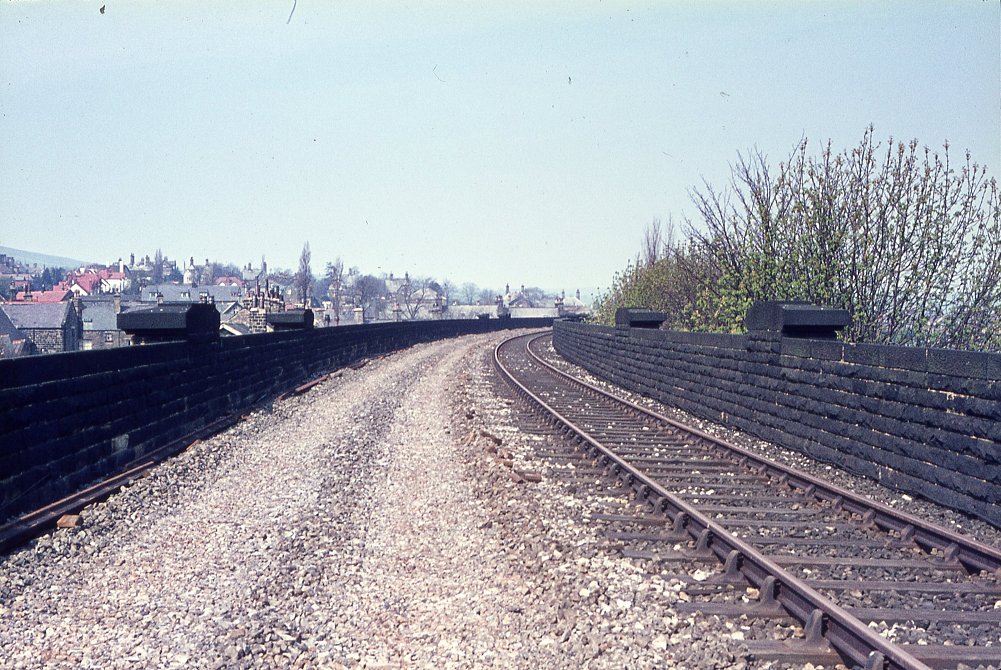
The line travelled through Ilkley on a large masonary viaduct, which was quickly demolished in 1972, along with most of the
remaining structures on the line. This view is looking back towards the station.
(c) YDRMT collection.
|
|
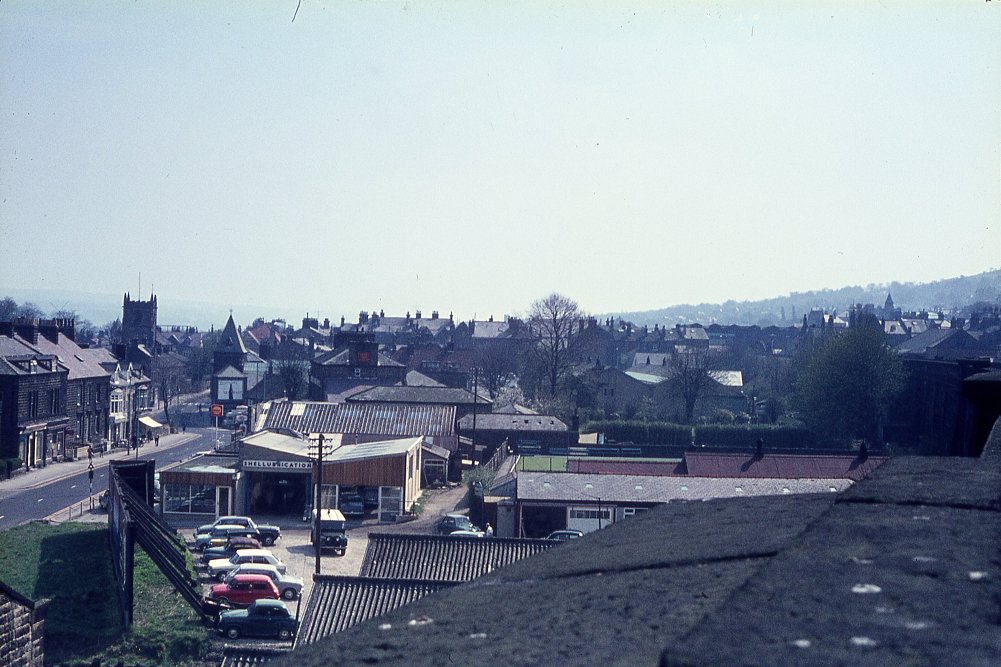
Looking from the viaduct, this view of Ilkley is available, clearly showing how impossible it would be to reinstate the
Railway back through to Ilkley station.
(c) YDRMT collection.
|
|
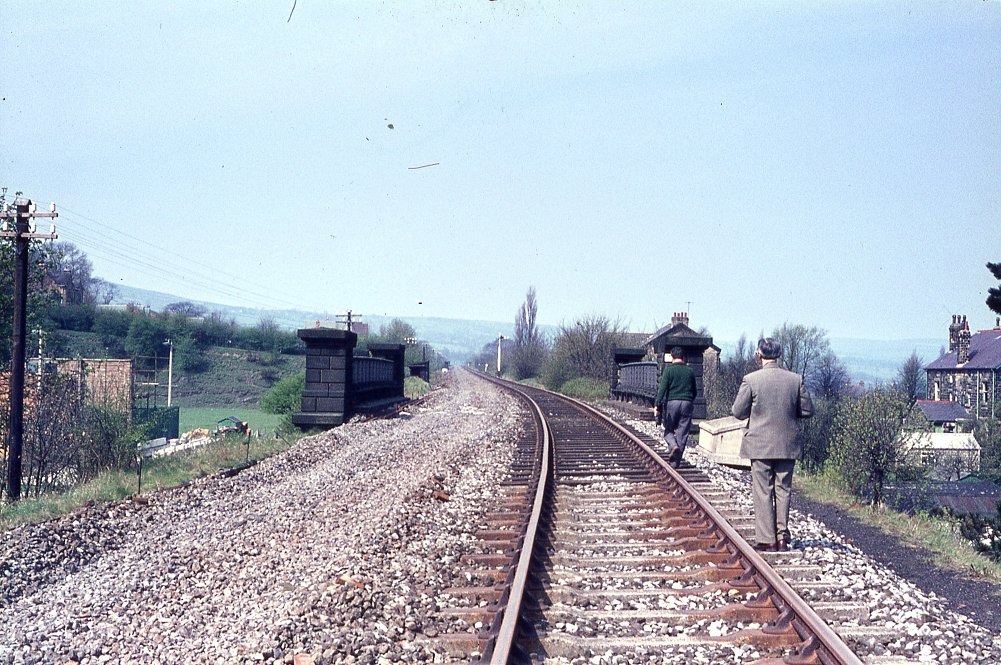
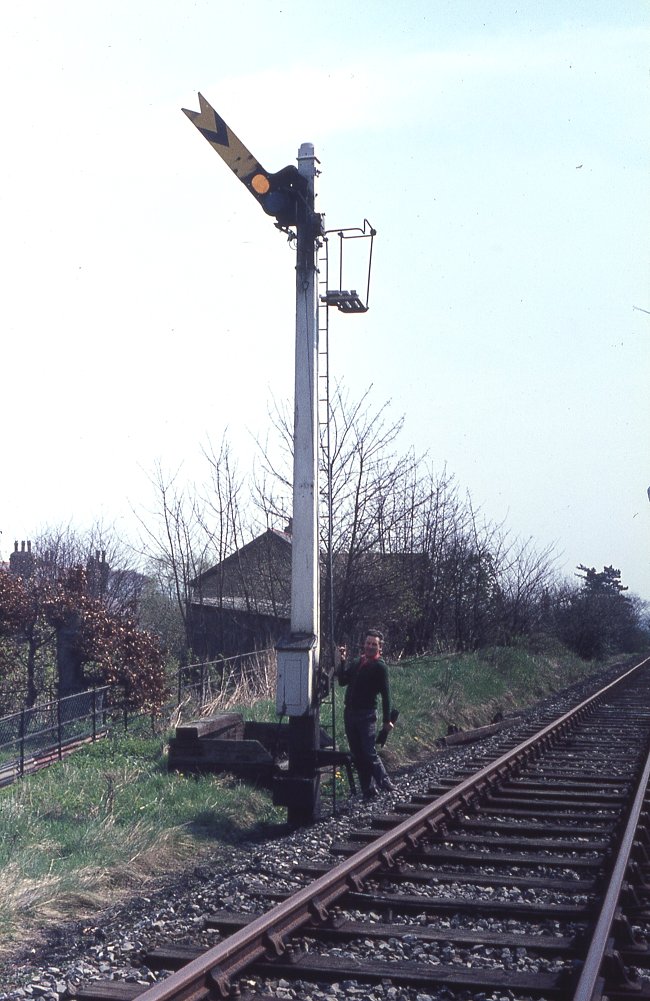
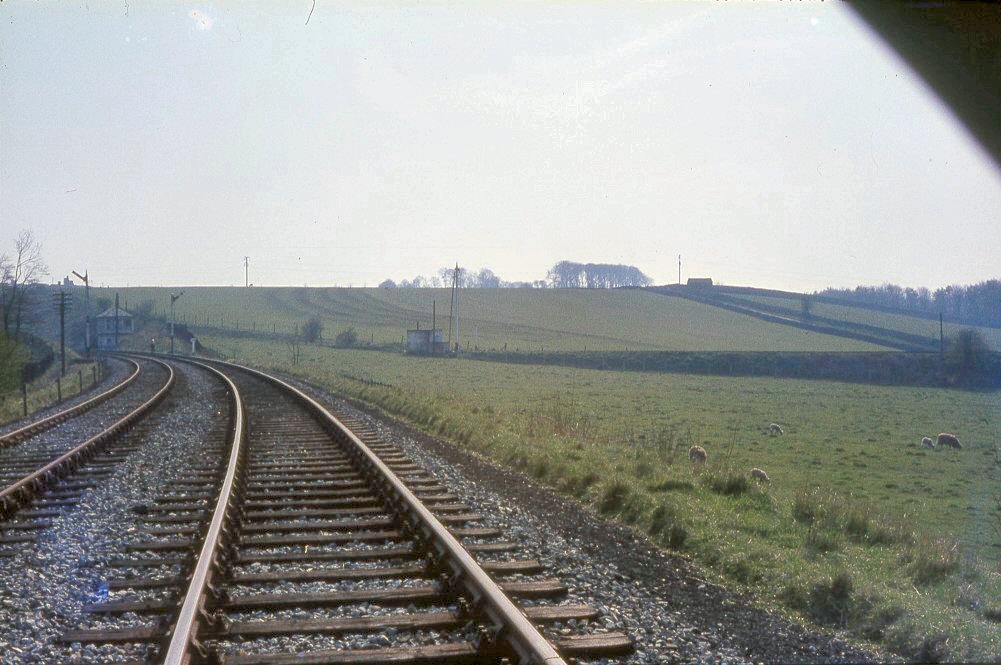
This view includes the distant signal for Ilkley station, and therefore must be on the outskirts of Ilkley, taken
looking towards Addingham.
(c) YDRMT collection.
|
|
The same signal pictured again, but looking back the other way.
(c) YDRMT collection.
|
|
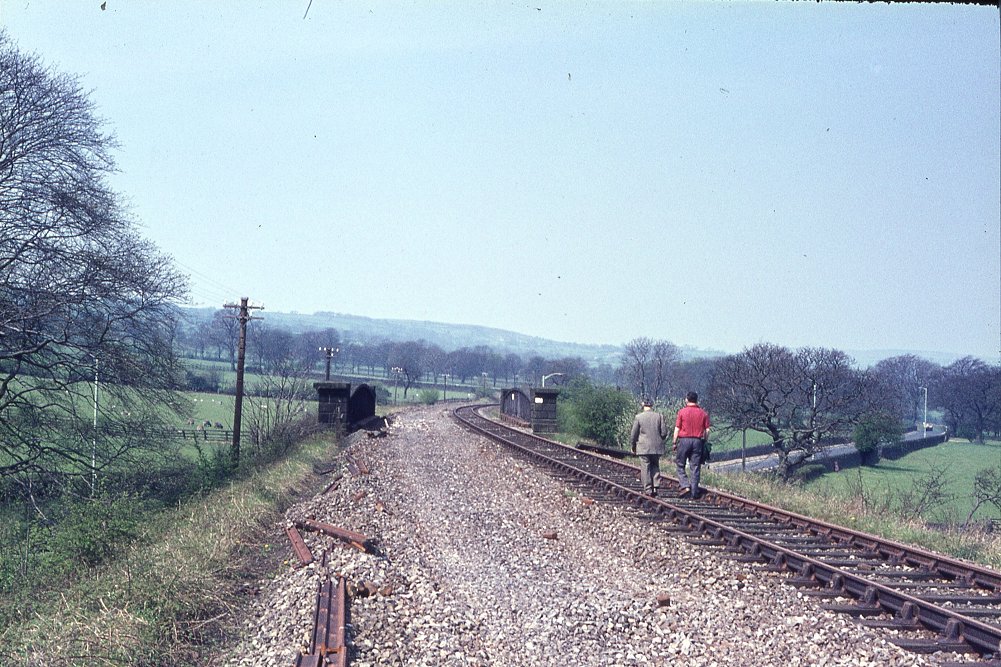
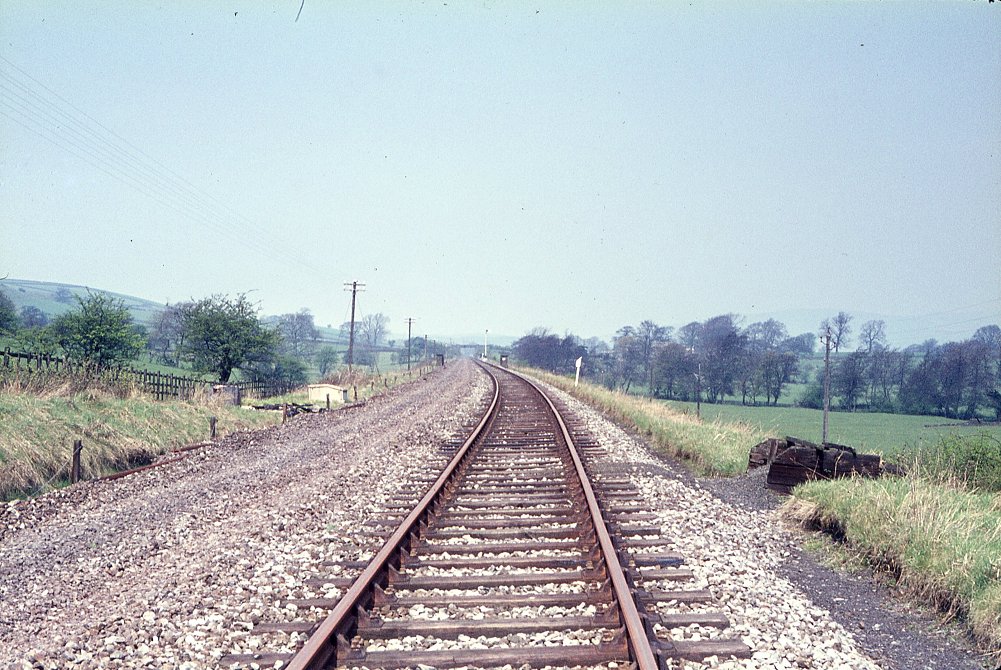
The line between Ilkley and Addingham crossed the main road several times, and some of the embankment still remains to this
day. Again, this would appear to be looking towards Addingham.
(c) YDRMT collection.
|
|
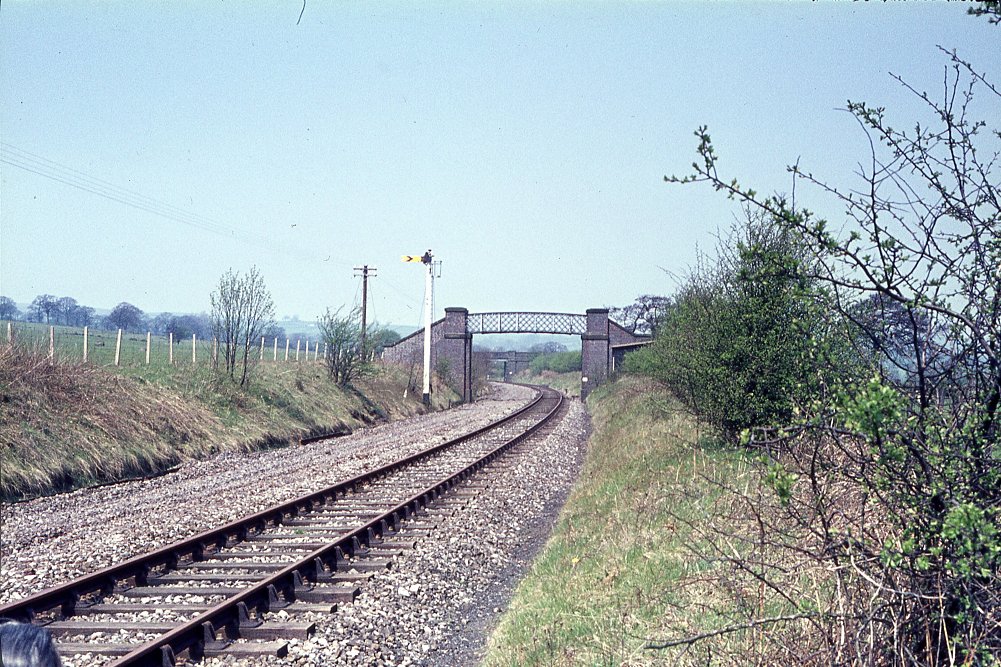
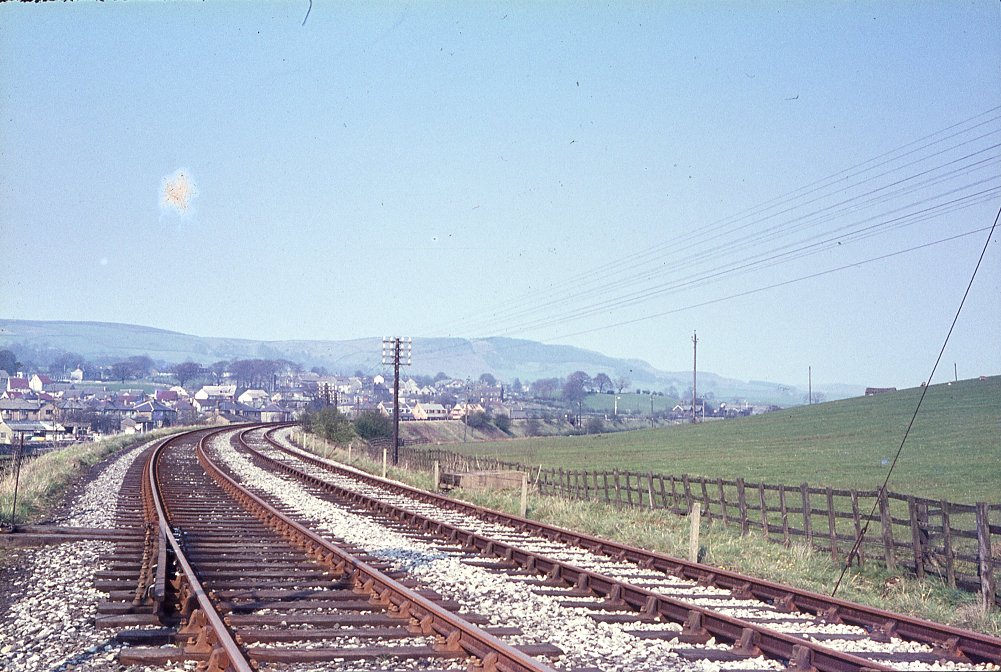
Despite the initial suggestion that this was Skibeden, the distant signal and bridge to the rear of the photo mean that this
must be the approach to Addingham, from Ilkley. This photograph was something of a surprise as we were of the impression that
the footbridge at Skibeden was unique in being built of blue brick.
(c) YDRMT collection.
|
|
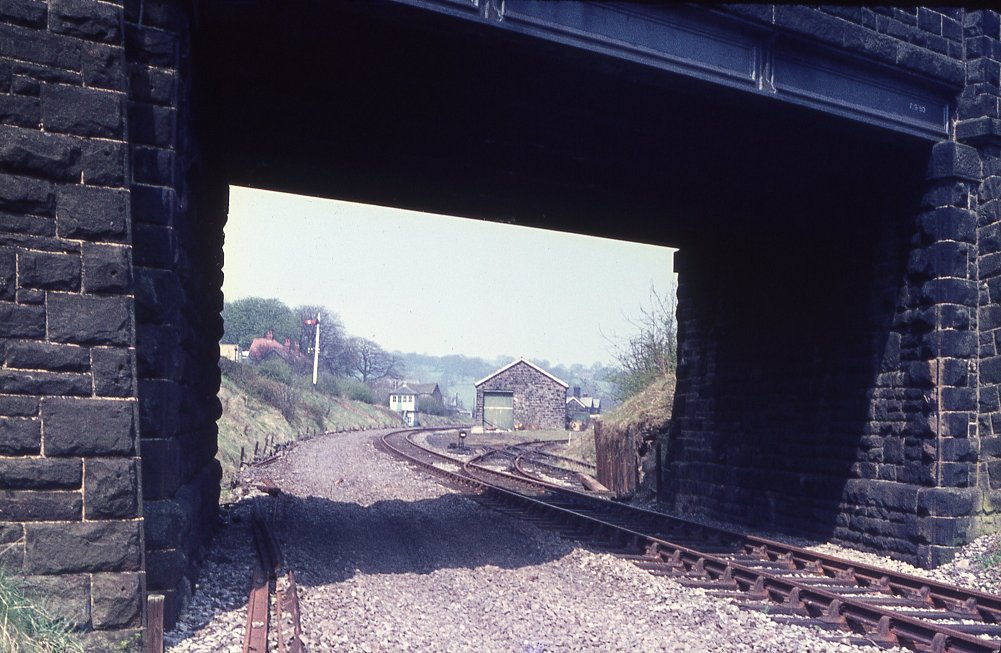
Viewd through the overbridge, the remains of Addingham's goods yard is apparant, with its substantial stone goods shed and
the station building itself visible towards the rear of the photo, on the right.
(c) YDRMT collection.
|
|
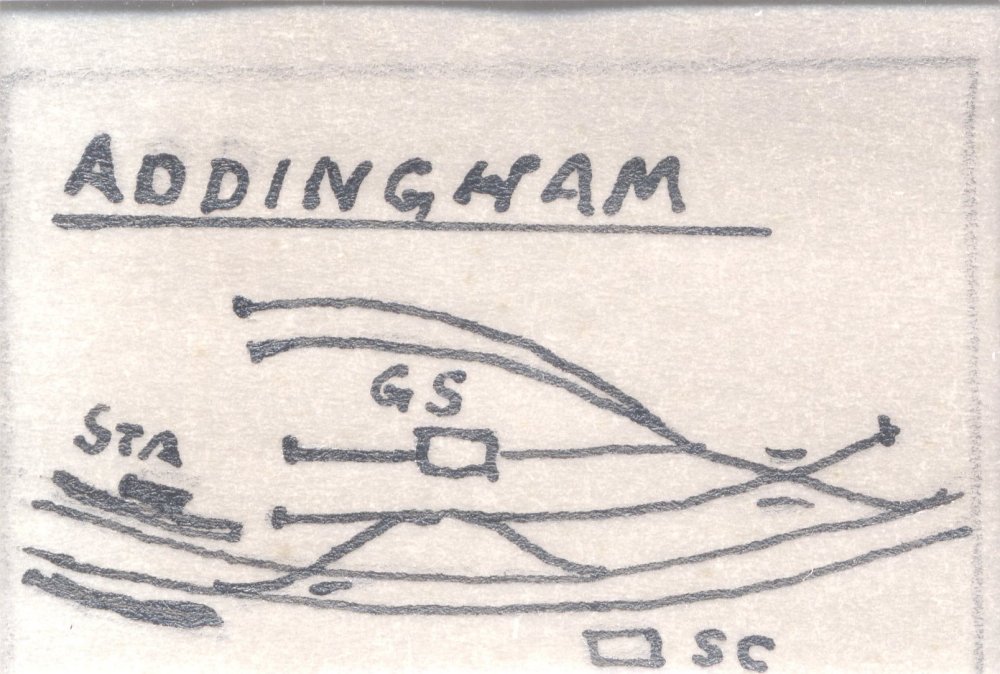
Included in the collection of slides were hand-drawn diagrams showing the track layouts of the stations on the line.
(c) YDRMT collection.
|
|
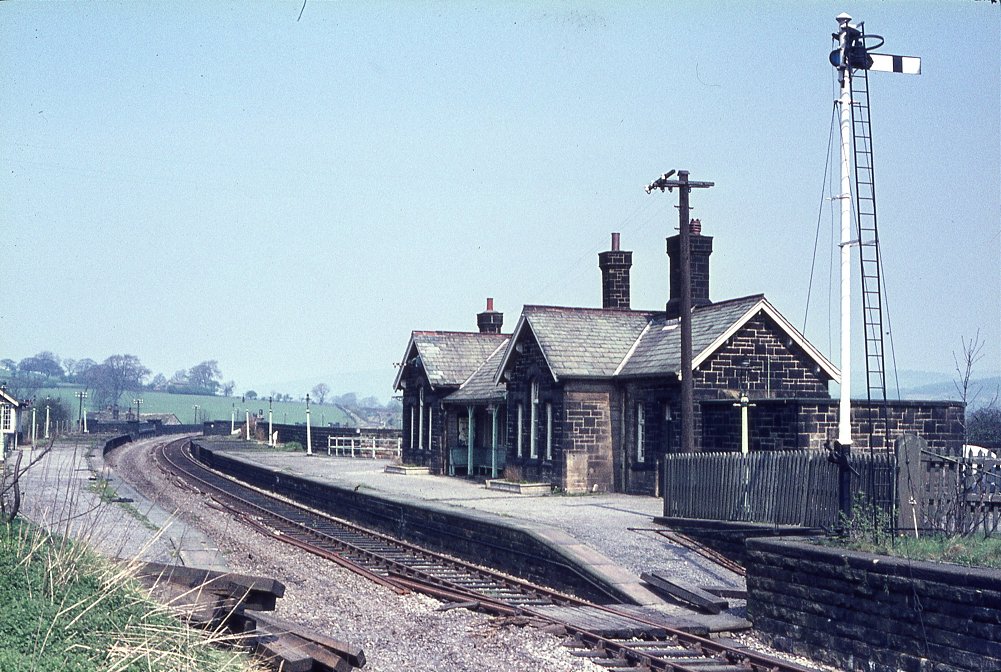
A close-up of Addingham station building shows its design clearly - a mirror image of Embsay's building. Note that despite
the closure being a good time ago, the station is still tidy and intact, even with its signalling equipment. This was removed
much earlier at Bolton Abbey.
(c) YDRMT collection.
|
|
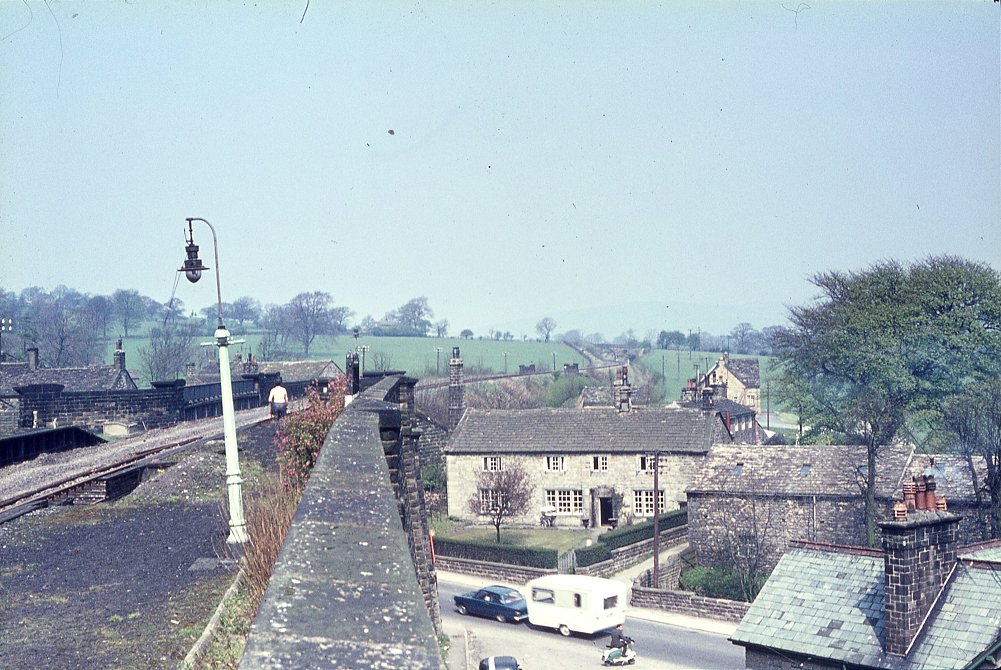
Viewd from the far end of the station building in the last photograph, this shows how the line ran through Addingham high
above ground level. Addingham station therefore had a subway instead of a footbridge. The embankment visible at the far
side of the road still exists, but everything else towards the photographer has gone, replaced by a fish and chip shop.
(c) YDRMT collection.
|

|
The running-in board at Addingham.
(c) YDRMT collection.
|
|
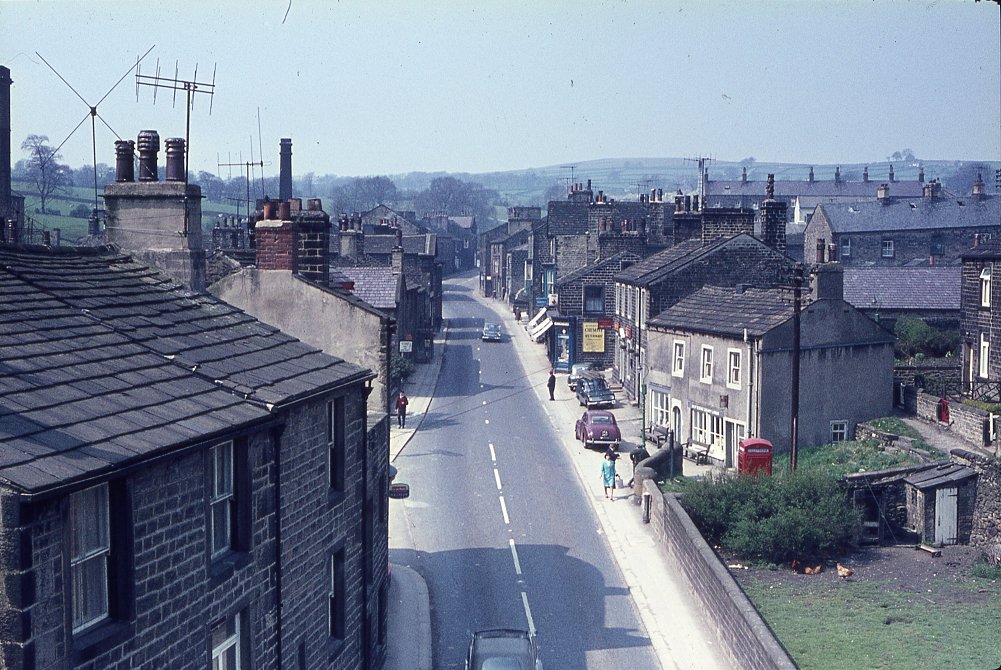
As they walked across the bridge crossing the main road in Addingham, this view was obtained. It would be interesting to
compare to modern day Addingham, but might be somewhat difficult to re-create!
(c) YDRMT collection.
|
|
A somewhat unknown view here - presumably it is the Bolton Abbey side of Addingham, and the signal visible is the distant
for Addingham, but this is not certain...
(c) YDRMT collection.
|
|
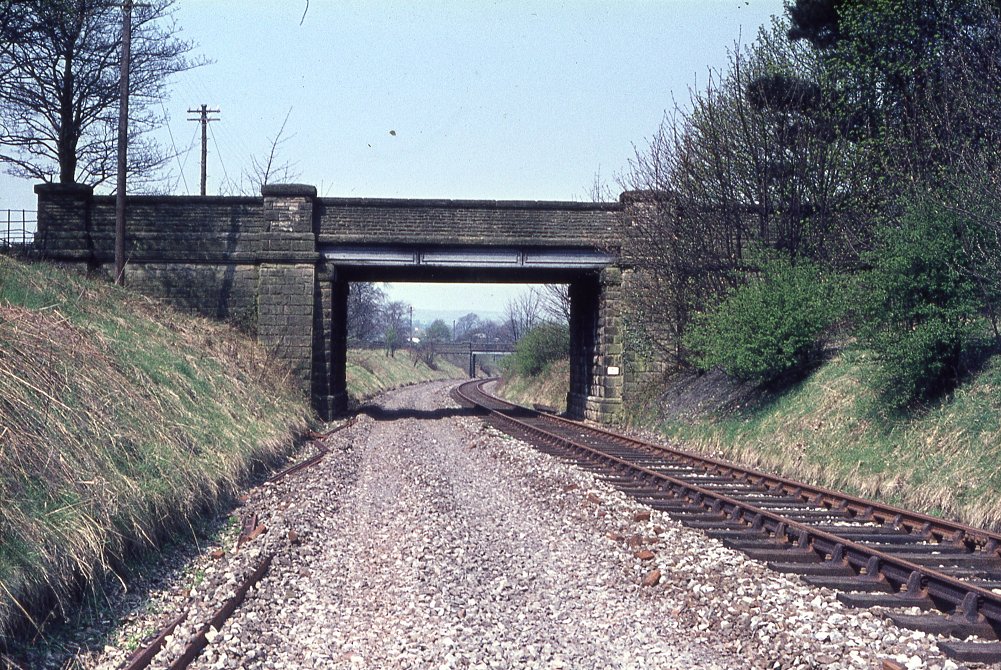
Between Adding ham and Bolton Abbey once more, and these two overbridges also remain intact, although there has been quite
a large amount of soil washed down onto the trackbed, resulting in about 6'6" headroom only!
(c) YDRMT collection.
|
|
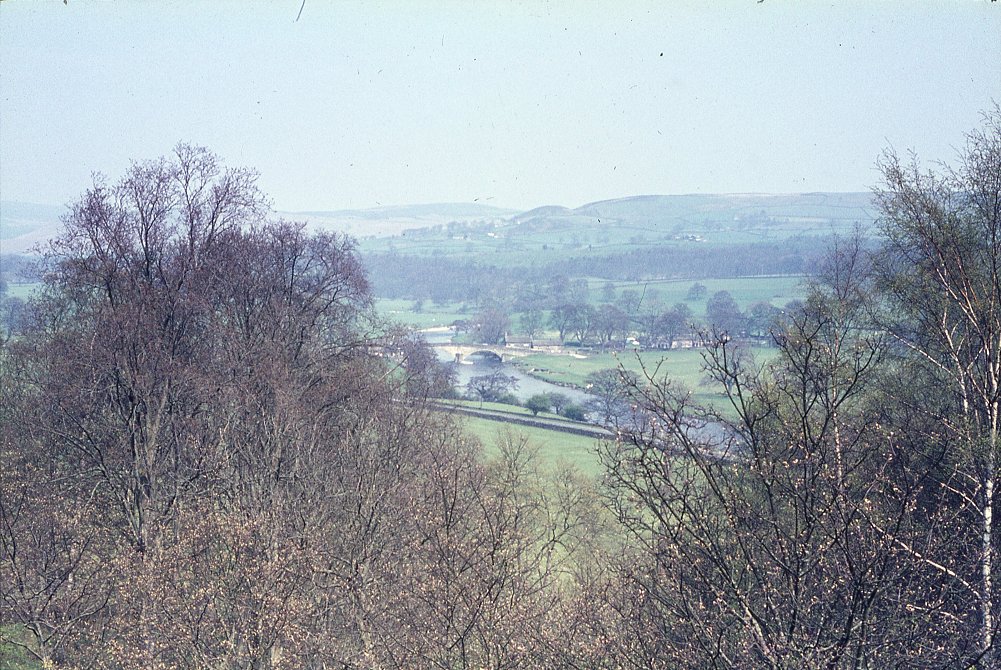
Approaching Bolton Abbey station, and the view here has changed somewhat with the new road bridge. This is looking across at
the Wahrfe, towards Bolton Priory.
(c) YDRMT collection.
|
|
Heading further towards Bolton Abbey, and this bridge is still intact. It is NOT the site of the school in Addingham as was
previously supposed - many thanks to those who helped identify it!
(c)YDRMT collection.
|

|
Just around the bend from the previous photograph, and Lobb Ghyll Viaduct is seen, presumably looking towards Addingham. This
structure has never been particularly easy to photograph, owing to the line passing through a wood. Today, this structure
remains intact, and in much the same appearance, as the greenery which was trying to grow on top of it was removed.
(c) YDRMT collection.
|
|
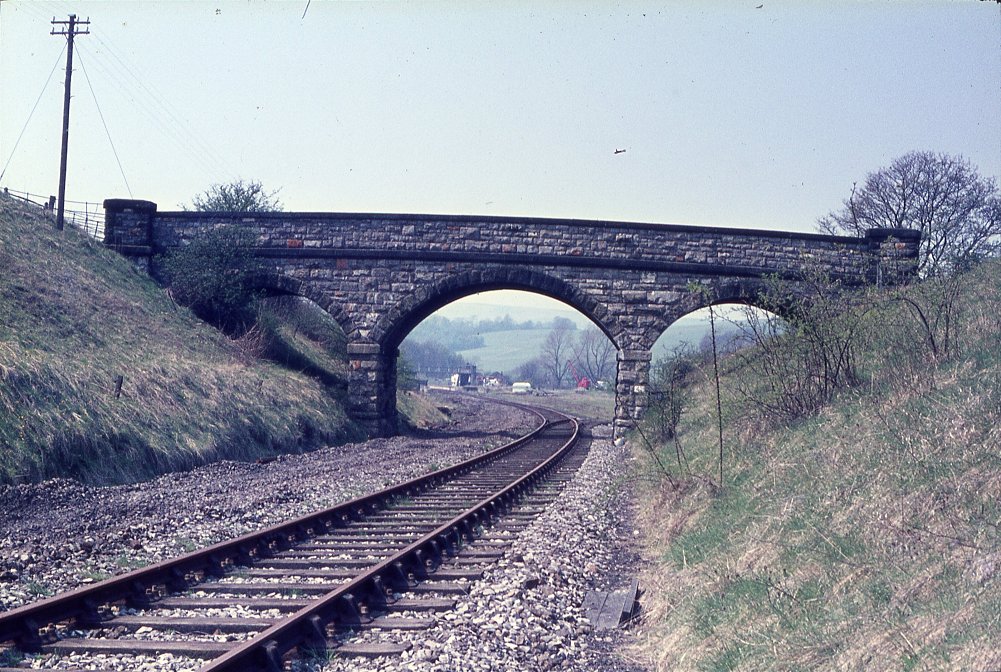
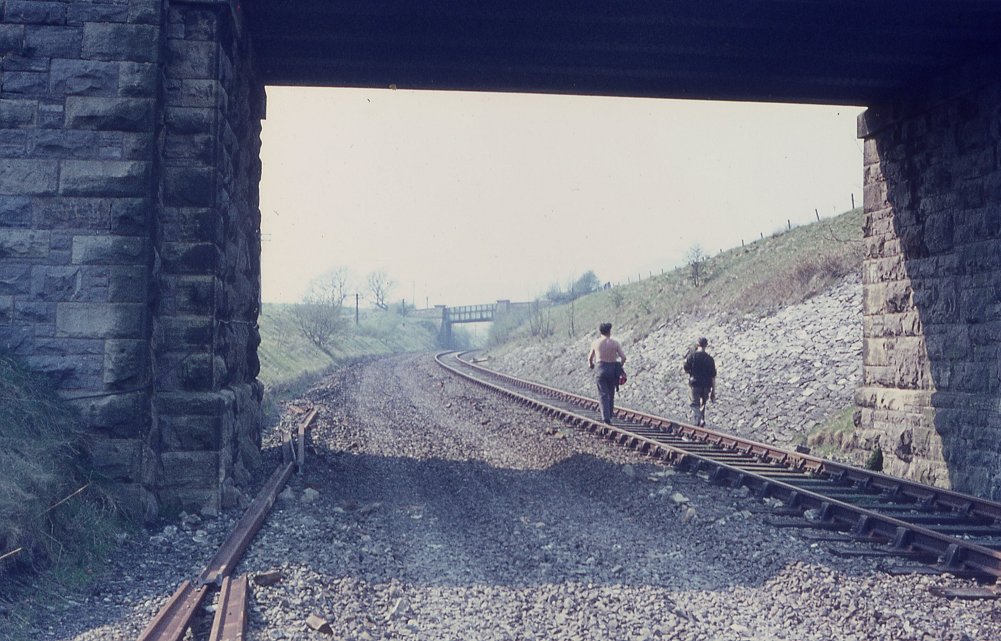
Once over the viaduct, the line sweeps around a bend, over a couple more underbidges, and then enters Bolton Abbey station,
under this bridge. The turnout to the goods yard can still be seen, as can the station in the background. Currently the
Railway owns right up to this bridge.
(c) YDRMT collection.
|
|
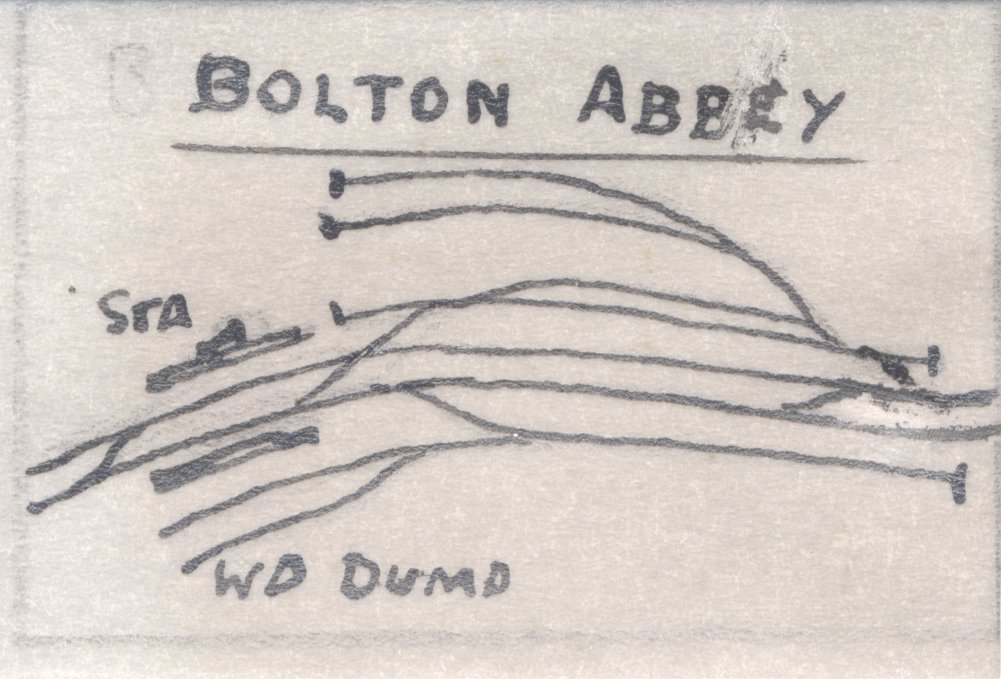
The former layout of the station, including the War Department munitions dump. These sidings formerly served the quarry.
(c) YDRMT collection.
|
|
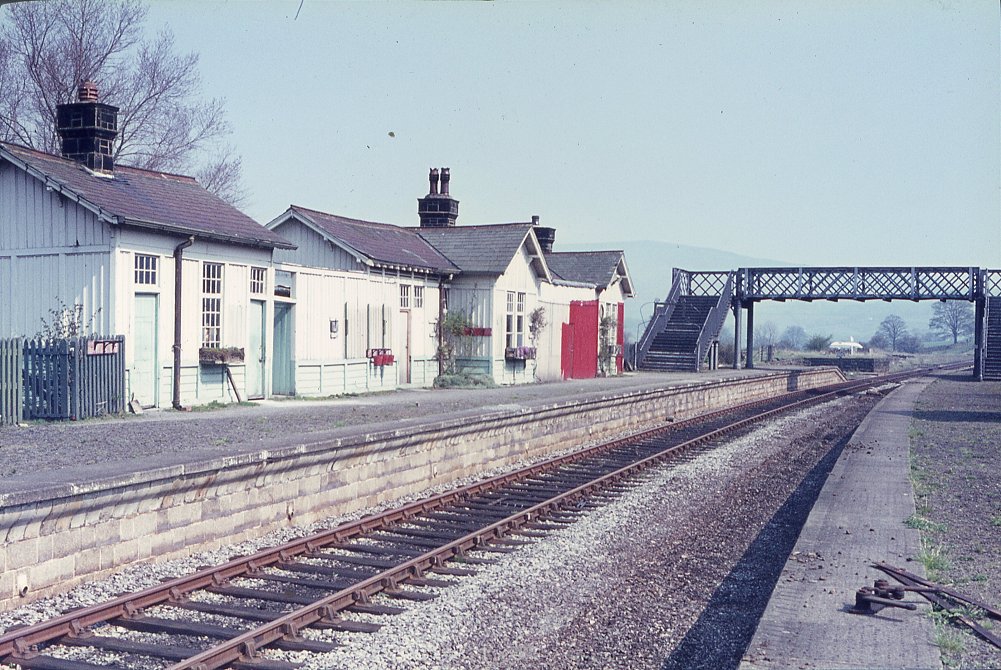
The original Bolton Abbey station is seen, looking towards Addingham, in its second lease of life as the headquarters for a
pipelaying company. The red boarding seals off the station building from the platform, and was sunsequently painted to match
the rest of the station before falling into disrepair, not helped by the removal of the slates from the roof.
(c) YDRMT collection.
|
|
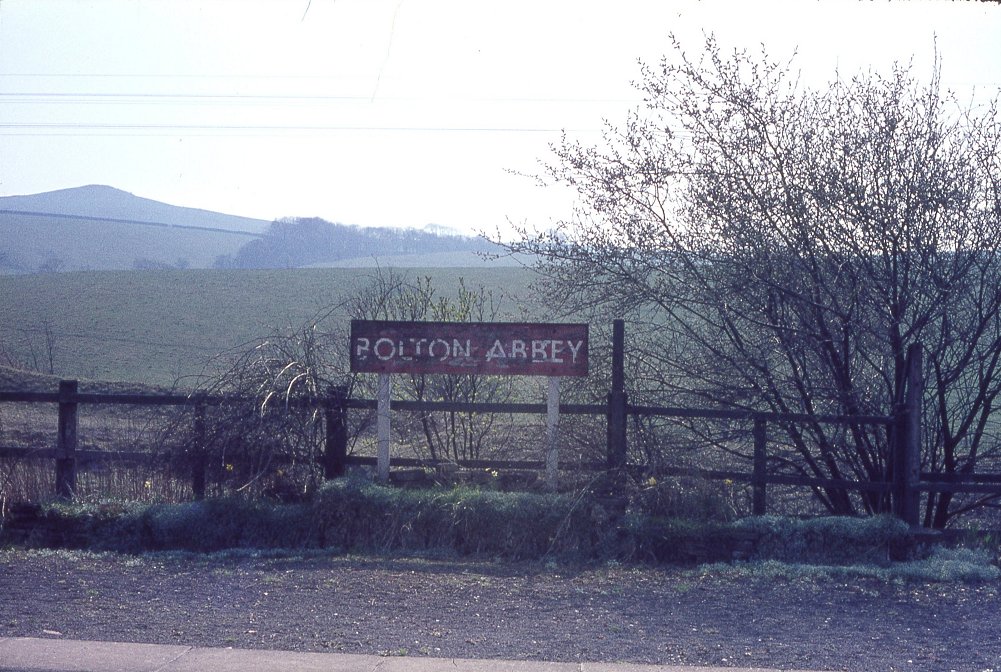
The running-in board on platform 2, unusually at the Embsay end.
(c) YDRMT collection.
|
|
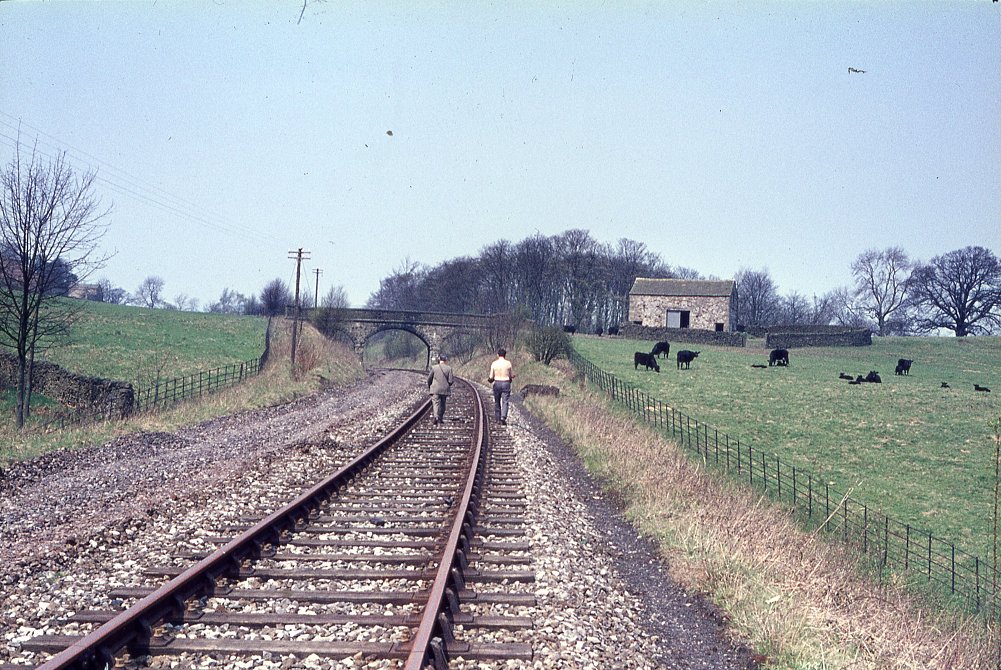
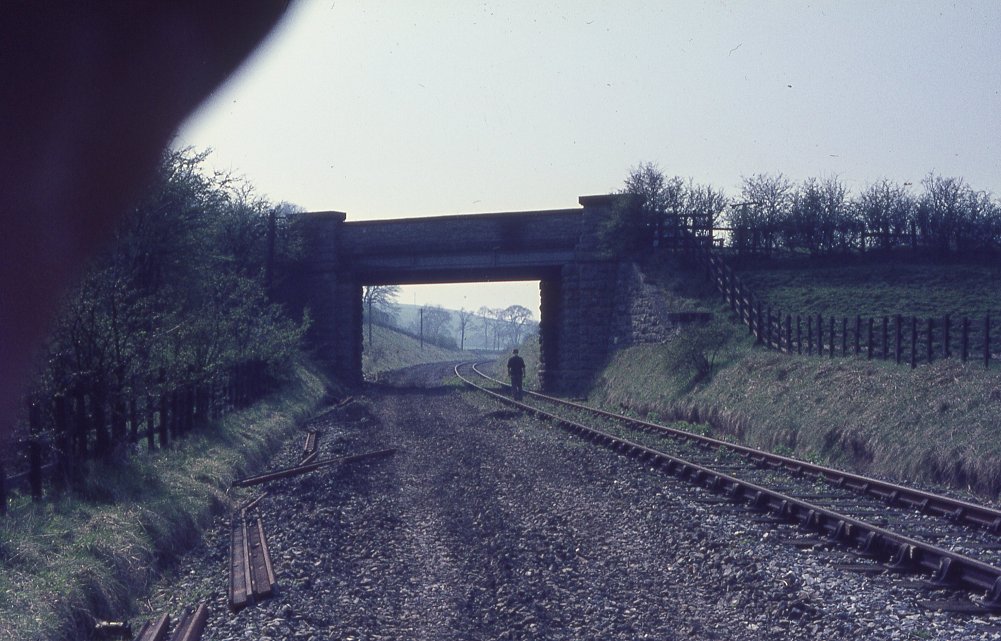
Moving on towards Embsay and the location is Prior's Lane bridge, with Draughton up the hill to the left of the picture. This
location has changed very little today.
(c) YDRMT collection.
|
|
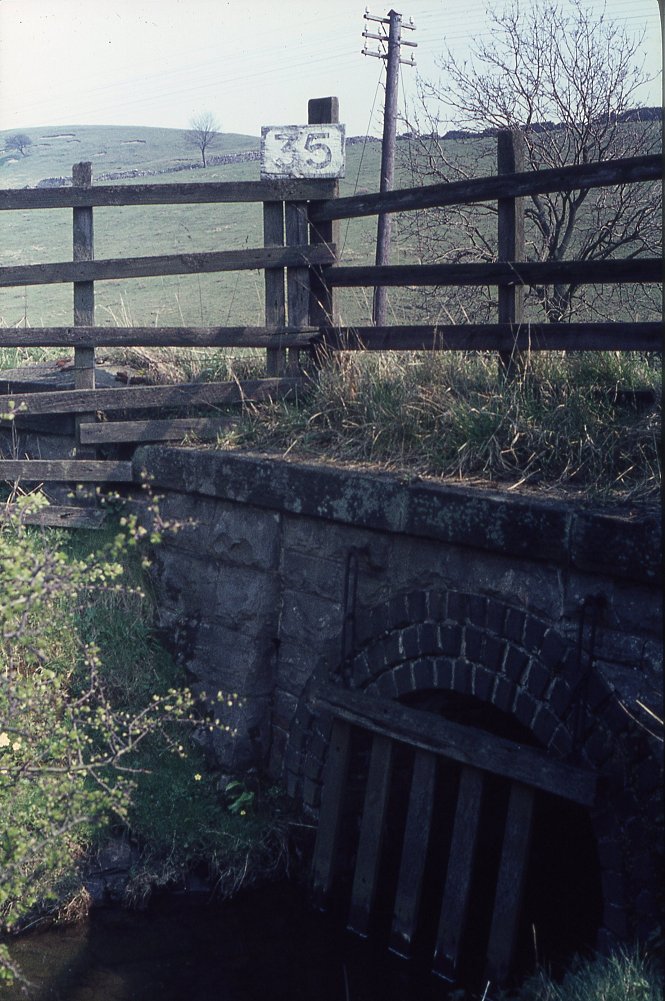
Nearing the location (now) of Stoneacre Loop, and this photo records culvert 35, still functioning today, having just been
partially repointed (2003).
(c) YDRMT collection.
|
|
Bridges 34 and 33 are seen in this photograph - 34 was in a very poor state when we rebuilt, and it parapets are now in red
brick. more dramatic changes have occured to Bridge 33 however...
(c) YDRMT collection.
|
|
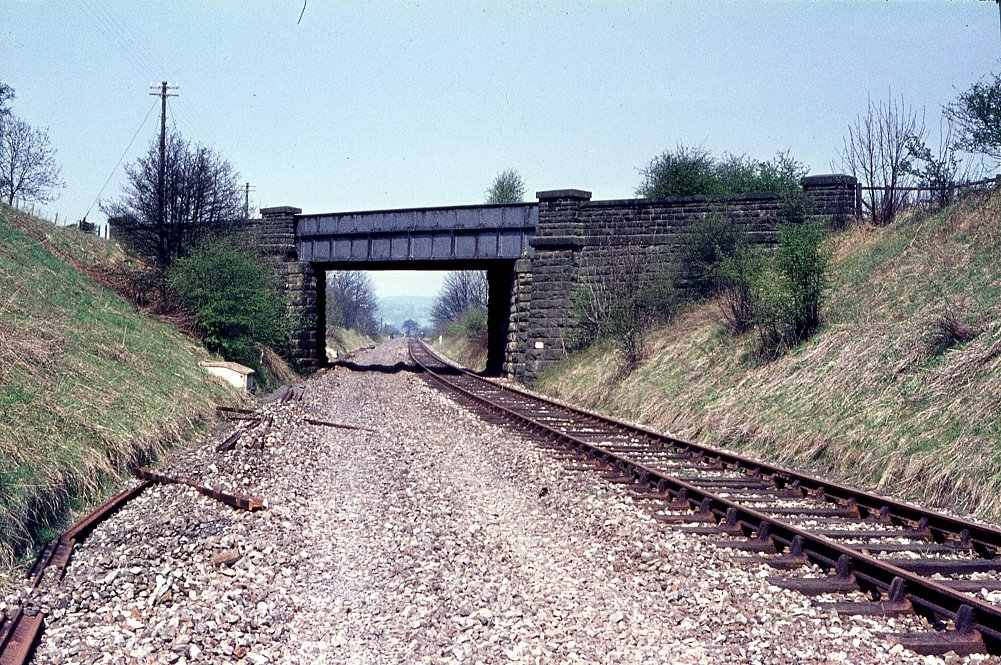
...as it carries the A59 over the Railway at Holywell Halt (just through the bridge). This bridge has since been encased in
concrete with an Armco arch inserted. The alternative option would have been to infill the cutting, preventing reinstatement
of the line.
(c) YDRMT collection.
|
|
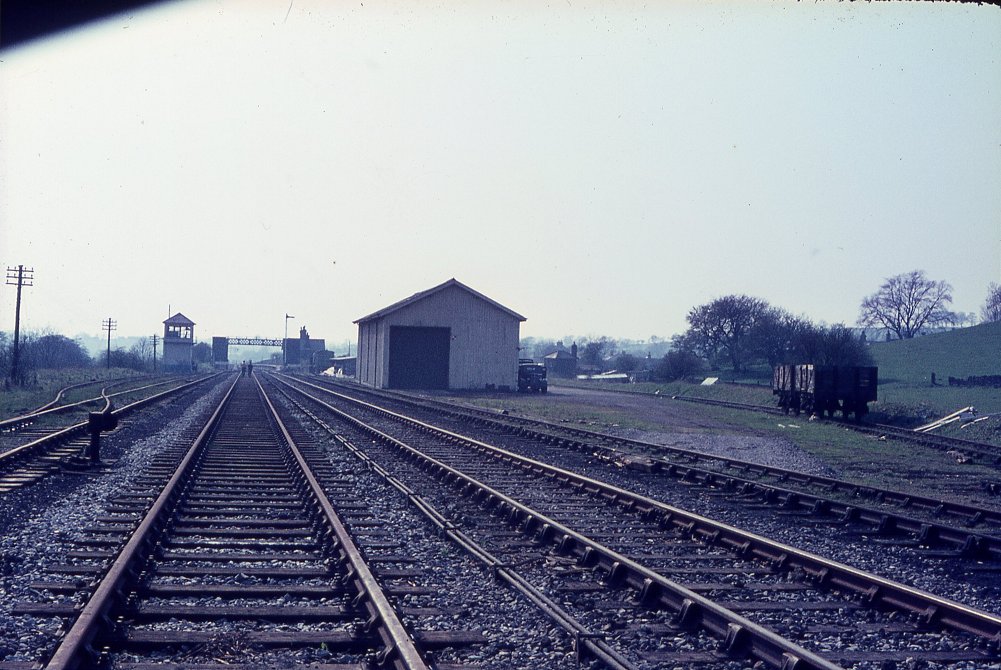
Embsay's yard is now reached, still with its full complement of signalling, trackwork and structures. The hope was that the
traffic from the quarry would continue, therefore the line was left intact for a while after the rest was dismantled. The view
from here today is very different.
(c) YDRMT collection.
|
|
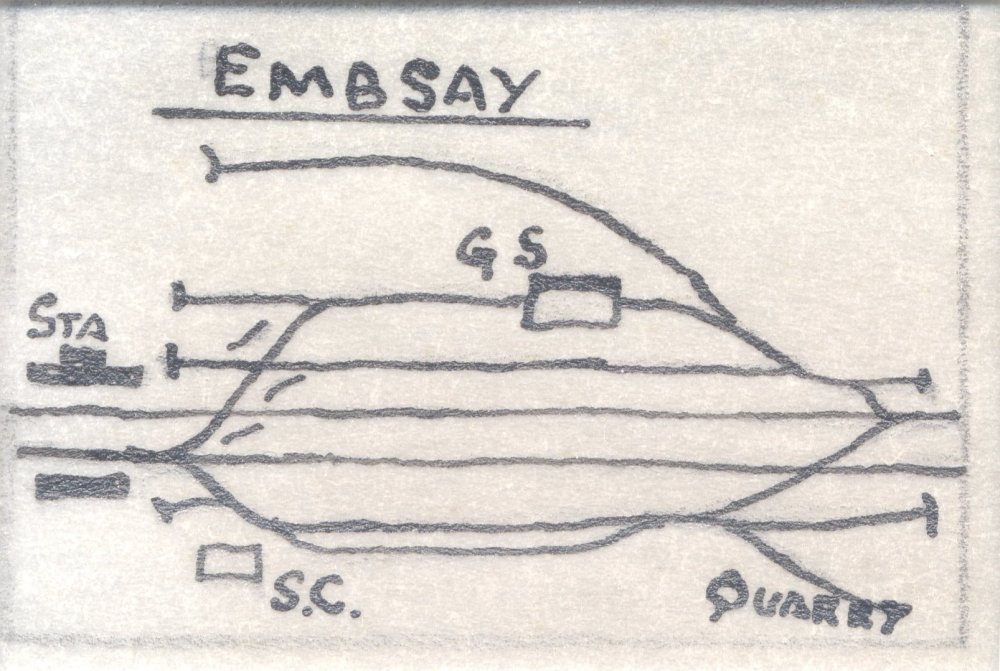
The track diagram from Embsay as was. This was inherited by the Railway, and modified to meet the changing needs of the
society.
(c) YDRMT collection.
|
|
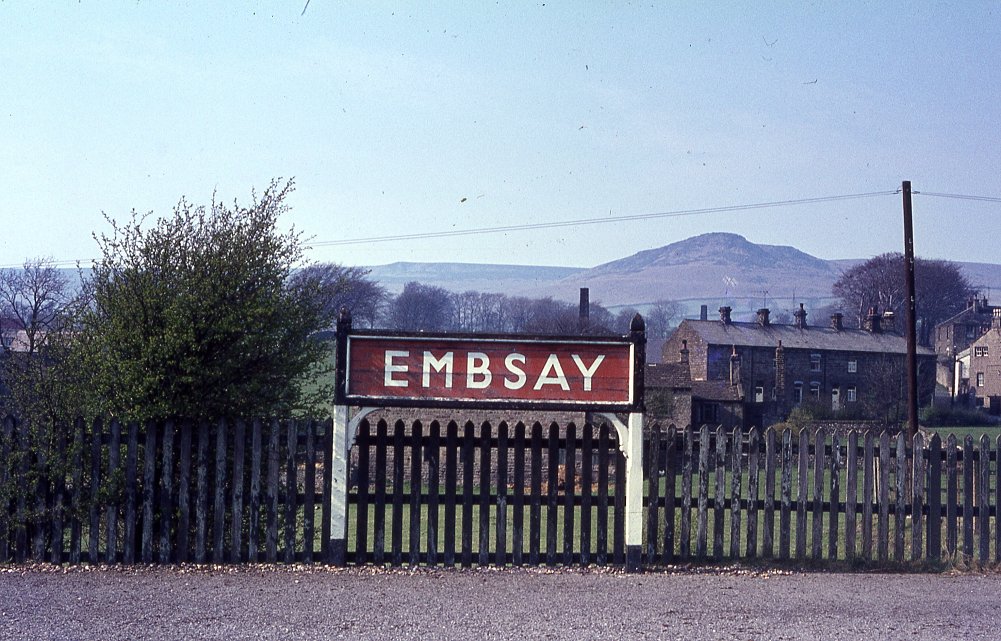
A running-in board on platform 1, with Embsay crag in the background.
(c) YDRMT collection.
|
|
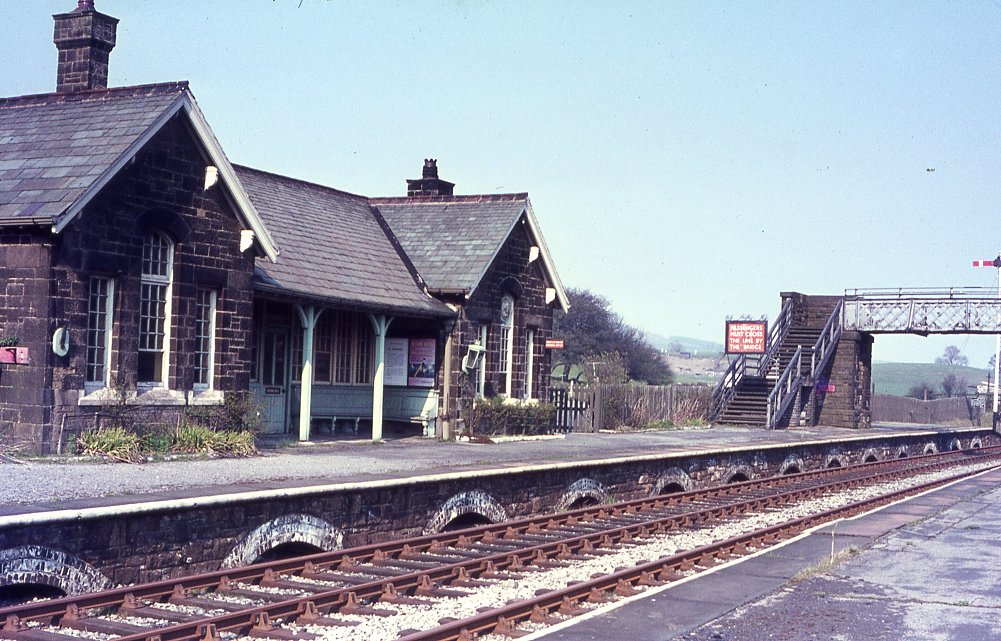
The station building itself was something of a gem when acquired - its state upon closure can be seen from this - not that it
still retains its lamps low-down to ease the job of the stationmaster. Originally they would have been mounted higher up on
the corners of the building - the location in which they are today. The station has since been butchered, including the recent
addition of a canopy to improve passengers' comfort in the usually wet weather. The plan is to return the station to its original
purpose once new buildings take the retail and catering facilities.
(c) YDRMT collection.
|
|
Looking towards Embsay Junction, with the line to Grassington just visible across the picture. Interesting to note that the
junction signalbox is switched out - for the mainline, which had closed. The branch line is still in use for trains to and
from Swinden Limeworks, near Rylstone.
(c) YDRMT collection.
|
|
Looking the other way, showing the trap point to prevent runaways fouling the junction. It would appear that this is locally
worked, as opposed to being from the 'box. This is the current site of Bow Bridge Loop, looking back towards Embsay, with the
station buildings just visible.
(c) YDRMT collection.
|
|
Yorkshire Dales Railway Museum Trust (Holdings) Limited
Registered Charity No. 1116386 Bolton Abbey Station, Bolton Abbey, Skipton, North Yorkshire, BD23 6AF General Enquiries: 01756 710614 - Talking Timetables & Fax: 01756 795189 enquiries AT embsayboltonabbeyrailway DOT org.uk webmaster AT embsayboltonabbeyrailway DOT org.uk |

|
