|
|
|
|
Home - Location - Timetable - Facilities - FAQs - Events - Stately Trains
News - Photogalleries - Digital Archive - History - Shops - Departments Stocklist - Projects - Signalling - Membership - Volunteering - Links
|
|
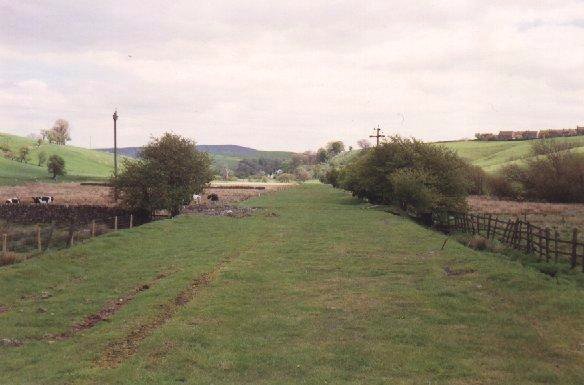
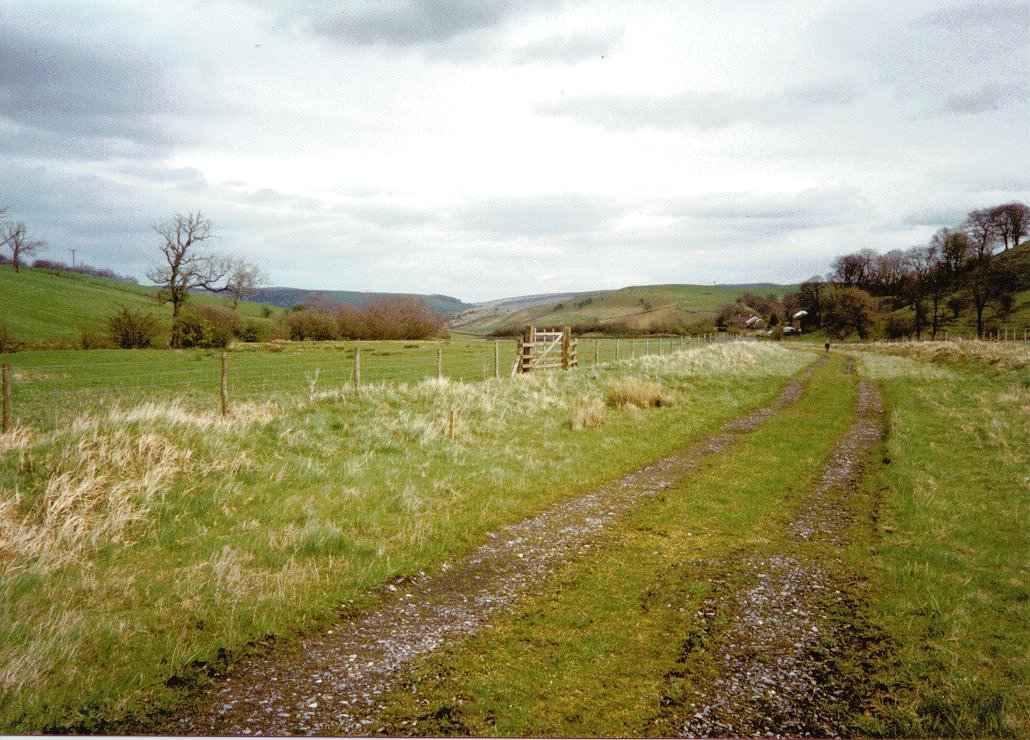
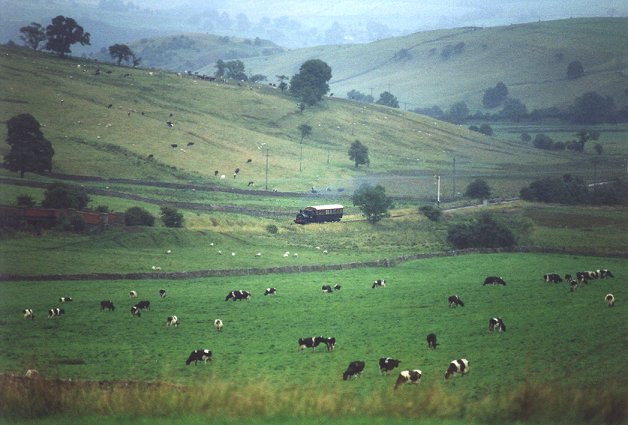
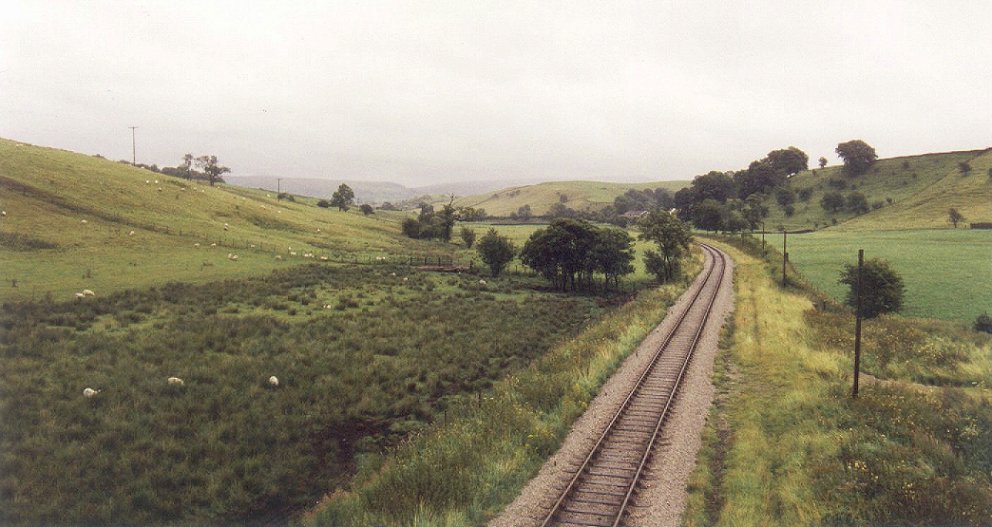
This view, taken before any work has commenced, shows the site of Stoneacre
Loop, looking towards Bolton Abbey, with the village of Draughton visible on
the top of the hill.
(c) Charles Boylan.
|
|
By 2/12/90, however, Stoneacre Loop was nearing completion, and is pictured
from a very similar location as the previous photo. Despite the rather gloomy
weather, the changes are obvious. Track is in place and ballasted, and the
lineside vegetation has been trimmed back. All it requiresd now is final
alignment and tamping to ensure the railhead is level.
(c) Charles Boylan.
|
|
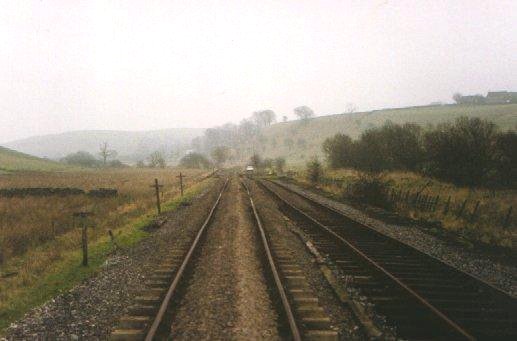
Looking from Stoneacre Loop back towards Holywell Halt and beyond shows the
state of the trackbed before anything was done - very much a green field.
(c) Charles Boylan.
|
|
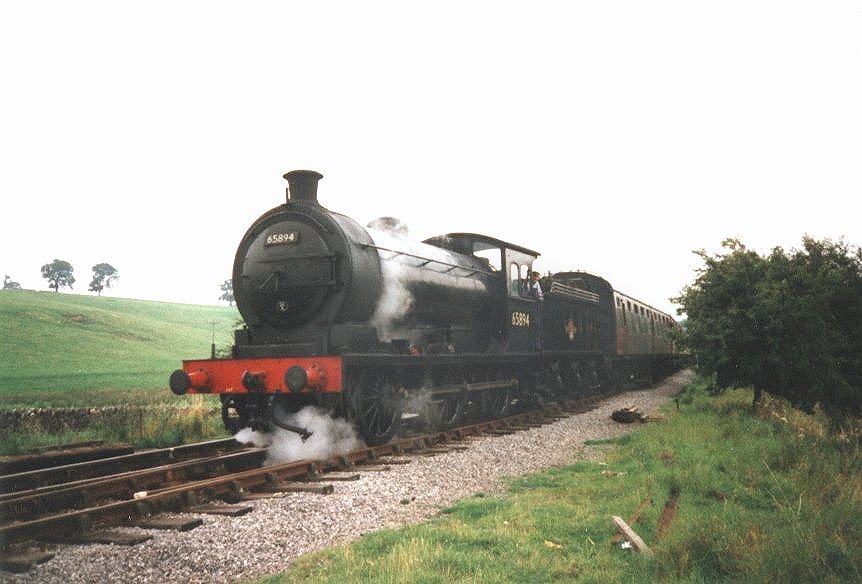
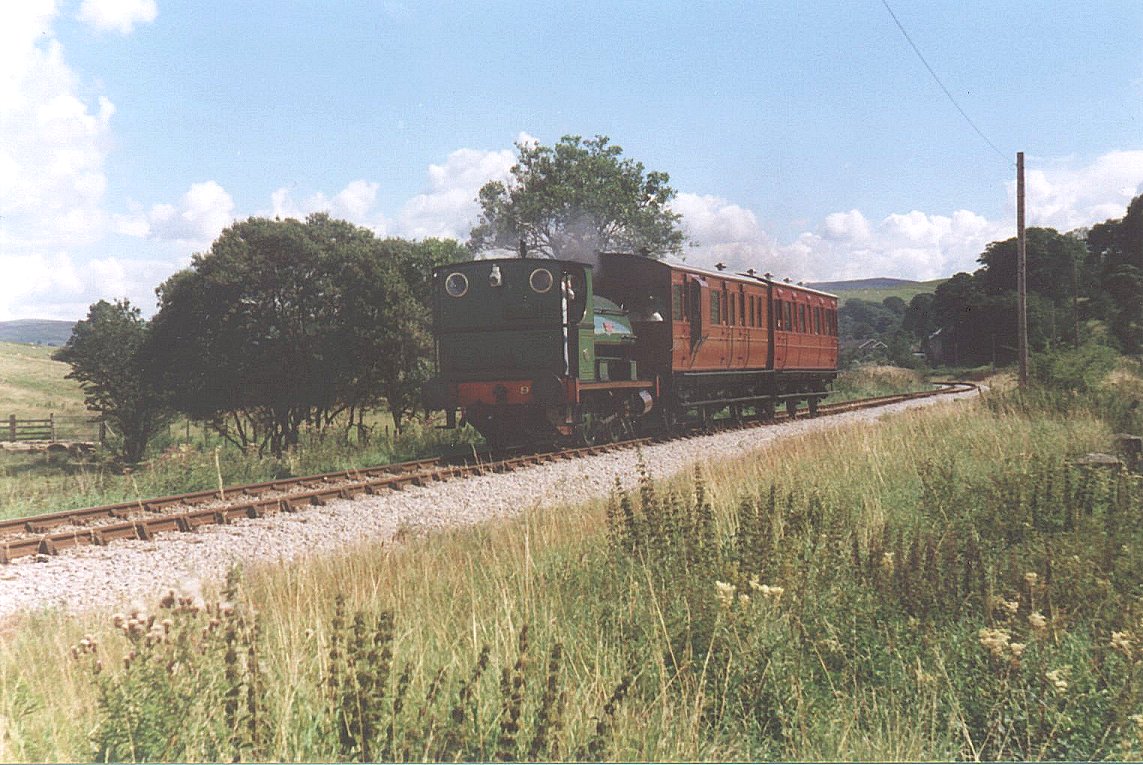
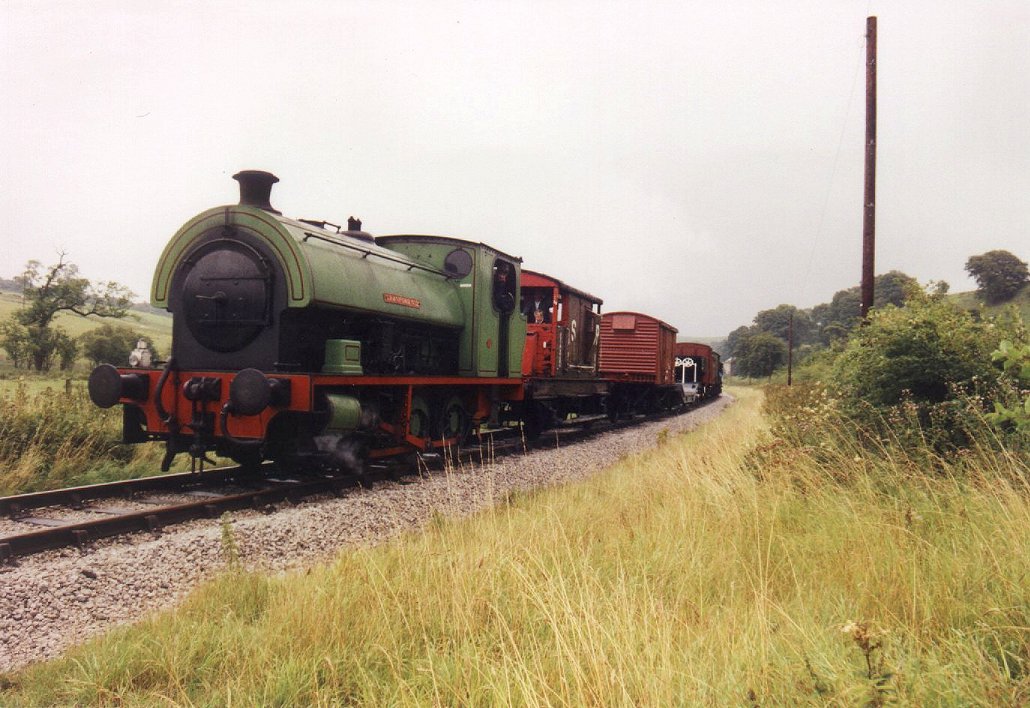
This comparative view, taken on 8/09/91, shows the loop completed with a
passenger train having just arrived, hauled by Wheldale.
(c) Charles Boylan.
|

|
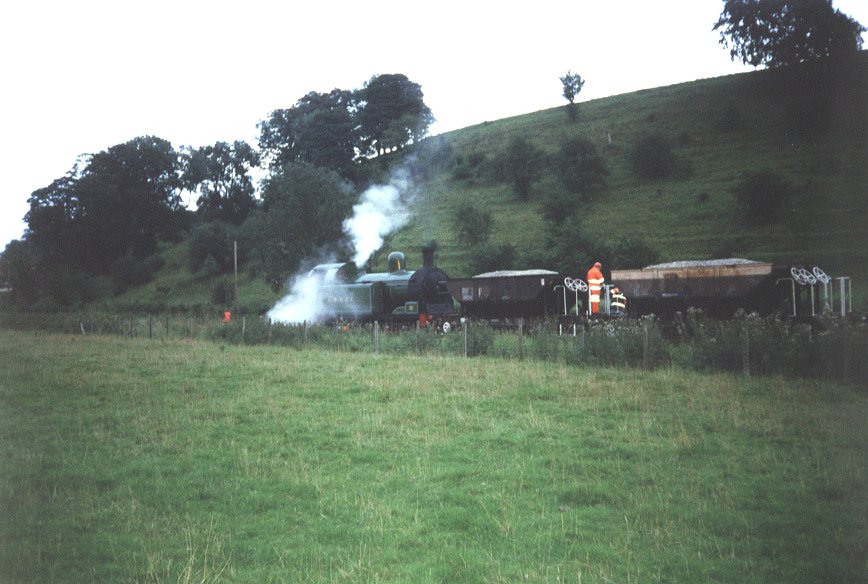
The visiting 4F is seen here on the extension towards Bolton Abbey, just to
the east of Stoneacre Loop on the newly laid track. Part of the volunteer
workforce that makes the railway what it is is seen here in the form of the
P-Way department. For more information about volunteering, please see our
page on volunteering.
(c) YDRMT.
|
|
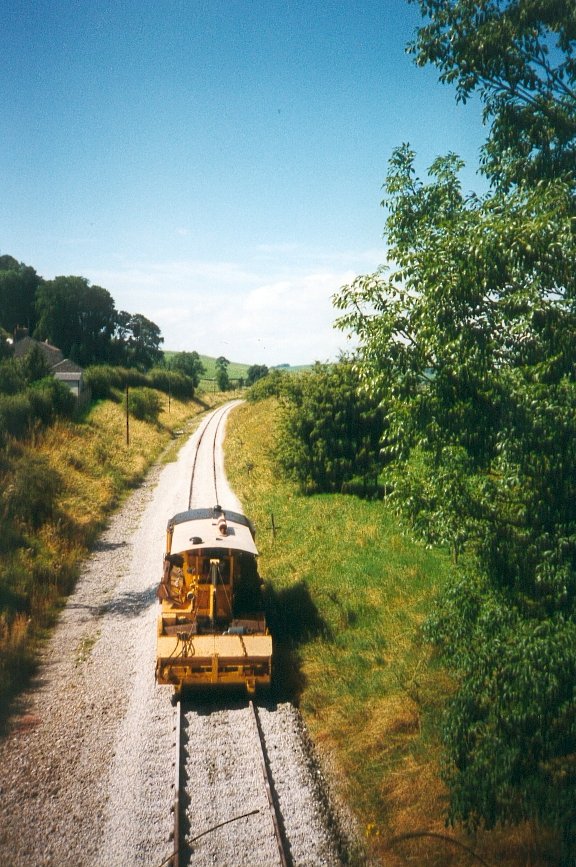
A view from Prior's Lane bridge as the tamper is seen between the bridge and
Stoneacre Loop not long before the re-opening to Bolton Abbey. More recently,
brand new GrantRail tampers have been over this stretch of line.
(c) William Lister.
|

|
This photograph shows the bracket signal, located at the east (Bolton
Abbey) end of the passing loop, being installed as the loop nears completion.
The steam crane being used to complete this task is one of the last steam
cranes to have been in BR stock. It dates from 1945, and was built for the LNER
by Cowans & Sheldon of Carlisle.
(c) Pete Walker.
|
|
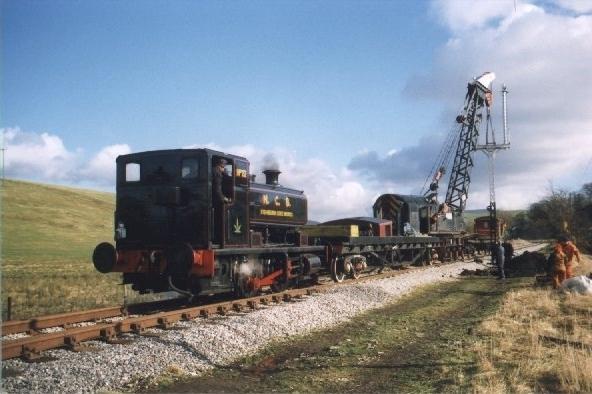
Another shot of the steam crane lowering the bracket signal into position.
The train is being hauled by Barclay No. 22, painted
in the fictitious livery of the N.C.B Fishburn Coke Works. It is interesting
to compare this photograph with an early one taken in Embsay Station of the
loco when it was in its red livery.
(c) Pete Walker.
|
|
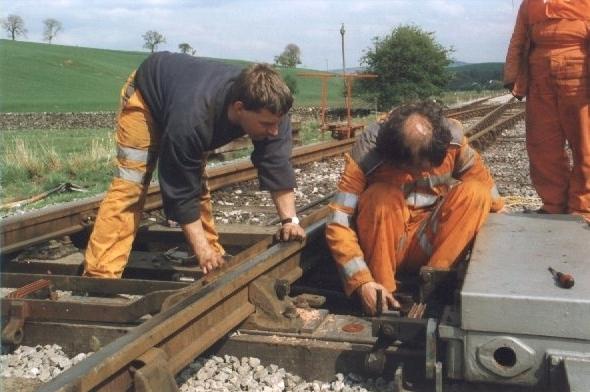
The loop is nearing completion here, as the Signal
& Telegraph department are seen attaching the point motor
to the point at the west (Embsay) end of the loop. This is the
only point at Stoneacre which is controlled by an electrtic
motor. The batteries which operate this are charged using
solar cells, although it isn't always the brightest of places!
Pictured are Steve Clunas (L) and Peter Burke (R, head of
S & T).
(c) Pete Walker.
|

|
Whilst the signalbox was being built, attention turned to providing a lever
frame with which to operate the loop. Here it is seen in the goods shed at
Embsay, following work on the interlocking, some of which is visible at the
bottom of the photo. It is now fully operational, inside the 'box and is used
whenever two trains are running.
(c) Wendy Anderson.
|
|
The signalbox is shown here under construction with the brickwork completed,
and the roof in place. The left over bricks from this project will either be
used to rebuild the gangers hut, which used to be located at the Embsay end of
the loop, or used in the rebuild of Holywell Halt.
(c) Dave Barlow.
|

|
A very unusual view of Stoneacre 'box under construction. No, we didn't strap
a camera onto a bird! The photo was taken from the top of the crane's jib, as
it was in the loop to pick up some of the bricks. Also visible is the yellow
P-Way van which served the railway well for moving tools and materials around
the railway. It has recently been replaced with a larger transit van. Again,
the nearest population of Draughton can just be seen on top of the hill.
(c) Wendy Anderson.
|
|
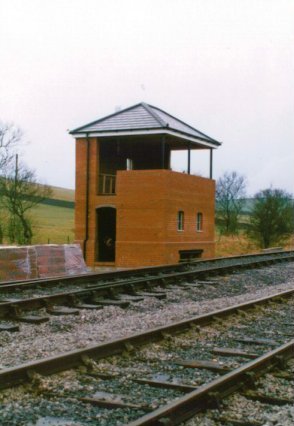
The roof is on, the windows are being fitted, and the box is almost complete.
(c) Stephen Walker.
|
|
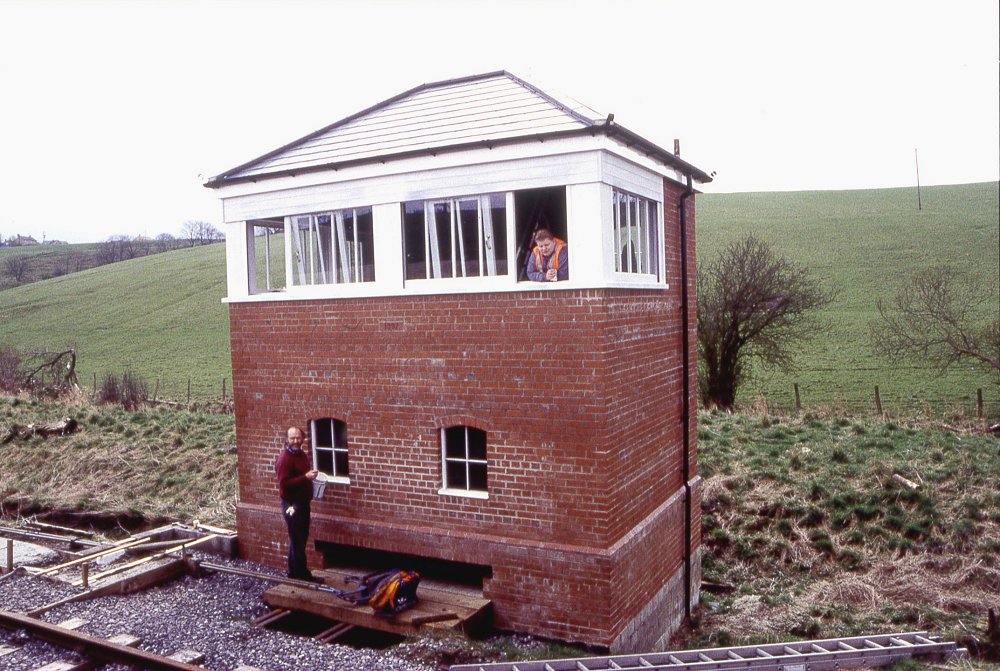
The signalbox itself is a very impressive structure, and is seen here
before the toilet was added. Originally it was based on a Saxby &
Farmer design which can be seen at Daisyfield. However, the the need for
security saw some modifications to incorporate roller shutters for when the
box is shut out.
(c) Pete Walker.
|
|
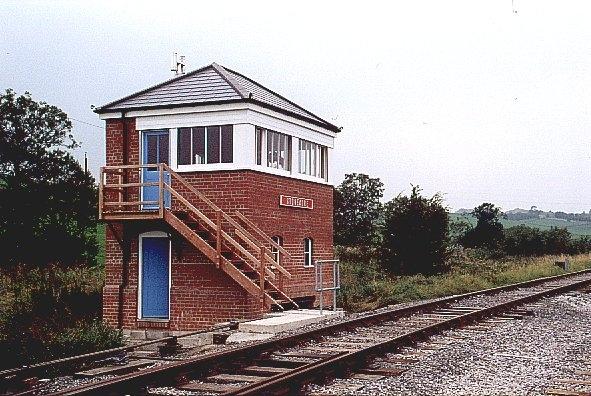
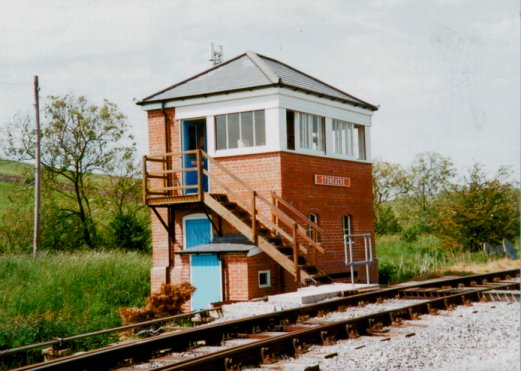
The signalbox is pictured here in its completed state - the toilet is seen
beneath the stairs, and the result of a lot of hard work by our volunteers
has been realised. It is hard to think of the box as having not been there
at some time earlier!
(c) Simon Gott.
|

|
The 'box is operational, and this photograph shows Bob Bonsall (who
took charge of building the signalbox) setting the road for
Cranford No 2 to head to Embsay. The beauty of the surroundings is
clearly shown looking through the windows.
(c) Pete Walker.
|
|
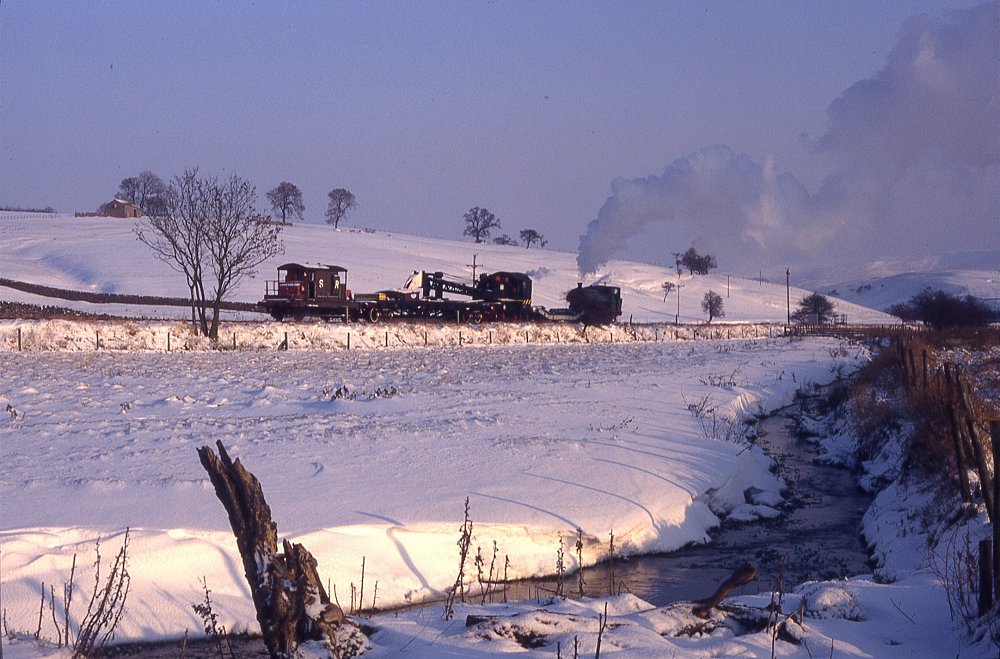
Cranford is seen at the Embsay end of Stoneacre loop in the snow with the steam
crane and SR brake van.
(c) John Furness.
|
|
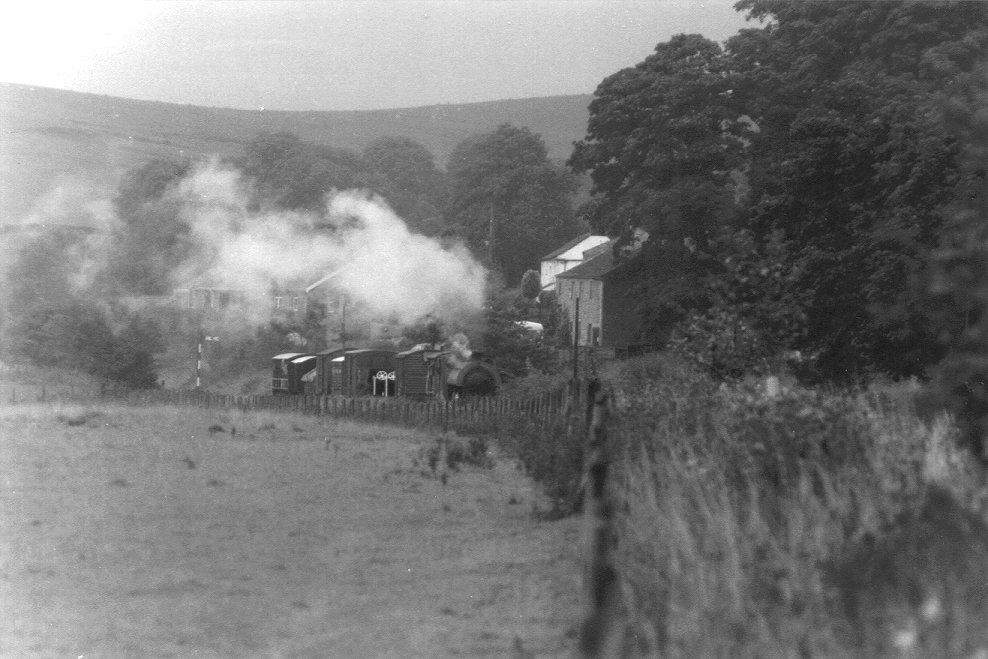
The visiting ex-NER P3 (or LNER J27) is seen here leaving Stoneacre
Loop, heading for Embsay with a service train.
(c) William Lister.
|
|
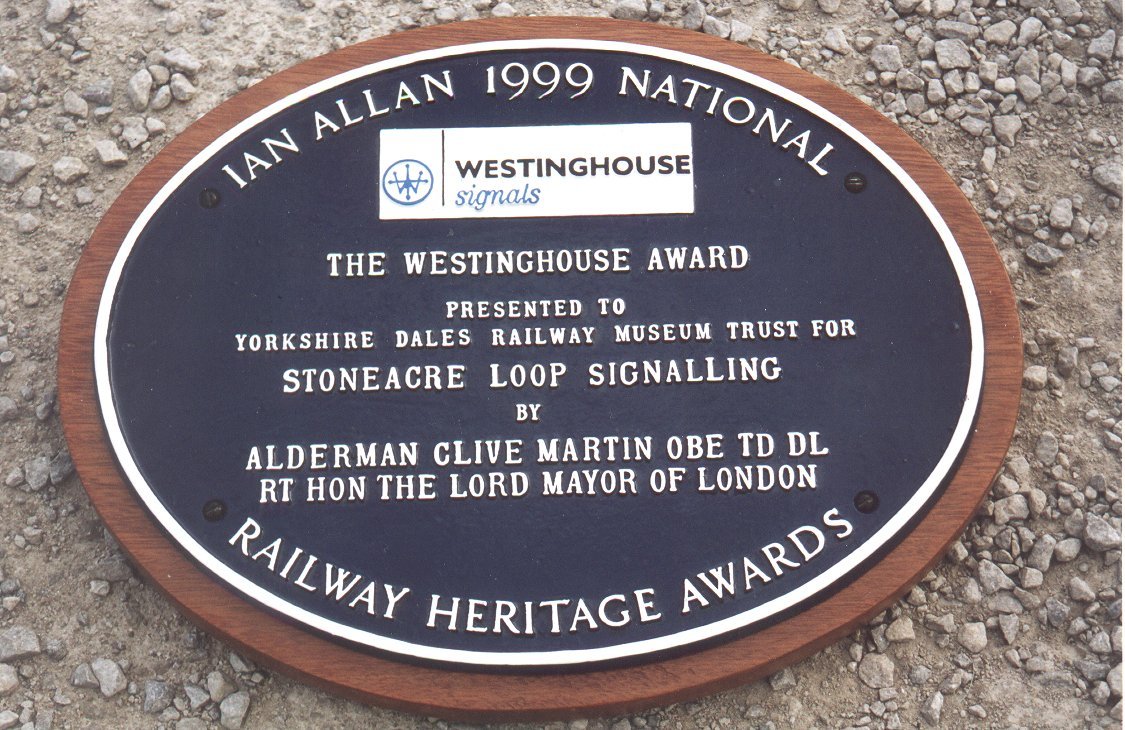
The entire installation at Stoneacre was awarded the Westinghouse Award, the
plaque which was received is shown here.
(c) Dave Barlow.
|
|
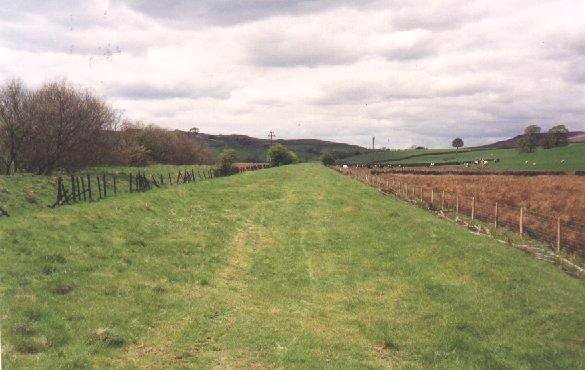
This view is very similar to the following two photographs, and is included to
show the difference made by the railway. It was taken further towards Prior's
Lane bridge than the next two. It also serves to show the scenery to good
effect.
(c) Stephen Walker.
|
|
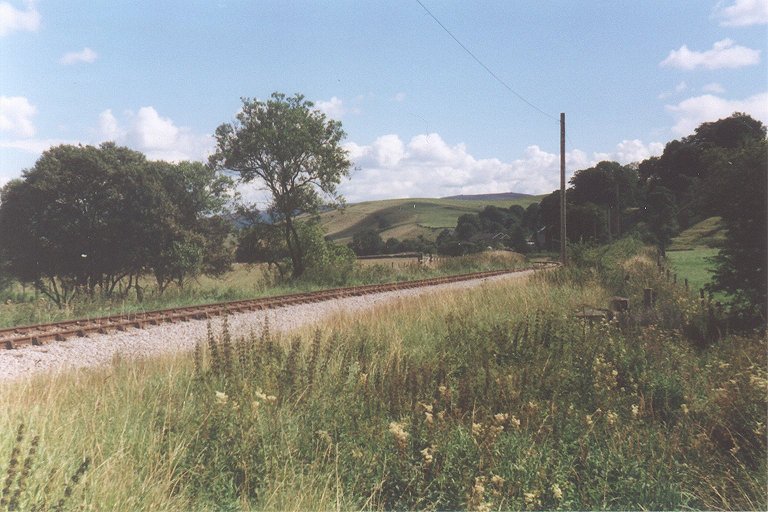
This is the view towards Bolton Abbey from just below the bracket signal which
allows trains to enter the loop.
(c) Tim Warner.
|
|
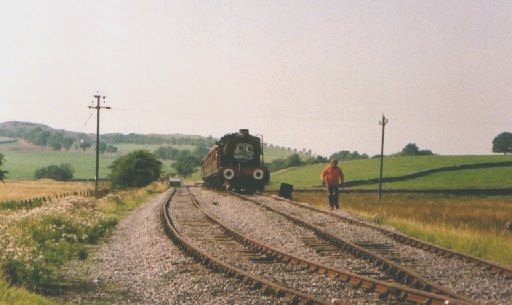
Annie is seen with the vintage train
as part of the summer Sunday operations. This entails the vintage train running
as well as a normal service train, and throughout the summer has proved very
popular with those travelling on it. It is seen here about to enter Stoneacre
Loop from Bolton Abbey.
(c) Tim Warner.
|

|
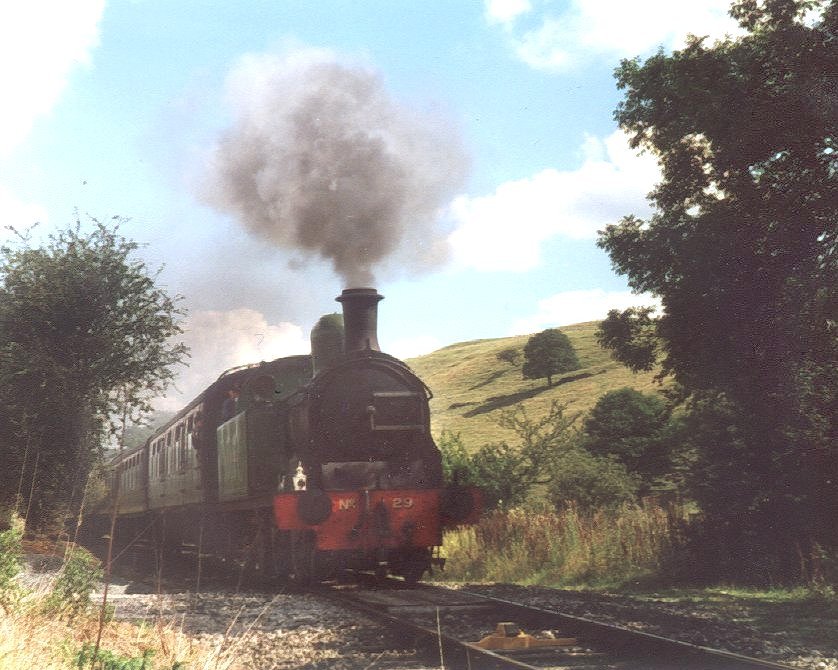
The visiting Lambton Tank (No. 29) from the North
Yorkshire Moors Railway is seen here approaching Prior's Lane bridge from
Bolton Abbey Station with a service train. In the foreground can be seen one
of GrantRail's machines. A few moments later...
(c) Simon Gott.
|
|
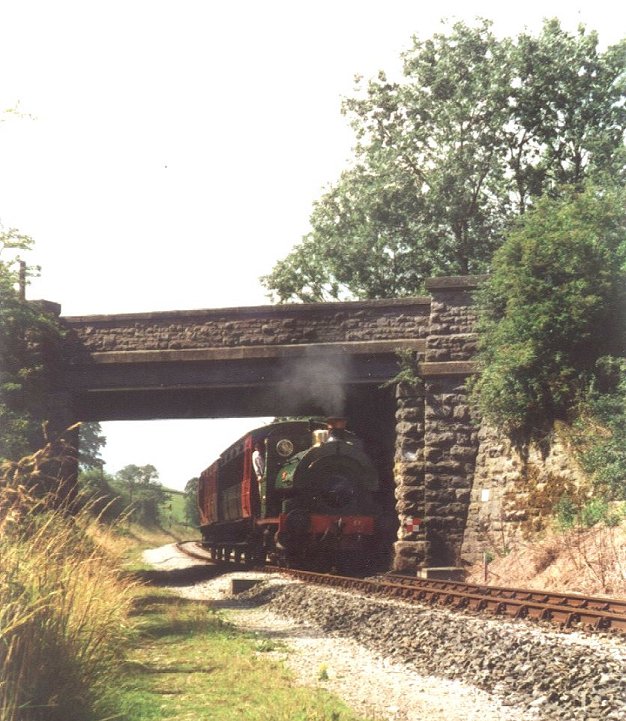
...No. 29 is seen here about to pass under Prior's Lane bridge with a service
train, towards the end of the Summer 2000 season. Hopefully it will be back...
(c) Tim Warner.
|
|
Annie is seen passing under Prior's Lane roadbridge having
passed the service train at Stoneacre. In the background the fixed distant
signal for the loop can be seen. The vintage train
has been operating alongside the normal service trains on Summer Sundays since
2000, and it has proved very popular.
(c) Tim Warner.
|
|
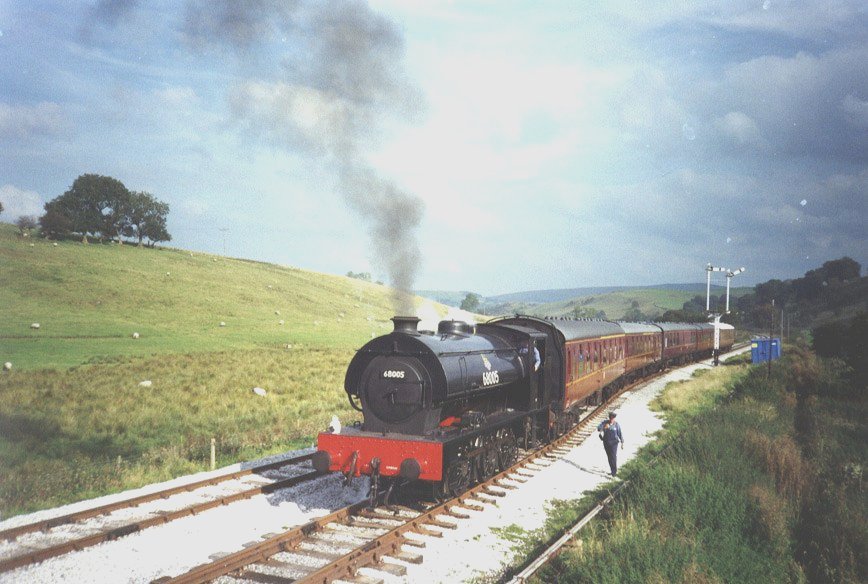
68005 is seen here entering the loop with a passenger train, the
signalman has just collected the staff, before heading back to the signalbox (from which this
photo is taken).
(c)William Lister.
|

|
A comparative view here shows the operating practice when the box is locked out - i.e. when only
one train is operating. Cranford passes through on the 'main' line, instead
of entering the loop as 68005 is in the above photo. The first houses in
Draughton village can just be seen on the skyline to the right of the picture.
(c)William Lister.
|

|
Part of the P-Way teams activities in 2000 included some ballasting in
preparation for the GrantRail visit to test their new Matisa tampers and
ballast regulator as well as train their staff. 68005
is seen here with two of the railway's dogfish hopper wagons prior to
dropping ballast between Stonacre Loop and Prior's Lane bridge.
(c) Tim Warner.
|

|
More ballasting operations are seen here as visiting locomotive No. 29
(Lambton Tank, from NYMR) propells two dogfish on the Embsay side of Prior's Lane bridge. This was
carried out on a late summer evening, as the sun was beginning to go down, hence the lighting.
(c) William Lister.
|
|
No. 29 is seen again with the dogfish hoppers, slightly nearer to Stoneacre loop than the previous
photo, as the sun goes further down. All in all it was a successful evening's work, as a number of
trips were made in preparation for GrantRail's machines.
(c) William Lister.
|
|
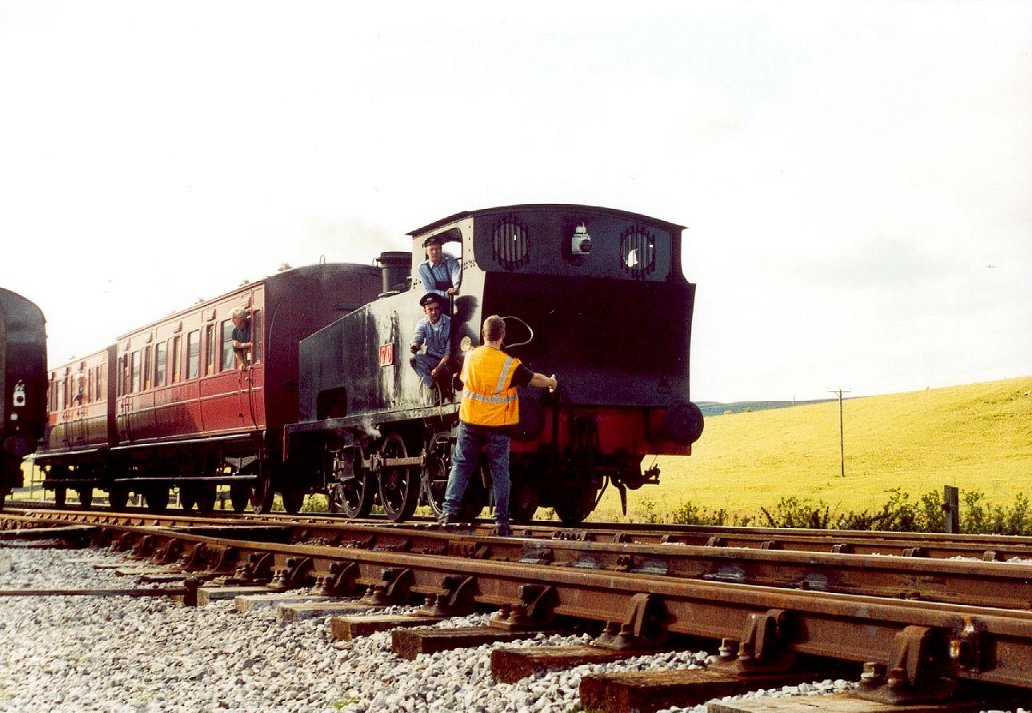
Visiting locomotive No. 70 (ex-Manchester Ship
Canal) is seen here in charge of the vintage train
as it passes through Stoneacre. The rear of the service train is visible as
signalman Steve Clunas exchanges staffs with Andy Booth (loco owner and
driver) as fireman Robert Milner looks on.
(c) Tim Warner.
|

|
This photograph was taken in November 2000, and is included to show the severity of the
rainfall. The volume of water is clear from this photograph, as it can be seen pouring out of the
siphon at the far side of the bridge (see also next picture), and running along the trackbed.
(c) William Lister.
|
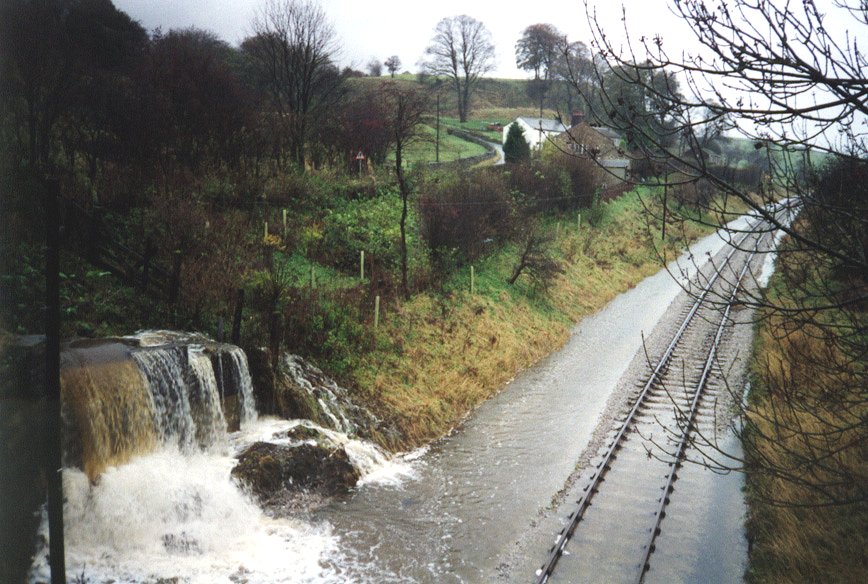
|
The climb towards Embsay is apparant here, in relation to the water level, as this photograph shows
the overflowing siphon which just can't cope with the volume of water which came down with all the
rainfall.
(c) William Lister.
|
|
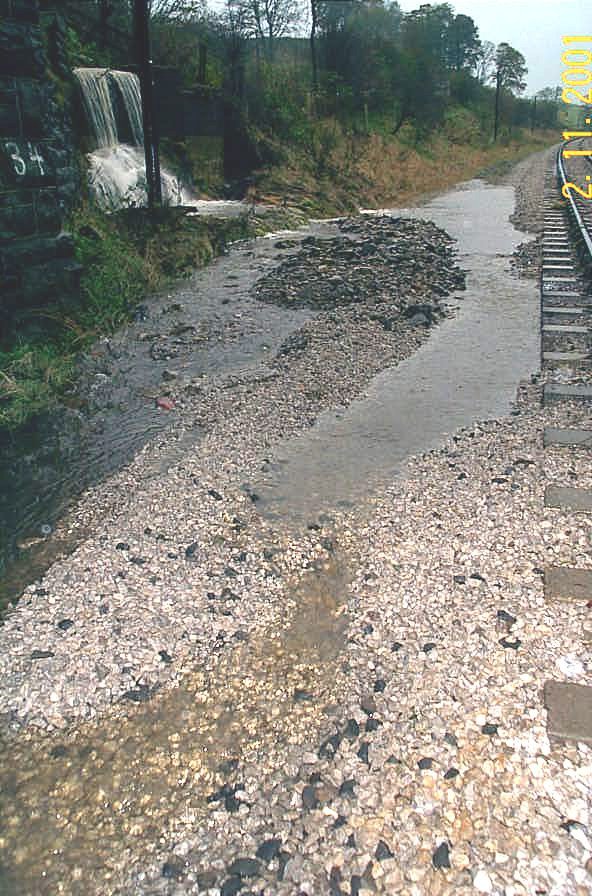
Despite the date on the photograph, this was taken in November 2000! The great
flooding of the country took its toll on the line, and this is the scene at
Prior's Lane Bridge (No. 34), where the siphon which passes beneath the railway
has overflowed and washed some of the ballast out. The water level had been much
higher - see previous photo!
(c) Mike Mason.
|
|
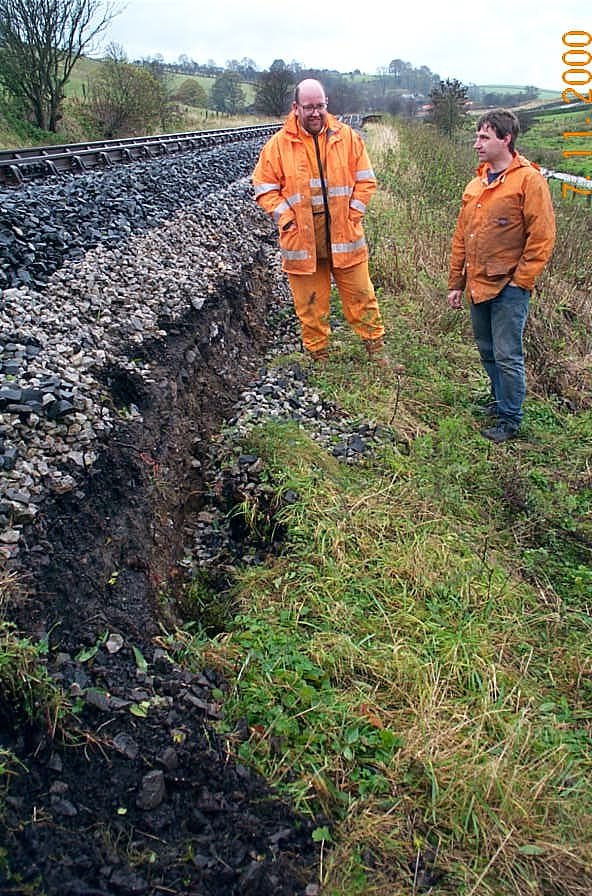
The second (and more serious) washout occurred nearer to Bolton Abbey than the
previous picture, and the stream at the foot of the embankment caused a
section to slip. Seen here inspecting the damage are Dave Barlow (chairman) and
Steve Clunas. Luckily the reapirs were carried out swiftly, and with the aid of
GrantRail the track was restored to its original
levels and alignment.
(c) Mike Mason.
|
|
Taken from the A59, this photo shows the L & Y society special
comprising their 'Pug' 51218 and Stephen Middleton's L & Y Director's
Saloon, which will be running on the Vintage Trains in 2002. The signals for
Stoneacre Loop can be seen behind the coach as the train heads for Holywell
Halt.
(c) Tim Warner.
|
|
This was one of the few photos from the vintage
weekend that survived the developing of my black and white film... Cranford
approaches Stoneacre Loop with the goods train in the pouring rain. The photo
was taken from the trackbed itself in the course of maintenance work. There was
no photography from the footpaths and surrounding fields due to the Foot &
Mouth crisis.
(c) Tim Warner.
|
|
A few moments later (and on colour film) Cranford passes on its way with the
goods train, about to enter the loop. The poor (very wet) weather is apparant
here!
(c) Tim Warner.
|

|
The goods waits in the loop for the staff as the rain pours down. The guard
presents as sorry sight as she checks the train...
(c) Tim Warner.
|
|
This was taken from the top of the bracket signal on a wet day, but clearly
shows something of the scenery visible from the train. This view is looking
towards Bolton Abbey station, with the hills in the background almost obscured
by the drizzle.
(c) Tim Warner.
|
|
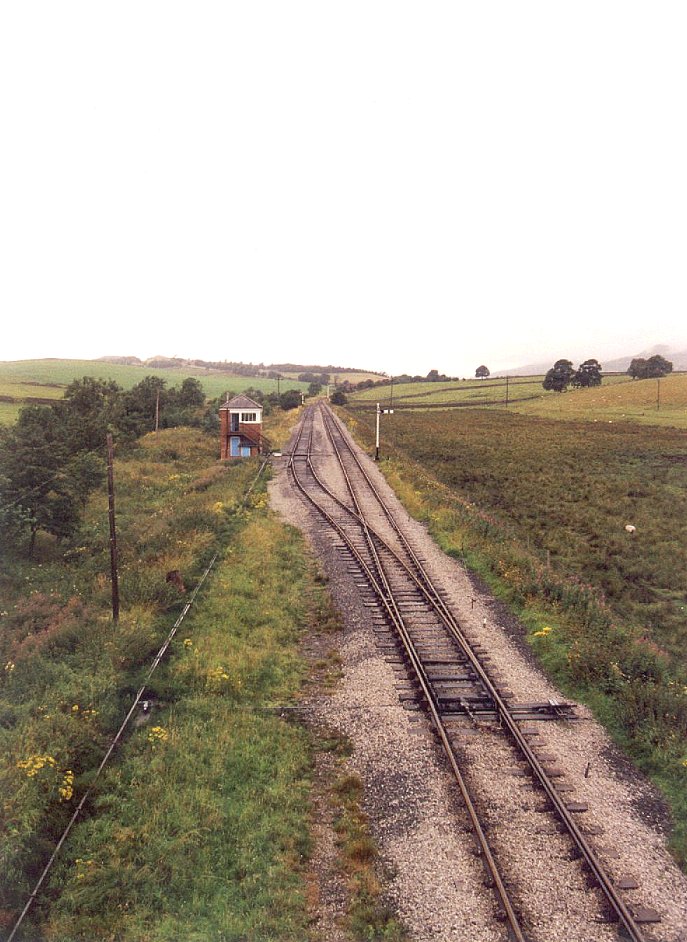
This view is looking the other way, towards Embsay, and shows clearly how the
loop is arranged. The rodding controlling the point and its locking are visible
to the left of the photo. Also visible is the catch point to revent trains in
the loop road rolling back onto the mainline towards Bolton Abbey.
(c) Tim Warner.
|
More photographs of Stoneacre Loop and the surrounding area can be found on the other page.
1 - 2
|
Yorkshire Dales Railway Museum Trust (Holdings) Limited
Registered Charity No. 1116386 Bolton Abbey Station, Bolton Abbey, Skipton, North Yorkshire, BD23 6AF General Enquiries: 01756 710614 - Talking Timetables & Fax: 01756 795189 enquiries AT embsayboltonabbeyrailway DOT org.uk webmaster AT embsayboltonabbeyrailway DOT org.uk |

|
