|
|
|
|
Home - Location - Timetable - Facilities - FAQs - Events - Stately Trains
News - Photogalleries - Digital Archive - History - Shops - Departments Stocklist - Projects - Signalling - Membership - Volunteering - Links
|

|
Skipton Station with the Ilkley platforms on the right of the picture, devoid of canopies, and with an early DMU waiting in
platform 6, presumably having arrived from Embsay.
(c) YDRMT collection.
|
|
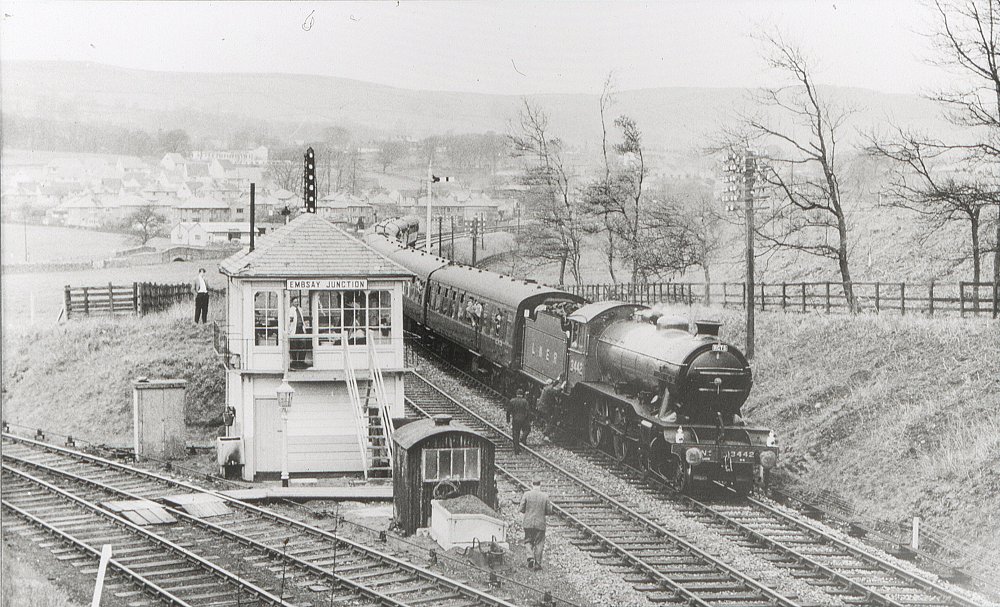
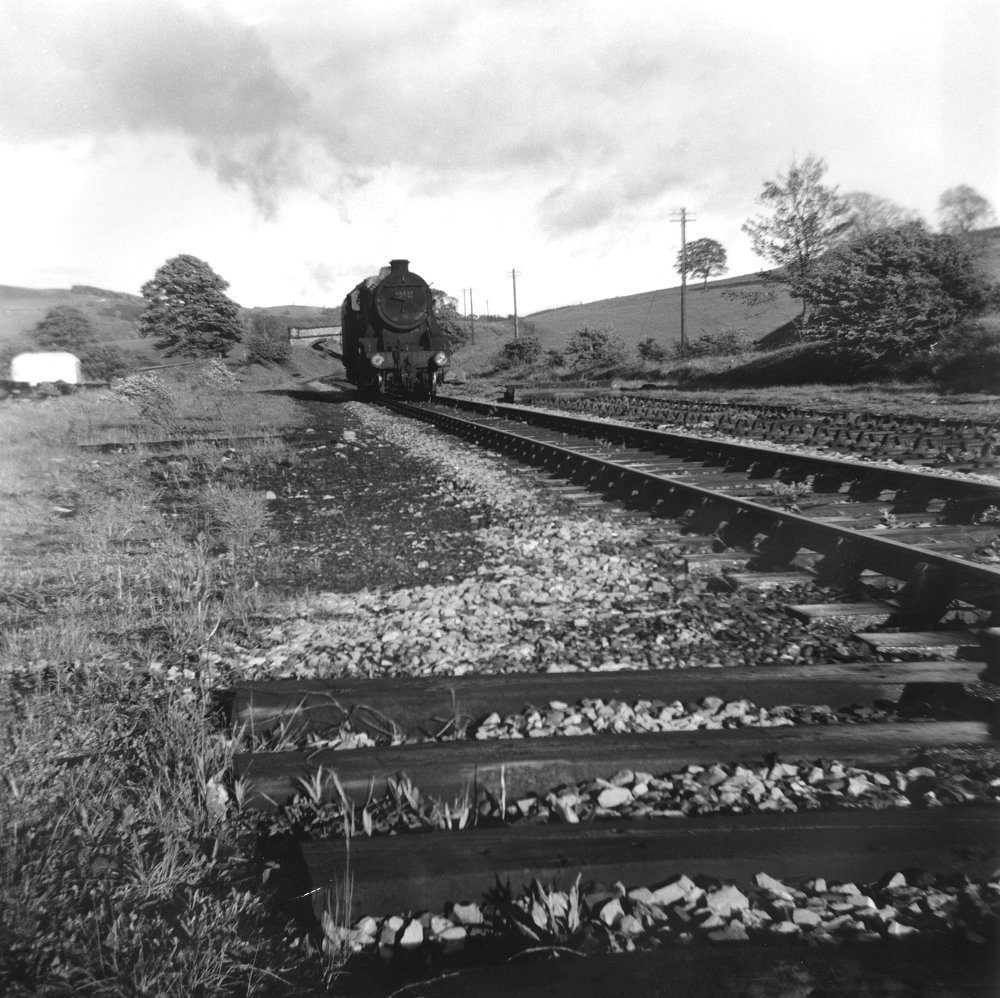
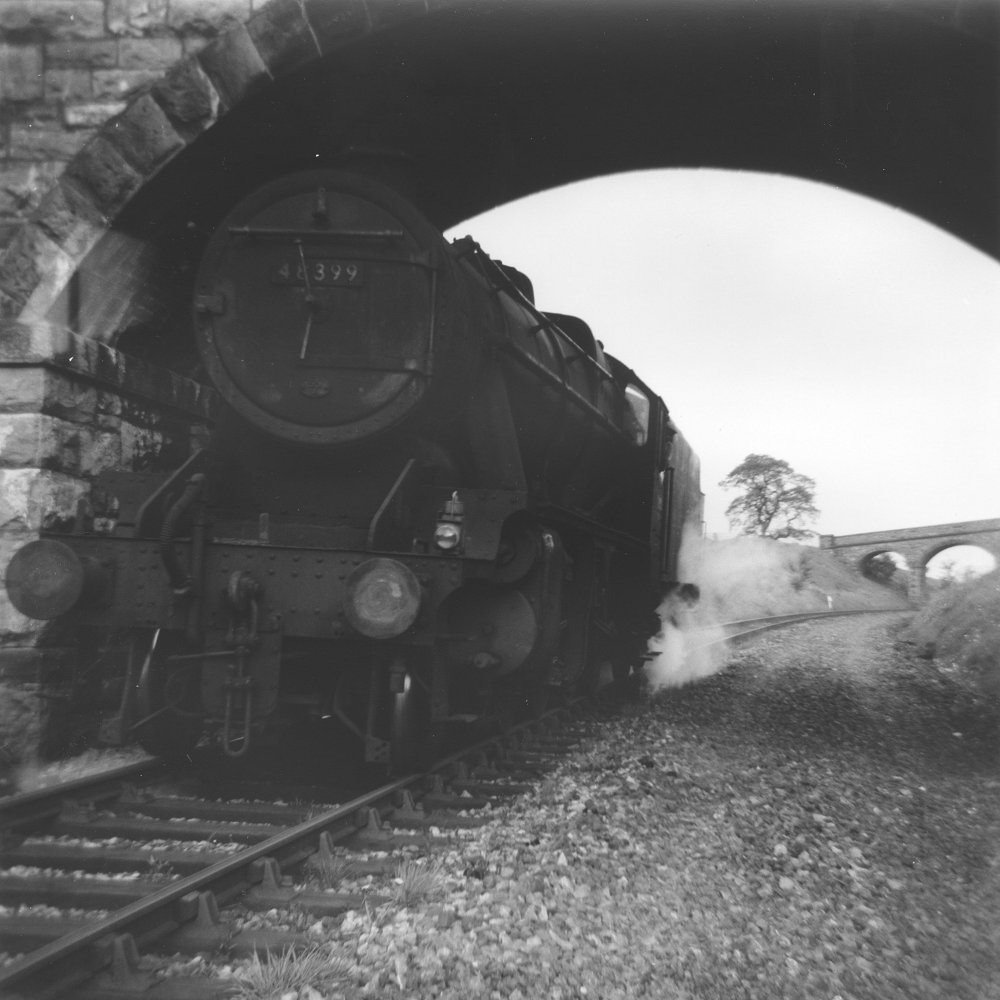
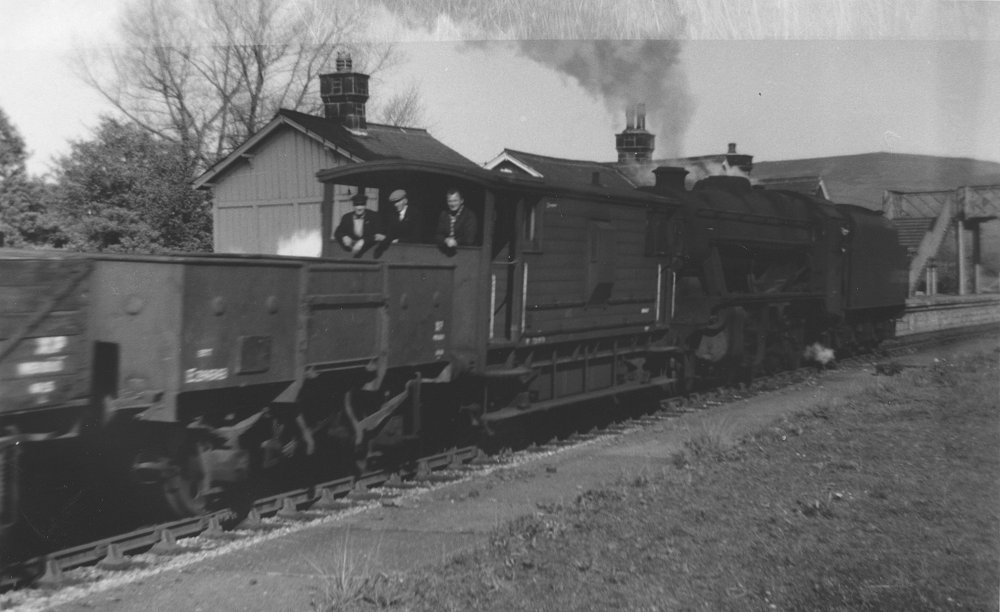
LNER K4 'The Great Marquess' at Embsay Junction with a special in the mid-60s. This is the site of Bow Bridge Loop, and
nothing now remains of the signalbox.
(c) Gavin Morrison.
|
|
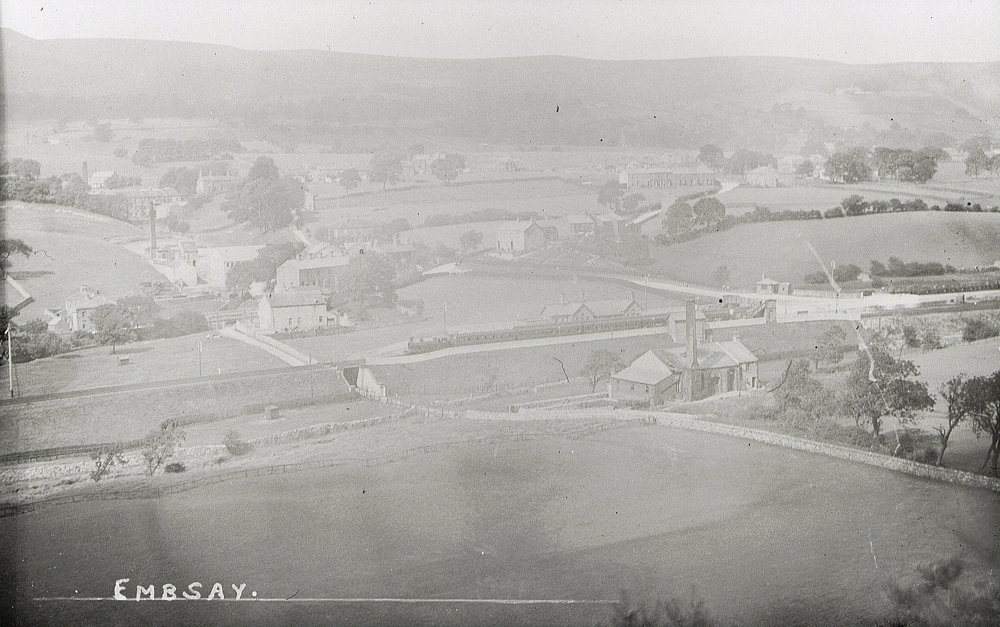
A very early picture postcard showing a train in Embsay station. From its appearance, it would seem to be from Midland
Railway days, featuring the company's engine and carriages. Note too how clean and tidy everything in shot is, as well as how
few buildings in the village there are.
(c) YDRMT collection.
|
|
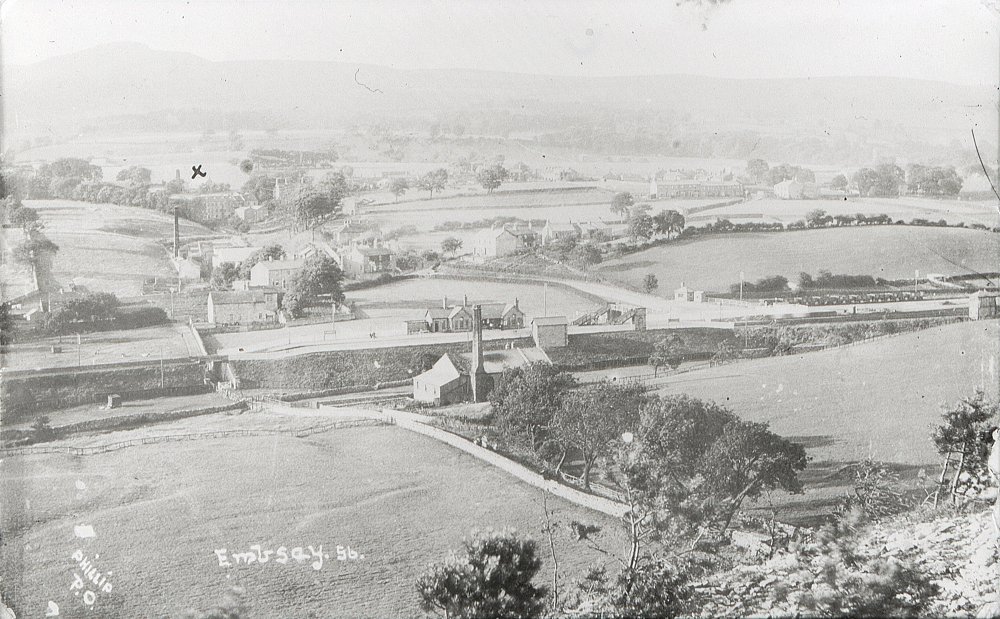
Another picture postcard of the station, this time showing the original Embsay Station signalbox. This seems to be the only
photo to include it as others from the same era just miss it off!
(c) YDRMT collection.
|

|
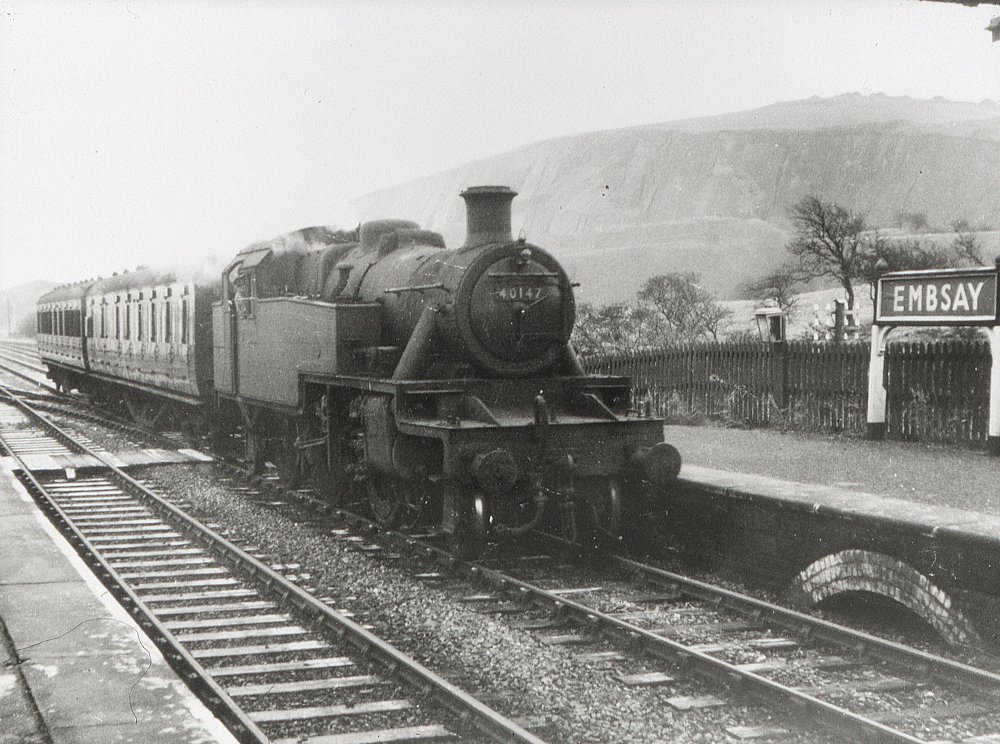
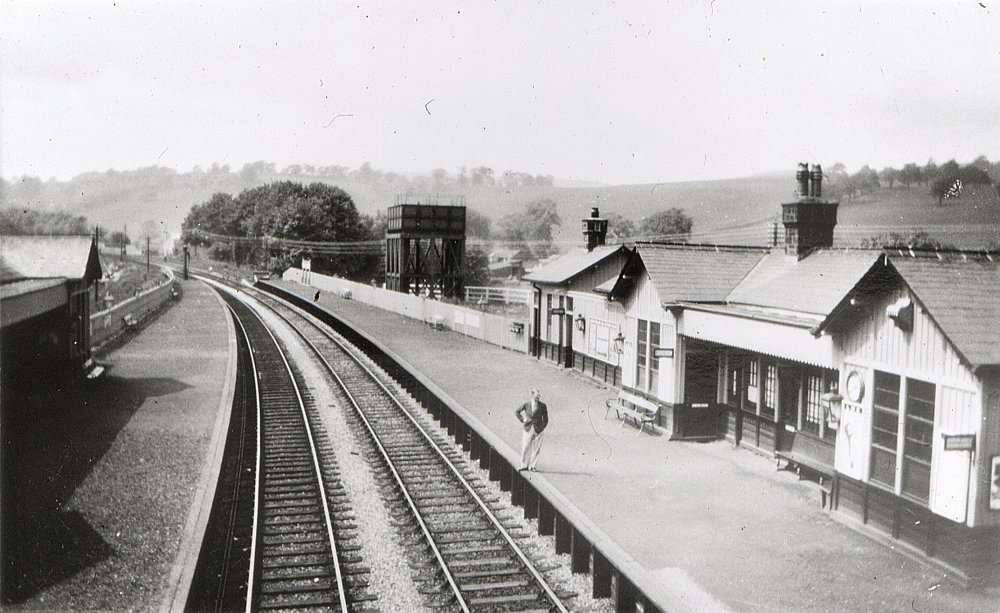
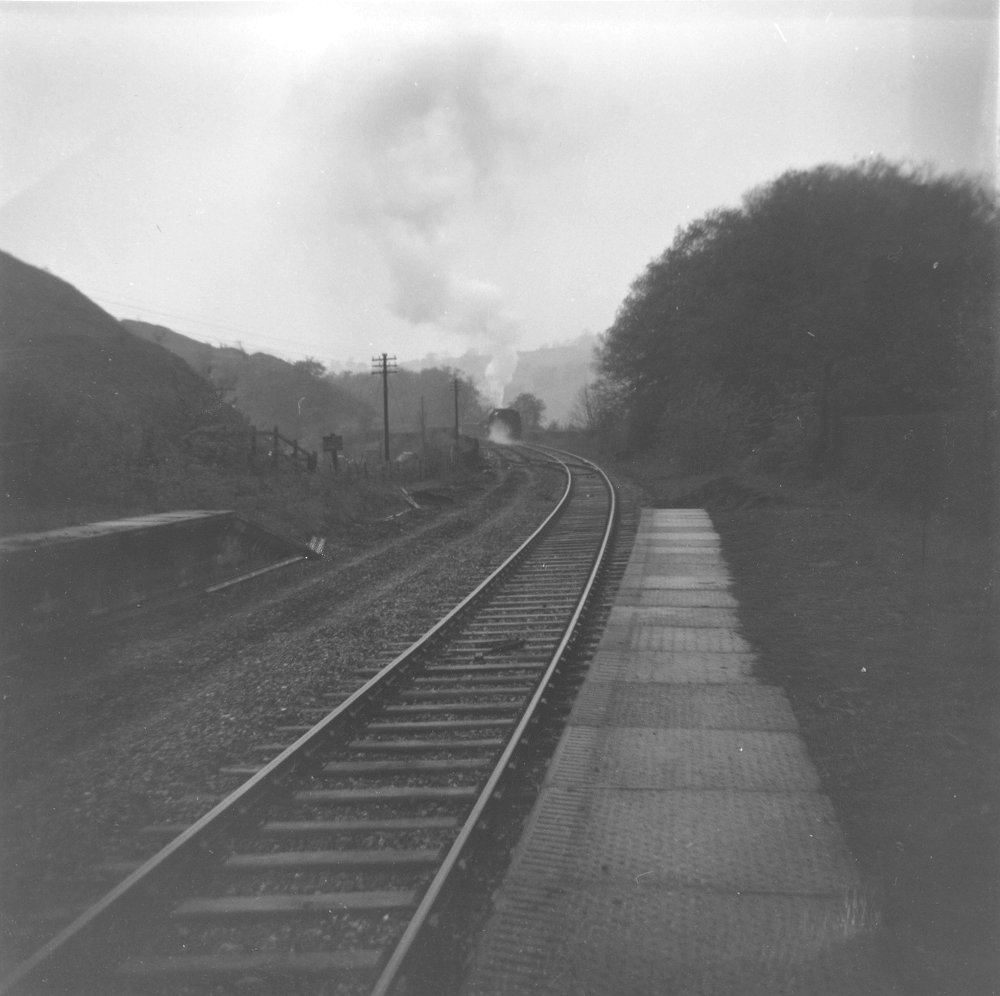
Embsay station, viewed from the west (Skipton) end, towards the end of the line's BR ownership.
(c) YDRMT collection.
|

|
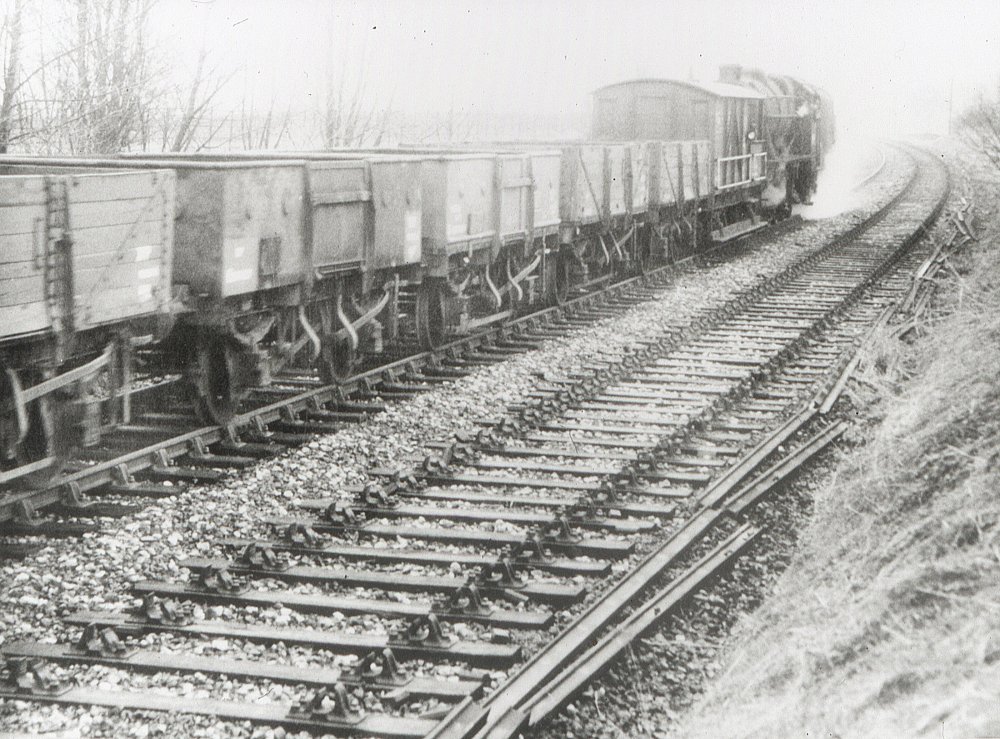
An ammonia working through Embsay (heading for Teeside?), headed by an austerity (of the 2-8-0 or 2-10-0 variety!). This
would probably be the 50s.
(c) YDRMT collection.
|
|
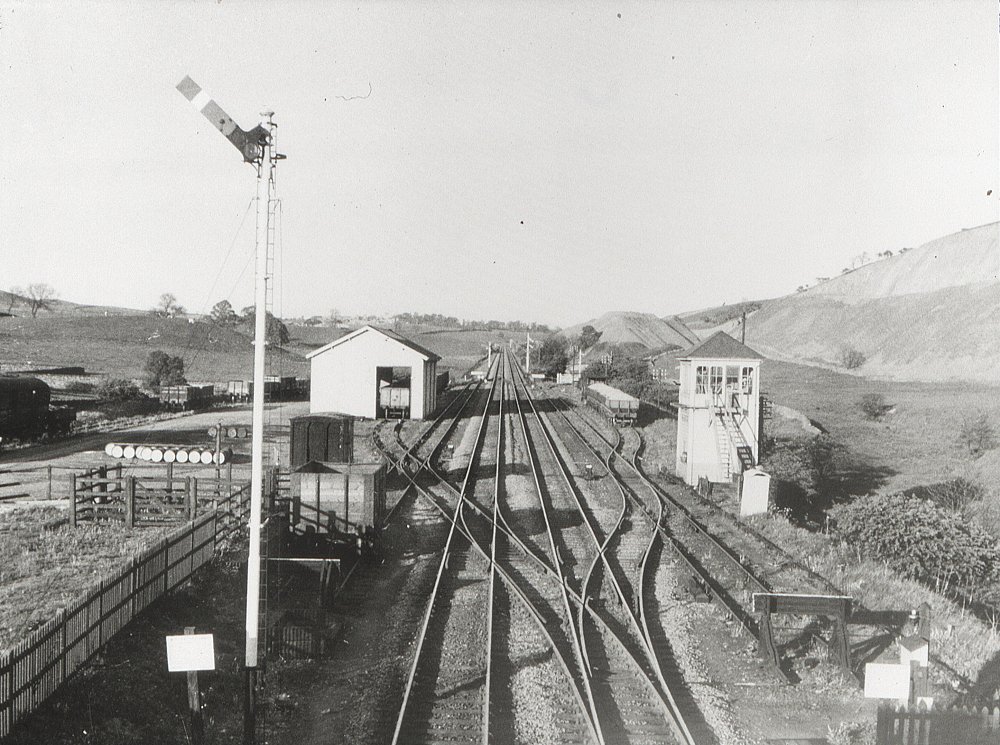
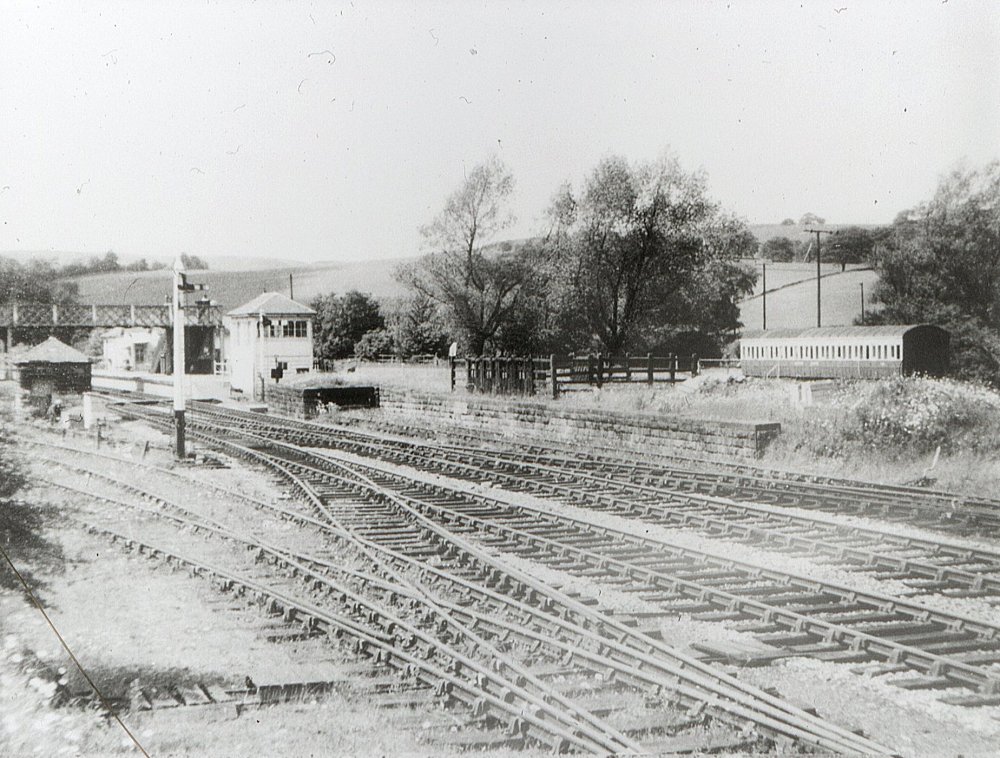
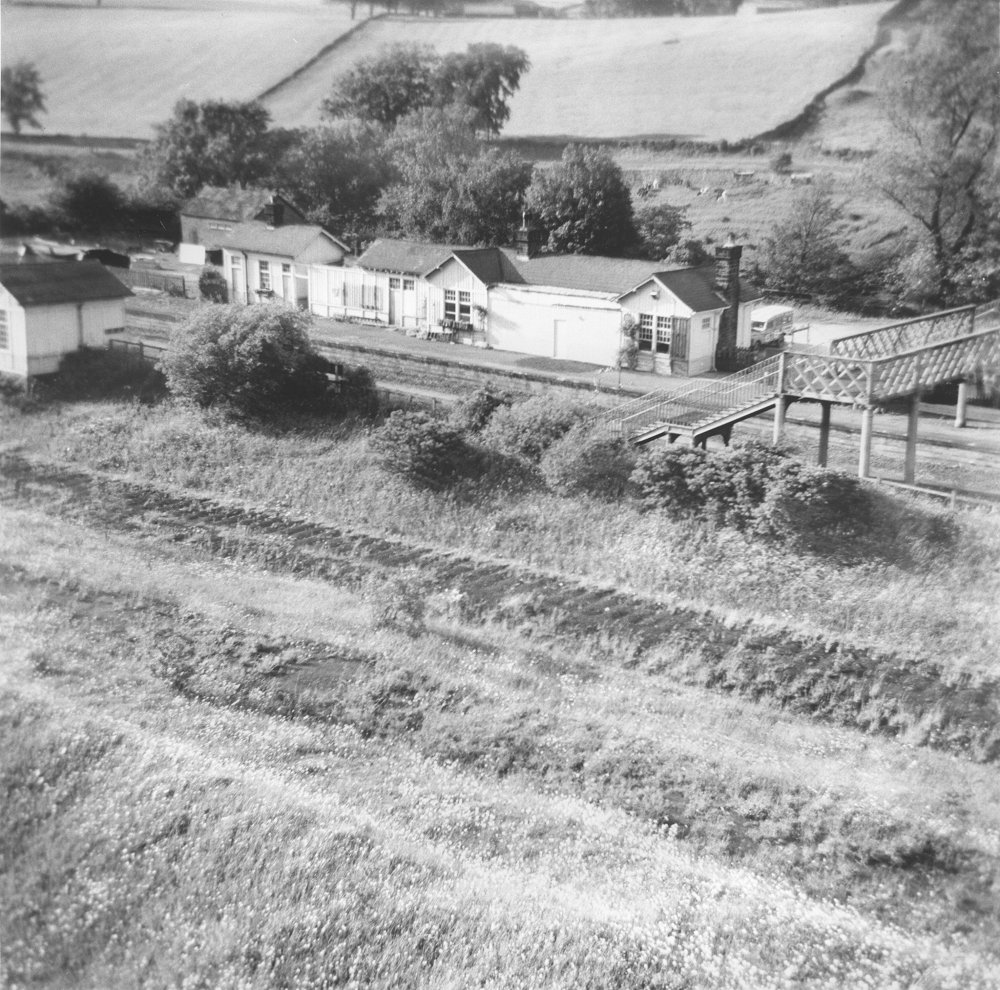
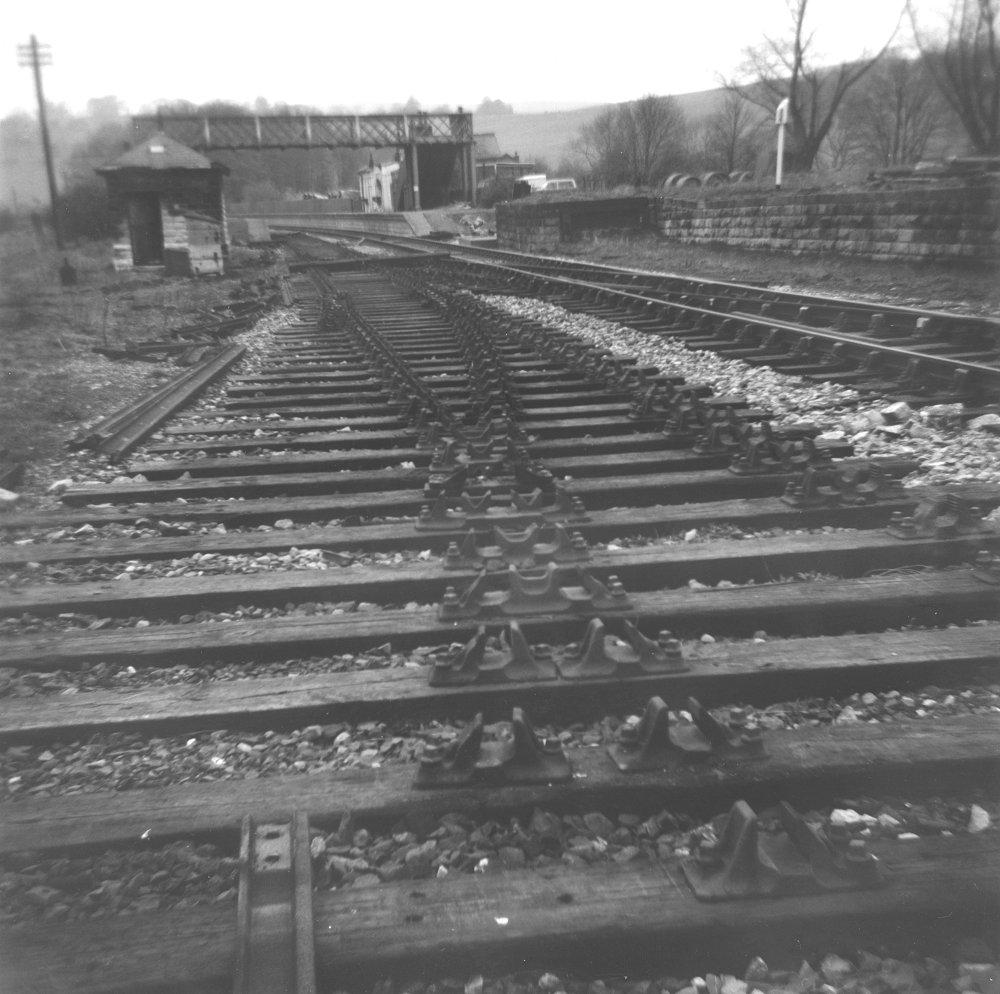
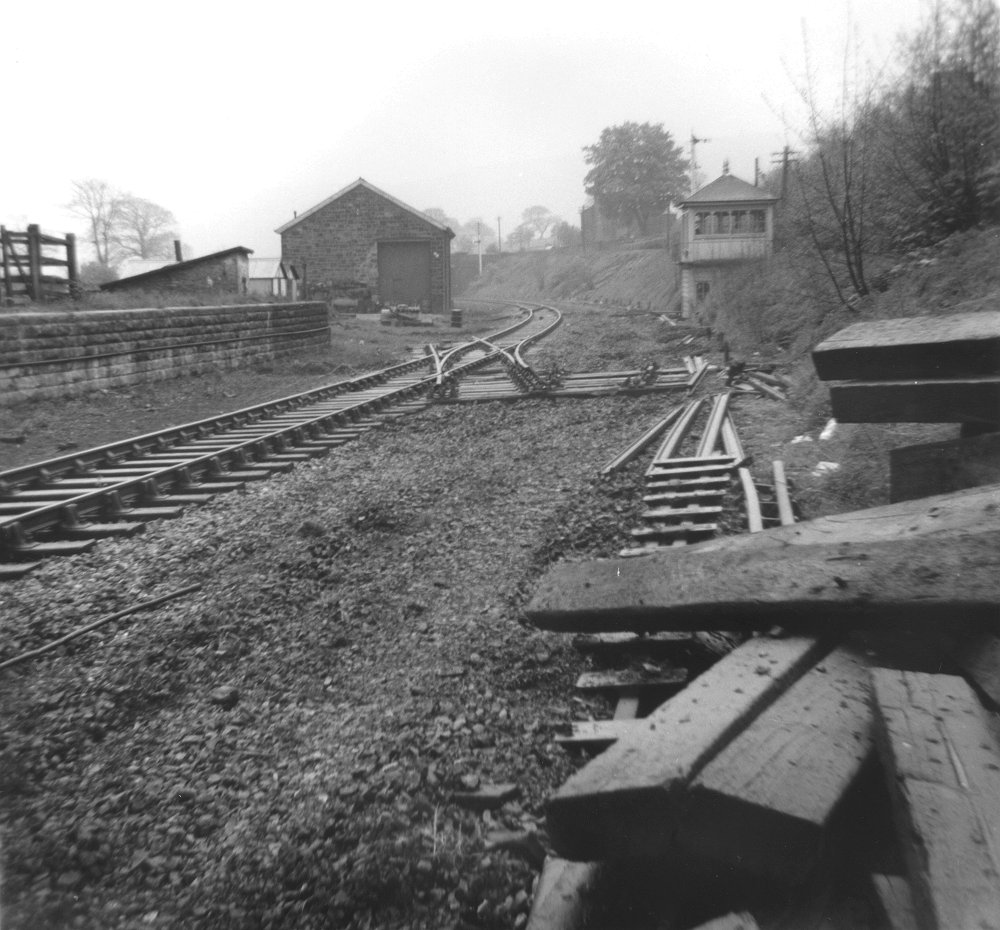
A good photo showing the track layout at Embsay prior to preservation, viewed from the footbridge. Note the wooden open
wagons on the cattle dock and the siding heading towards the weighbridge (left).
(c) YDRMT collection.
|

|
Another view from the footbridge, this time of a train containing tanker wagons as well as steel mineral wagons. The motive
power appears to be a class 37, complete with brake tender.
(c) YDRMT collection.
|
|
The local passenger working prior to DMU operation is seen here - an Ivatt tank and two seemingly non-corridor carriages of
LMS origin.
(c) YDRMT collection.
|
|
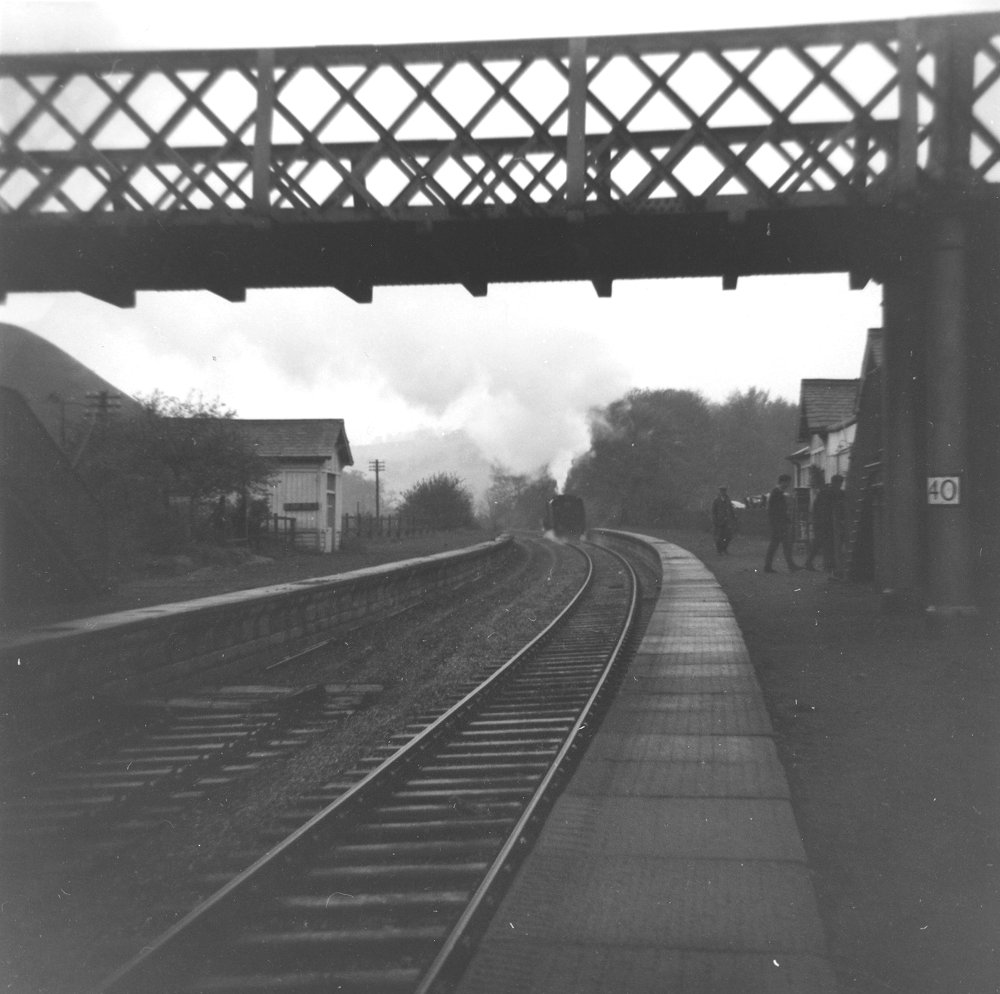
Embsay station viewed from the signalbox balcony. Even though this is late on, the site still looks well looked after, although
not as neat as in Midland days.
(c) YDRMT collection.
|
|
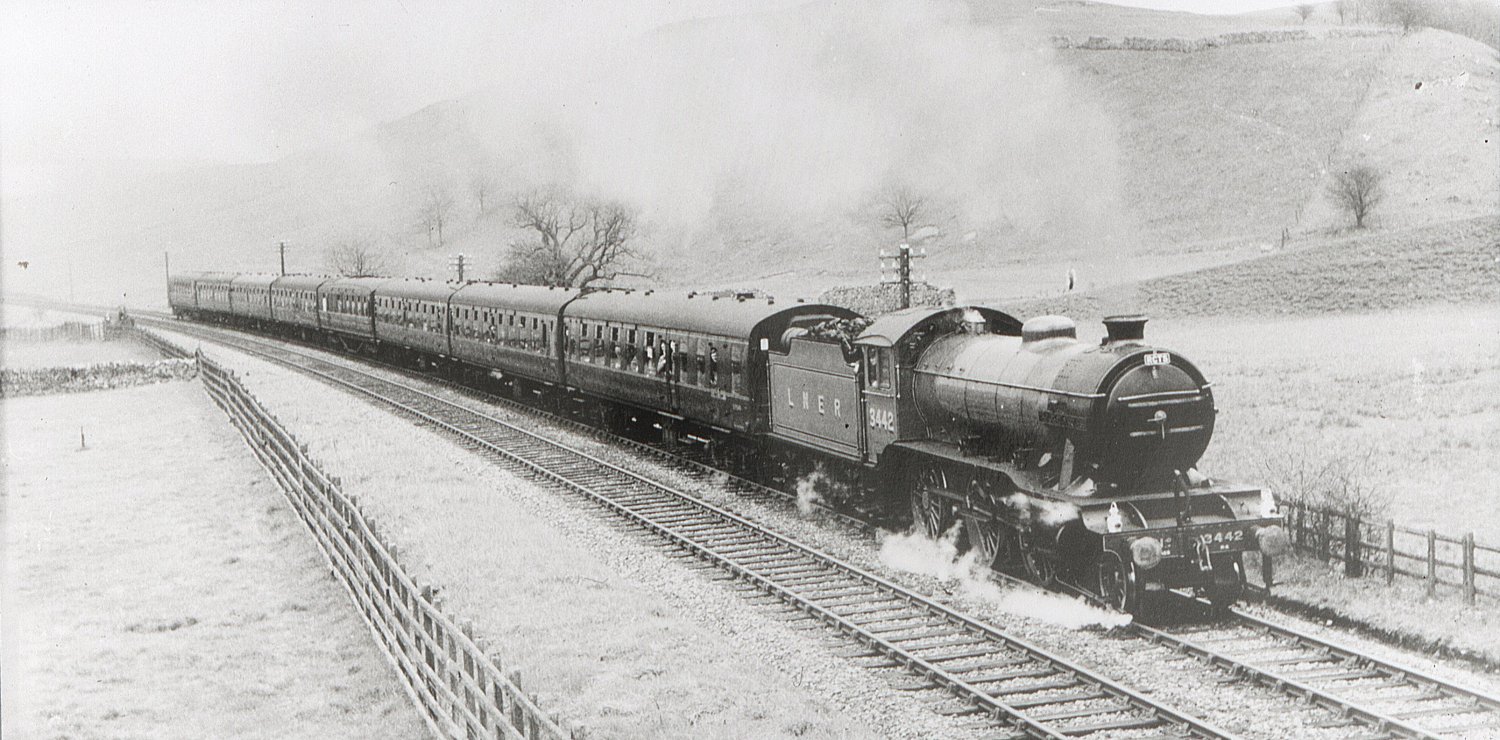
A special working through Embsay (a photo exists of it at Bolton Abbey), with an ex-LMS Jubilee at the head of a rake of
ex-LNER teak carriages.
(c) YDRMT collection.
|

|
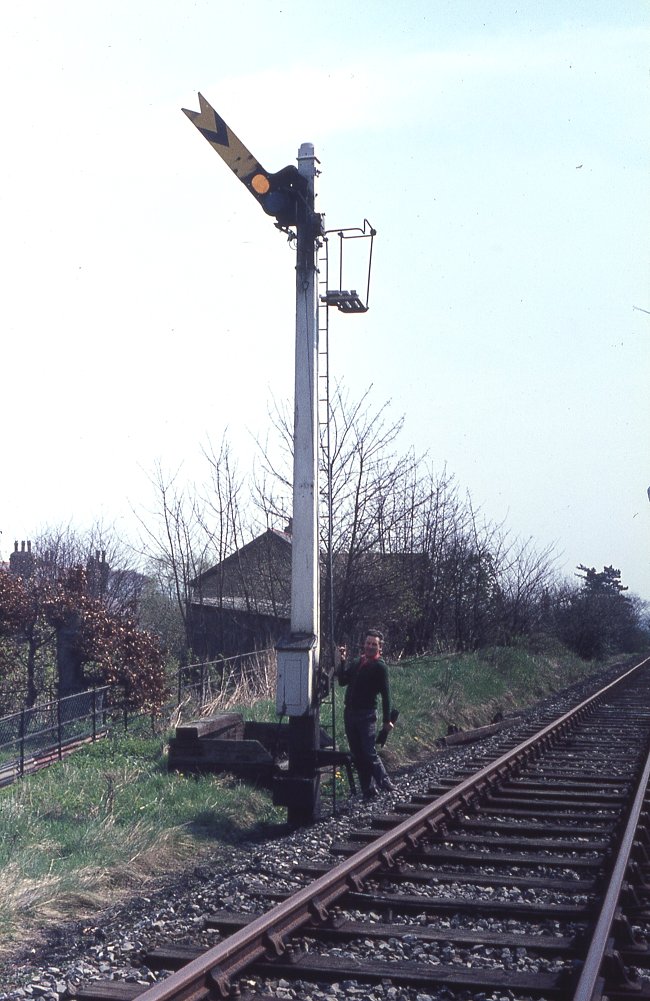
A view of the entrance to the Skipton Rock Company's quarry at the west end of Embsay. Note that teh signals are all ex MR/LMS
and lower quadrant. The ground signal is of particular note, and a pair of these have been used on the new signal on platform
2 as dollies.
(c) YDRMT collection.
|
|
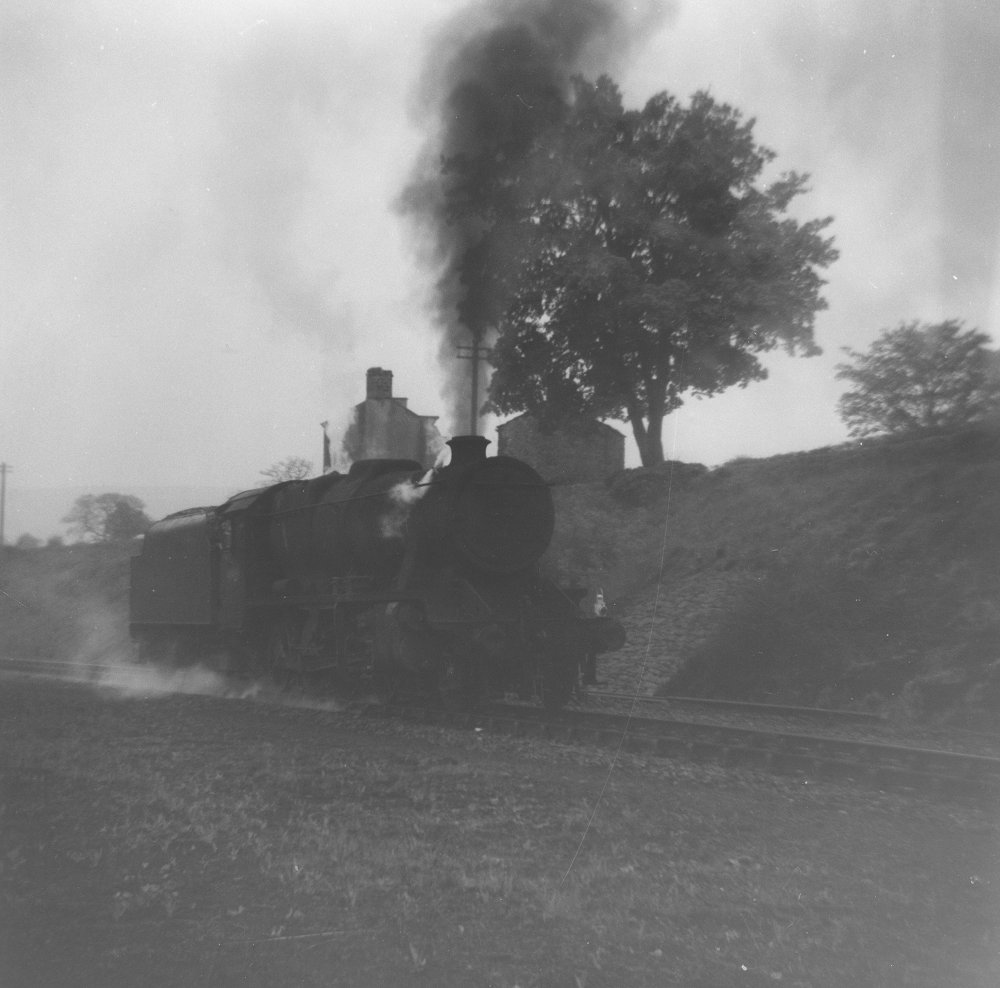
K4 'The Great Marquess' seen on the line again. The location is just to the Bolton Abbey side of Prior's Lane, past the site
of the MR's proposed site for Draughton station. The earthworks for this can be seen here, and are still visible today.
(c) YDRMT collection.
|
|
The approach to Bolton Abbey station is somewhat different now compared to this photo. Notice the signalpost which has arms
on both sides.
(c) YDRMT collection.
|
|
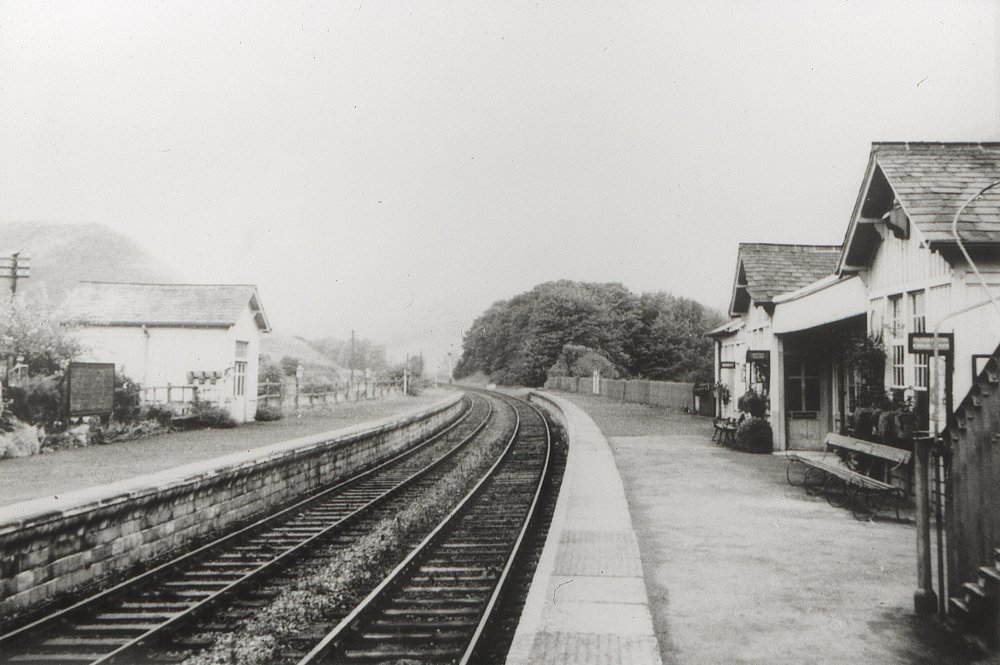
Bolton Abbey station looking towards Embsay, with the buildings on platform 2 in their reduced form of only one gable.
(c) YDRMT collection.
|
|
Taken outside the entrance to the statitionmaster's office, this picture shows a number of interesting railway features,
including the stone chimney (recreated on the new building), poster, platform trollet and lamp.
(c) YDRMT collection.
|
|
Bolton Abbey's original signalbox was located at the ADDINGHAM end of platform 1, the replacement from Guiseley was located
at the EMBSAY end of the rebuilt station.
(c) YDRMT collection.
|

|
The signalman (Dick Fawcett) sits on the steps of Bolton Abbey signalbox.
(c) YDRMT collection.
|

|
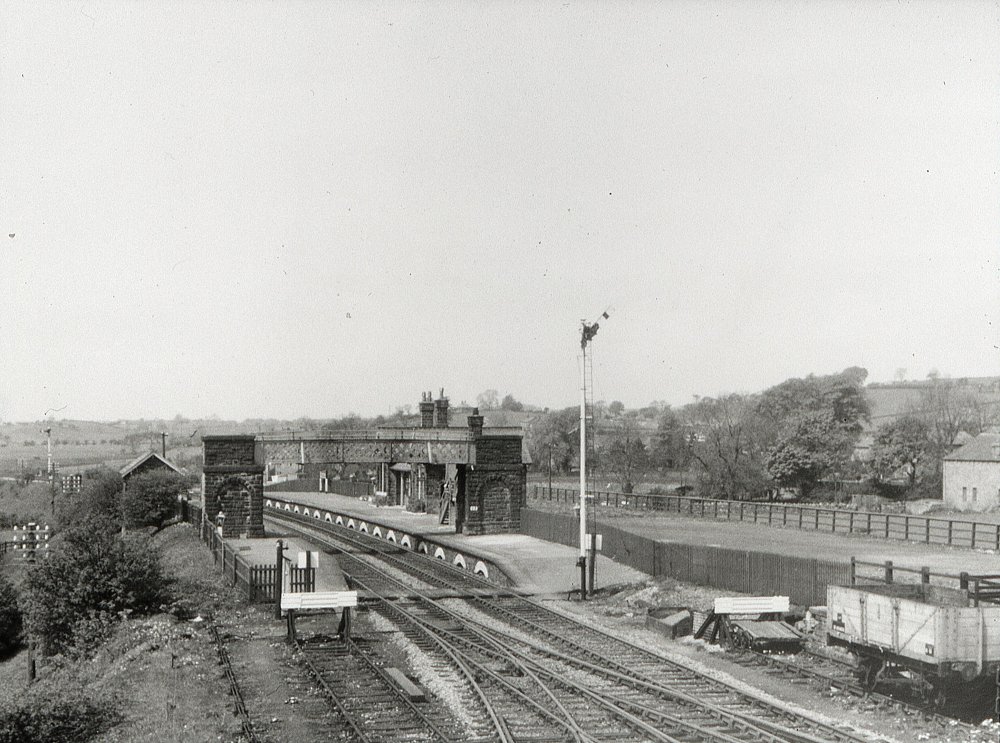
Bolton Abbey station in its heyday, showing how neat the station is kept, and how ornate the footbridge is by comparison to
others on the line.
(c) YDRMT collection.
|
|
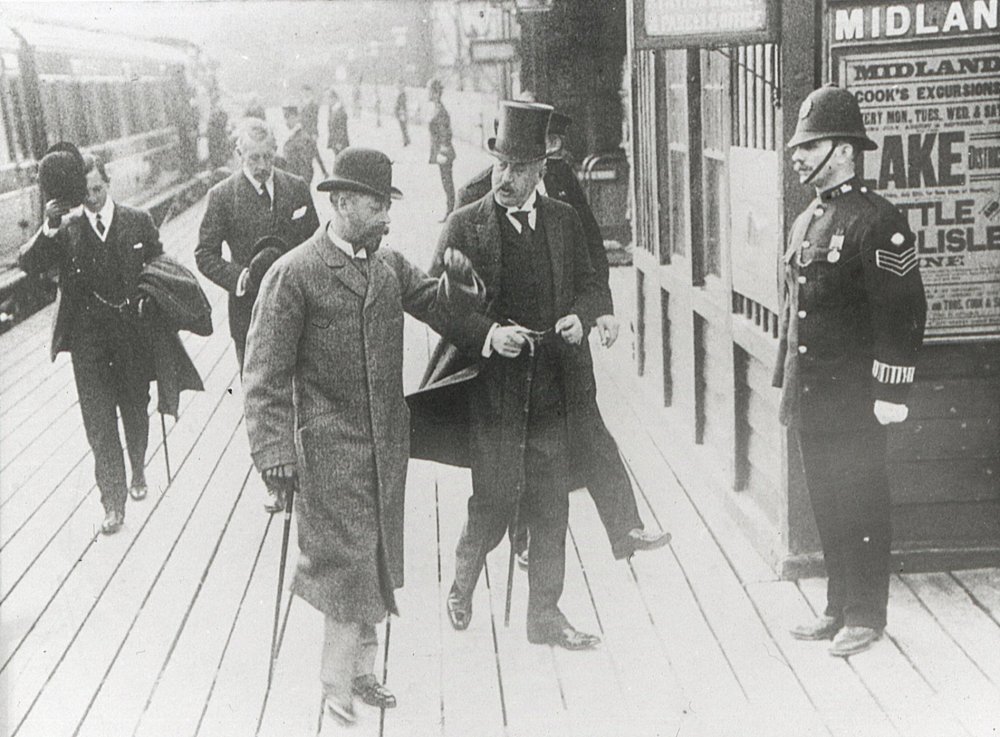
Policemen line the station for the royal visit - heading for Bolton Abbey estate and hunting.
(c) Bolton Abbey Estate.
|
|
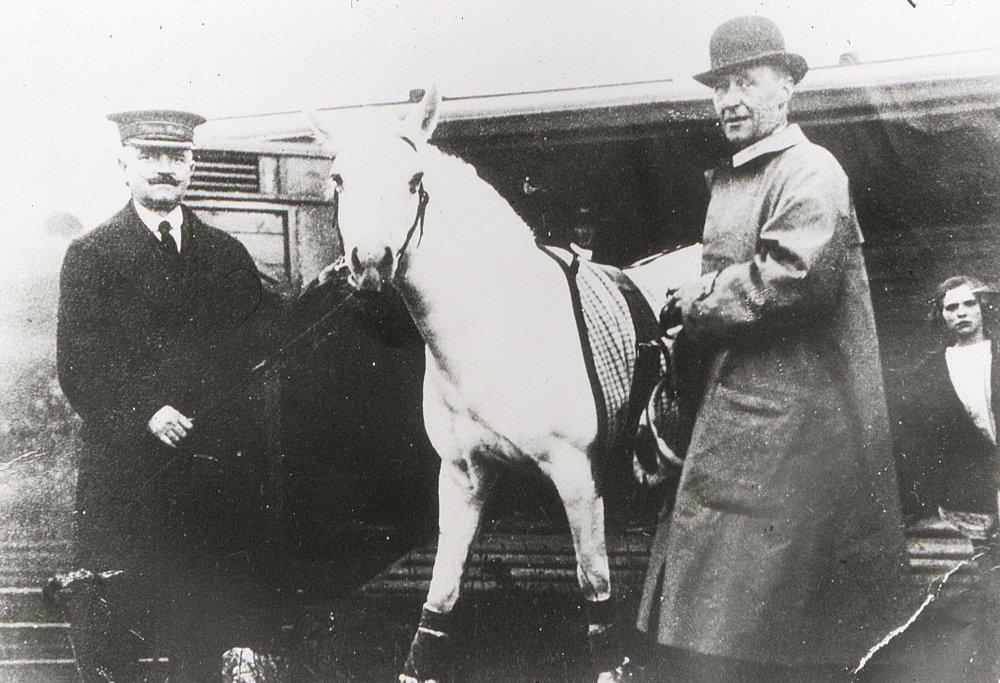
The King's horse being unloaded at Bolton Abbey station.
(c) YDRMT collection.
|
|
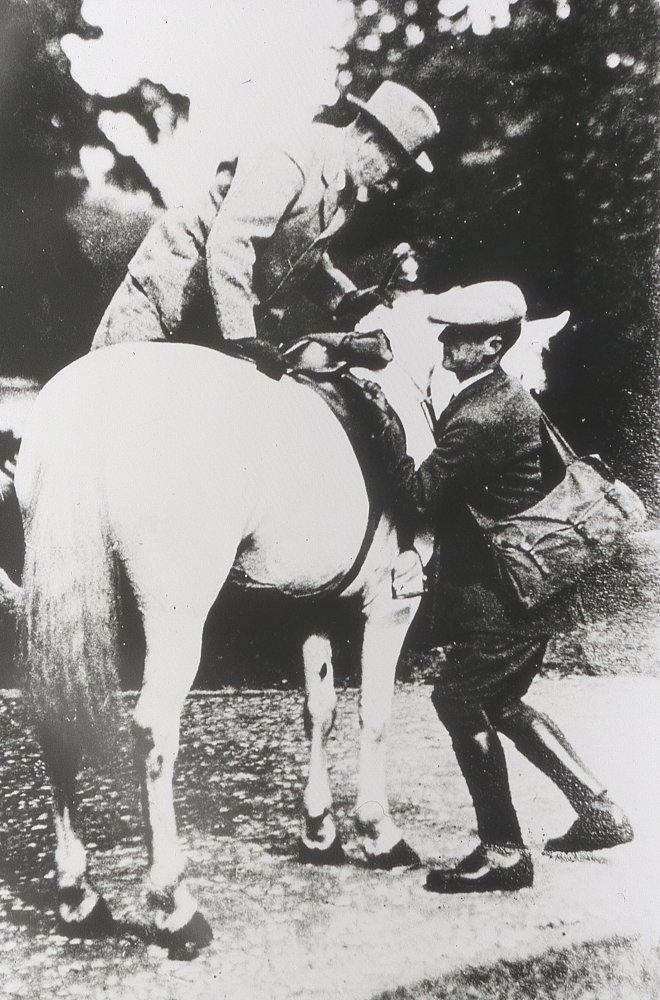
The King mounts his horse outside the station before travelling to the estate.
(c) YDRMT collection.
|
|
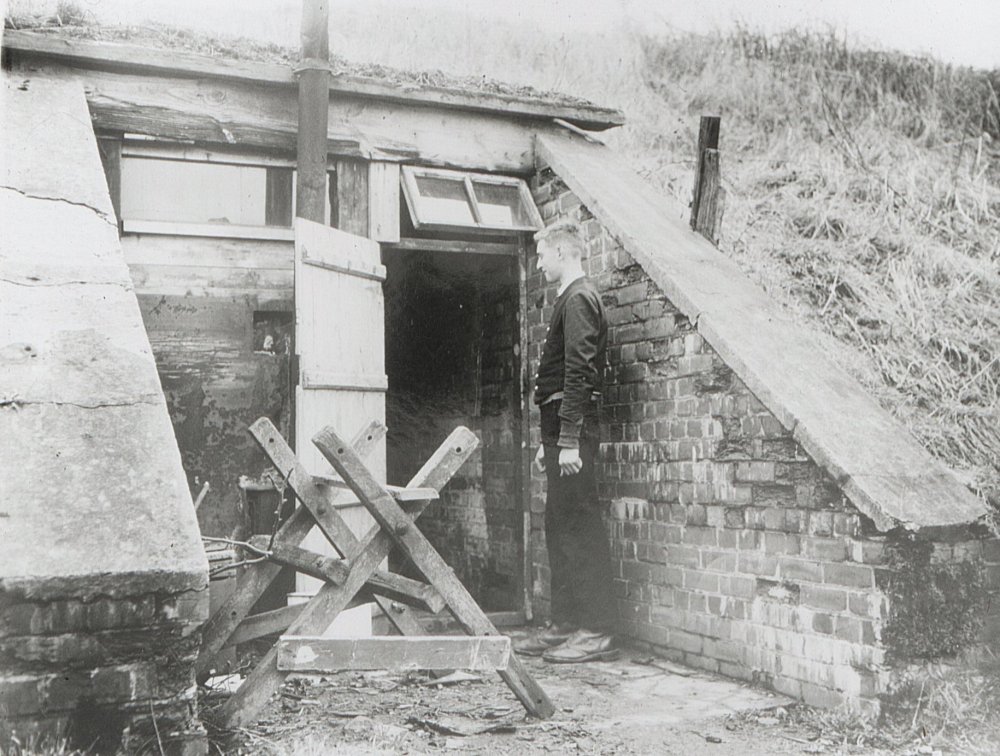
An air raid shelter was built into the side of the embankment during the war, and was even prepared for royal use.
(c) Ilkley Gazette.
|
|
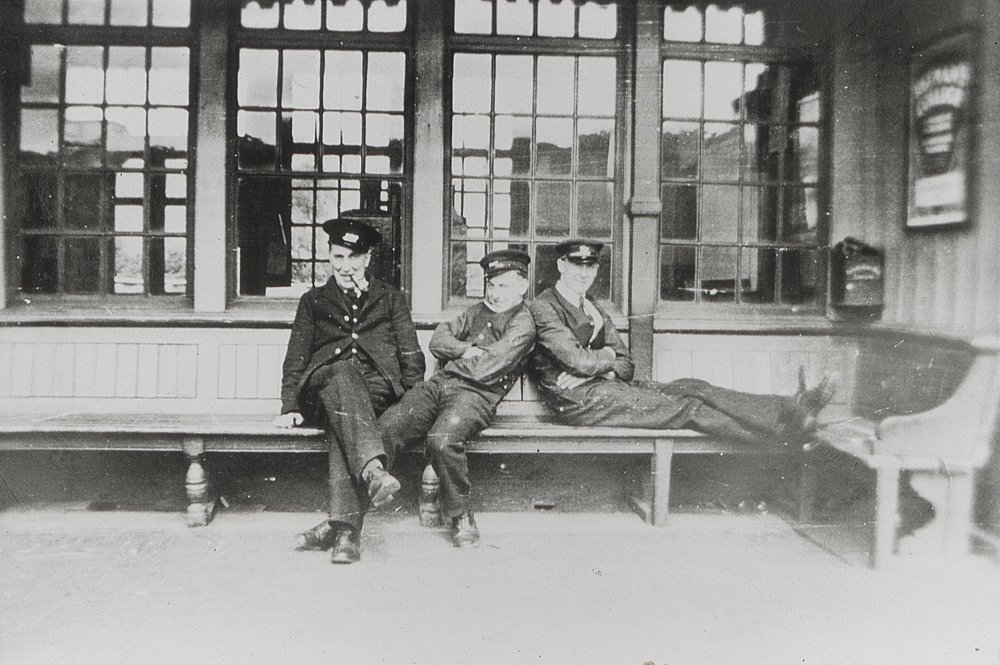
Station staff spending a couple of minutes sitting outside the Booking Hall during a quiet period.
(c) YDRMT collection.
|
|
A view from the footbridge showing the neat station, although no longer with a wooden decked platform - it appears to have
been filled in with gravel - seemingly a much safer option than wood in the wet weather.
(c) YDRMT collection.
|

|
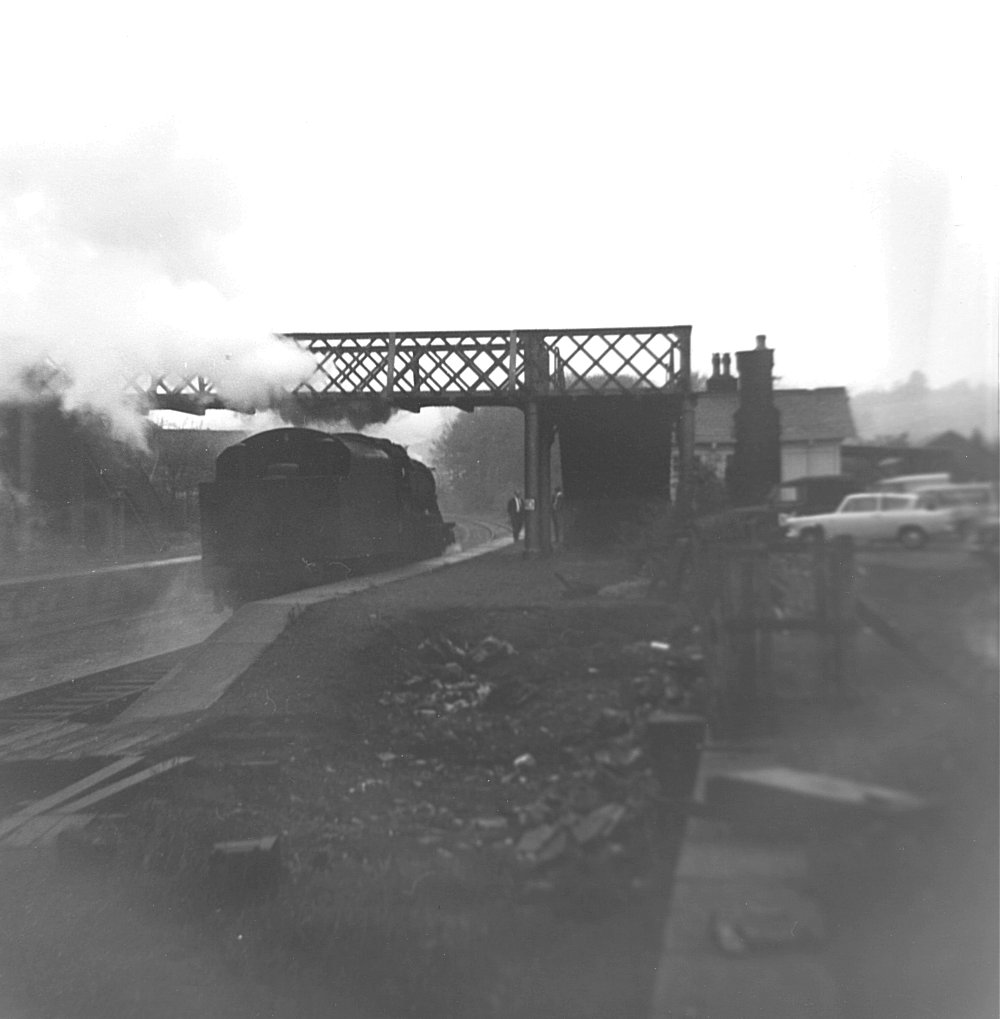
A postwar photo of the station, showing that it has become somewhat rundown looking at the fencing. The lights on the platform
still retain blackouts, but the loco would appear (from the larger original) to have a BR number. The great water tower is
still in existence here, but hadn't much longer.
(c) YDRMT collection.
|
|
A photo from near the end, although it does include the camping coach in the back siding. The wooden platform edgings have
been replaced with concrete blocks which still survive to this day.
(c) YDRMT collection.
|
|
A photo of the track-lifting train, possibly one taken by David Cash, somewhere close to Bolton Abbey.
(c) YDRMT collection.
|

|
The walk started at Ilkley station, with this board giving details of where and when it took place.
(c) YDRMT collection.
|

|
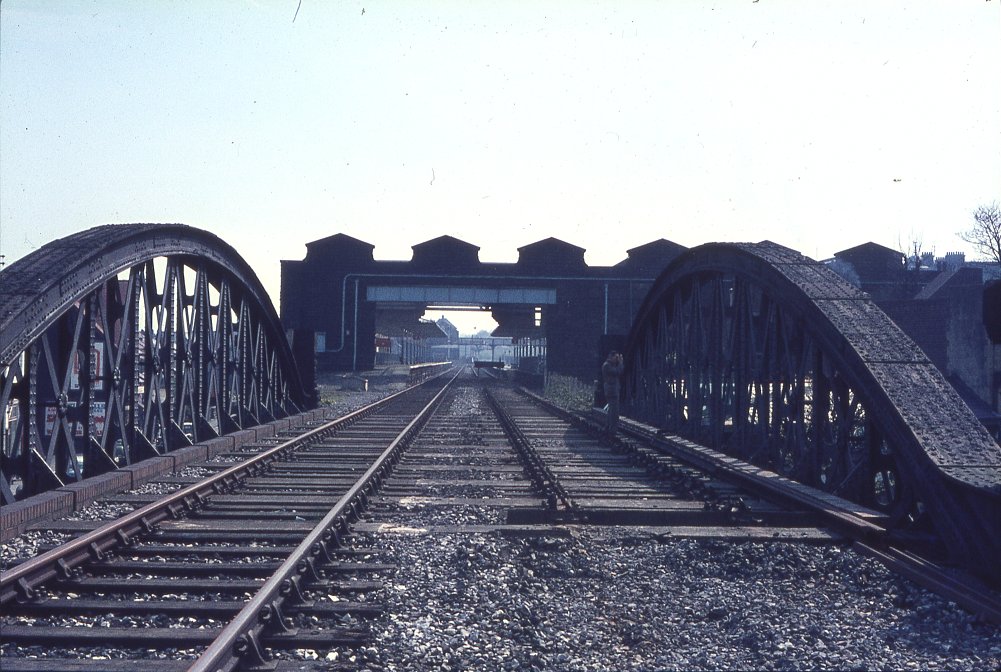
The first photograph shows Ilkley station boasting 4 platforms and the 'hole in the wall' where the line to Skipton headed
off. The area formerly occupied by the Skipton platforms (3 and 4) is now the carpark for the station.
(c) YDRMT collection.
|
|
Immediately outside the station lay Brook Street Bridge, seen here looking back through the 'hole in the wall' into Ilkley
station.
(c) YDRMT collection.
|
|
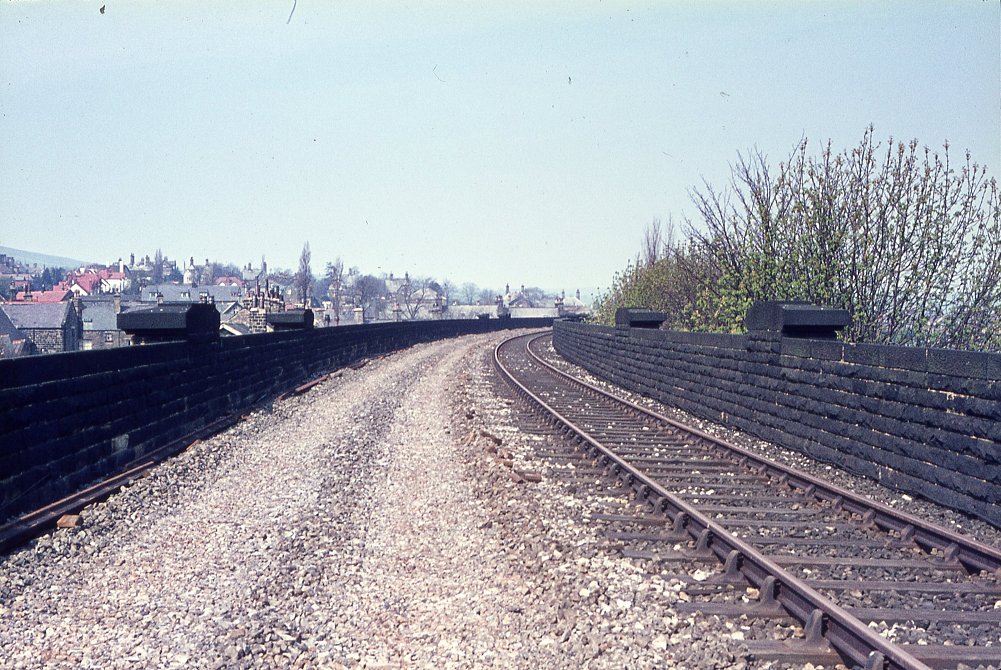
The line travelled through Ilkley on a large masonary viaduct, which was quickly demolished in 1972, along with most of the
remaining structures on the line. This view is looking back towards the station.
(c) YDRMT collection.
|
|
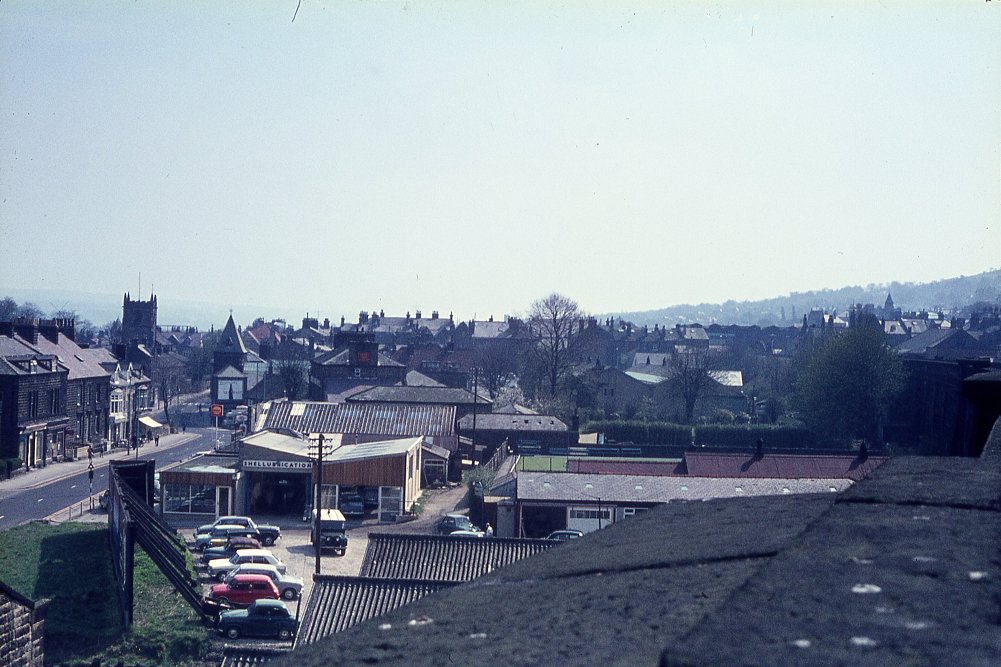
Looking from the viaduct, this view of Ilkley is available, clearly showing how impossible it would be to reinstate the
Railway back through to Ilkley station.
(c) YDRMT collection.
|
|
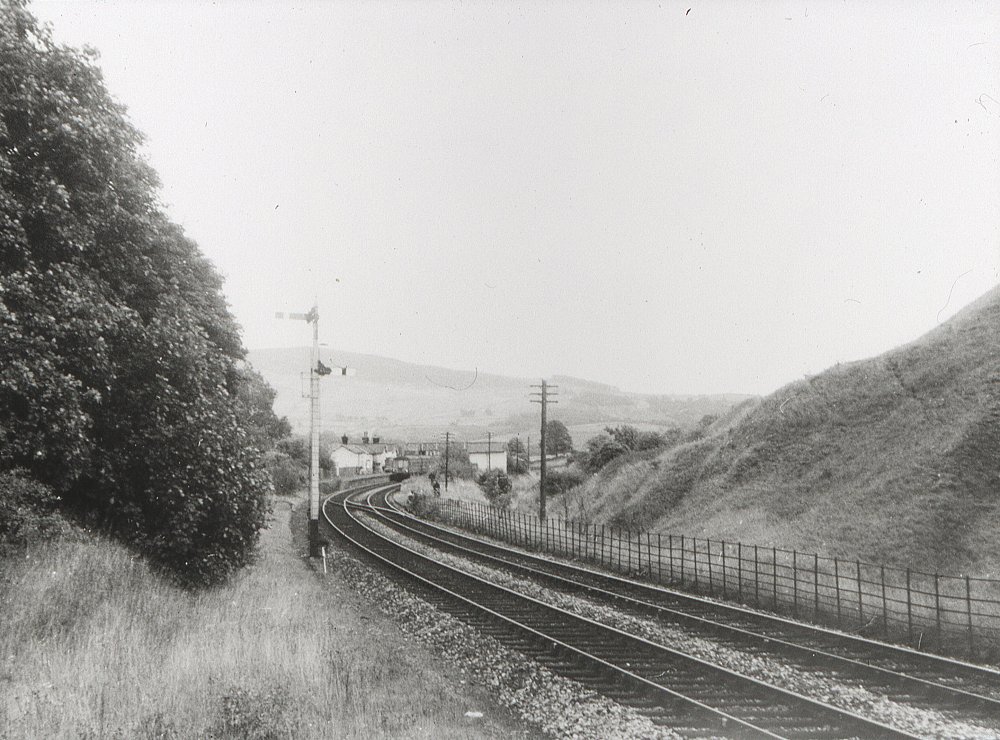
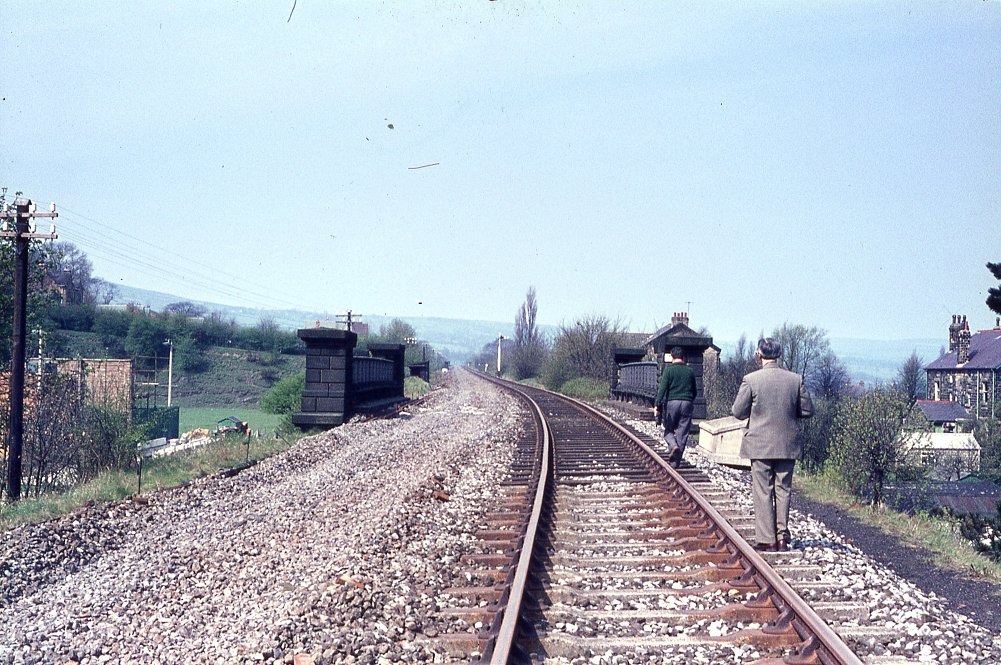
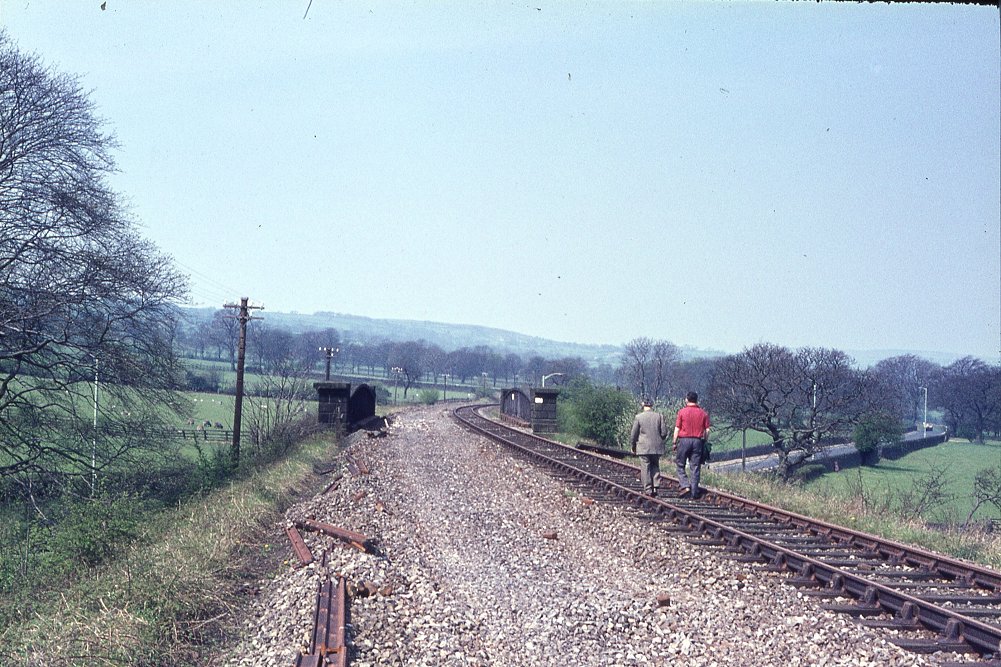
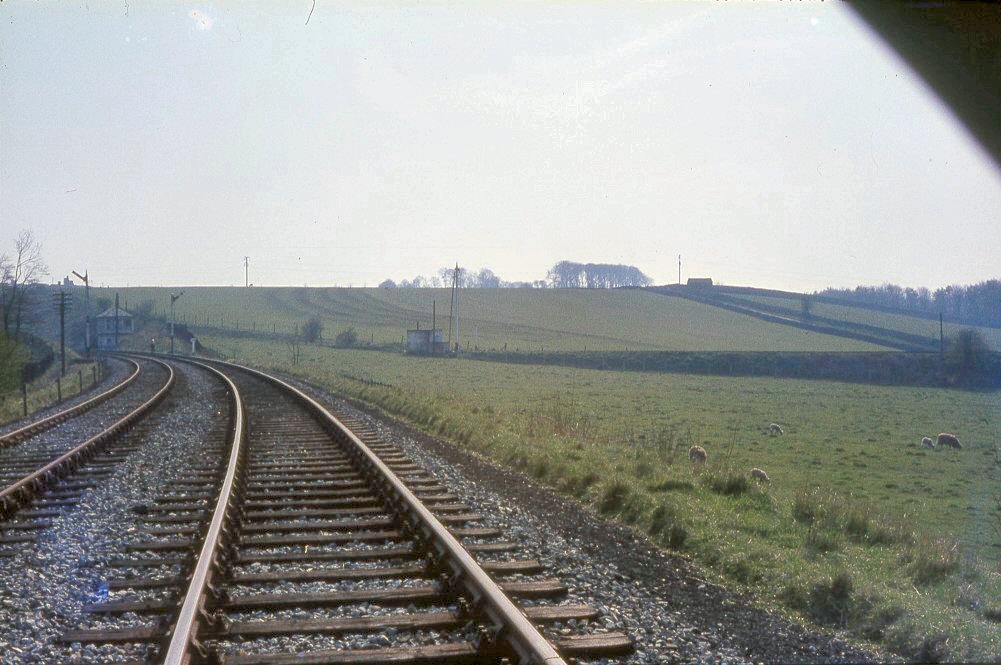
This view includes the distant signal for Ilkley station, and therefore must be on the outskirts of Ilkley, taken
looking towards Addingham.
(c) YDRMT collection.
|
|
The same signal pictured again, but looking back the other way.
(c) YDRMT collection.
|
|
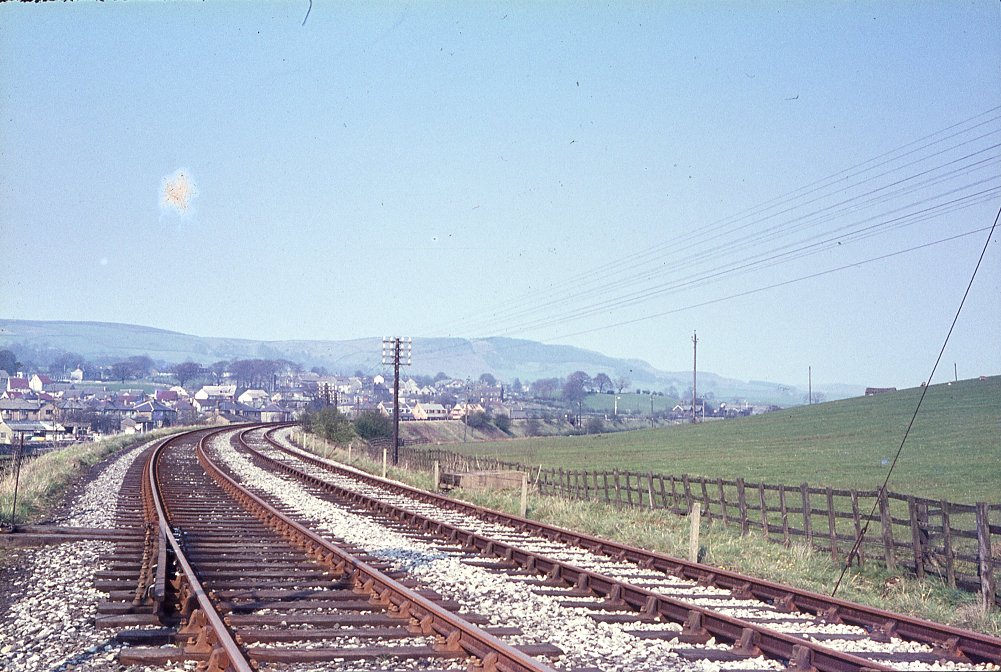
The line between Ilkley and Addingham crossed the main road several times, and some of the embankment still remains to this
day. Again, this would appear to be looking towards Addingham.
(c) YDRMT collection.
|
|
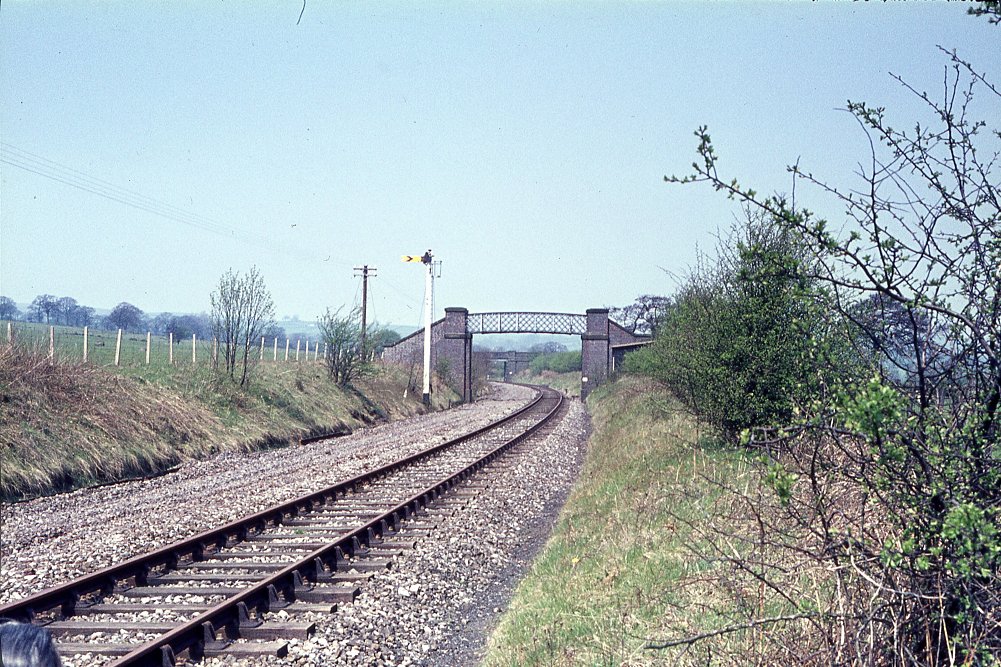
Despite the initial suggestion that this was Skibeden, the distant signal and bridge to the rear of the photo mean that this
must be the approach to Addingham, from Ilkley. This photograph was something of a surprise as we were of the impression that
the footbridge at Skibeden was unique in being built of blue brick.
(c) YDRMT collection.
|
|
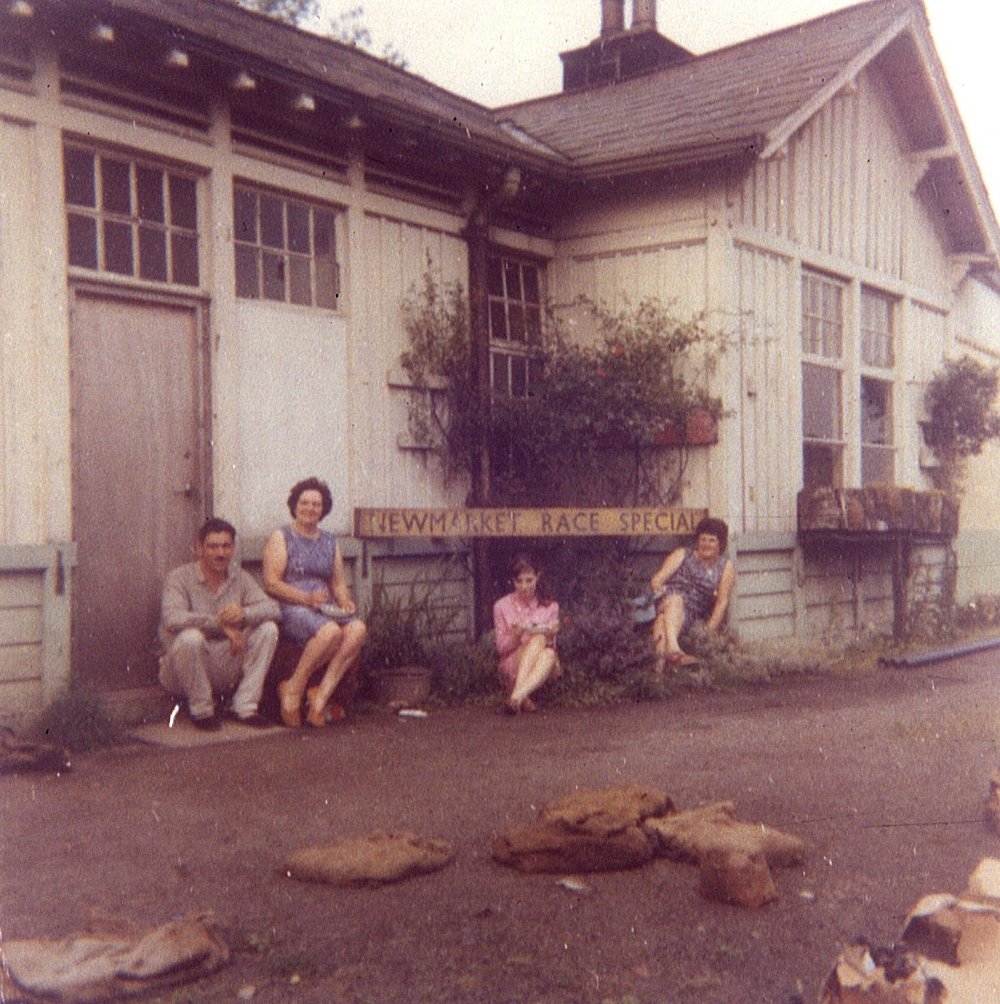
Viewd through the overbridge, the remains of Addingham's goods yard is apparant, with its substantial stone goods shed and
the station building itself visible towards the rear of the photo, on the right.
(c) YDRMT collection.
|
|
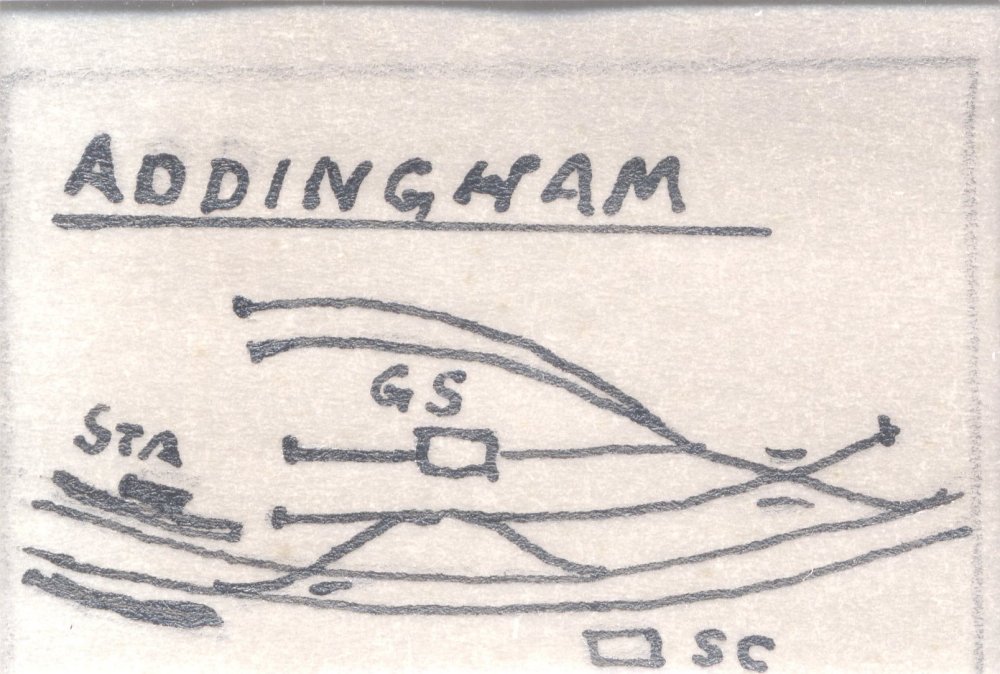
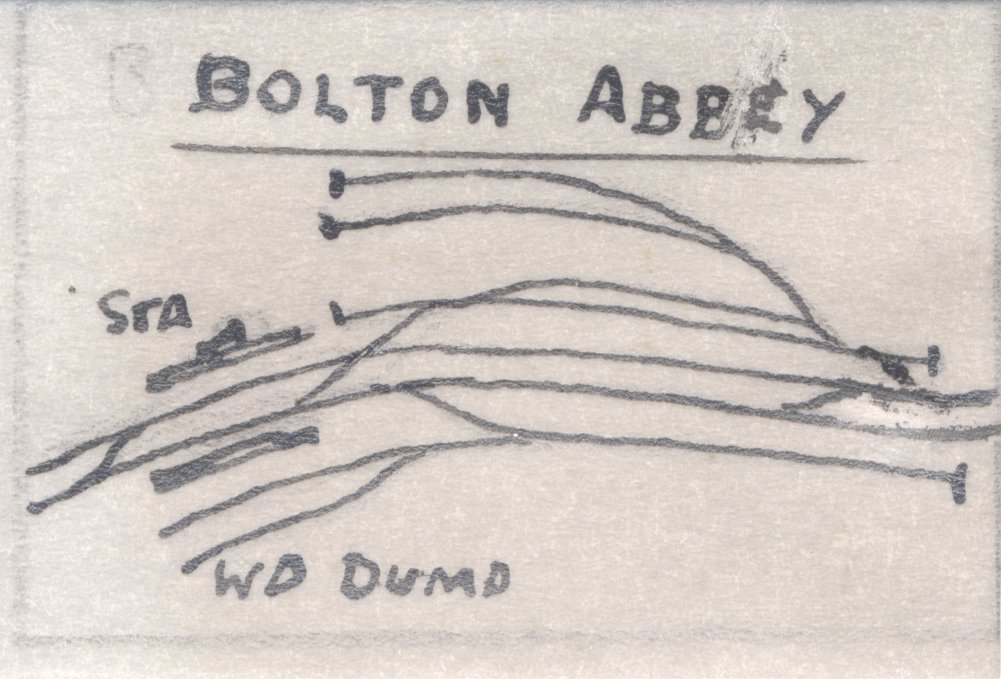
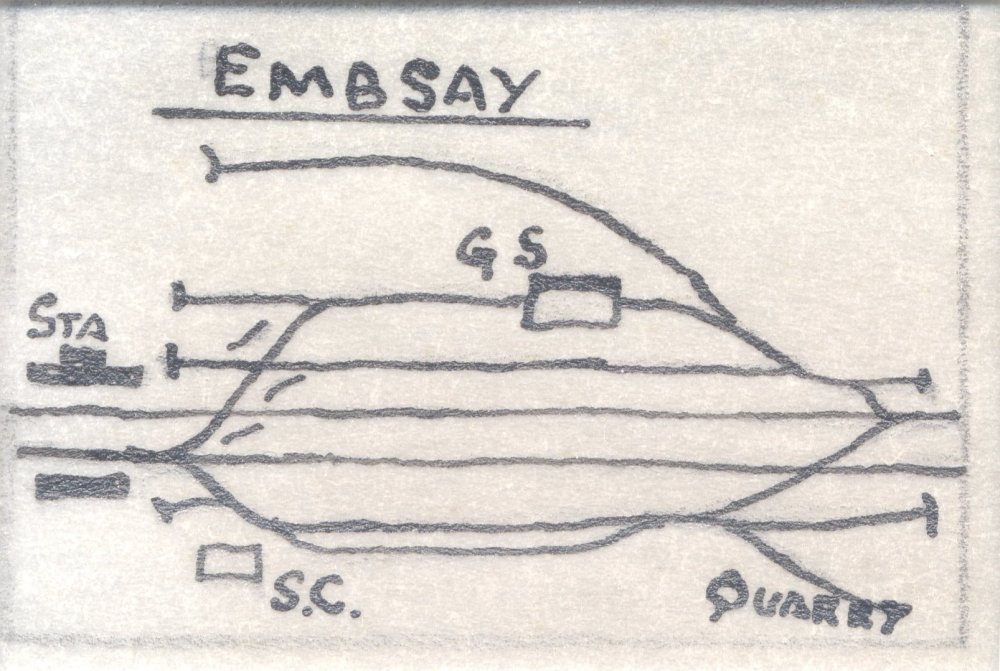
Included in the collection of slides were hand-drawn diagrams showing the track layouts of the stations on the line.
(c) YDRMT collection.
|
|
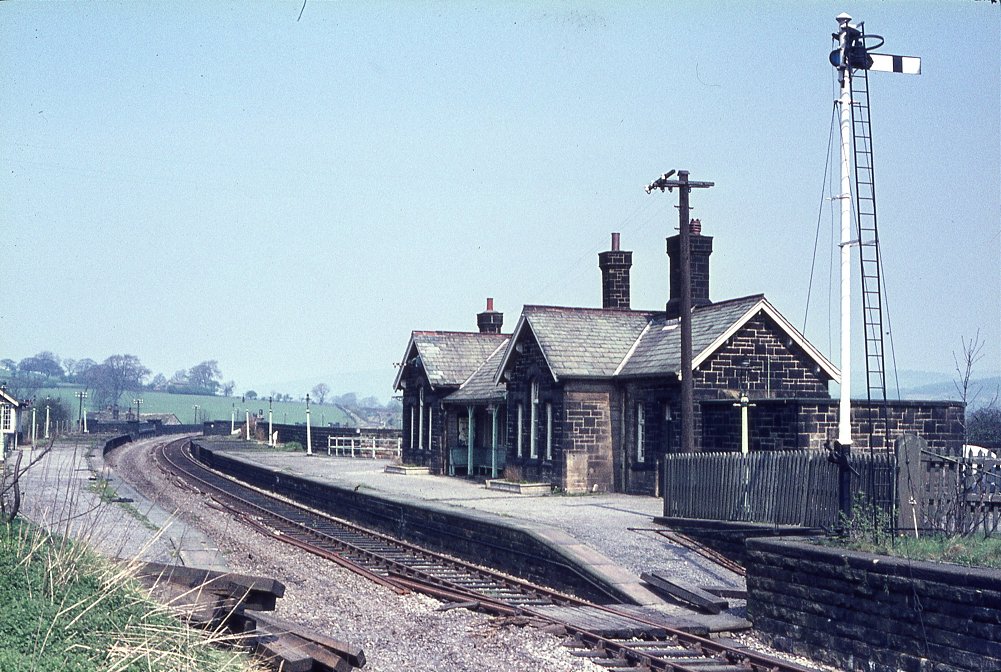
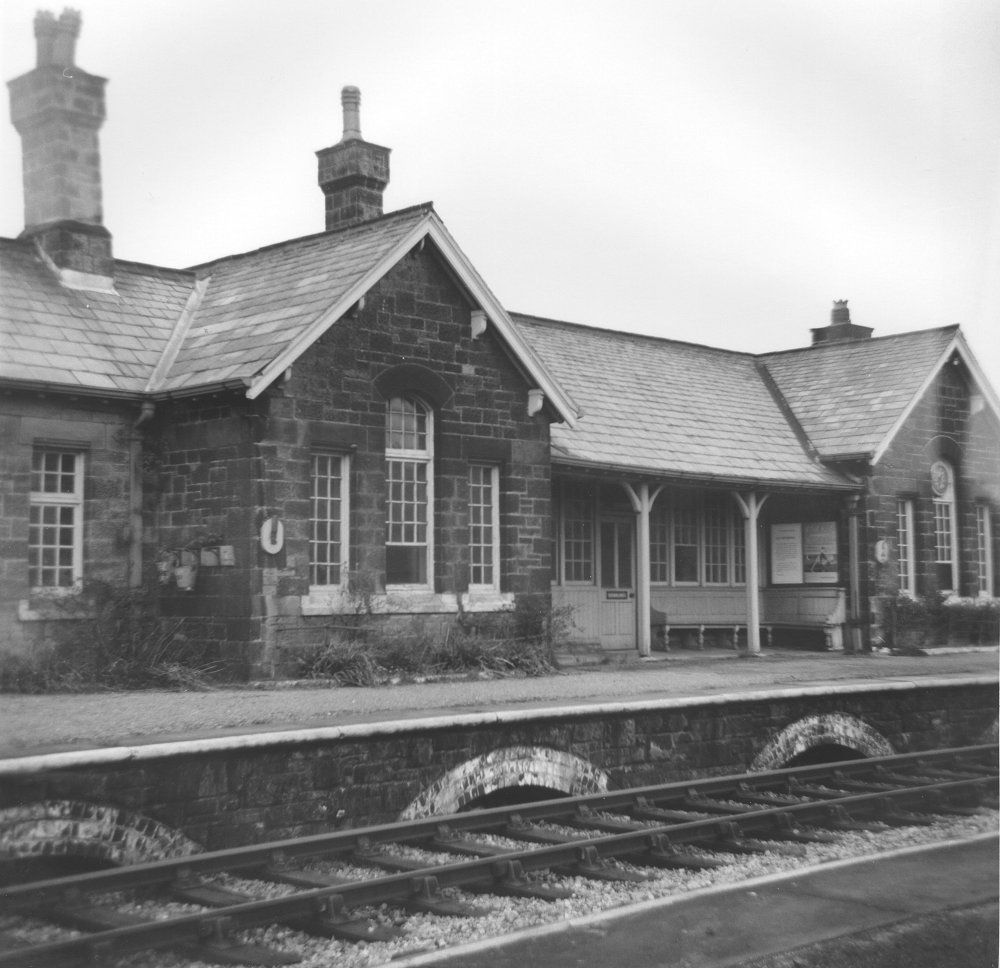
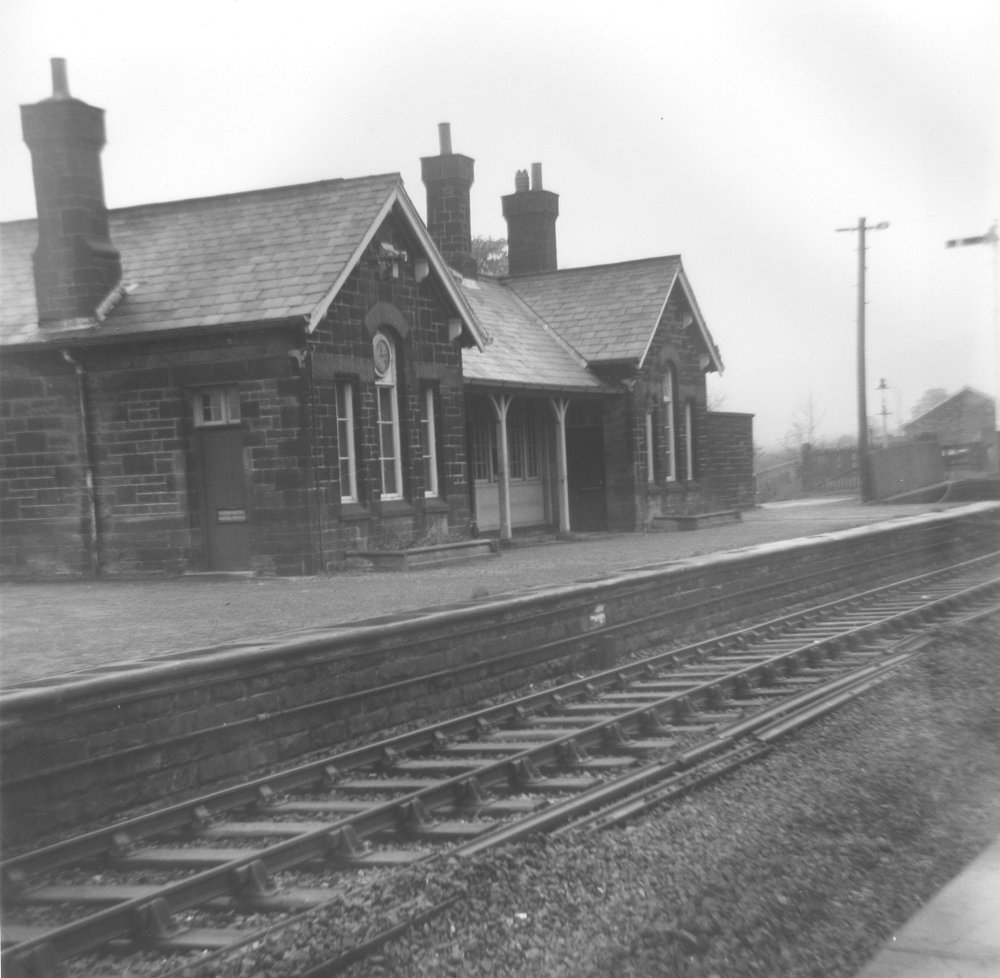
A close-up of Addingham station building shows its design clearly - a mirror image of Embsay's building. Note that despite
the closure being a good time ago, the station is still tidy and intact, even with its signalling equipment. This was removed
much earlier at Bolton Abbey.
(c) YDRMT collection.
|
|
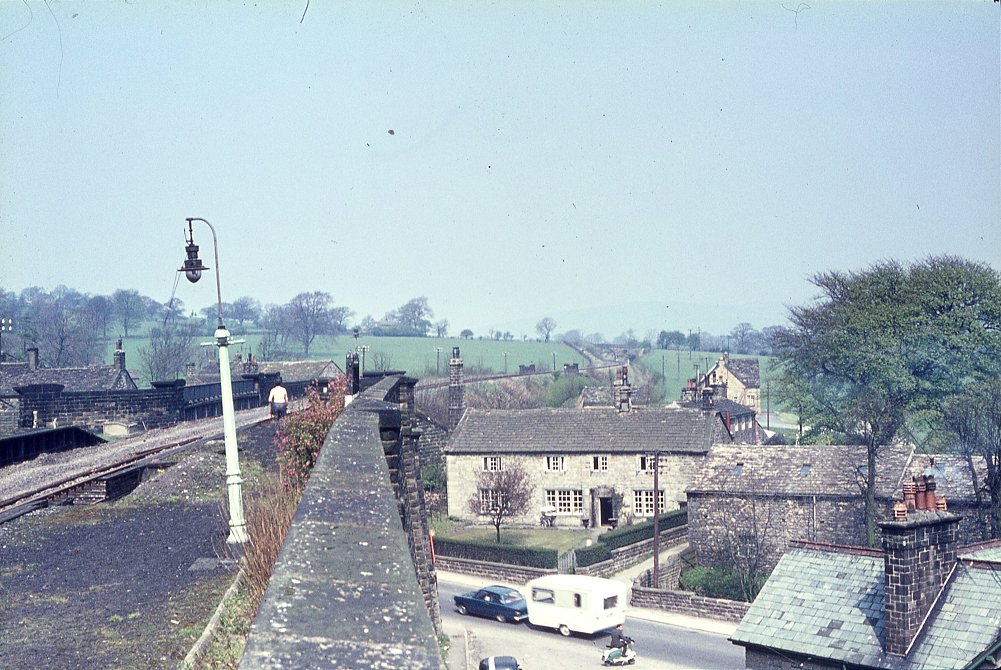
Viewd from the far end of the station building in the last photograph, this shows how the line ran through Addingham high
above ground level. Addingham station therefore had a subway instead of a footbridge. The embankment visible at the far
side of the road still exists, but everything else towards the photographer has gone, replaced by a fish and chip shop.
(c) YDRMT collection.
|

|
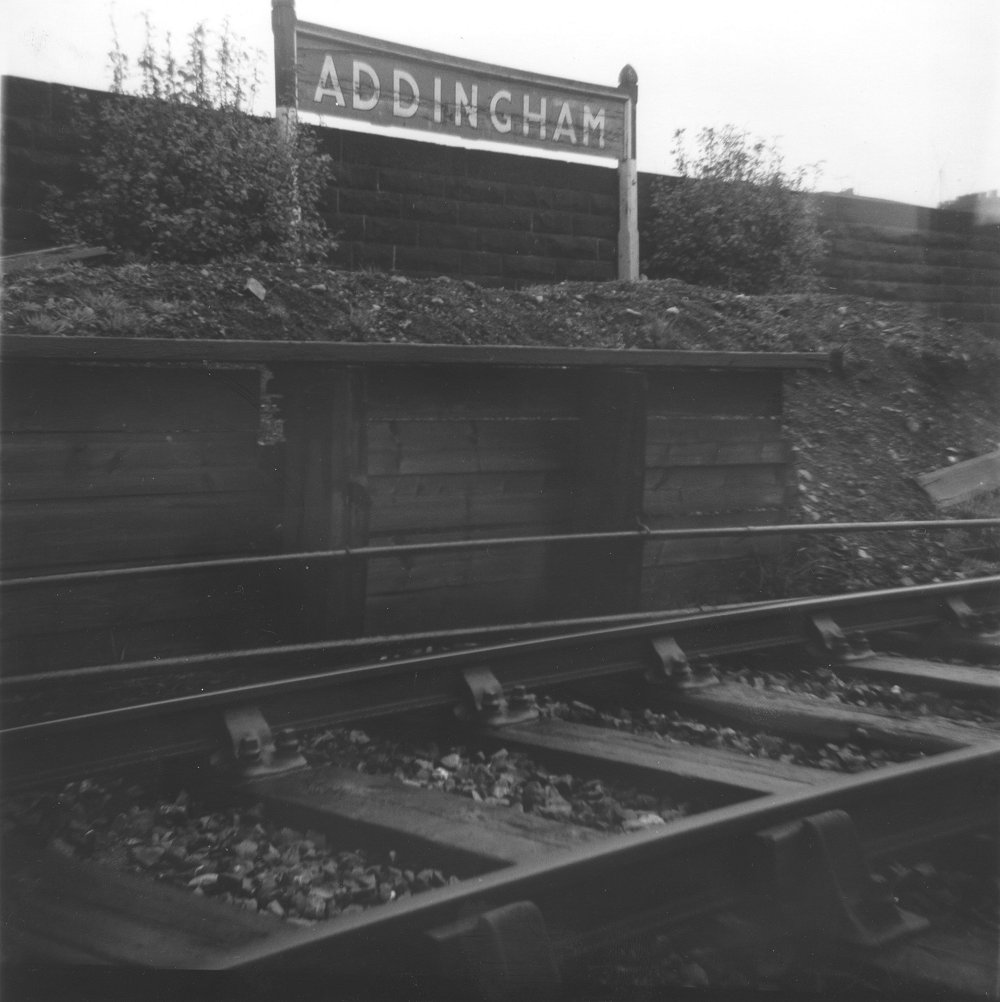
The running-in board at Addingham.
(c) YDRMT collection.
|
|
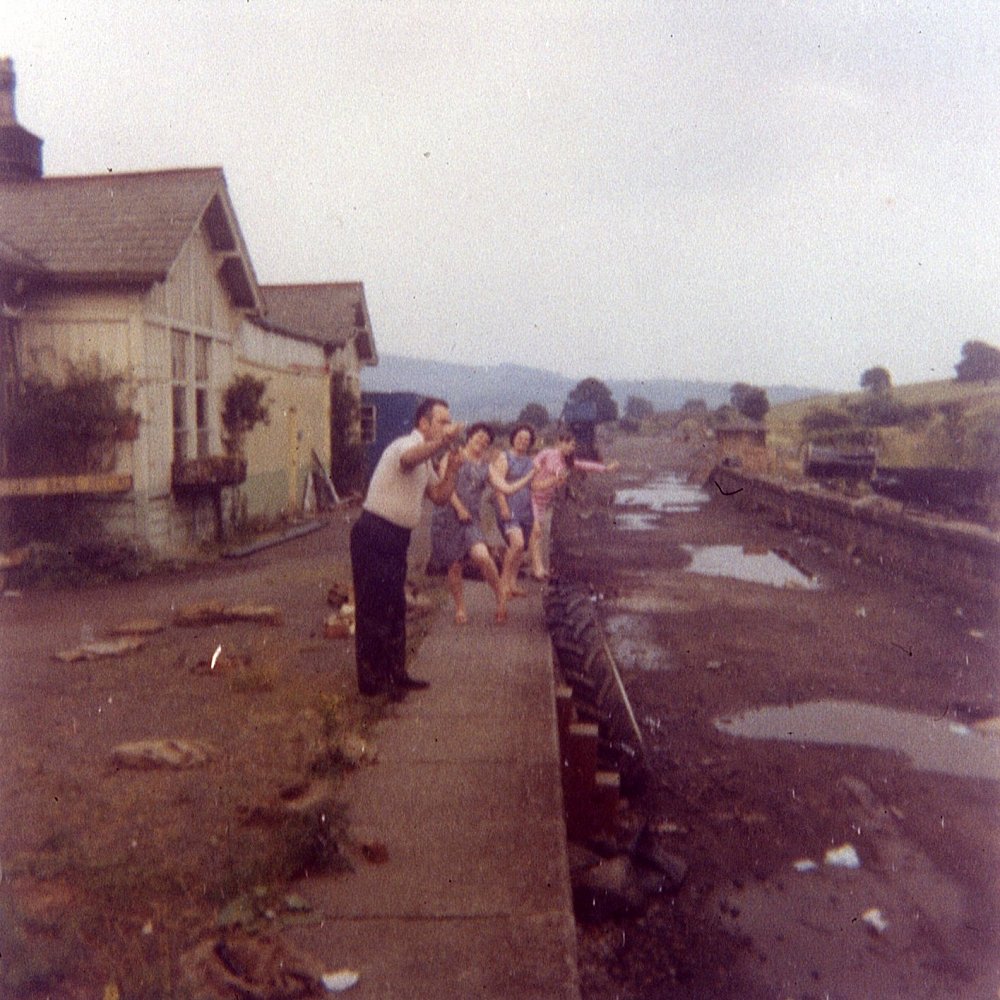
As they walked across the bridge crossing the main road in Addingham, this view was obtained. It would be interesting to
compare to modern day Addingham, but might be somewhat difficult to re-create!
(c) YDRMT collection.
|
|
A somewhat unknown view here - presumably it is the Bolton Abbey side of Addingham, and the signal visible is the distant
for Addingham, but this is not certain...
(c) YDRMT collection.
|
|
Between Adding ham and Bolton Abbey once more, and these two overbridges also remain intact, although there has been quite
a large amount of soil washed down onto the trackbed, resulting in about 6'6" headroom only!
(c) YDRMT collection.
|
|
Approaching Bolton Abbey station, and the view here has changed somewhat with the new road bridge. This is looking across at
the Wahrfe, towards Bolton Priory.
(c) YDRMT collection.
|
|
Heading further towards Bolton Abbey, and this bridge is still intact. It is NOT the site of the school in Addingham as was
previously supposed - many thanks to those who helped identify it!
(c)YDRMT collection.
|

|
Just around the bend from the previous photograph, and Lobb Ghyll Viaduct is seen, presumably looking towards Addingham. This
structure has never been particularly easy to photograph, owing to the line passing through a wood. Today, this structure
remains intact, and in much the same appearance, as the greenery which was trying to grow on top of it was removed.
(c) YDRMT collection.
|
|
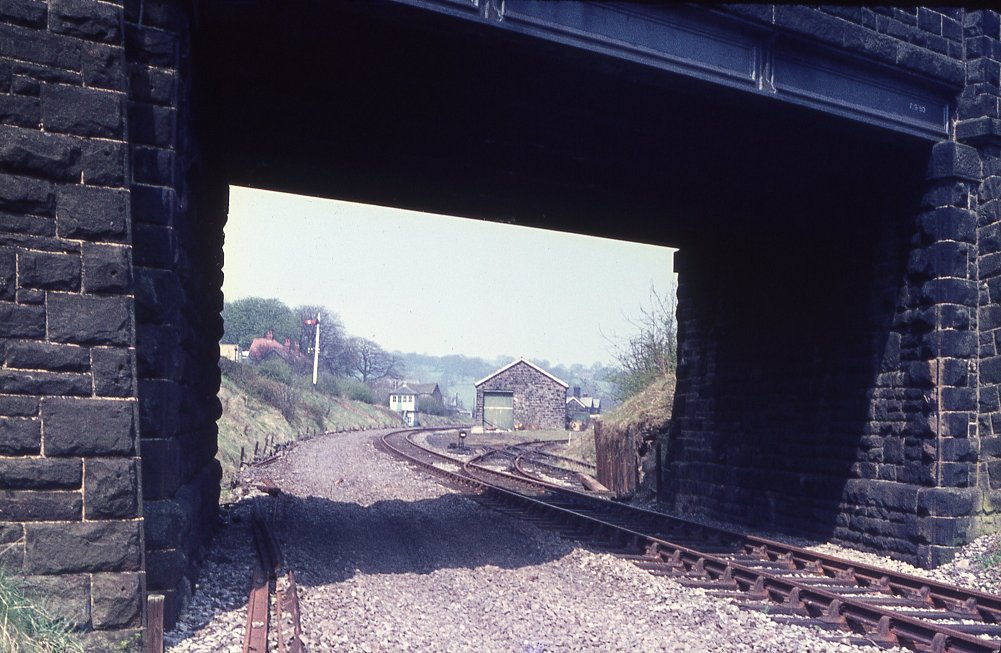
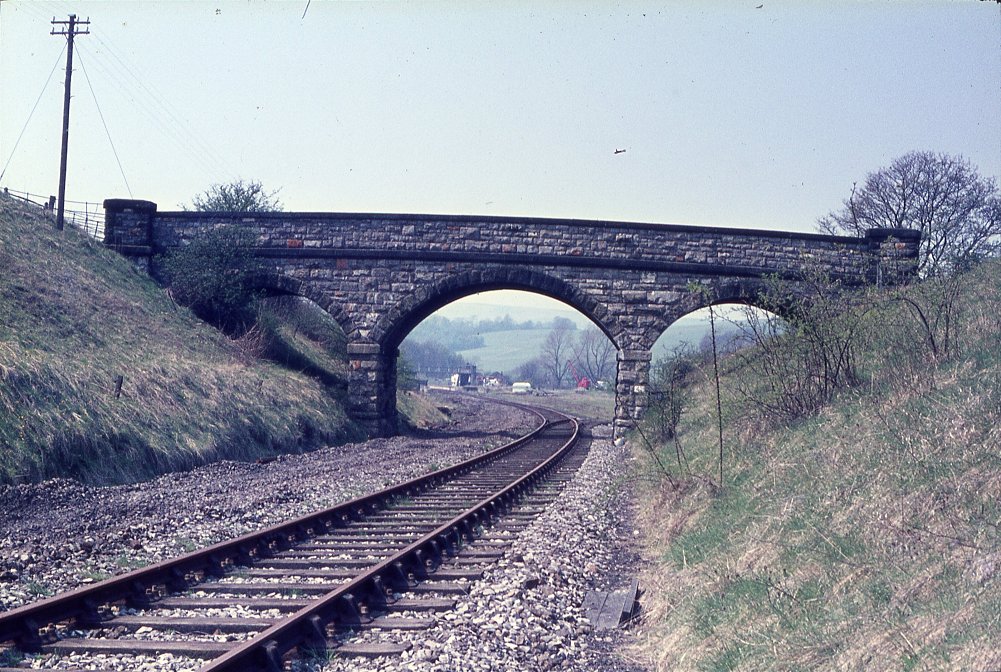
Once over the viaduct, the line sweeps around a bend, over a couple more underbidges, and then enters Bolton Abbey station,
under this bridge. The turnout to the goods yard can still be seen, as can the station in the background. Currently the
Railway owns right up to this bridge.
(c) YDRMT collection.
|
|
The former layout of the station, including the War Department munitions dump. These sidings formerly served the quarry.
(c) YDRMT collection.
|
|
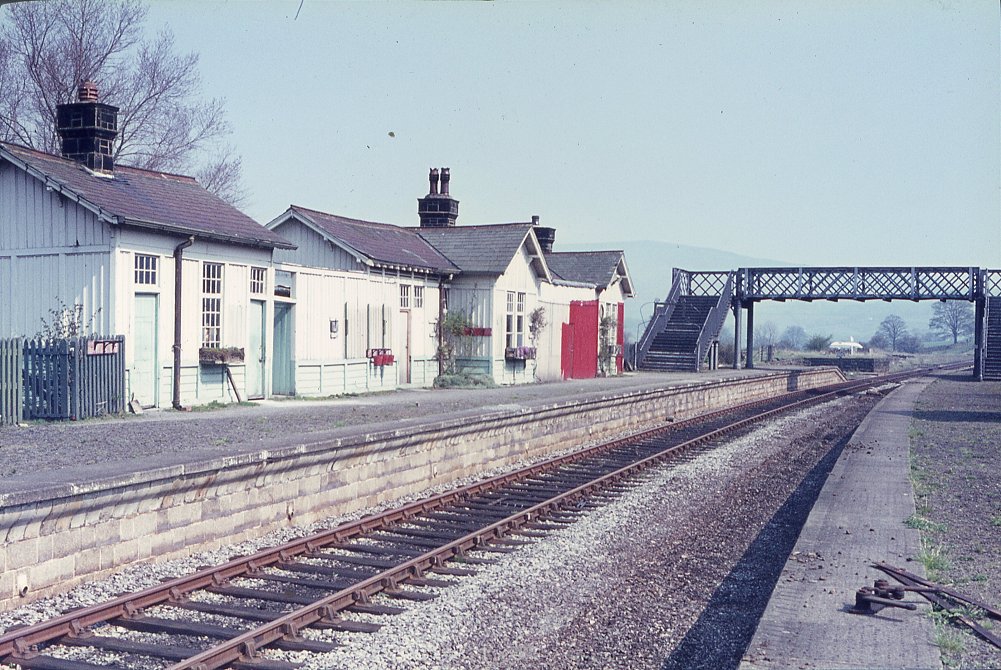
The original Bolton Abbey station is seen, looking towards Addingham, in its second lease of life as the headquarters for a
pipelaying company. The red boarding seals off the station building from the platform, and was sunsequently painted to match
the rest of the station before falling into disrepair, not helped by the removal of the slates from the roof.
(c) YDRMT collection.
|
|
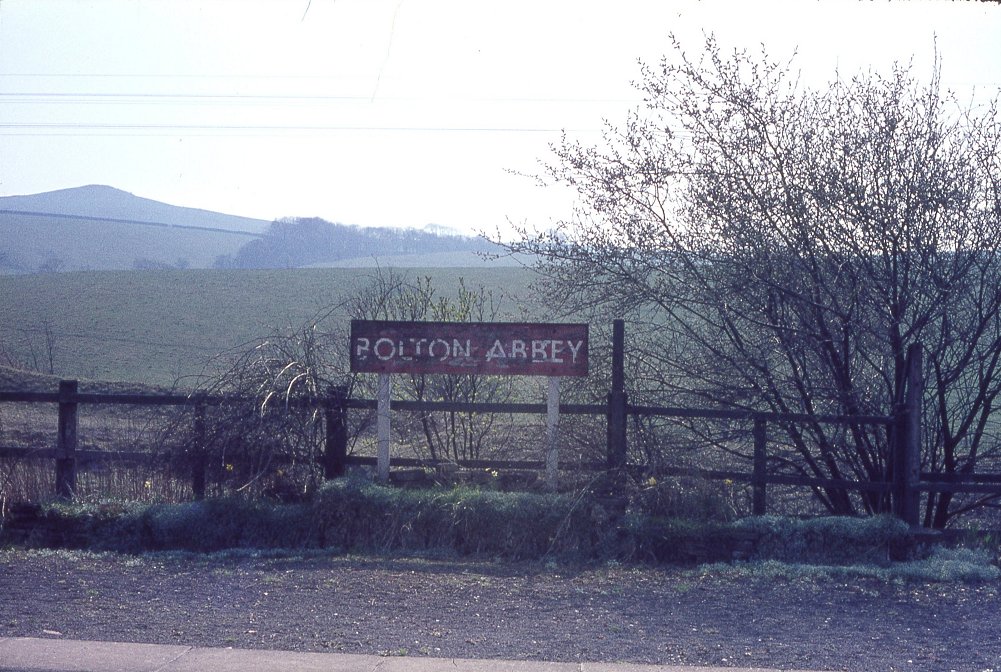
The running-in board on platform 2, unusually at the Embsay end.
(c) YDRMT collection.
|
|
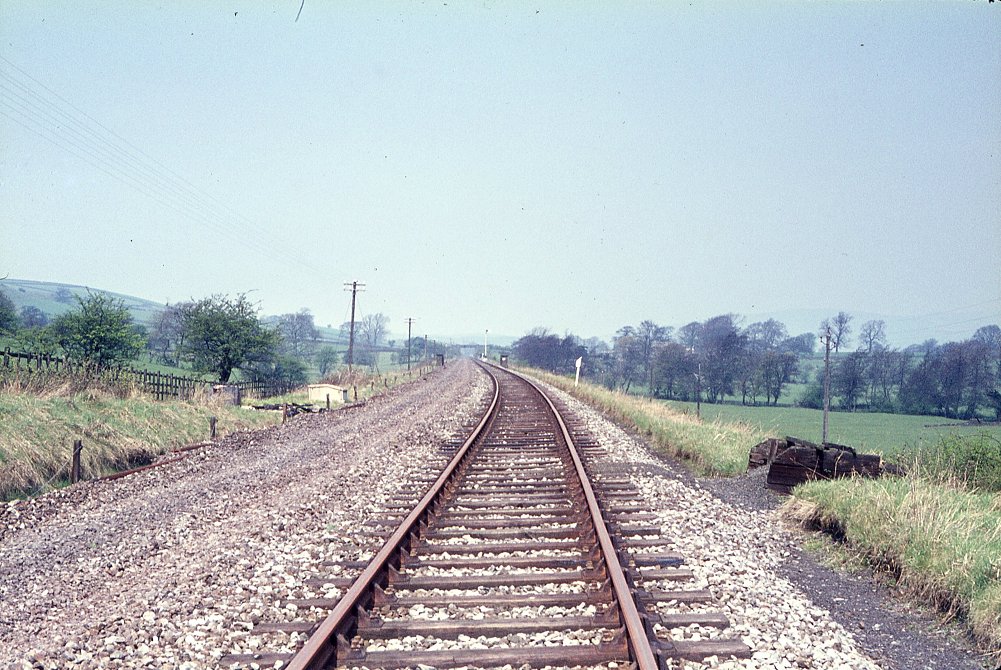
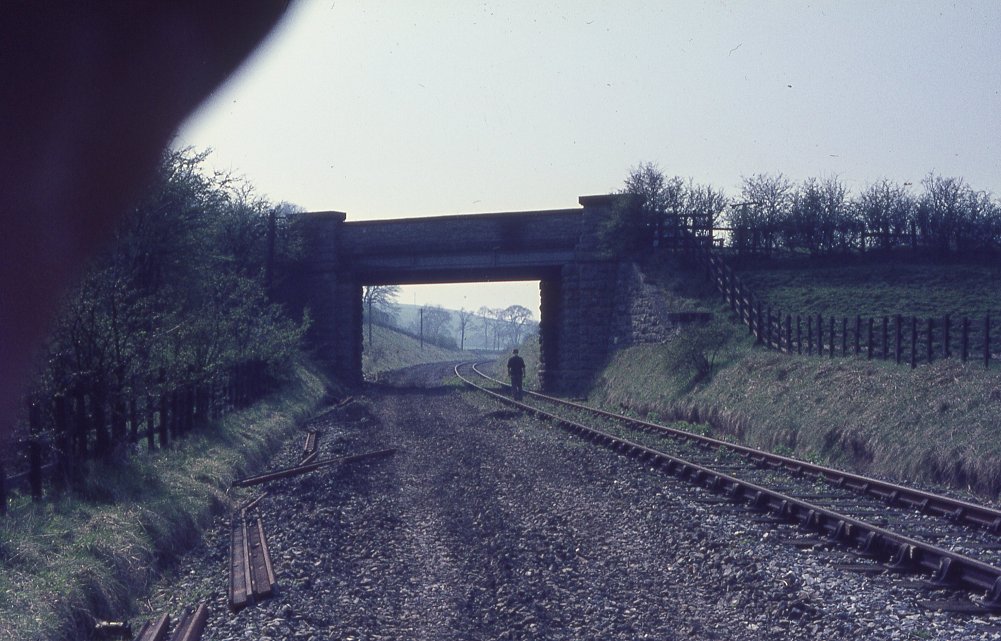
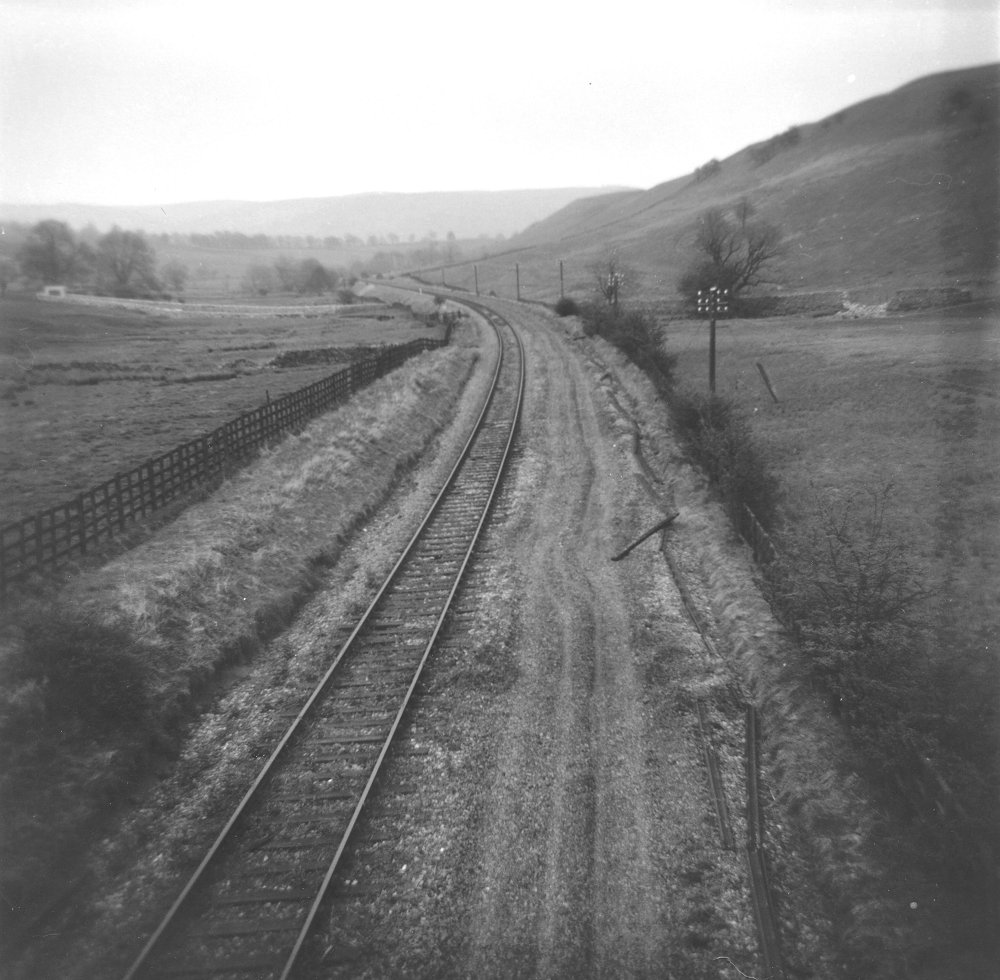
Moving on towards Embsay and the location is Prior's Lane bridge, with Draughton up the hill to the left of the picture. This
location has changed very little today.
(c) YDRMT collection.
|
|
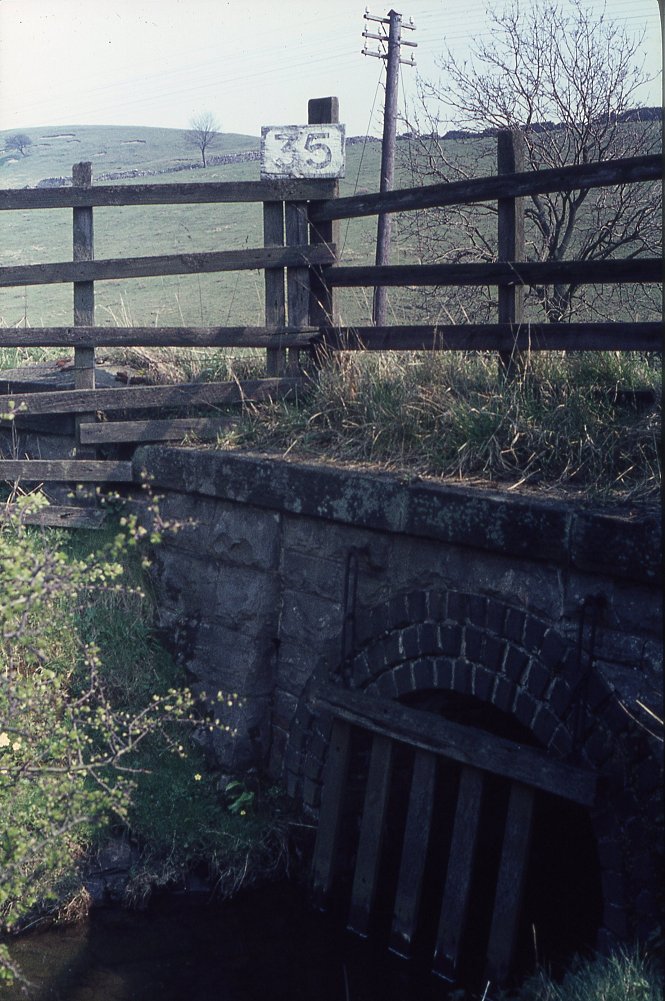
Nearing the location (now) of Stoneacre Loop, and this photo records culvert 35, still functioning today, having just been
partially repointed (2003).
(c) YDRMT collection.
|
|
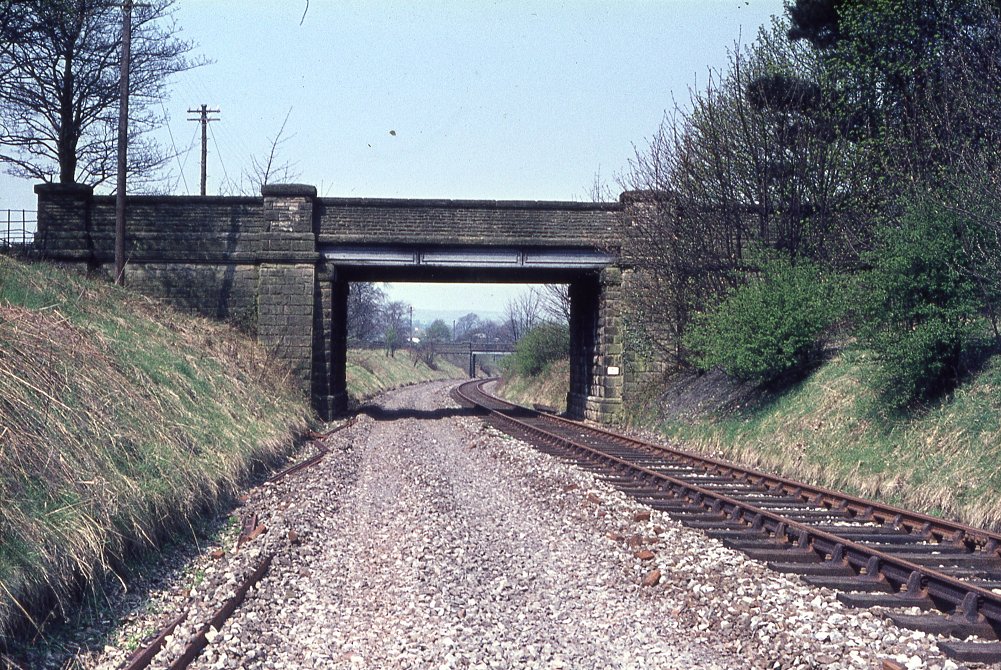
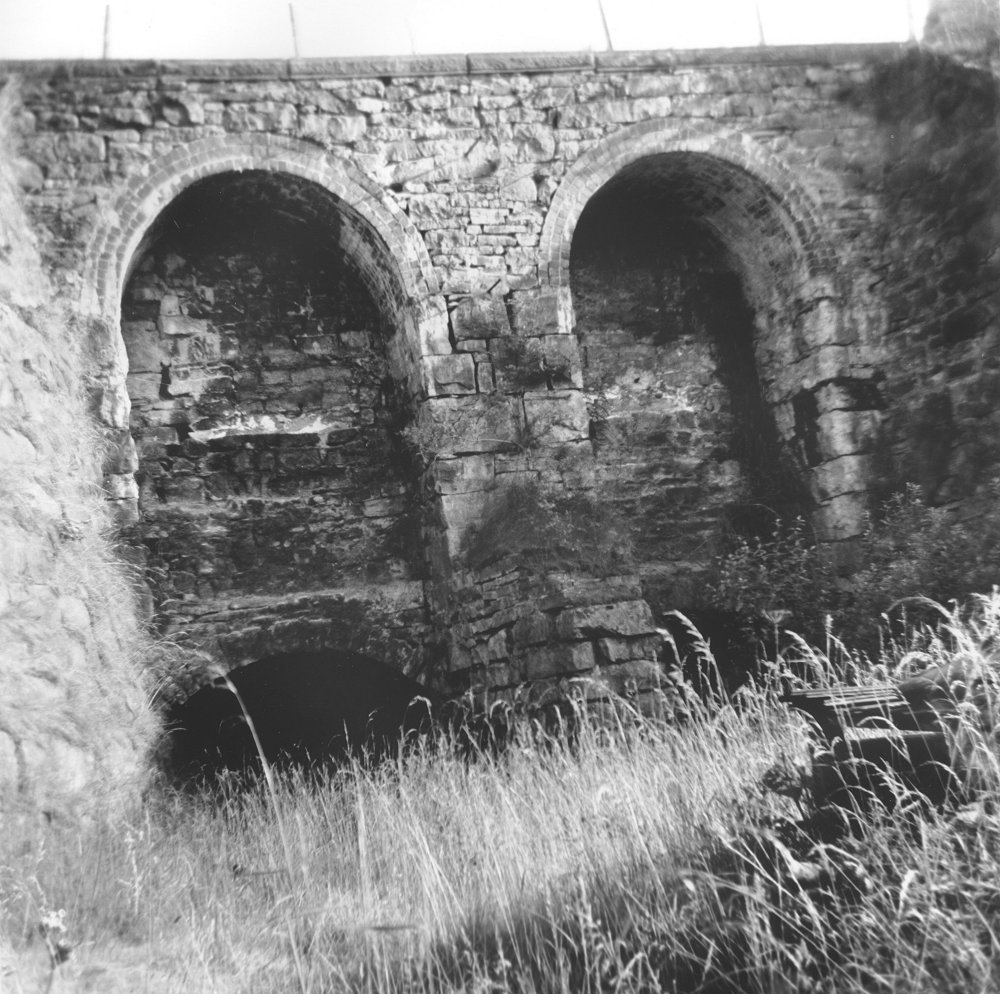
Bridges 34 and 33 are seen in this photograph - 34 was in a very poor state when we rebuilt, and it parapets are now in red
brick. more dramatic changes have occured to Bridge 33 however...
(c) YDRMT collection.
|
|
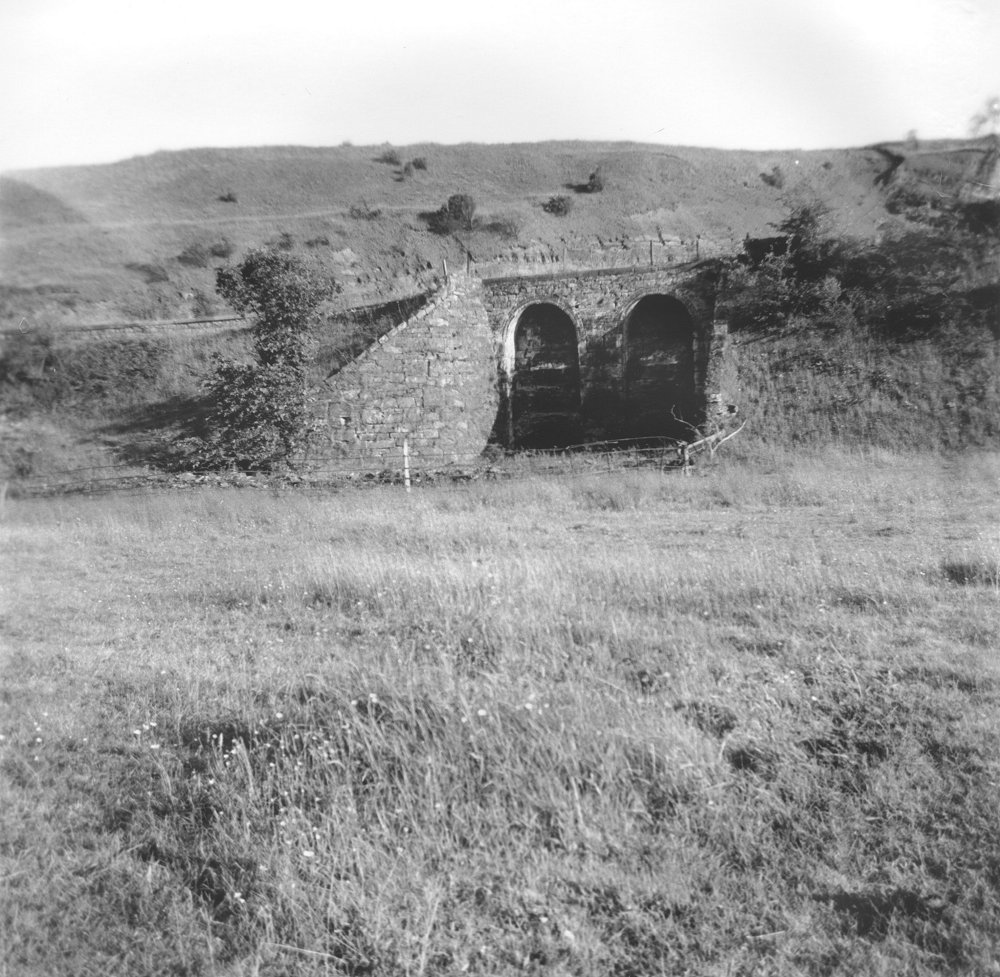
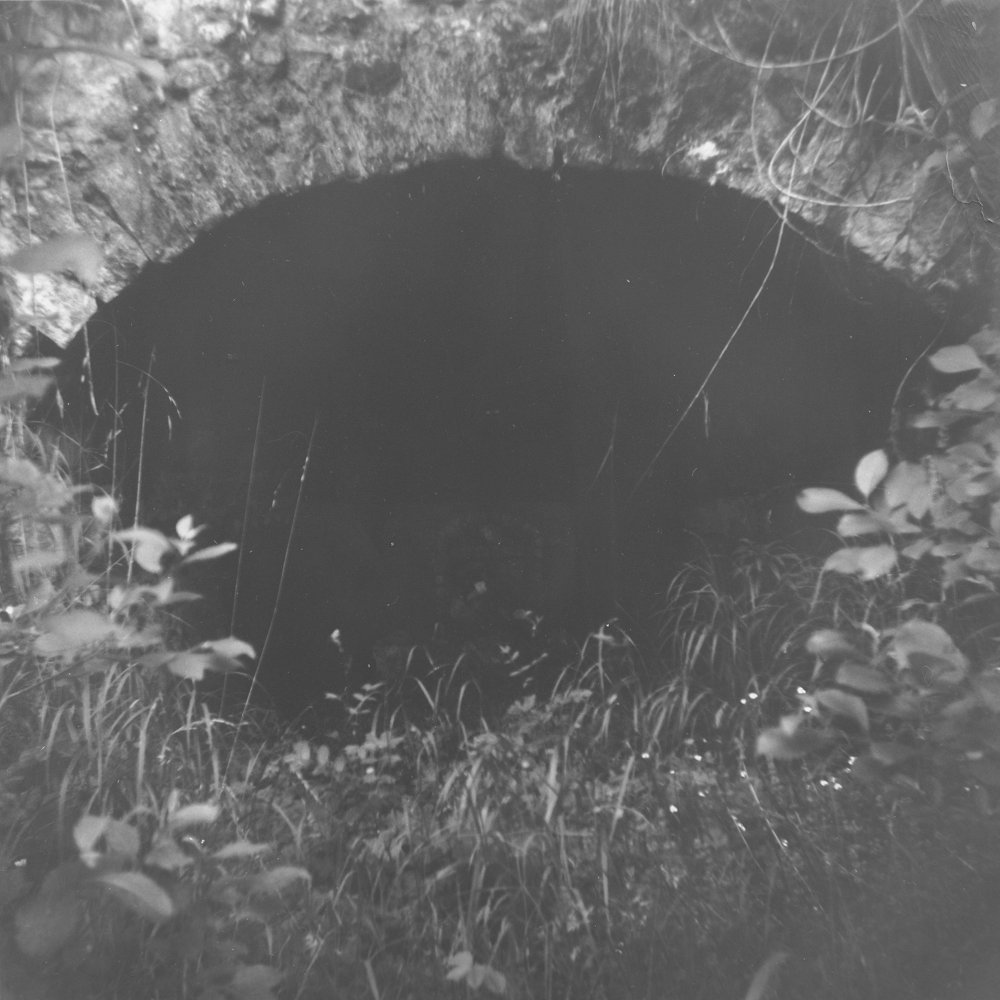
...as it carries the A59 over the Railway at Holywell Halt (just through the bridge). This bridge has since been encased in
concrete with an Armco arch inserted. The alternative option would have been to infill the cutting, preventing reinstatement
of the line.
(c) YDRMT collection.
|
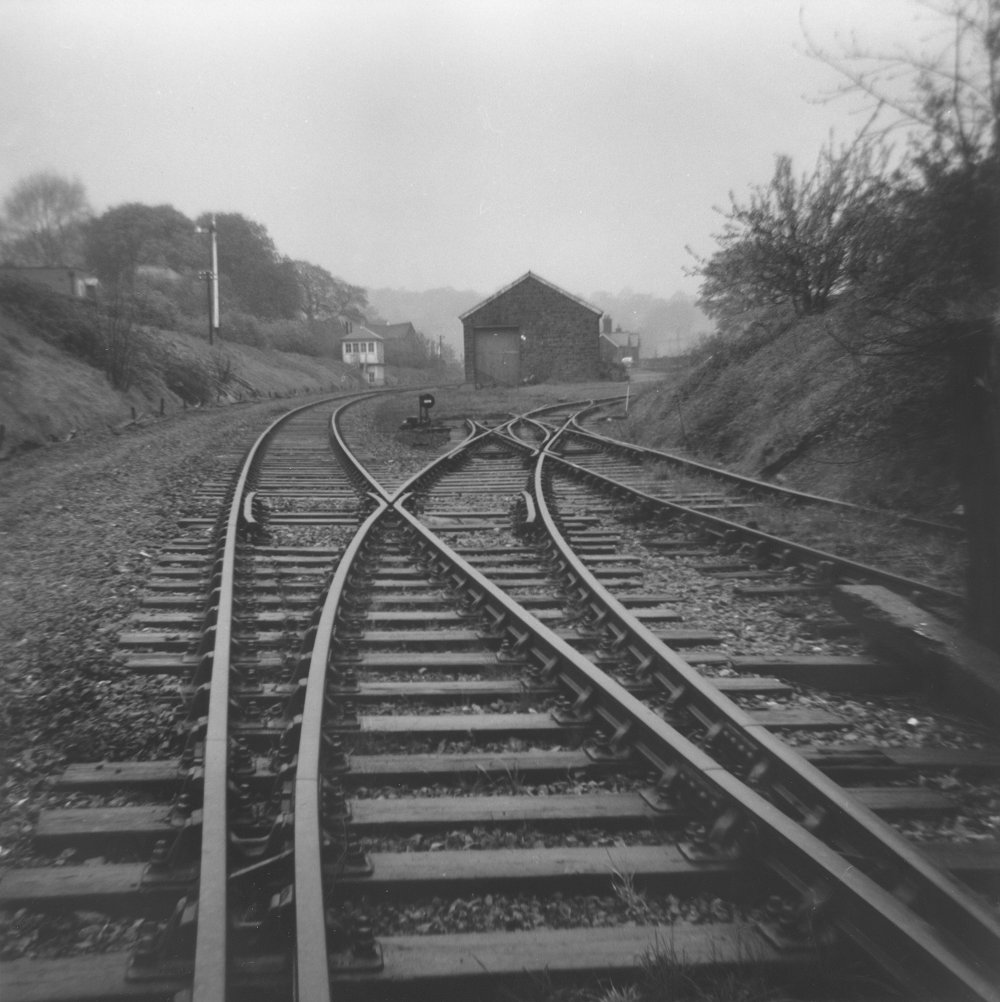
|
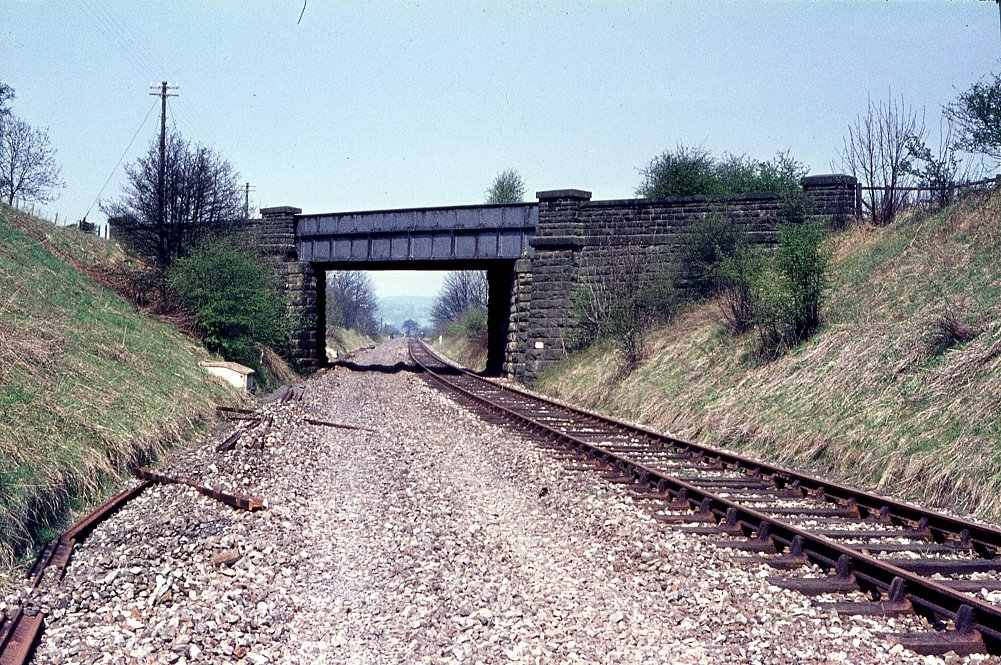
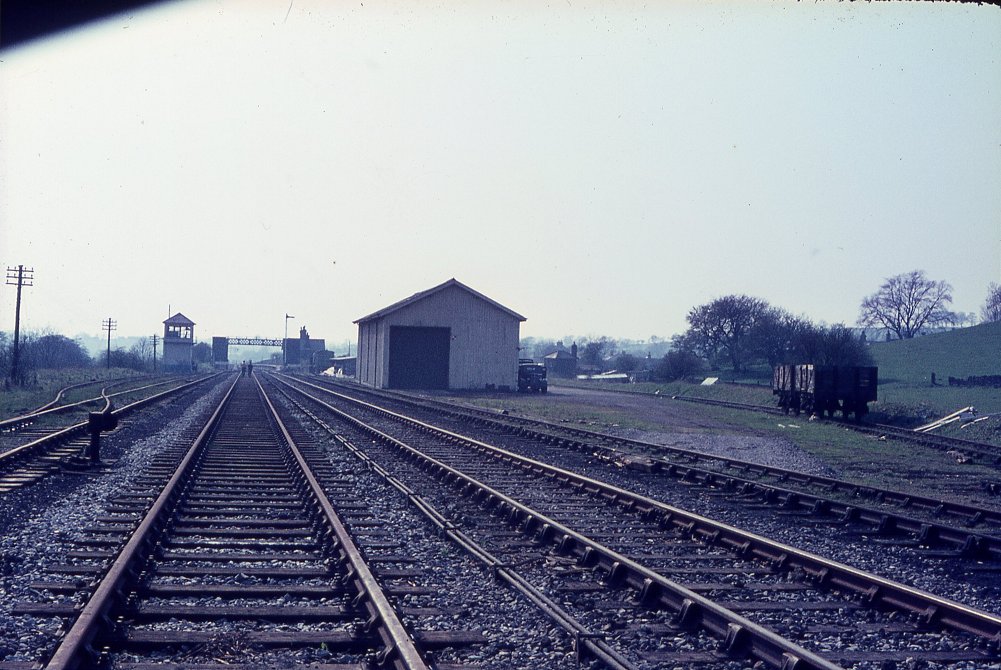
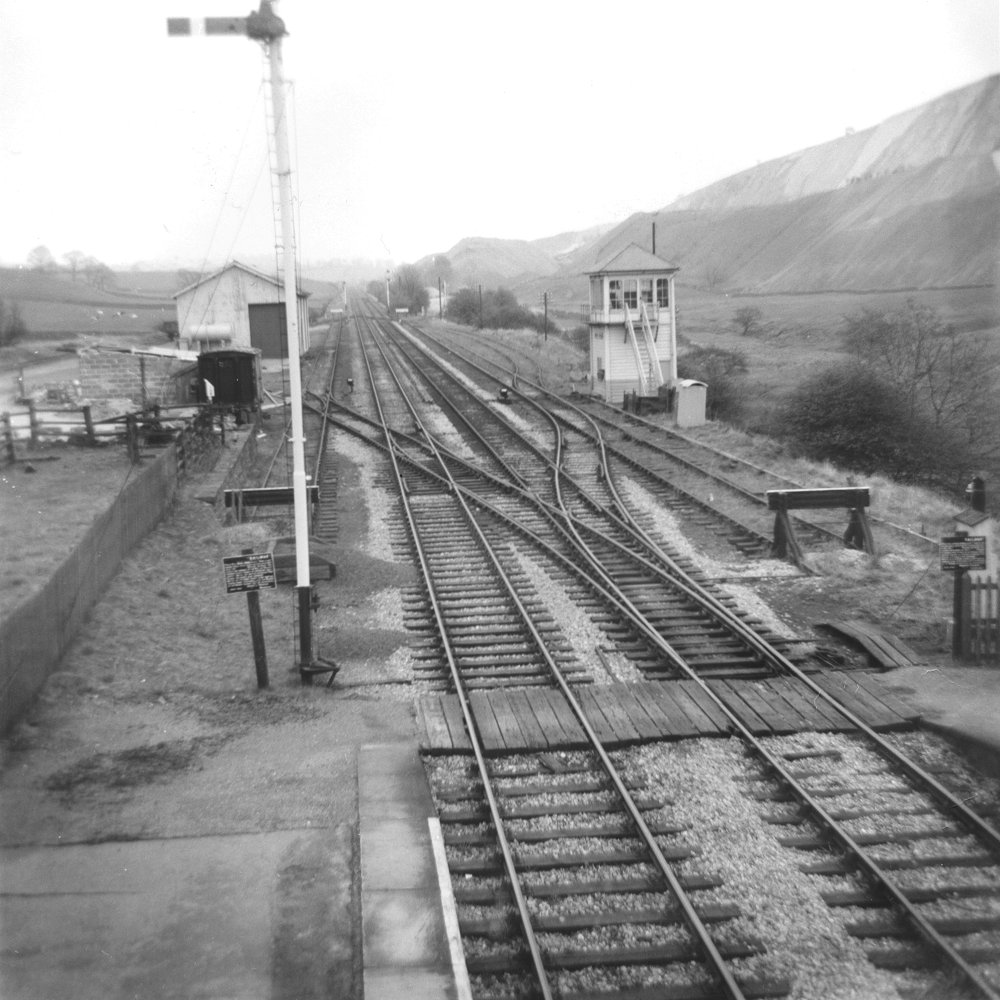
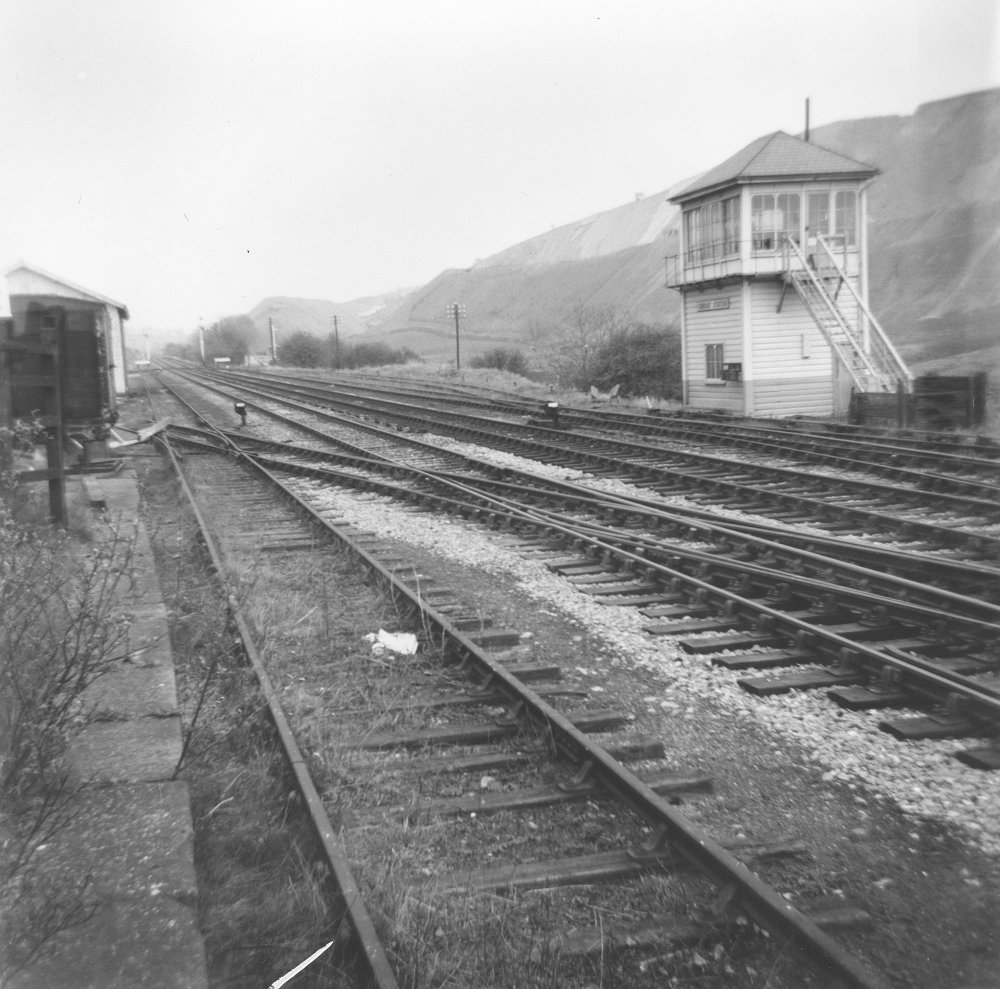
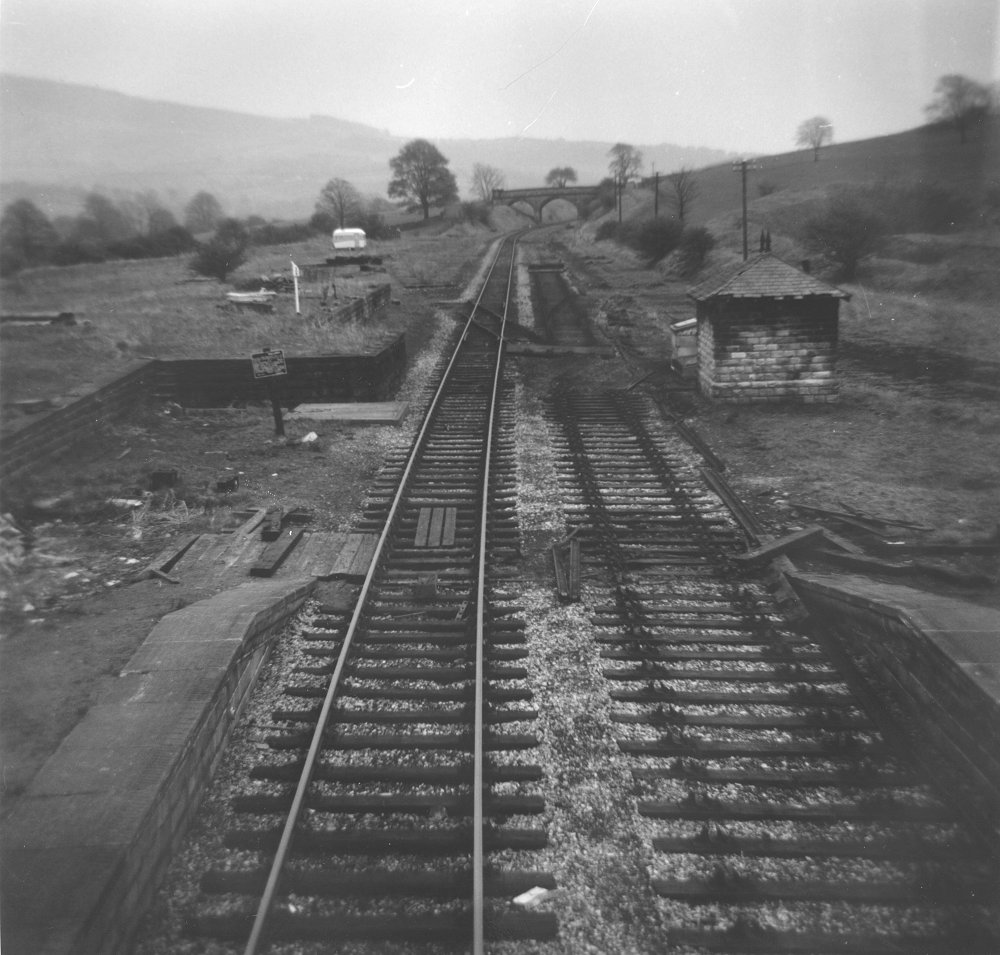
Embsay's yard is now reached, still with its full complement of signalling, trackwork and structures. The hope was that the
traffic from the quarry would continue, therefore the line was left intact for a while after the rest was dismantled. The view
from here today is very different.
(c) YDRMT collection.
|
|
The track diagram from Embsay as was. This was inherited by the Railway, and modified to meet the changing needs of the
society.
(c) YDRMT collection.
|
|
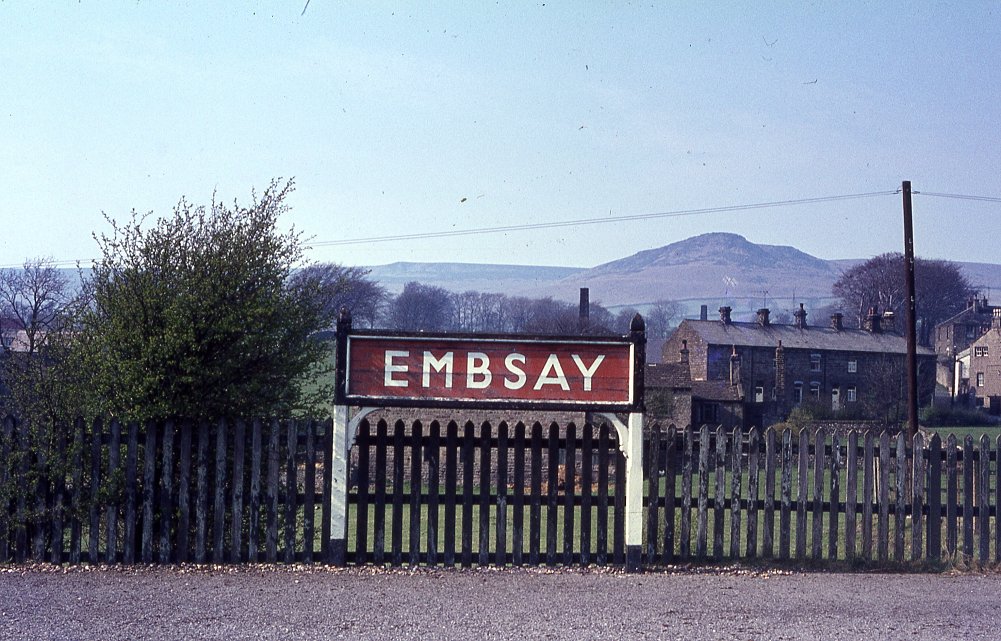
A running-in board on platform 1, with Embsay crag in the background.
(c) YDRMT collection.
|
|
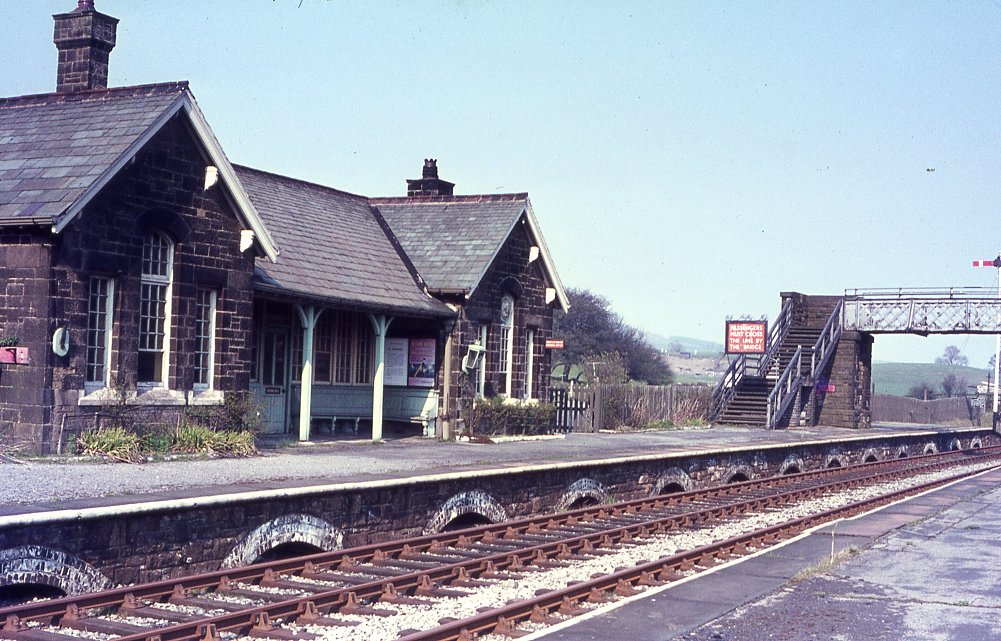
The station building itself was something of a gem when acquired - its state upon closure can be seen from this - not that it
still retains its lamps low-down to ease the job of the stationmaster. Originally they would have been mounted higher up on
the corners of the building - the location in which they are today. The station has since been butchered, including the recent
addition of a canopy to improve passengers' comfort in the usually wet weather. The plan is to return the station to its original
purpose once new buildings take the retail and catering facilities.
(c) YDRMT collection.
|
|
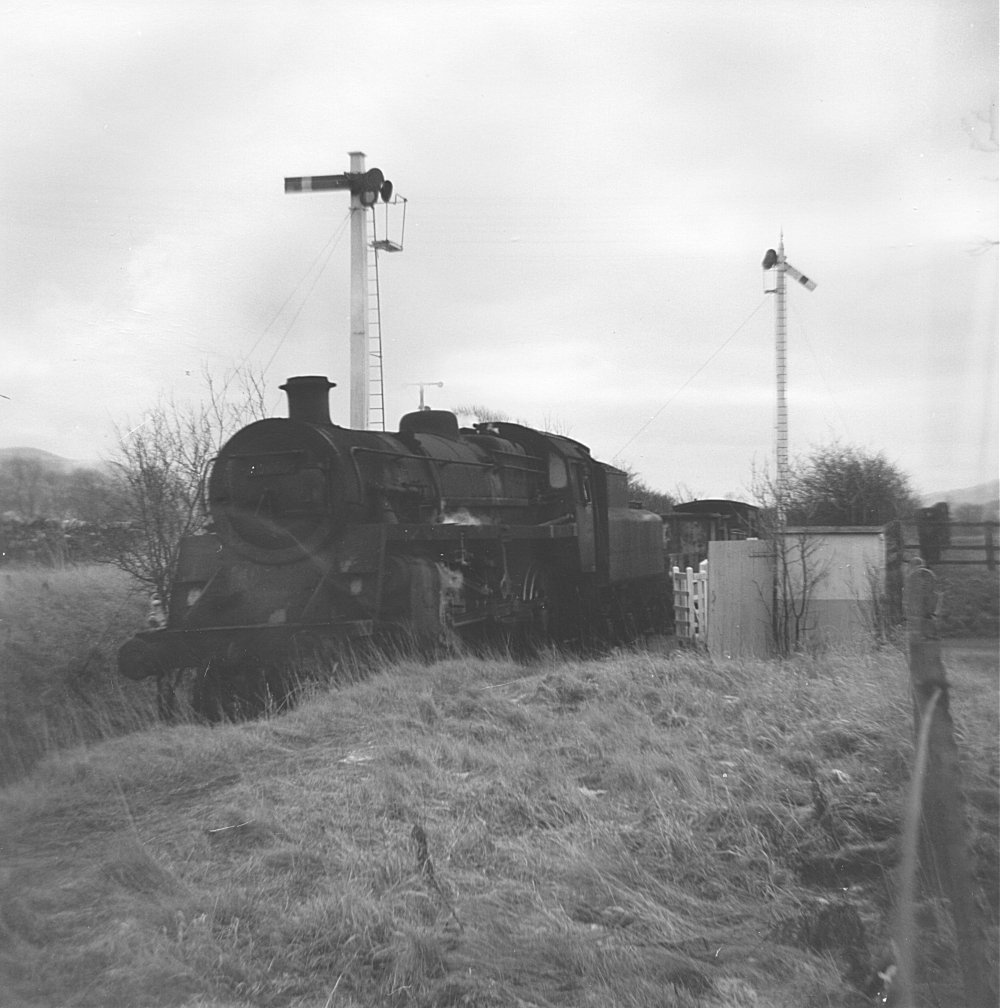
Looking towards Embsay Junction, with the line to Grassington just visible across the picture. Interesting to note that the
junction signalbox is switched out - for the mainline, which had closed. The bracnch line is still in use for trains to and
from Swinden Limeworks, near Rylstone.
(c) YDRMT collection.
|
|
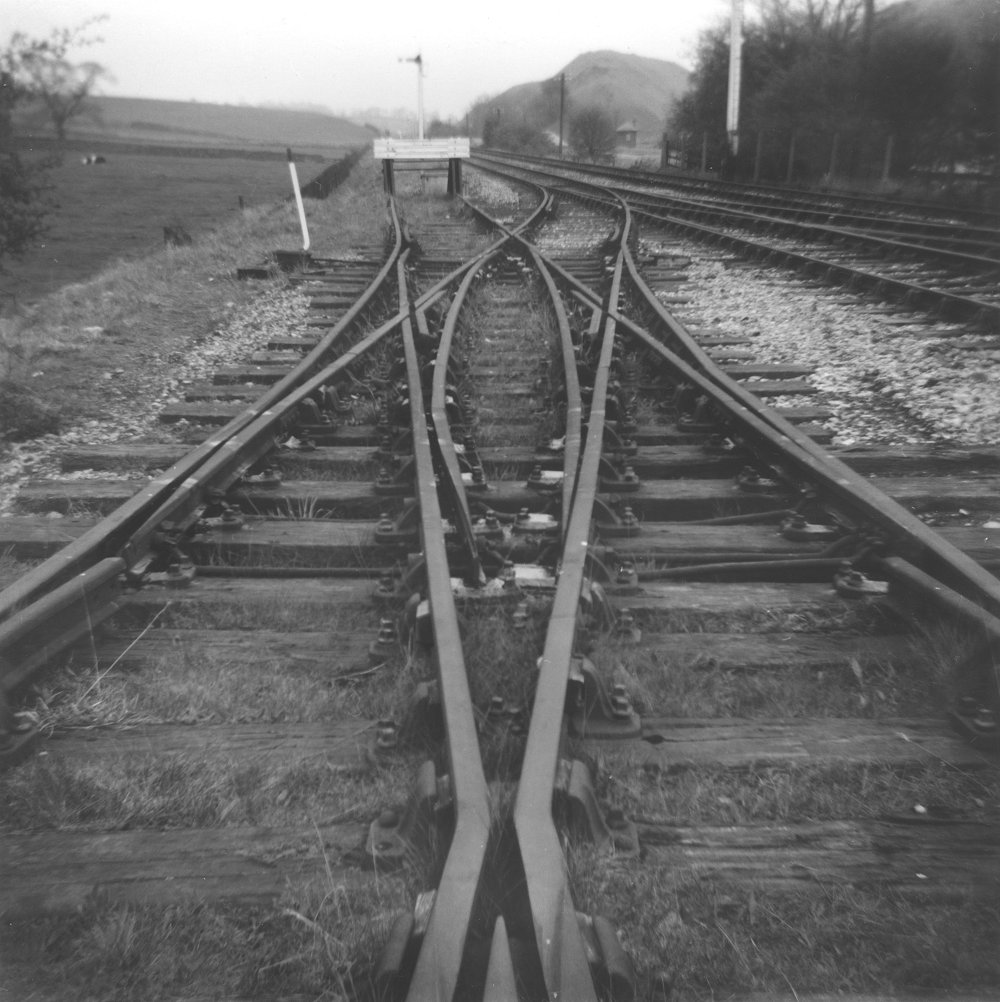
Looking the other way, showing the trap point to prevent runaways fouling the junction. It would appear that this is locally
worked, as opposed to being from the 'box. This is the current site of Bow Bridge Loop, looking back towards Embsay, with the
station buildings just visible.
(c) YDRMT collection.
|
|
Embsay station, complete with L-shaped bench, and possibly closure poster alongside the advert.
(c) David Cash.
|
|
The view from the footbridge, looking over the yard towards Bolton Abbey. The sidings are MUCH fuller now, and the new shed
also change the scene dramatically.
(c) David Cash.
|
|
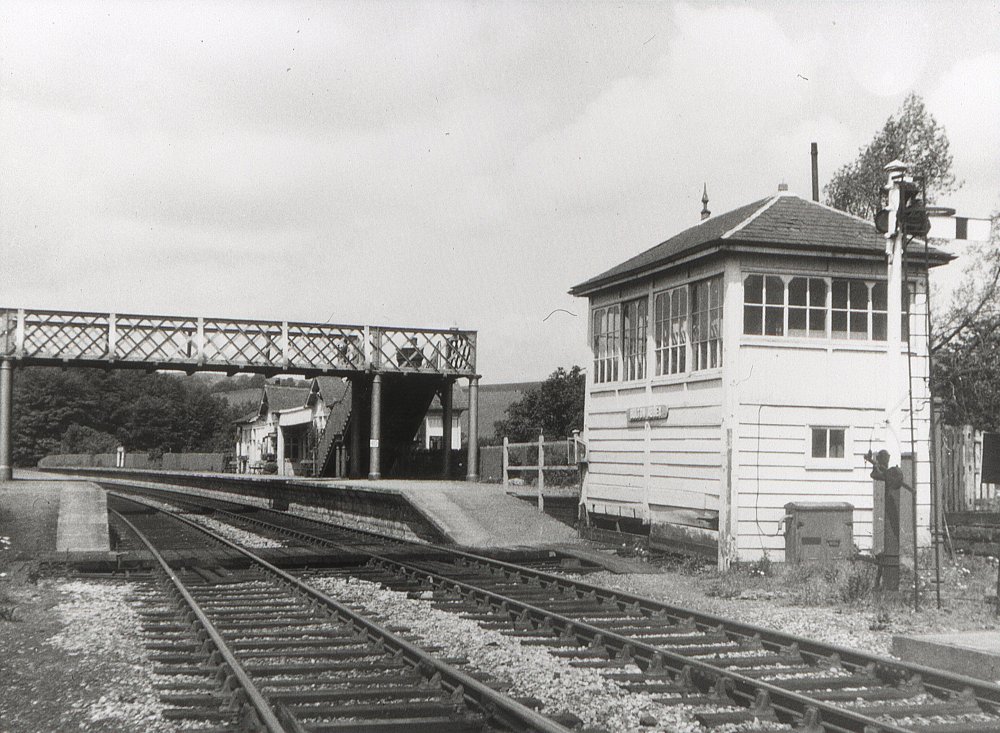
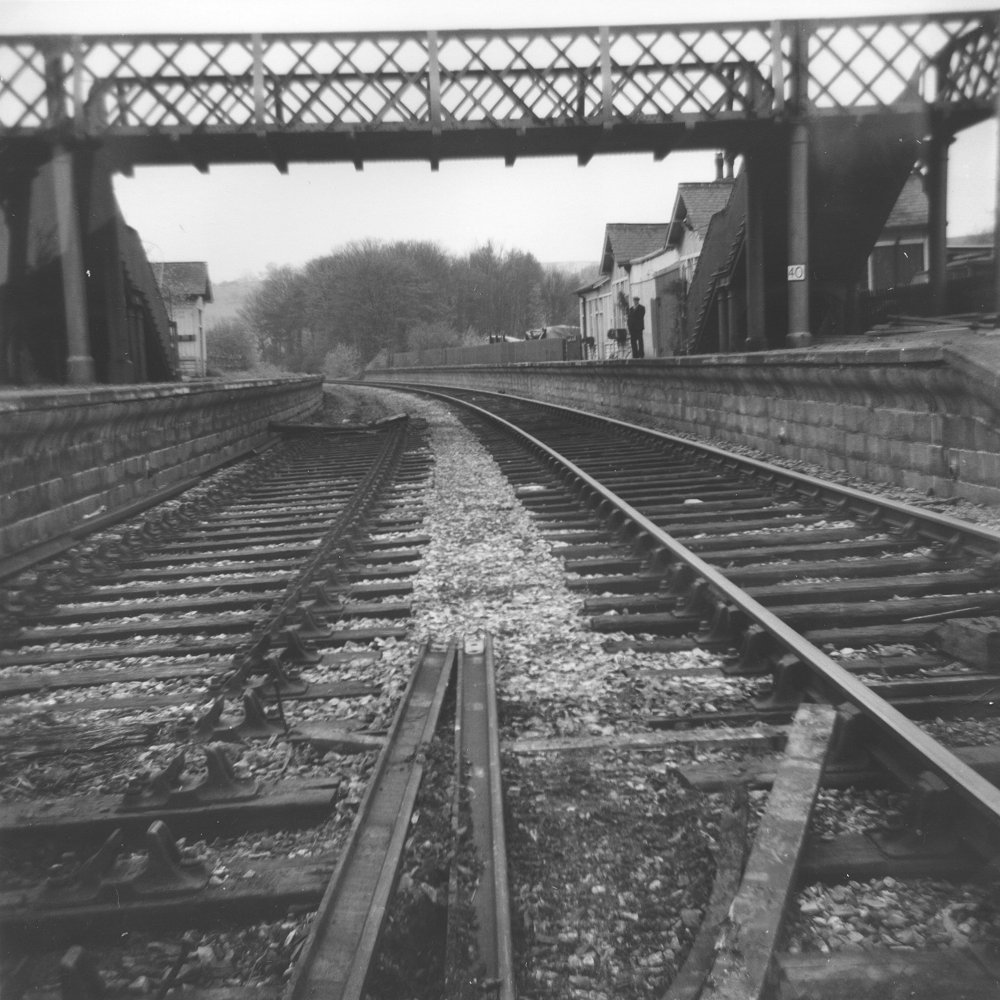
View from the cattle dock towards the still-complete signalbox. The interlocking has only had to be modified slightly for
use in preservation. The cattle dock is currently used for servicing / preparing locos, but with the new shed it is hoped
to move this elsewhere, allowing the cattle dock to revert to its former use.
(c) David Cash.
|

|
One scene that has hardly changed - only the removal of the footbridge guard rail has altered this photo, and the
improvement in the painting of the brick arches.
(c) David Cash.
|
|
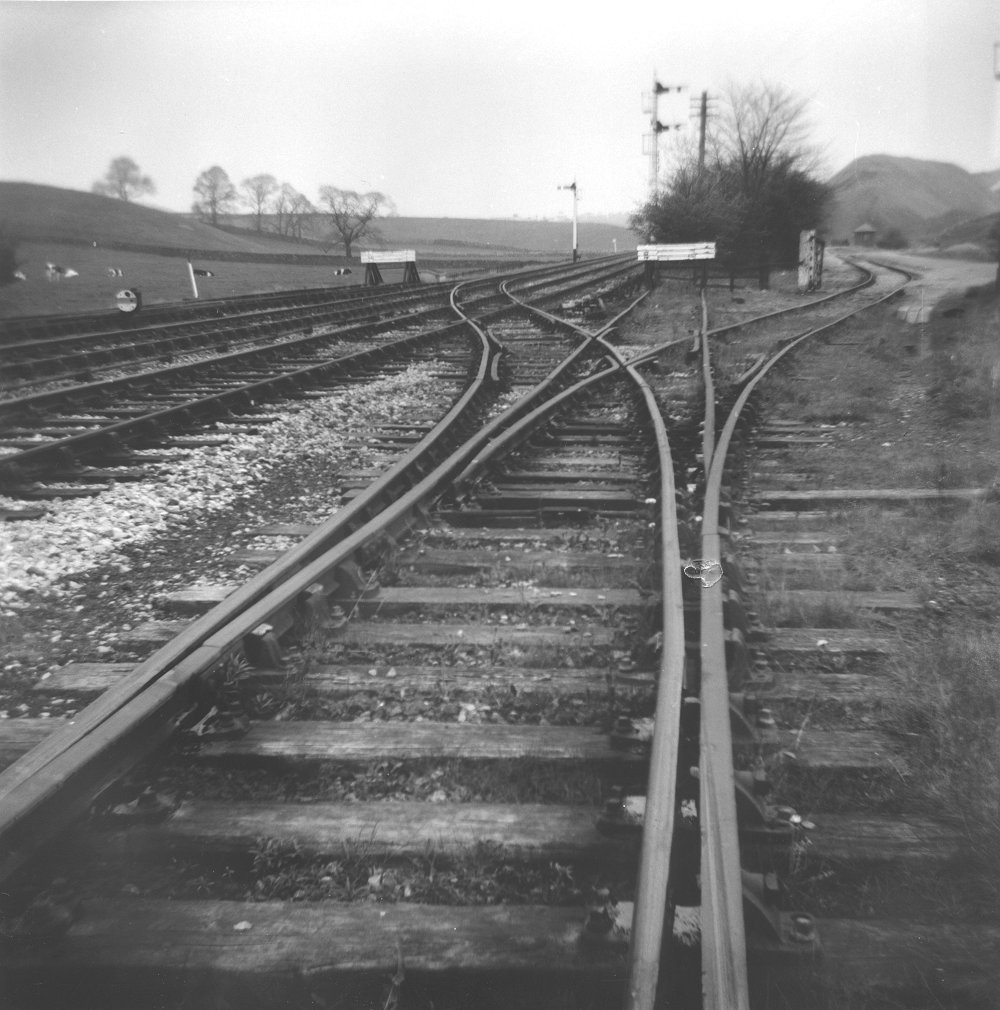
This is the headshunt for the top yard, as was, with a double slip, looking towards Bolton Abbey. The signal visible is in
approximately the same place as No. 4 now.
(c) David Cash.
|
|
Across the other side of the main line, and this three way point controls access to the quarry (to the right).
(c) David Cash.
|

|
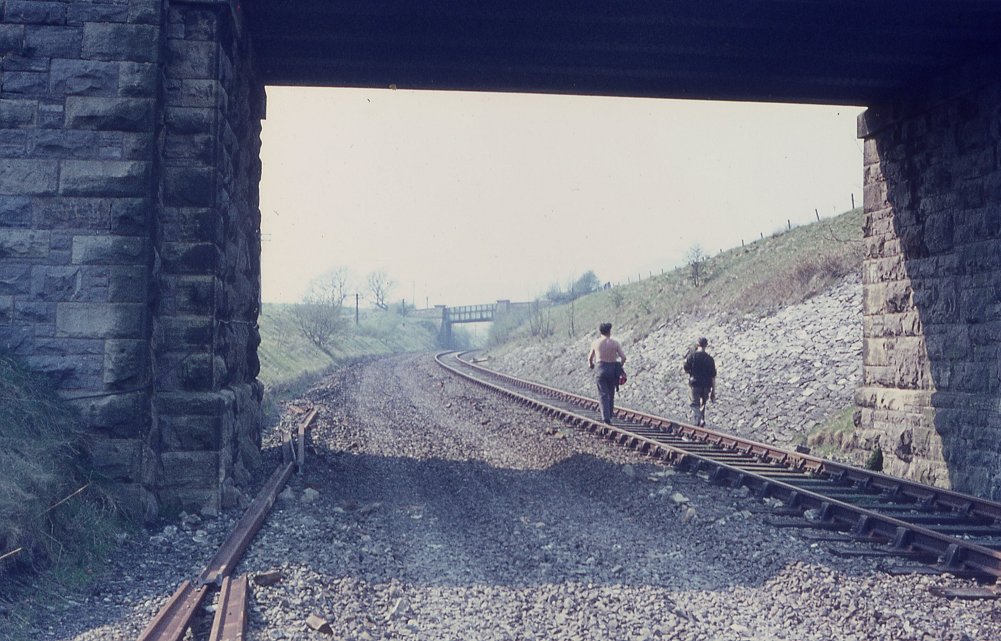
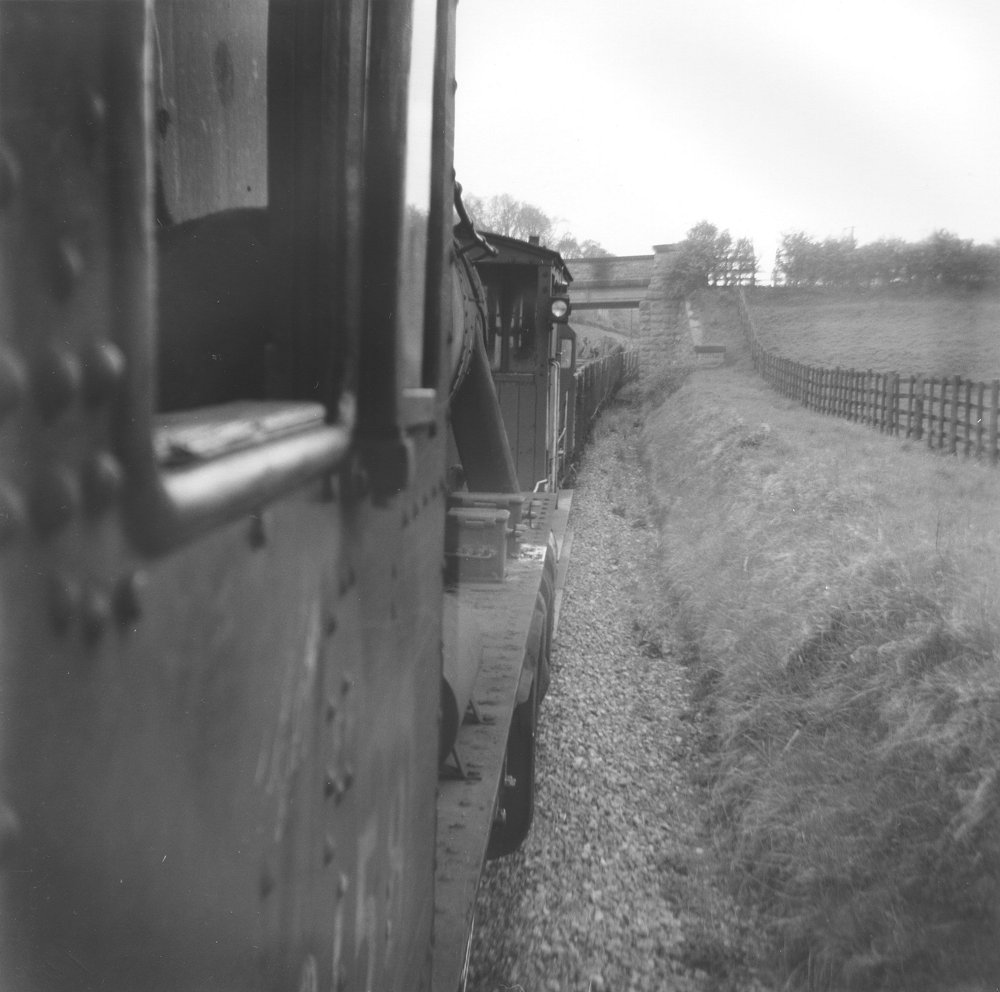
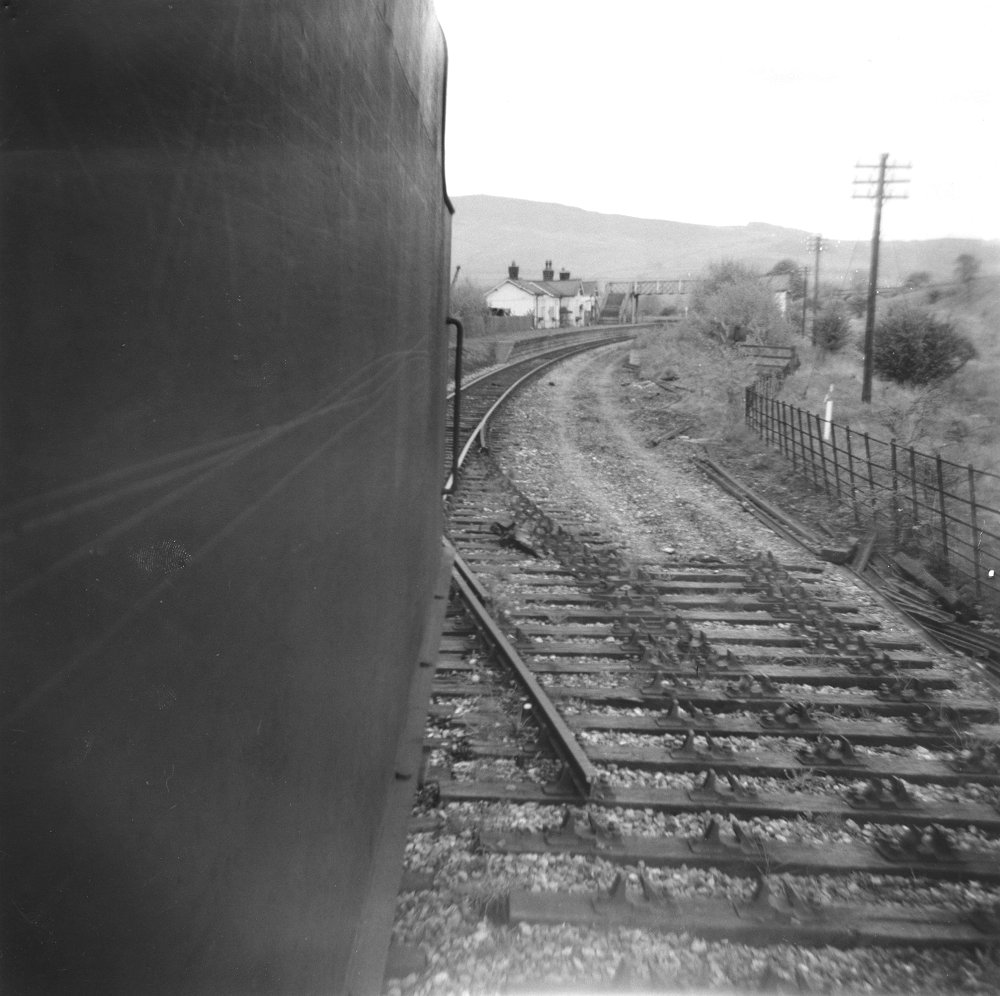
A jump is now made to Prior's Lane, the bridge in the background. This photo was taken from the footplate of an 8F, possibly
on one of the demolition trains.
(c) David Cash.
|
|
Almost certainly the same train, the other side of the bridge, looking back towards Embsay.
(c) David Cash.
|
|
This time we see the view from Prior's Lane bridge, looking towards Bolton Abbey. This view now contains more lineside
greenery, but is otherwise VERY similar, with single track. Note the lifted (and cut?) rails from the other line.
(c) David Cash.
|

|
Another 8F at Prior's Lane, running light engine.
(c) David Cash.
|

|
An overview of Bolton Abbey station, after closure. Note the brick ablutions block, left over from the station's use during
WWII. Also worth noting are the remains of the building on platform 2. Since closure, the ground has been altered, and so the
new layout has access to the sidings from the Embsay end.
(c) David Cash.
|
|
Another view of the station, showing how the building has been altered in private ownership. Also visible are the indentations
from the sidings in the foreground, which originally led to the quarry.
(c) David Cash.
|
|
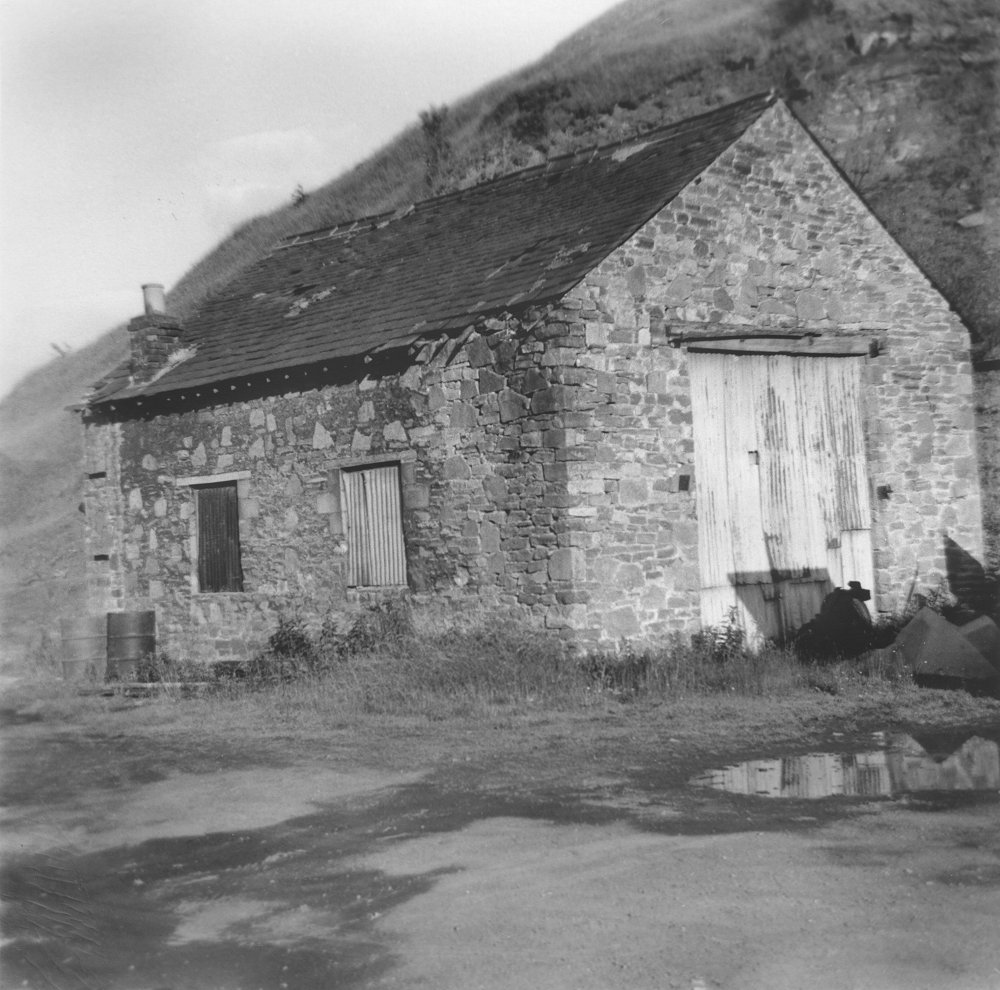
Although somewhat derelict in this picture, this is the sole remaining quarry building, and its condition is only marginally
worse today. It is thought that this was some form of engine shed linked to the quarry, but its exact role is uncertain.
(c) David Cash.
|
|
On board another 8F, entering Bolton Abbey station, with the remains of the trainling crossover visible.
(c) David Cash.
|
|
This selection of photos shows a light 8F running through Bolton Abbey station and onwards. From the number of photos taken,
and the presence of several people on the platform, I suggest that this could be the last loco to run over the whole length
of the line, although I cannot confirm this. The 8F enters the station from Embsay, running tender first.
(c) David Cash.
|
|
Viewed from further down the platform as the loco approaches.
(c) David Cash.
|
|
Running light engine under the footbridge, the loco continues on its way.
(c) David Cash.
|
|
Having passed the photographer, the 8F continues on towards Adding ham, passing the remains of the goods yard to the left
and the other line.
(c) David Cash.
|
|
Another photo, probably at the Addingham end of Bolton Abbey station, about to pass under the bridge on its way.
(c) David Cash.
|
|
From the presence of buildings in the background, I suggest that this picture was taken on the approach to Addingham from
Bolton Abbey, probably opposite the site of the school?
(c) David Cash.
|
|
Viewed from the field between the railway and the A59 road, the limekilns at Bolton Abbey are shown. Behind them can be
glimpsed the quarry. The kilns were served by the original Duke's Siding, and remain today, although somewhat overgrown.
(c) David Cash.
|
|
A close-up view of the kilns - trying to take a photo from this location today would be almost impossible without severe
pruning of greenery!
(c) David Cash.
|
|
Another close-up of the lower part of one of the kilns.
(c) David Cash.
|
|
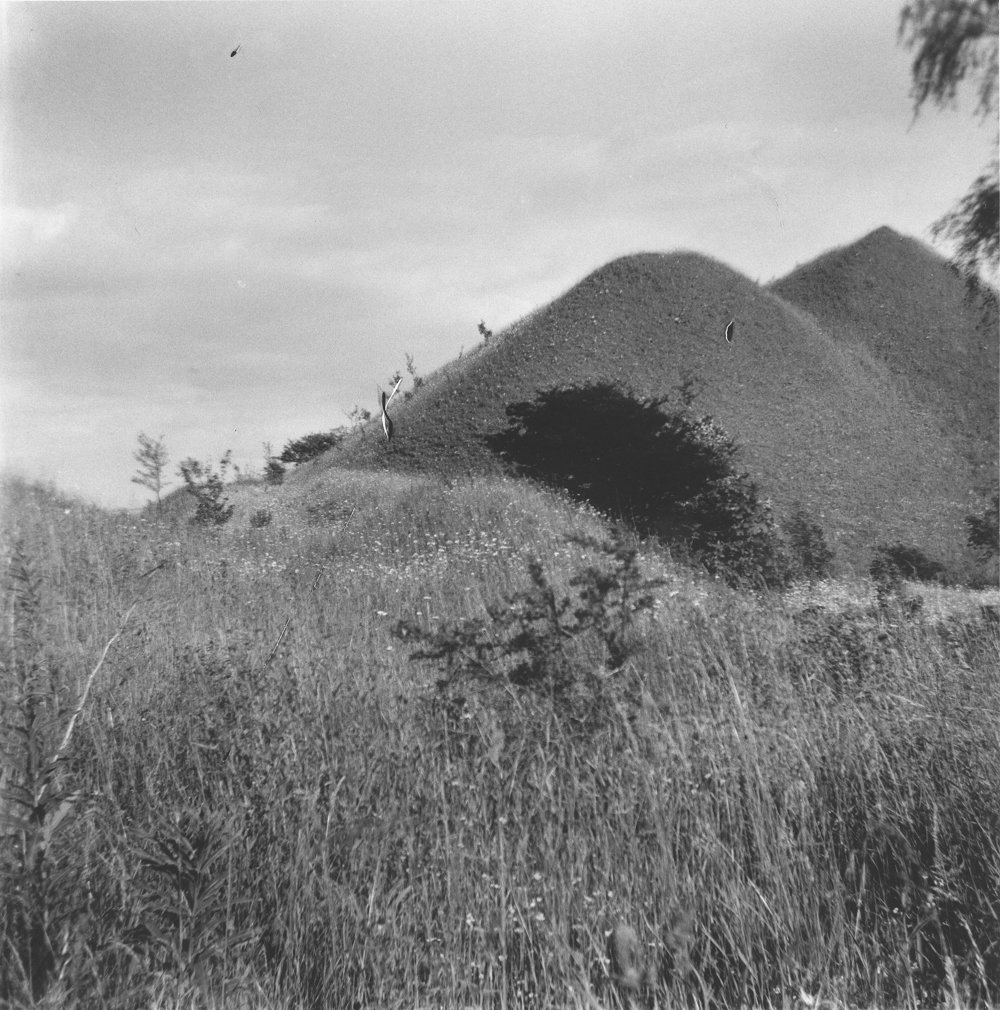
This photo shows the spoil heaps at Bolton Abbey station (Addingham end), in their not-grown-over state - the view today
contains a large number of small trees.
(c) David Cash.
|
|
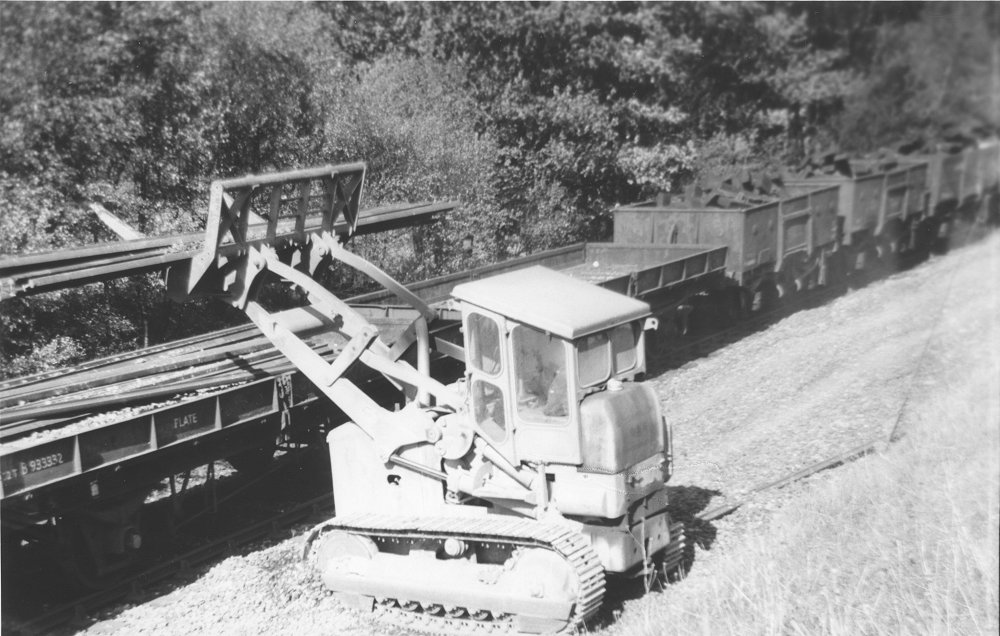
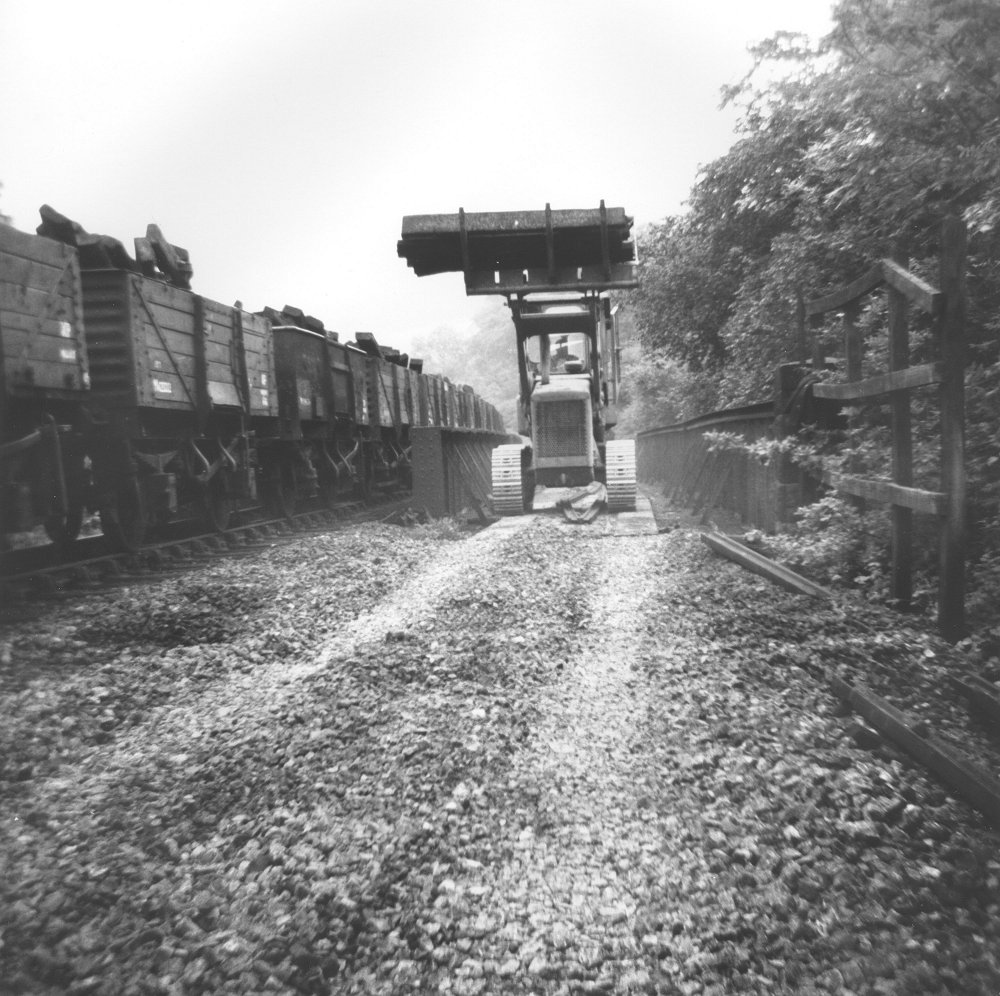
This view appears to have been taken in Hambleton Cutting, showing the demolition train being loaded up with rails from the
other line (down line). The smaller size of the print comes from the camera not winding on correctly, although this hasn't
affected this part of the picture.
(c) David Cash.
|
|
The demolition train heads through Bolton Abbey station with a dirty 8F in charge.
(c) David Cash.
|
|
Viewed from the Addingham end, Bolton Abbey station presents a sad sight with the remains of the trailing crossover visible,
as well as the point giving access to the sidings on the quarry side of the line. Note the cattle dock on the right - the
foundations for which were uncovered during the rebuilding of the station. This may yet be re-instated.
(c) David Cash.
|
|
The station viewed through the footbridge, looking towards Embsay, showing the progress made with lifting the track through
the platforms.
(c) David Cash.
|
|
Viewed from the footbridge, looking towards Addingham, the station yard site looks rather bleak - the caravan in the background's
occupiers also took some pictures of the station, and these will be shown shortly. The signalbox was situated to the left of the
photo, at the end platform 1. Its modern day replacement stands at the opposite end. Unusually, the signalling equipment at Bolton
Abbey was dismantled very early on, whereas that at Addingham remained in situ a lot later, as can be seen from the earlier photos.
(c) David Cash.
|
|
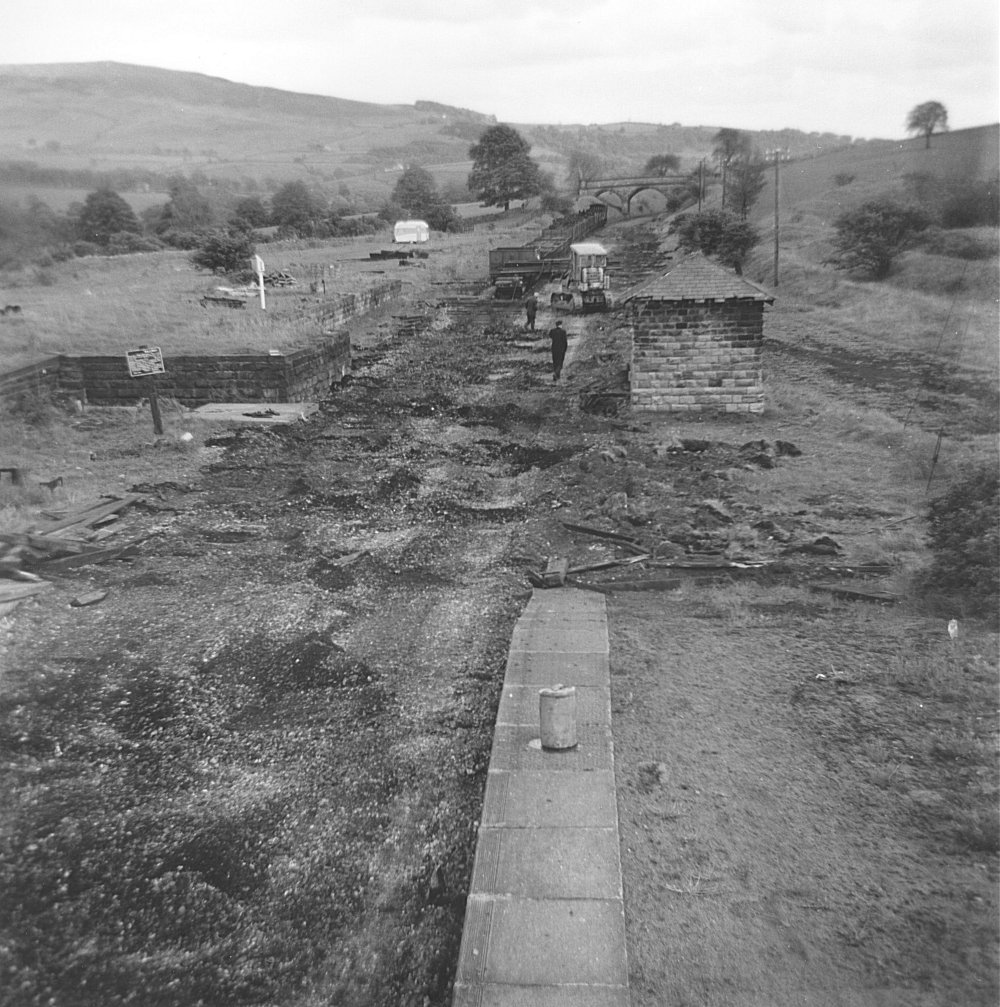
A short while later, and the track has gone completely, witht he final demolition train standing without an engine at the
far end of the site. The stone building in the foreground was a P-Way structure, and was unusual in that it was built of
stone as opposed to wood like the rest of the structures. This may too be replaced at some point.
(c) David Cash.
|
|
These two photos come from the people staying in the caravan and were taken shortly after the previous photo. Looking towards
Addingham with track removed, but the P'Way hut still in existence at the end of platform 2.
(c) YDRMT collection.
|
|
This is more interesting as it shows a destination board from the roof of a carriage. Was it found in the sidings where
excursion stock was stabled, or in the station buildings?
(c) YDRMT collection.
|
|
At Addingham station there was a section of wooden platform (over a bridge?), pictured here. Looking back at the colour
slides of Addingham station, the location can be determined as being the Bolton Abbey end
(photo).
(c) David Cash.
|
|
Once more we see Addingham station, and can clearly see its design as a mirror image to Embsay's. Worthy of note is the
condition of the building, in comparison to Embsay at this time. It would seem to be better off.
(c) David Cash.
|
|
Viewed from teh end of platform 2, the remains of the yard and trailing crossover can once more be seen. Also worthy of note
is the track layout giving access to the cattle dock from beside the shed, allowing shunting moves to take place without
going out of station limits.
(c) David Cash.
|

|
A nice view of Addingham signalbox, retaining it Midland style nameplate to the very end, even though it was painted in BR
(NE) region colours.
(c) David Cash.
|
|
The throuat of the station is seen here from the Ilkley end of the site, with the headshunt for the yard visible to the right
and the retention of the signalling.
(c) David Cash.
|
|
More demolition going on - presumably between Addingham and Ilkley, although this is harder to be certain about as this doesn't
remain in existence today to check up on!
(c) David Cash.
|
|
The 8F in charge of the demolition train crosses the main viaduct in Ilkley, heading for the station, bringing this section
of the line's history to an abrupt close.
(c) David Cash.
|
|
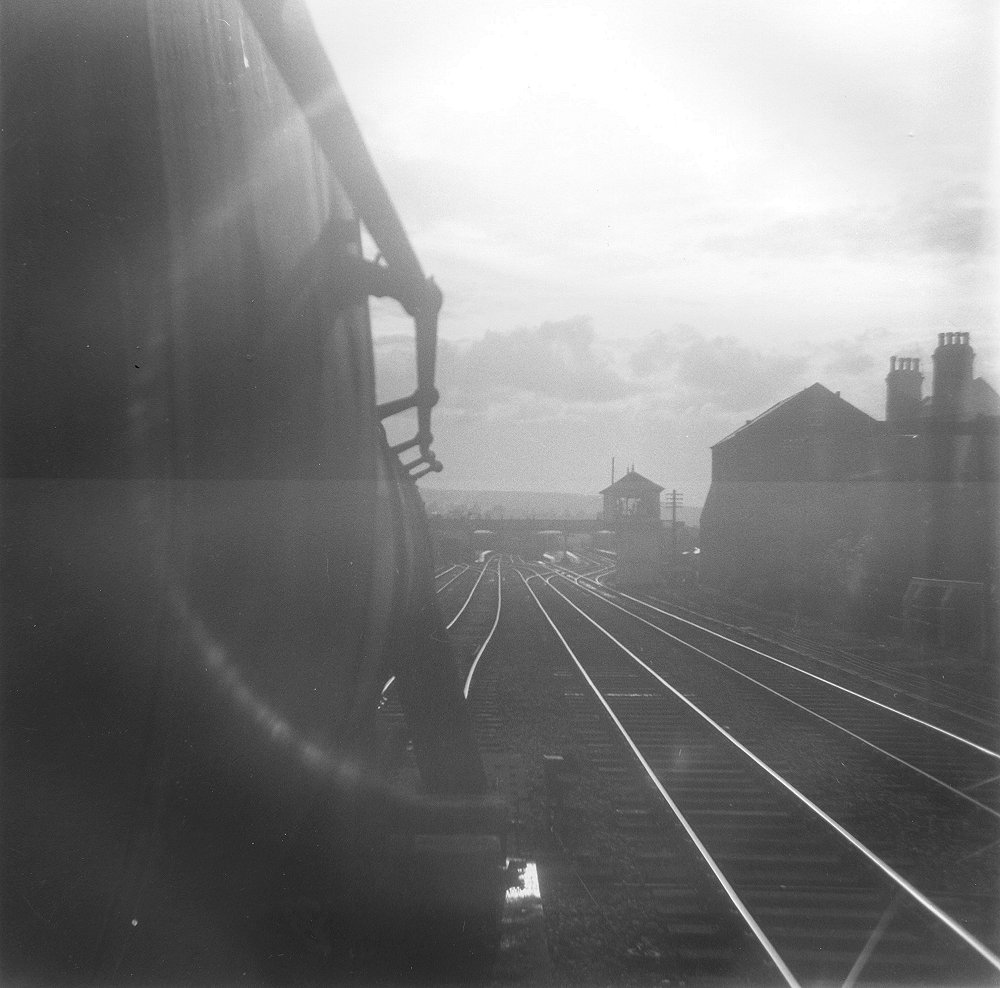
This picture was taken from the footplate of an 8F approaching Ilkley station, heading towards platforms 1 and 2 from the
east. The platforms for Skipton are seen at the far right hand side of the photo - now a carpark.
(c) David Cash.
|
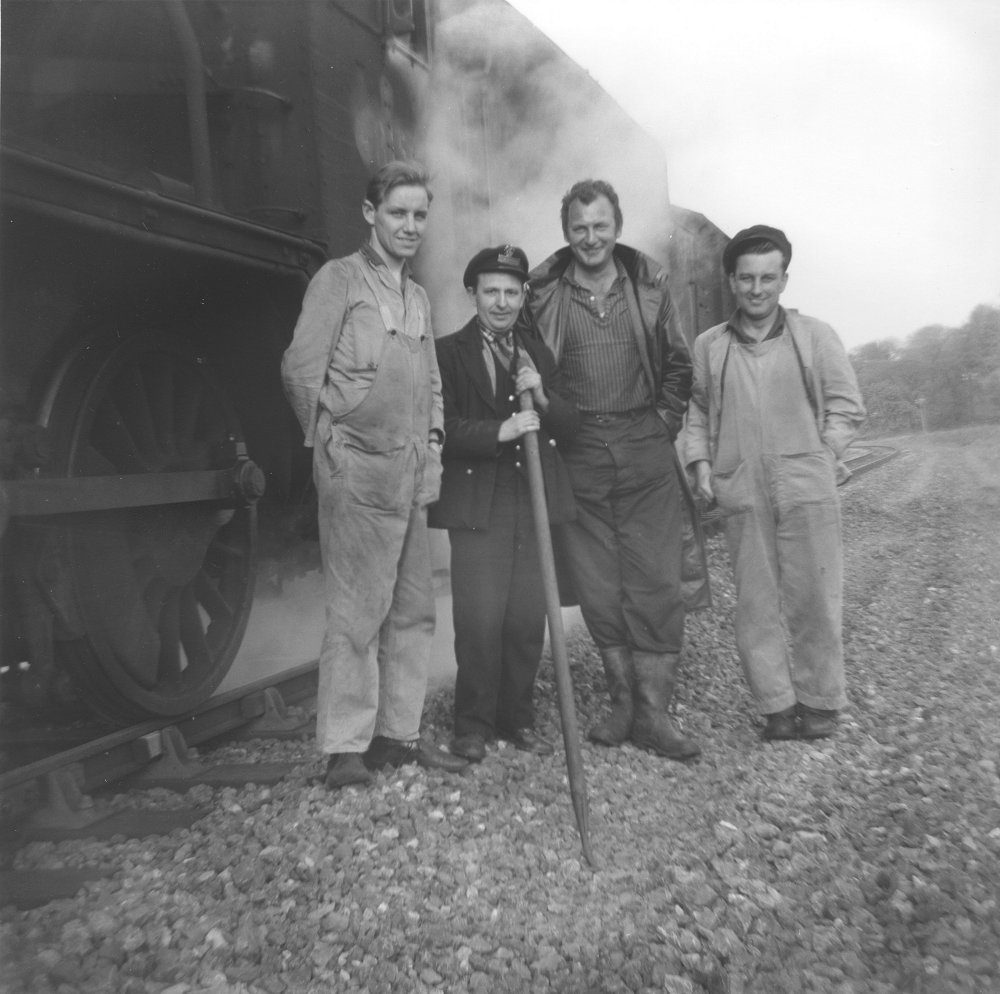
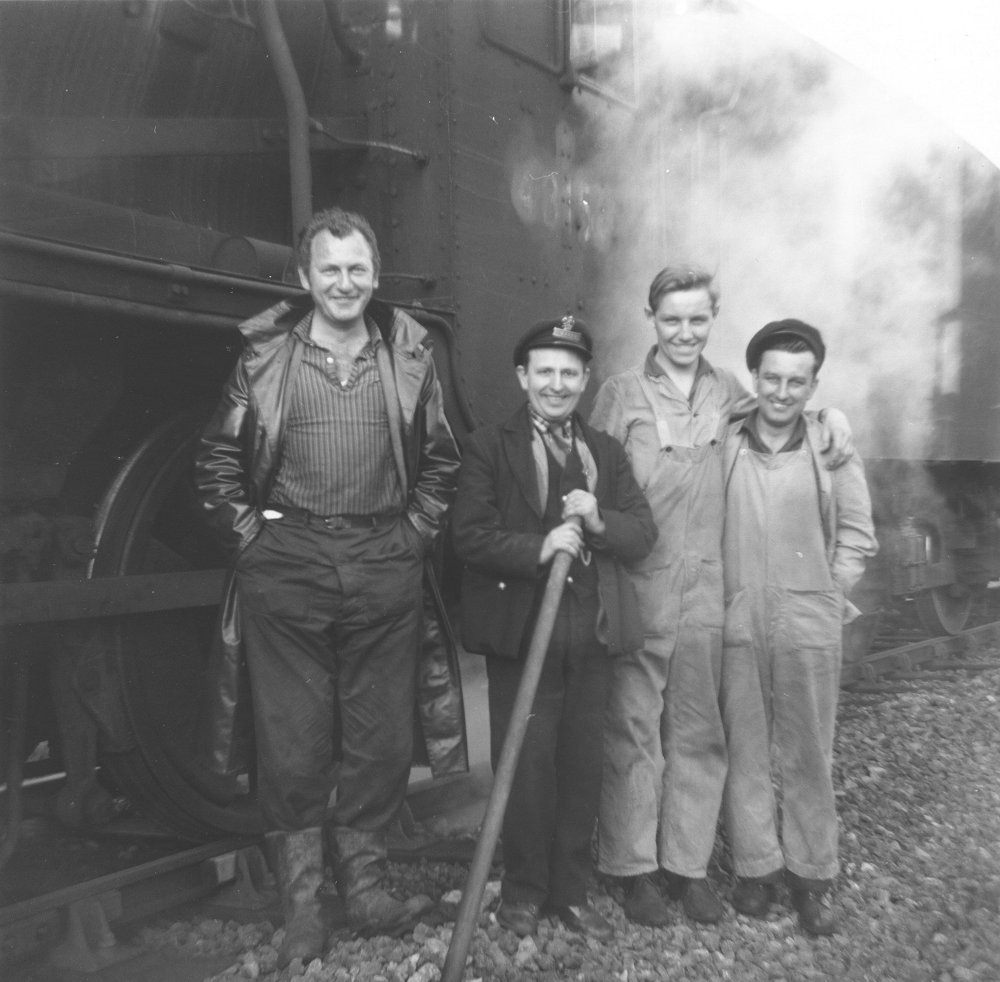
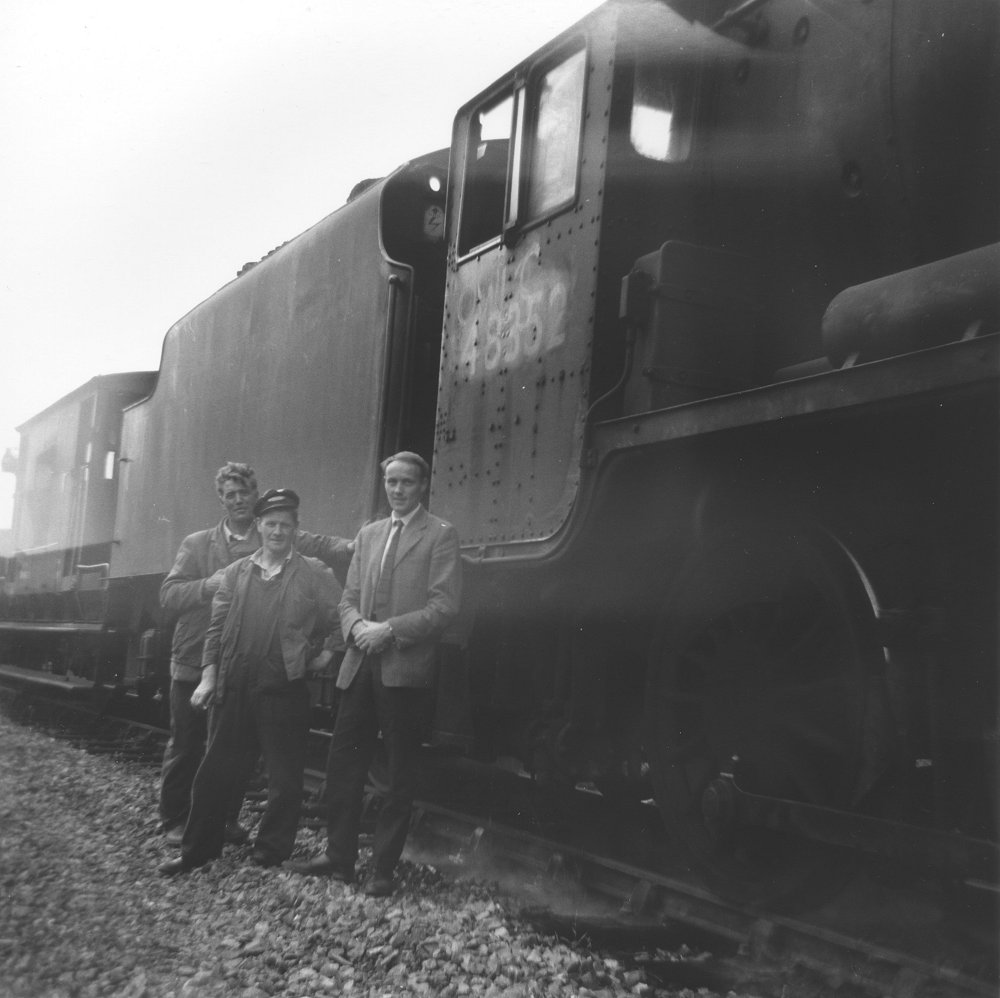
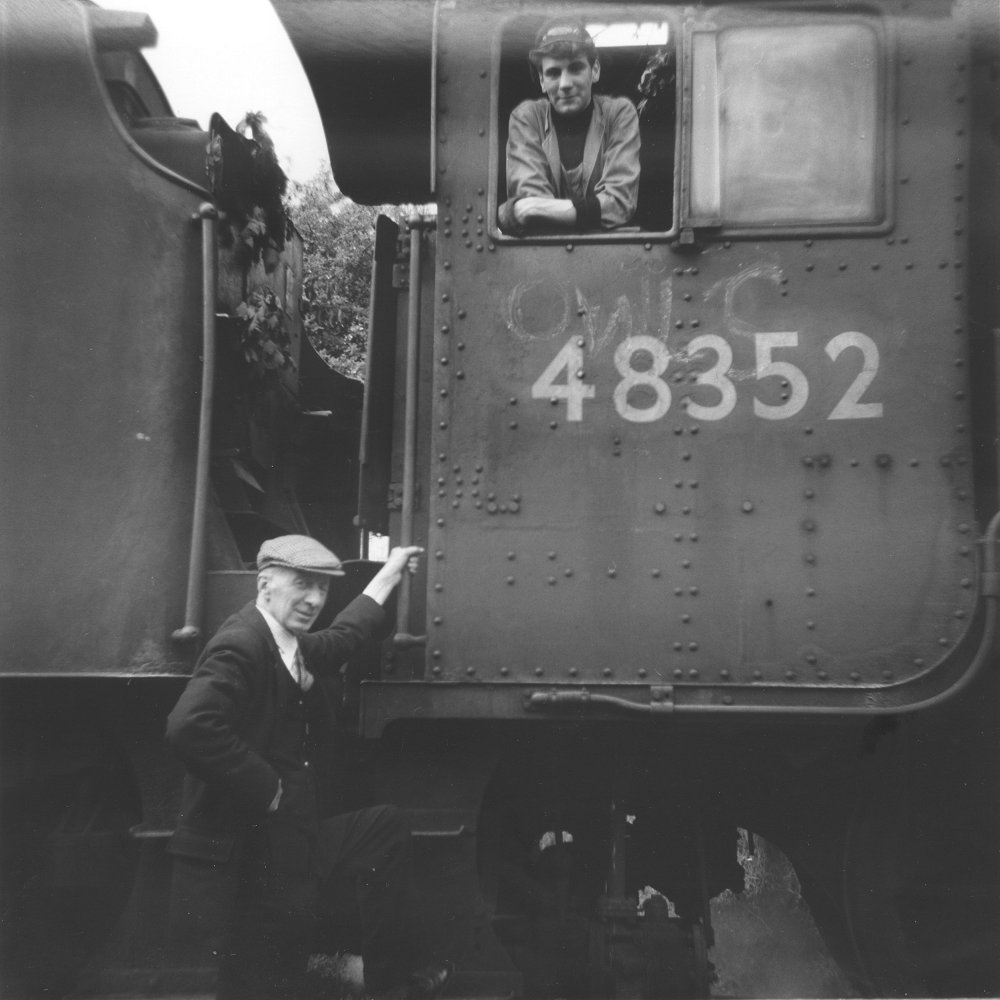
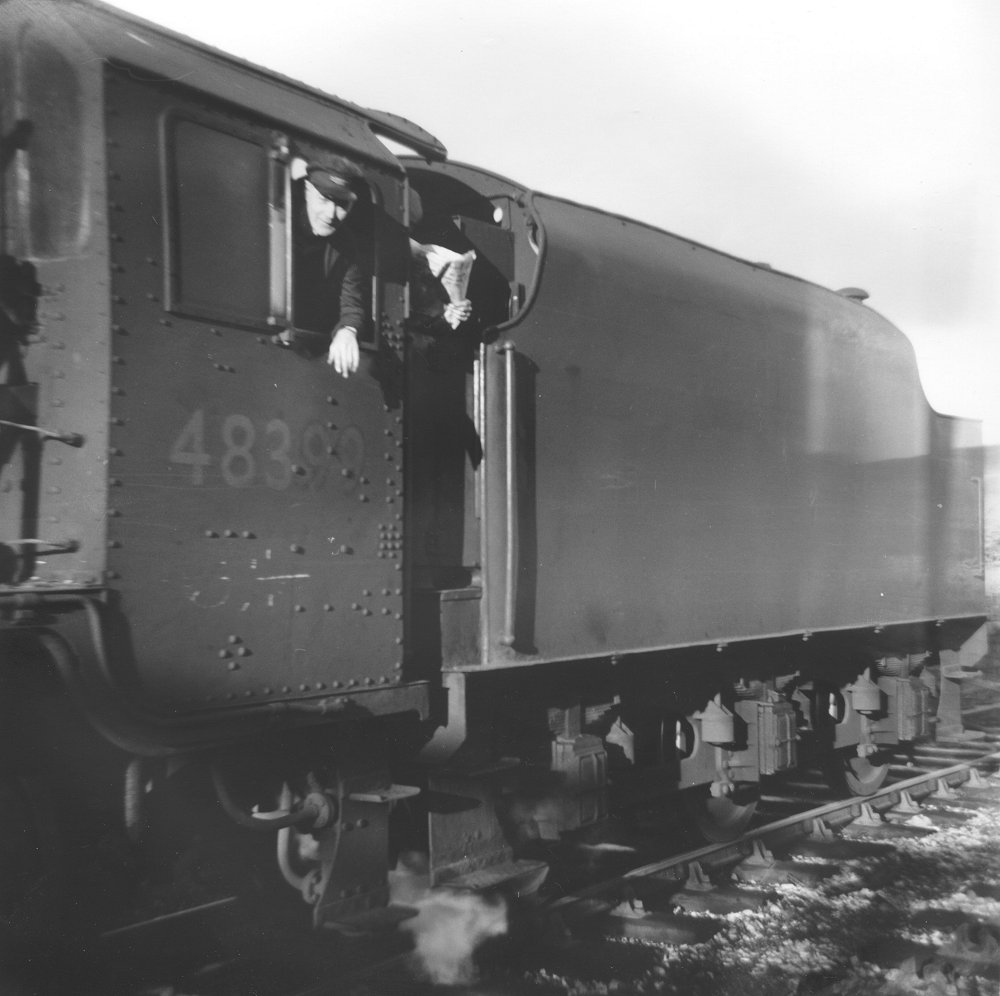
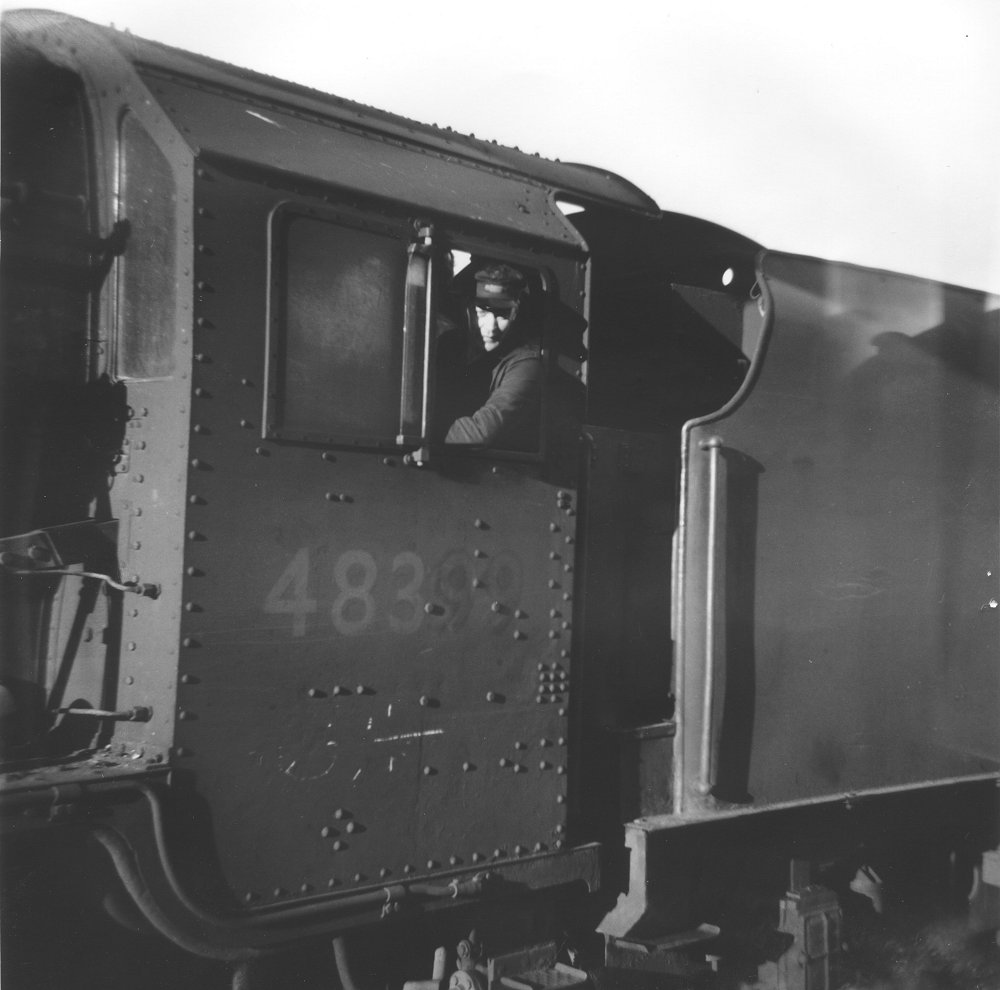
Several photos now follow, showing posed pictures of the crews of the final trains in front of their loco, with David Cash himself joining in. Location unknown, although there is a sharp curve visible to the rear of the photo.

|
Although not on the Skipton - Ilkley line, these final three photos are on lines connected to it, and therefore interesting
to see. This shows the goods shed at Otley, looking towards the station.
(c) David Cash.
|
|
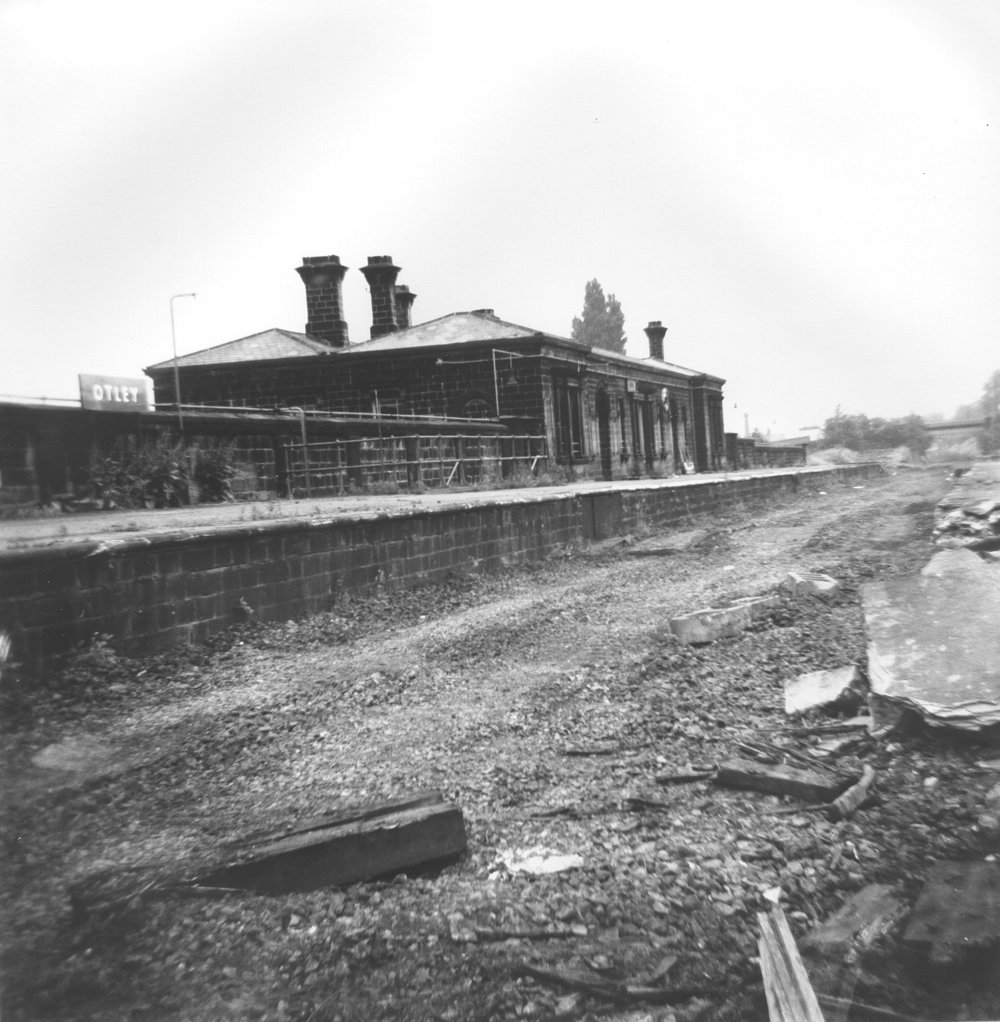
Otley station, a sad sight completely deviod of track and now derelict.
(c) David Cash.
|
|
Moving closer to home, and the Grassington branch, vieing its level crossing at Rylstone, which survives to this day,
although without its tall protecting signals. An unidentified BR Standard 4 crosses the road, heading towards the quarry
(I think).
(c) David Cash.
|
|
Yorkshire Dales Railway Museum Trust (Holdings) Limited
Registered Charity No. 1116386 Bolton Abbey Station, Bolton Abbey, Skipton, North Yorkshire, BD23 6AF General Enquiries: 01756 710614 - Talking Timetables & Fax: 01756 795189 enquiries AT embsayboltonabbeyrailway DOT org.uk webmaster AT embsayboltonabbeyrailway DOT org.uk |

|
