|

These photos show Embsay junction as it was when it marked the start of the Grassington branch, and as it is now - the
terminus of the Embsay & Bolton Abbey Steam Railway alongside the branch leading to the quarry.
|
|
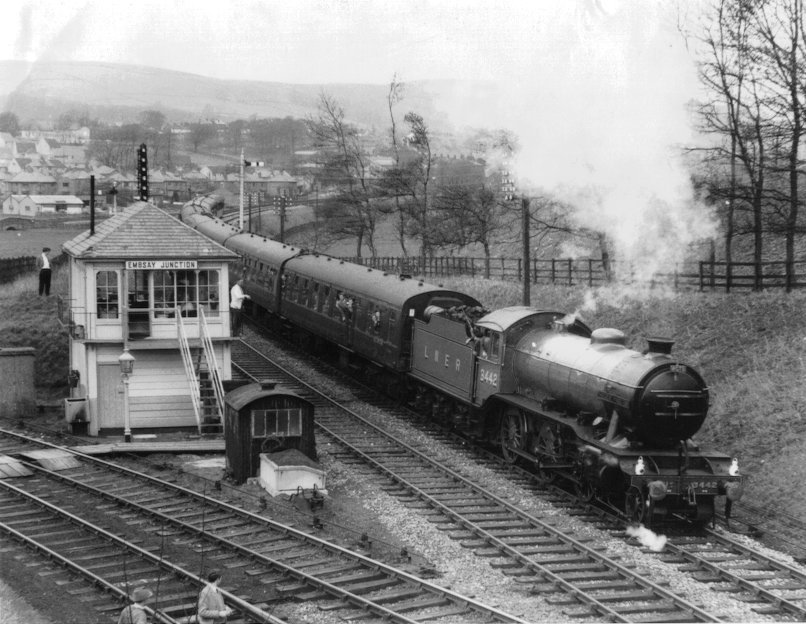
LNER K4 'The Great Marquess' is seen here at Embsay Junction in 1963 with 'The Dalesman Railtour', just before progressing up
the Grassington Branch (left). The site of Bow Bridge Loop is just behind the signal visible above the signalbox in the
photograph. The base of the lamp pictured by the 'box is still in situ (see lower), and the lamphut continues to serve its
original purpose, now located outside Embsay Station signalbox.
(c) Gavin Morrison.
|
|
|
|
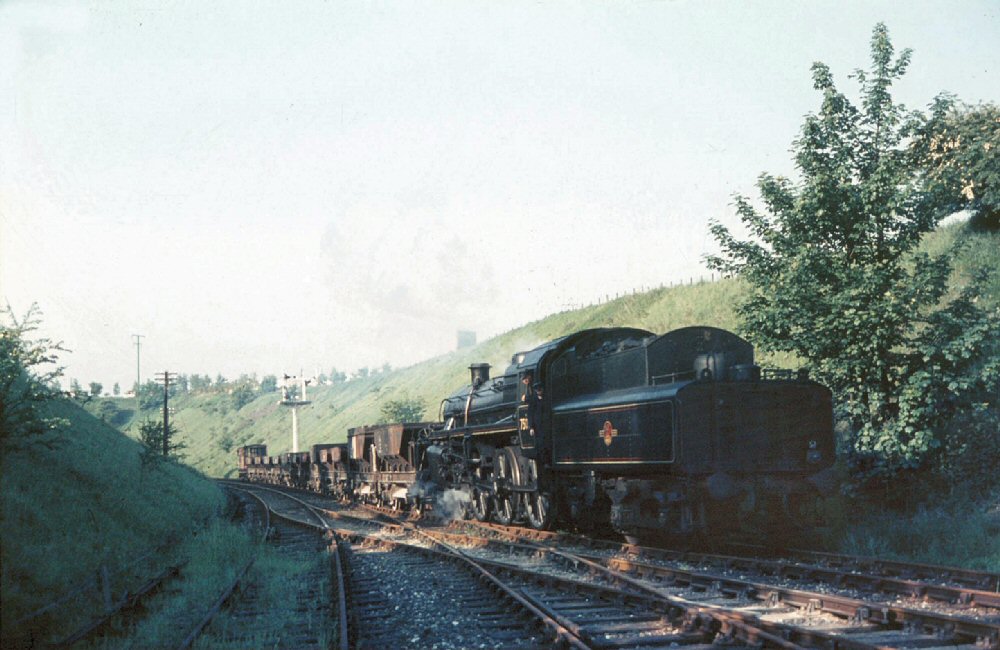
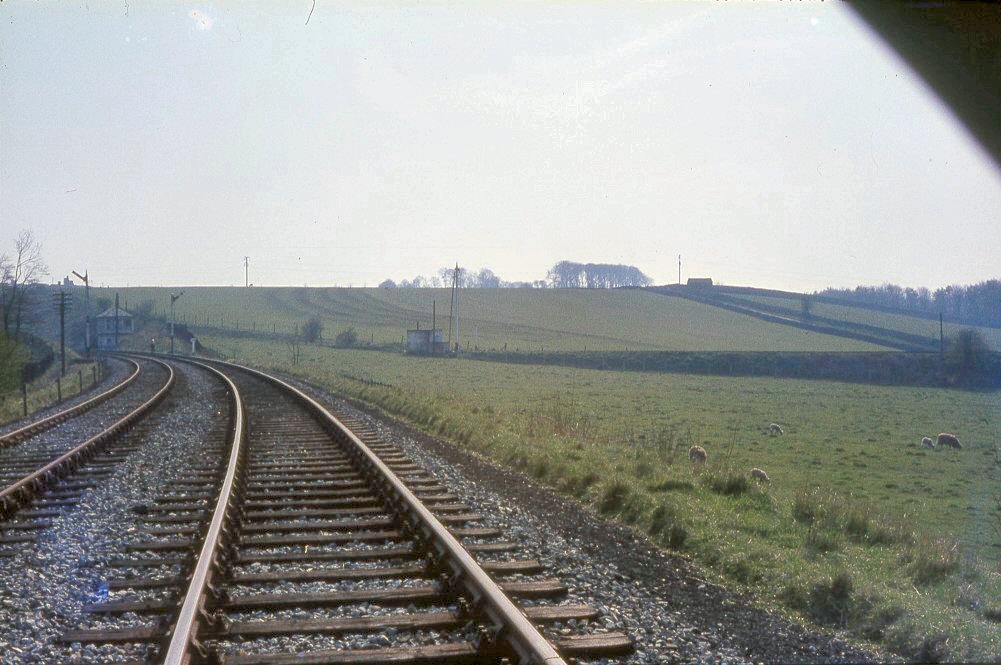
Viewed from the main Skipton - Ilkley line to the Embsay side of Embsay Junction (about where the K4 is in the previous
photo), a BR Standard Class 4 heads up the branch towards Grassington (more likely to Swinden Limeworks) with a rake of
empty hopper wagons. This photo was taken after the line to Ilkley was closed by the look of the track in the foreground,
but before the signalbox was closed on 6th July 1969.
(c) David Hey collection.
|
|
|
|
Taken during a 'walk of the line' on 30th April 1966. Looking towards Embsay Junction, with the line to Grassington just
visible across the picture. Interesting to note that the junction signalbox is switched out - for the mainline, which had
closed. The branch line is still in use for trains to and from Swinden Limeworks, near Rylstone. More
photos from the walk.
(c) YDRMT collection.
|
|
|
|
Class 4 4-6-0 No.?unknown? coming off the branch at Embsay Junction with a trip working from Grassington. By this time
the main line (to the left - the Skipton-Ilkley line) was probably closed.
(c) Malcolm Roughley, F.W.Smith Collection.
|
|
|
|
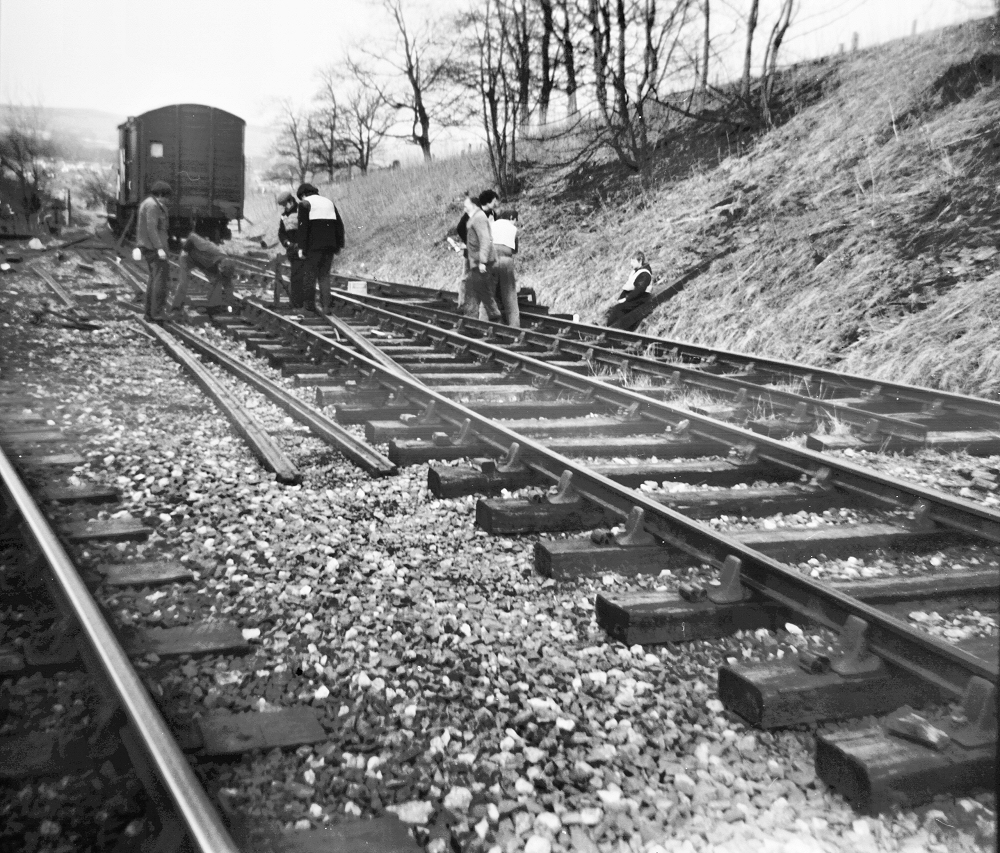
In the early days of the society, work was carried out to reinstate the junction. These photos show work underway by the
Railway's P-Way team to connect up 'our' line with BR's line to Swinden Limeworks.
(c) Fred Youell, YDRMT Collection.
|
|
|
|
The trap points are located where the box van is sat, and the team here are linking this up with the 'main line'. As can be
seen from the photos below of the stone trains, the branch needed to be slewed to link up with Embsay - the crossing was
installed but not the switch blades or stock rails.
(c) Fred Youell, YDRMT Collection.
|
|
|
|
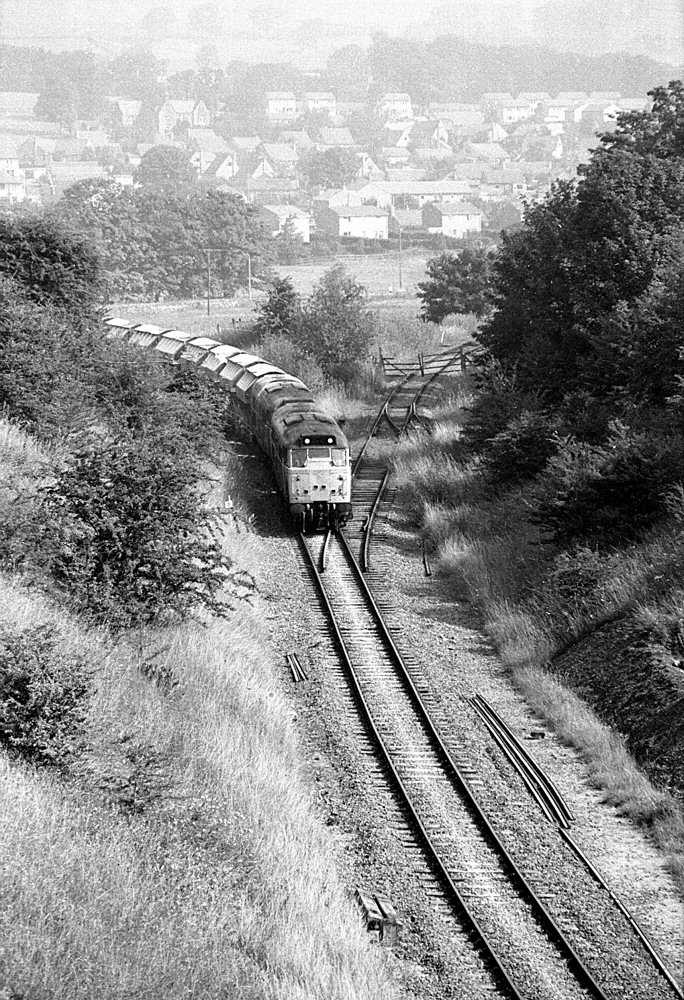
A pair of BR Class 31 diesels bring a loaded train down the Grassington branch, passing the site of Embsay Junction signalbox
and about to cross the partly-installed turnout that provided the Railway with a mainline connection in its earlier years.
This dates from the mid 1980s I would guess.
(c) David Hey.
|
|
|
|
A little further on and the train has negotiated the turnout. When stock was delivered over the connection the track was
slewed instead of adding stockrails and switch blades. The limit of the E&BASR line is now the gateway, visible to the right
of the train.
(c) David Hey.
|
|
|
|
This is the new bypass bridge (shown here in August 1982 after a washout) over the railway, located just north of Haw Bank
Tunnel. The original formation was double track from here down into Skipton.
(c) Charles Boylan.
|
|
|
|
|
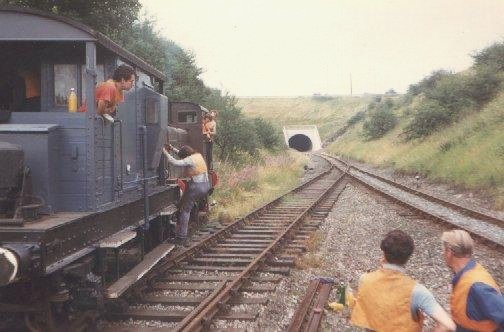
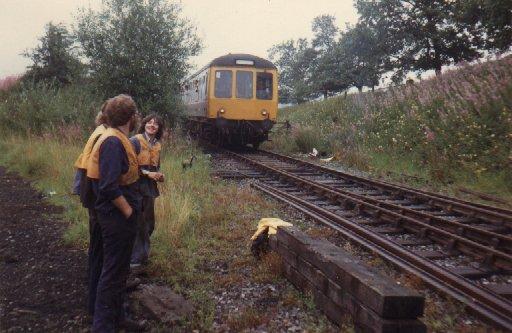
In 1982 a special working was put on from Skipton to Embsay over the recently re-instated junction. This was to be short lived
as BR wanted a lot of money to maintain the connection, which at the time was not viable for the society. It was useful while
it was in place, and it saw the arrival of several items of rolling stock. Here the works train is seen, then the DMU as it
moves onto the line before passing through Bow Bridge Loop and then returning later.
(c) Charles Boylan.
|
|
|
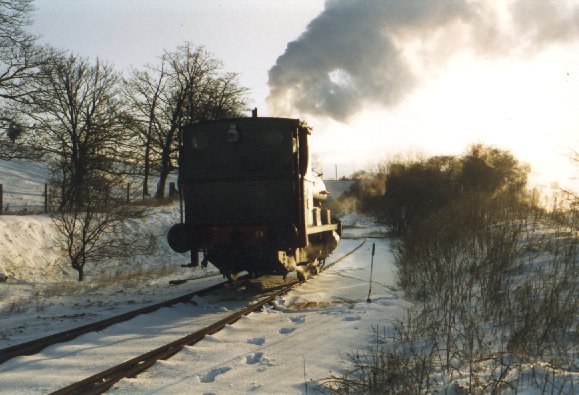
Annie has come off the train at Bow Bridge loop and is now seen as near to the site of Embsay Junction
as is possible, in the headshunt. This picture could have been taken when the loco was in industrial service, as there is
little by which to date it.
(c) YDRMT.
|
|
|
|
The end of the line at the moment, but with Network Rail's line so tantalisingly close! The Junction signalbox was situated
to the right of the Skipton-Ilkley line as we are looking at it.
(c) Tim Warner.
|
|
|
|
A small reminder of the former presence of the signalbox at Embsay Junction - the foot of a cast iron MR lamp, as can be seen
on one of the photos above with the K4.
(c) Tim Warner.
|
|
|
|
Occasionally trains can be seen passing one another close to the junction, as happened here during the 2004
Harvest of Steam when a special ballast working was heading up the branch, top and tailed by
two Class 66s.
(c) Tim Warner.
|
|
|