
|

Addingham station site has been completely redeveloped with buildings over the trackbed and no real way of squeezing past
them to meet up with the next section of trackbed towards Ilkley. Further photos will appear here when they become available.
|
|
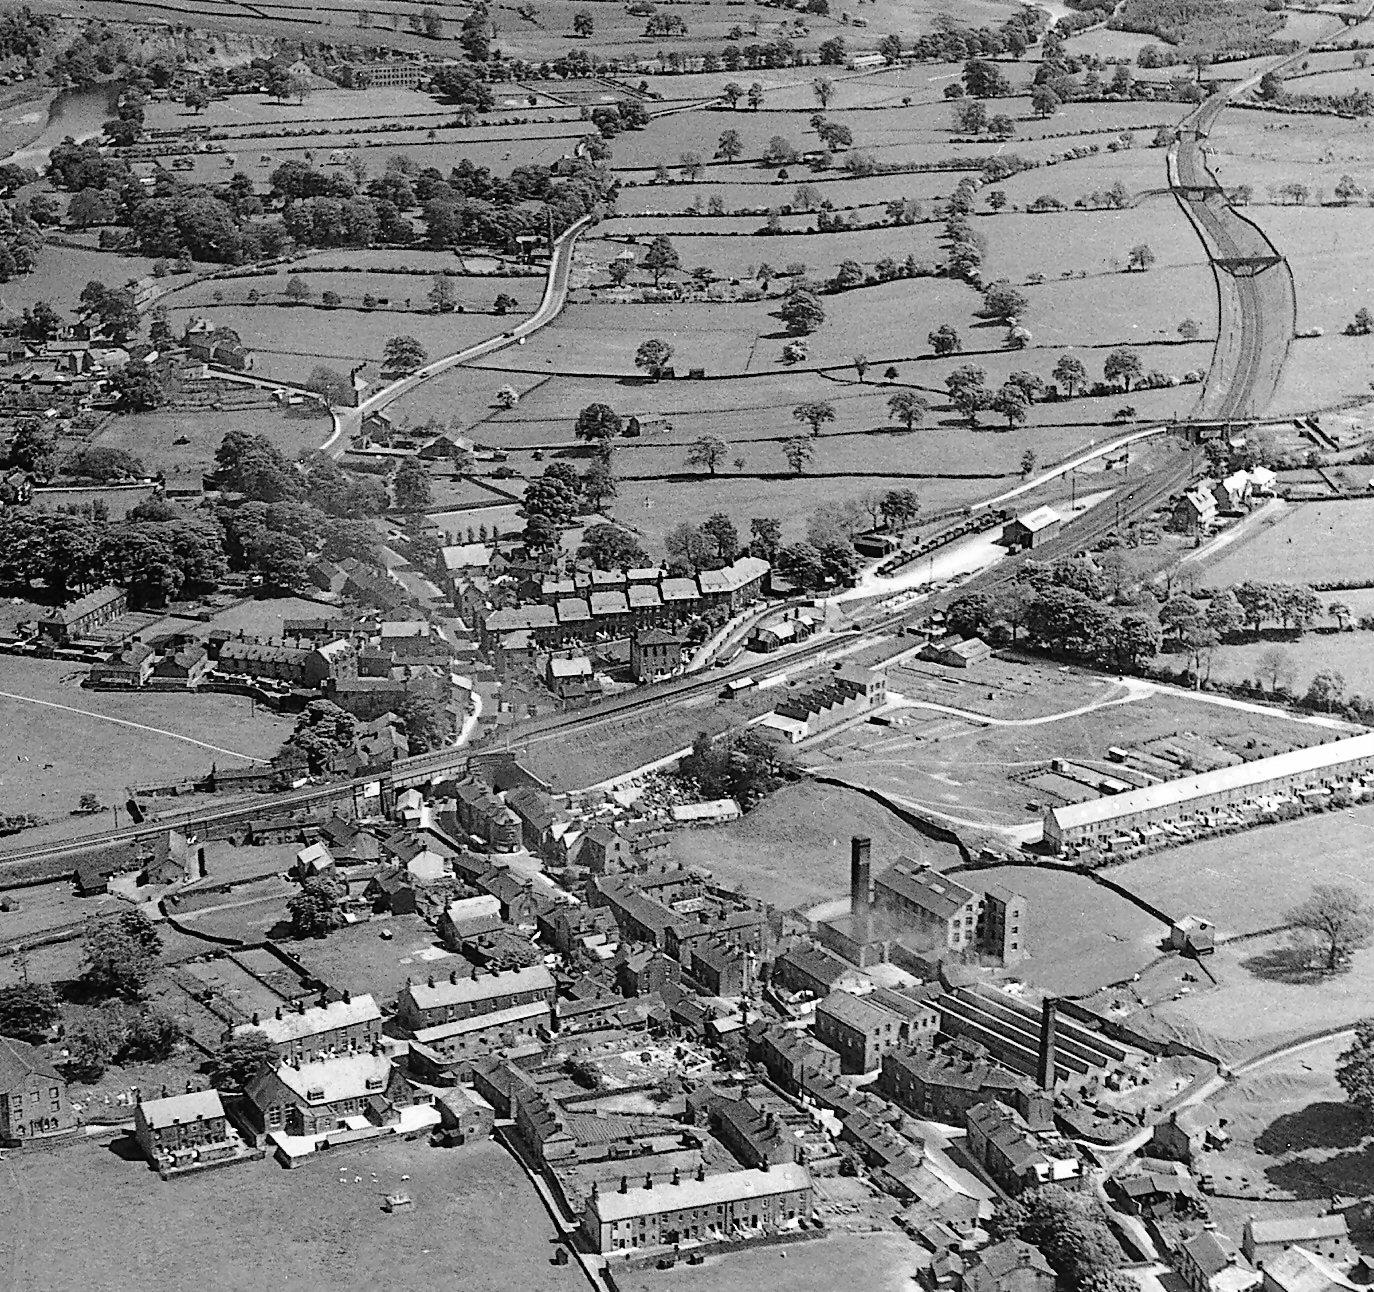
A superb aerial photograph of Addingham (date unknown) shows the layout of the Railway very clearly. The line heads off to
the left of the photo towards Bolton Abbey and Skipton, whereas the right leads to Ilkley.
(c) Addingham Electronic Archive.
|
|
|
|
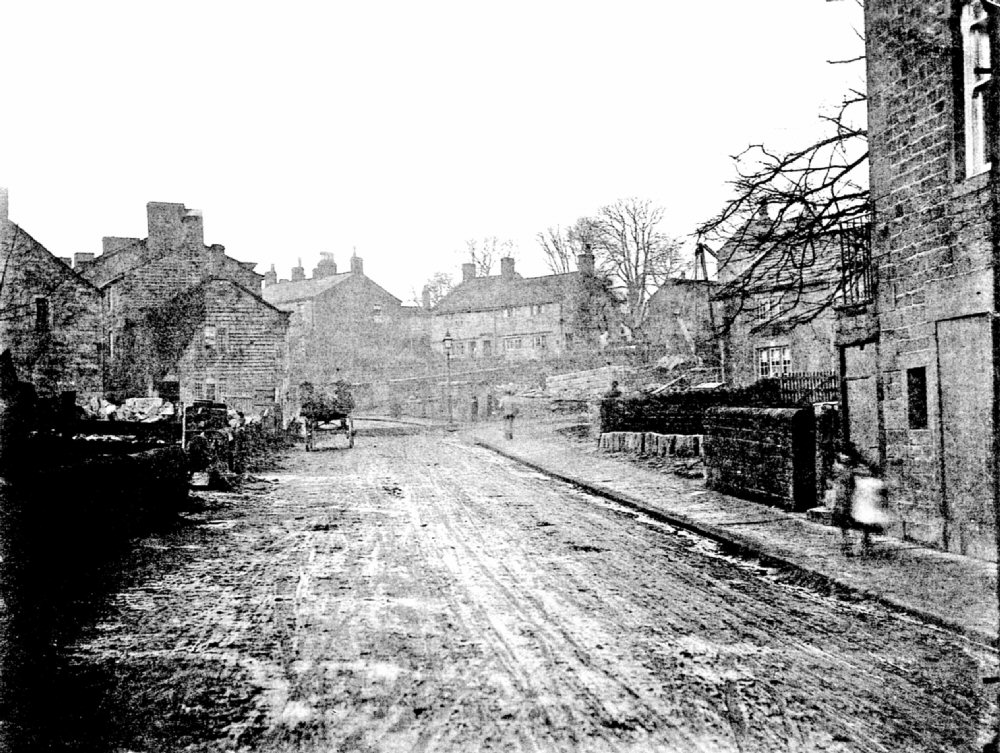
The construction of the Railway through Addingham took place between 1885 and 1887, which dates this picture to that period.
The photo shows the bridge across the main road under contruction, with the site of the station out of shot to the left. The
new parapet walls can just about be made out in the centre of the picture, to the right of the road.
(c) Addingham Electronic Archive.
|
|
|
|
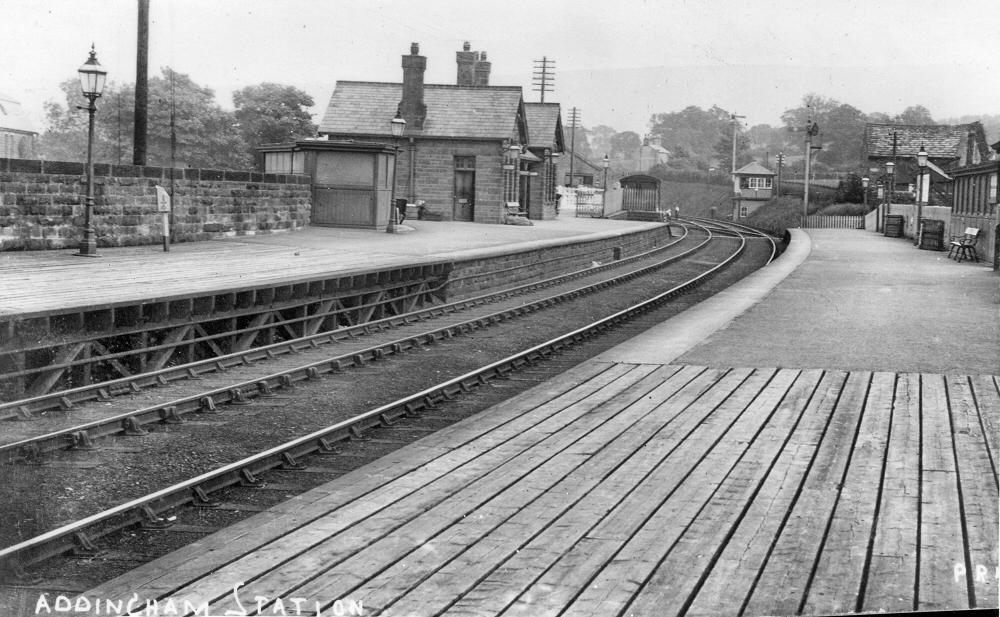
In immediately post-Midland Railway days (1925), Addingham station is seen looking towards Ilkley. Its similarity to Embsay
station is apparant here. Note also the starting signal sited on the opposite side of the line at the end of the platform -
common Midland practice on corners, but avoided wherever possible afterwards. This signal's replacement can be seen on later
photographs. The wooden section of the platform reflects the fact that the station approach was built on an embankment and
crossed the bridge over the main road.
(c) Addingham Electronic Archive / YDRMT Collection.
|
|
|
|
Addingham's station staff are posed for a photo in this view fairly early on, judging by their appearance. Note the
passengers and the gangers who also feature in the photo. The building behind the staff is the shelter over the subway that
linked the two platforms.
(c) Addingham Electronic Archive.
|
|
|
|
Addingham station, looking towards Ilkley, probably in the mid-1930s.
(c) Douglas Thompson - F.W.Smith Collection.
|
|
|
|
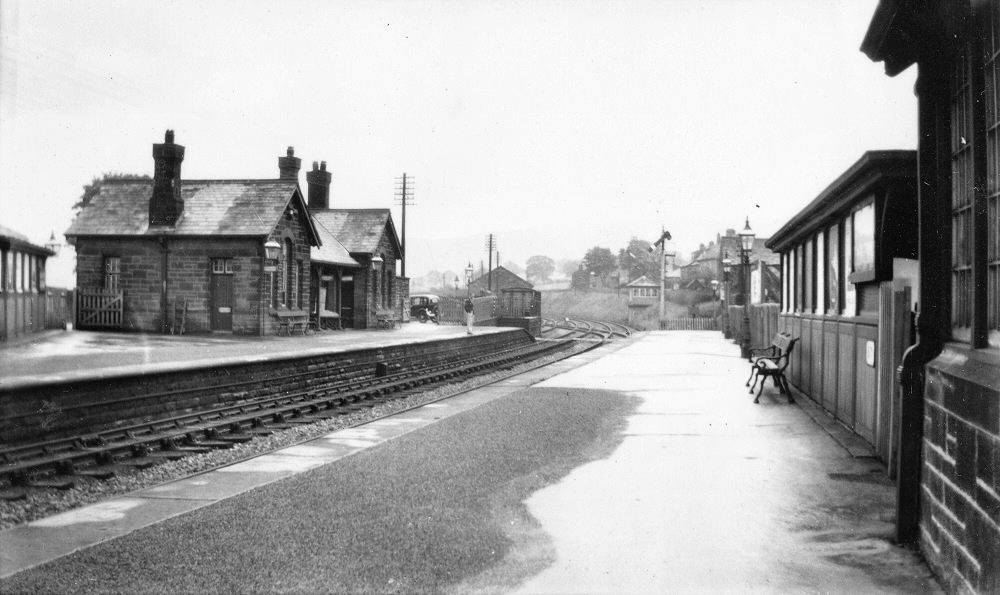
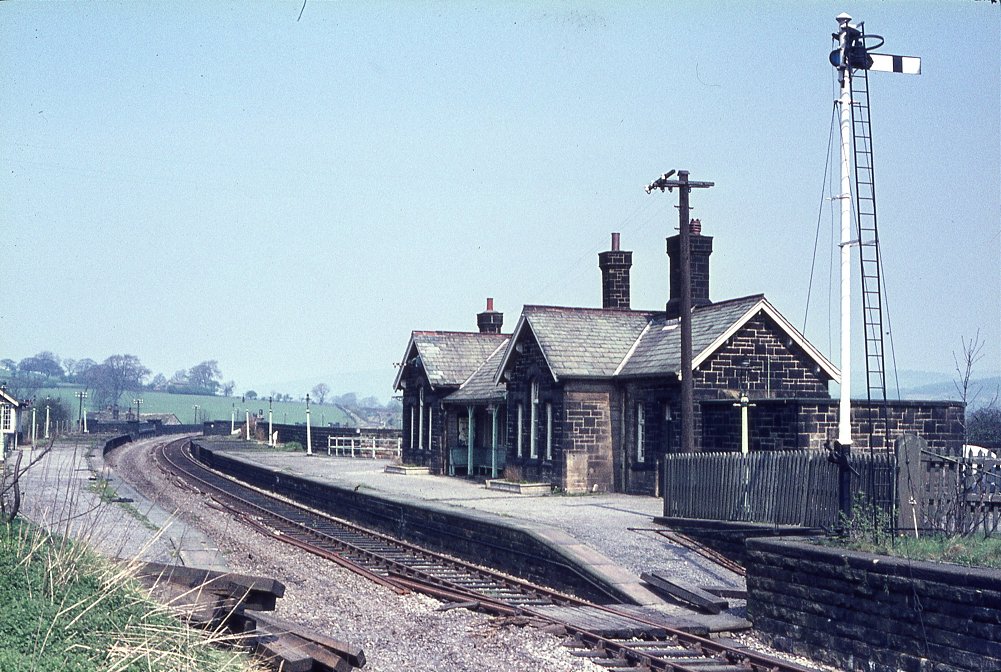
In later days changes to the station are apparant. The shelter over the subway entrance has been removed, the new (LMS?) starting
signal is visible, and the station has a deserted air to it. Towards the end, Addingham signalbox was switched out, and then used
as a groundframe only when required by the pick-up goods. A current view is available.
(c) Addingham Electronic Archive.
|
|
|
|
A train from Skipton is seen entering the station hauled by an unknown loco. This was probably a service diverted from the
Aire Valley route (still in use today) owing to maintenance work, and accident or flood damage.
(c) Addingham Electronic Archive.
|
|
|
|
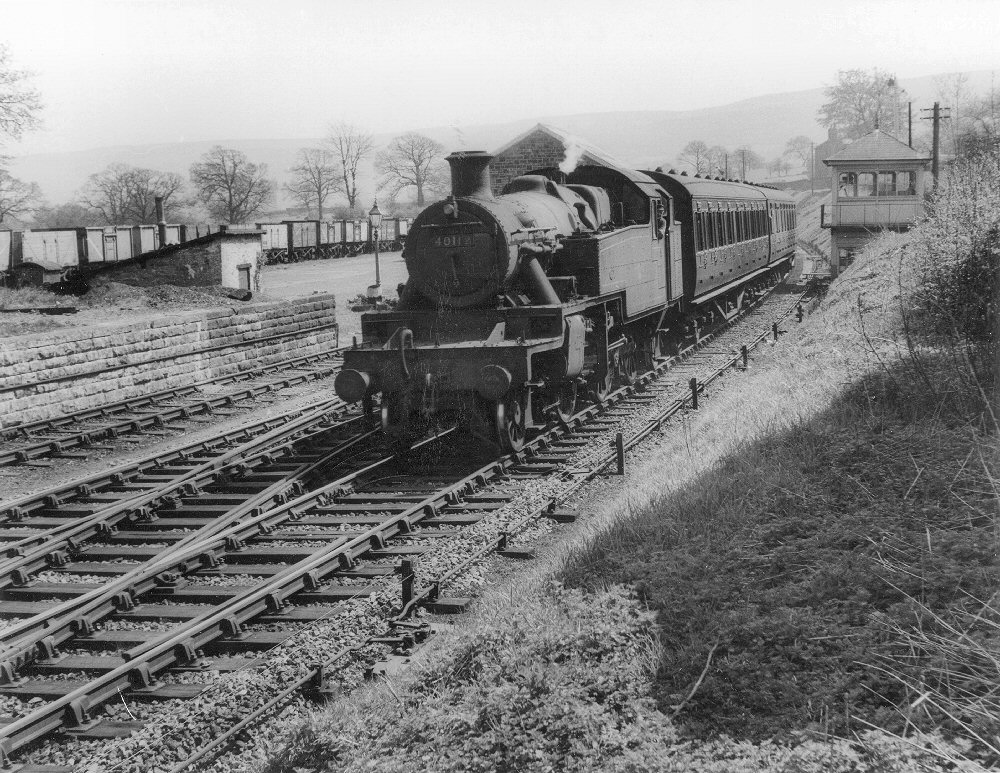
Stanier Class 3 2-6-2T No. 40117 entering Addingham station (from Ilkley) circa 1954.
(c) P.Sunderland, F.W.Smith's collection.
|
|
|
|
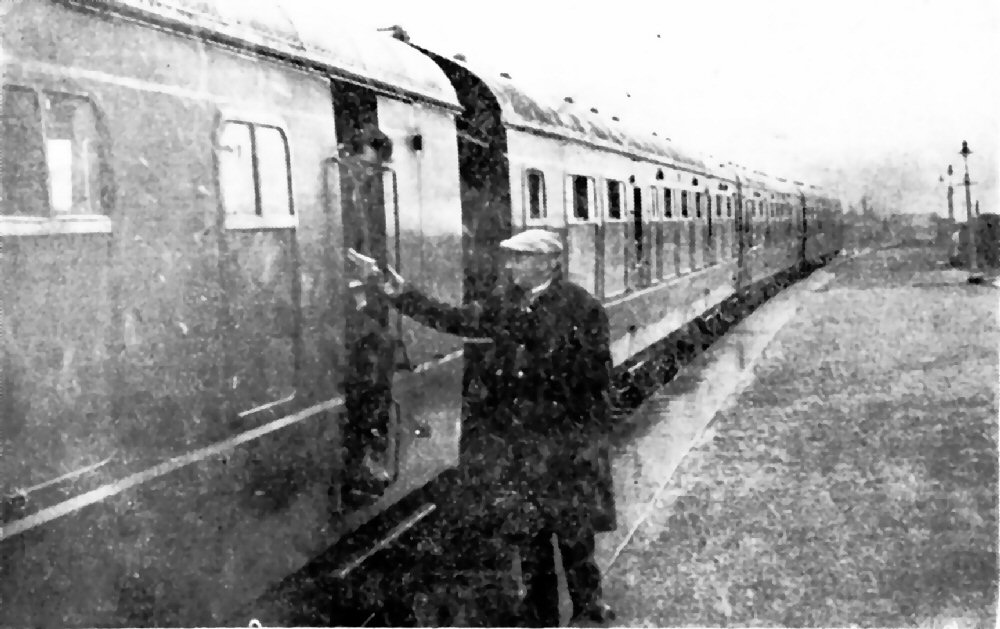
The last train ran from Addingham on 20th March 1965. This picture was taken from a scan of a newspaper, hence the quality.
(c) Addingham Electronic Archive.
|
|
|
|
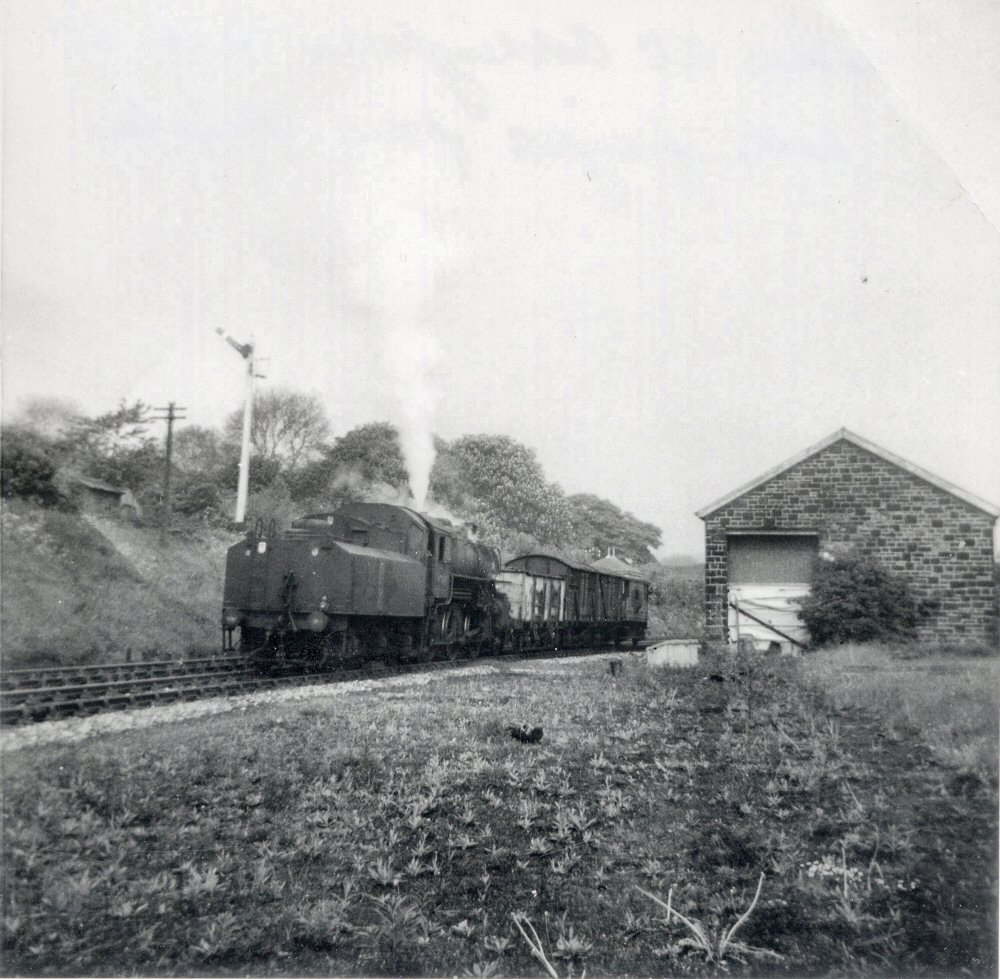
No.43039 at Addingham with the freight from Skipton - 4/06/65 - AFTER OFFICIAL CLOSURE. Note that the sidings have by now been removed, although
the signals survive - the signalbox switched out for the last months of the line's existence.
(c) Jack Smith.
|
|
|
|
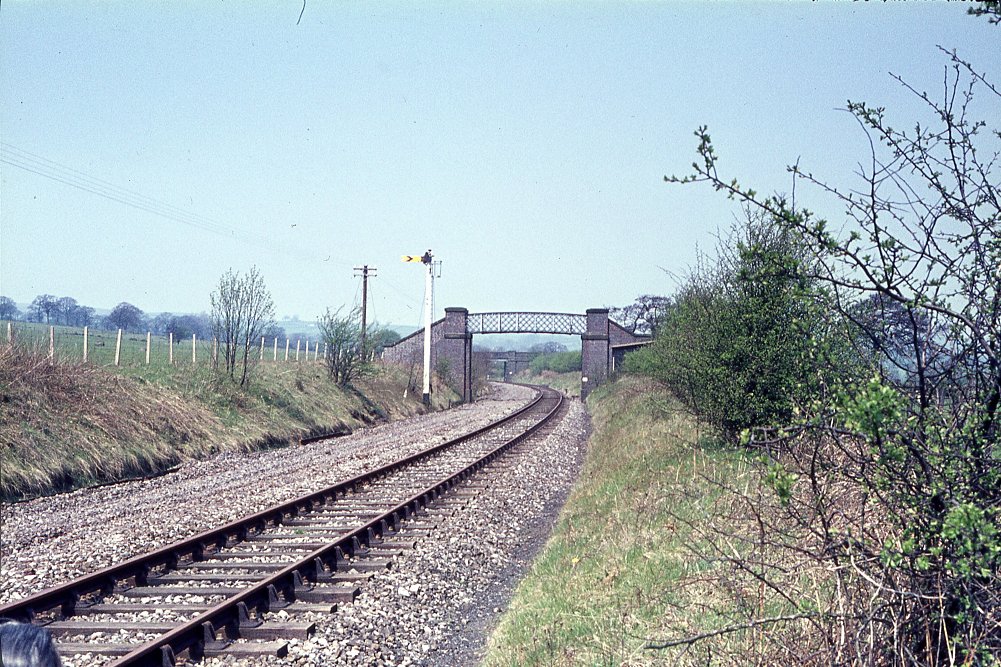
Addingham's Down distant signal was located beside a blue brick footbridge (visible on the aerial photo). This view was taken
as part of a walk along the line from Ilkley to Embsay Junction in 1966. (The rest of the photos from this walk are available
here.) The bridge is no longer in existance - see the photo showing the current
view. The clump of trees also visible on this view corresponds to those visible in the 1966
photo above to teh right of the bridge. A view along the footpath as it is now demonstrates the
approximate alignment of the bridge, from left to right on the above photo, and some remnants
from its demolition.
(c) YDRMT Collection.
|
|
|
|
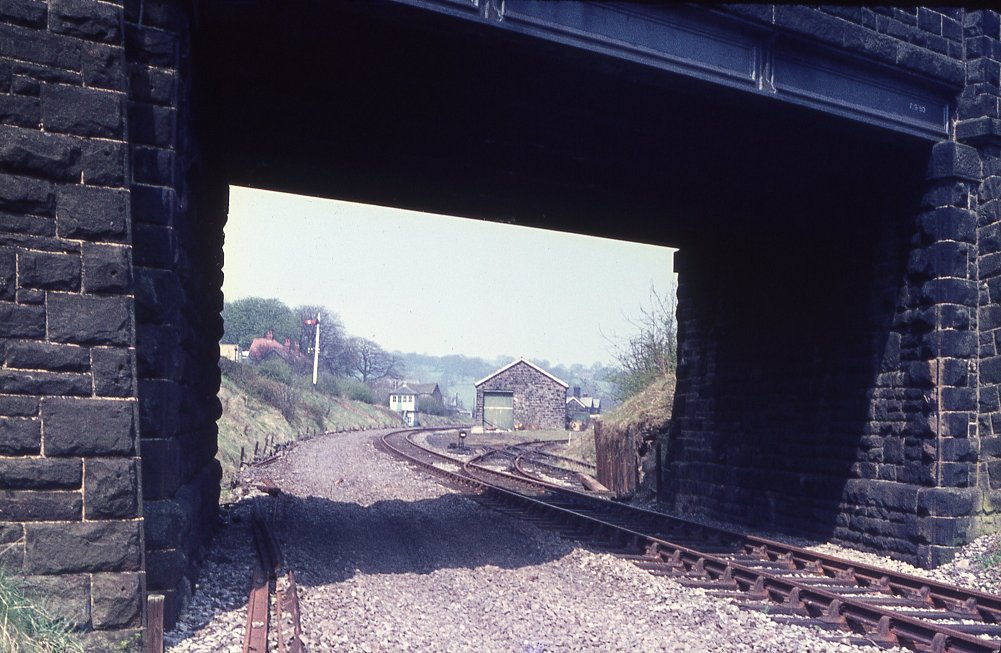
Moving closer to Addingham station, and the line passes under a bridge, which is still in existence today, although filled
in. The remains of the goods yard can be seen to the right, with the stone built goods shed. The other goods sheds on the
Skipton - Ilkley line were built of wood.
(c) YDRMT Collection.
|
|
|
|
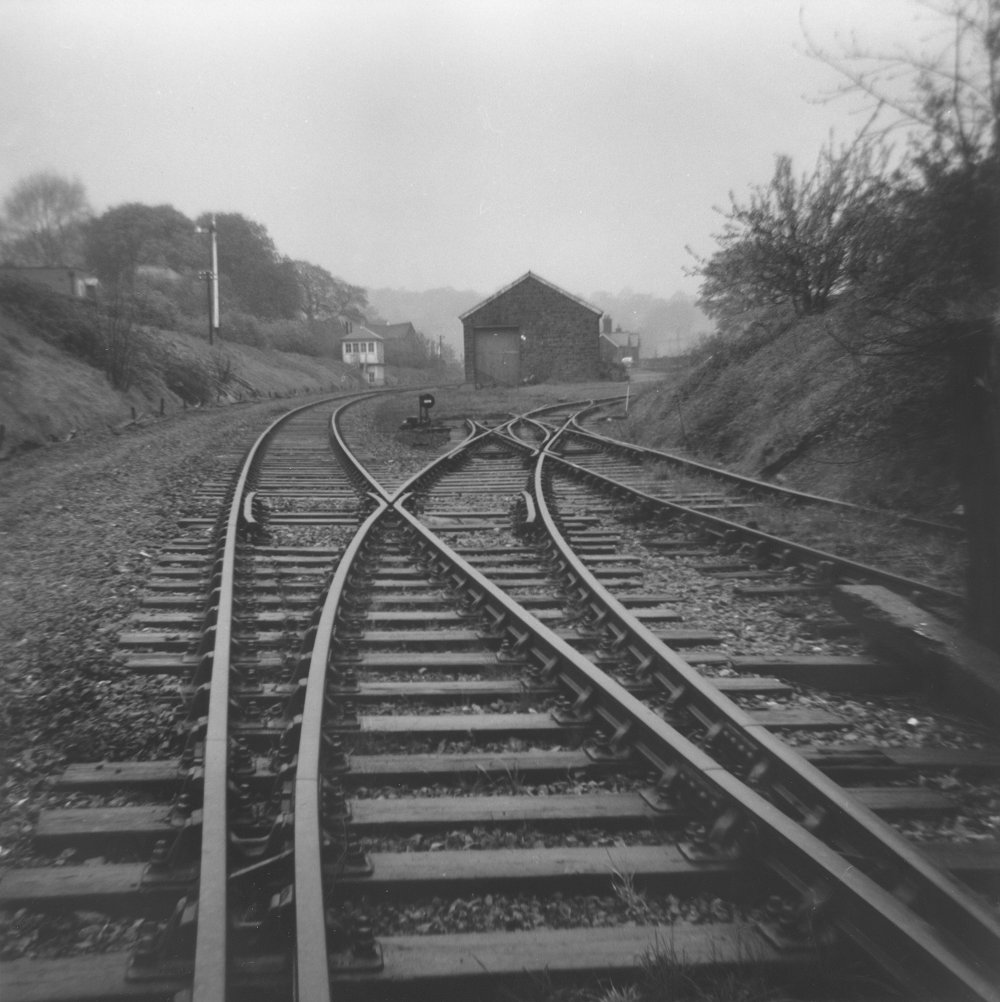
With the Up line still in existence at this point, the general layout of the station site can be seen from just under the
bridge. The Midland Railway's typical station layouts usually involved single and double slips as well as three way points,
and although a large amount of the track has been lifted by this time it is still possible to imagine the layout. The
signalling has not yet been removed.
(c) David Cash.
|
|
|
|
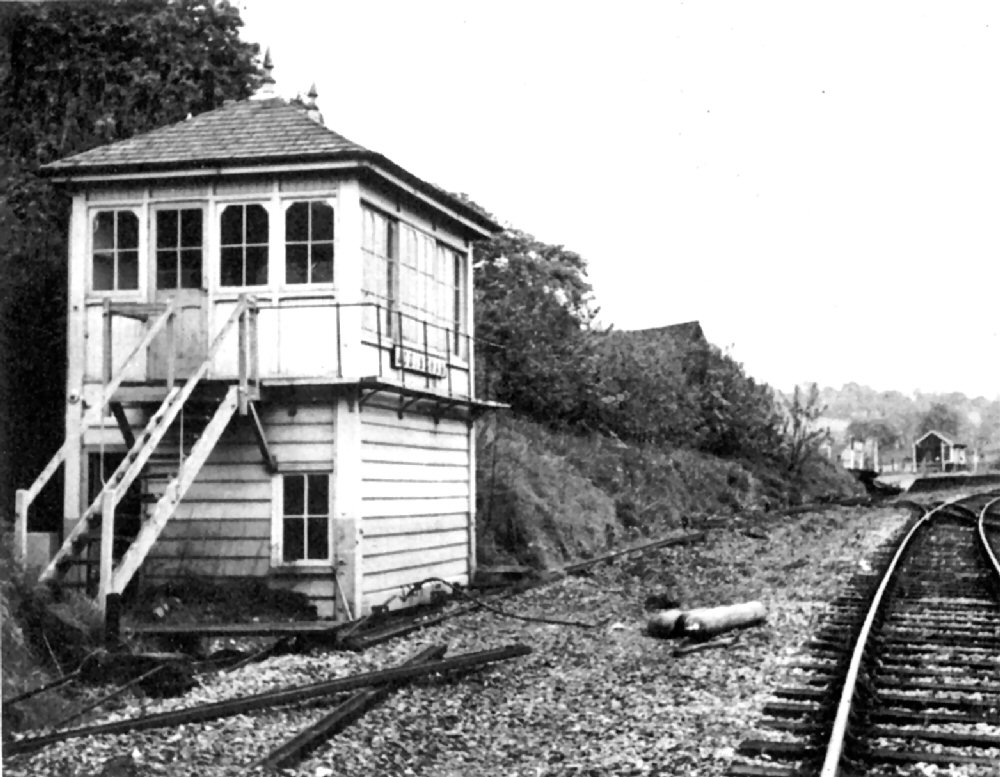
Addingham's signalbox survived right until the end of the line (unlike Bolton Abbey's), even though it saw very little use
and was latterly operated as a groundframe rather than as a block post. The rest of the signalling was dismantled after the
track was lifted.
(c) Addingham Electronic Archive.
|
|
|
|
Another view of the 'box showing the LMS style nameboard that it still carried. The signalboxes along the line all managed
to see a repaint into BR NE colours of blue and white, whereas only Bolton Abbey station was similarly treated (by nature of
it being wood) - Embsay and Addingham stations retained their LMS colours until the end. The stations were looked after by a
different department.
(c) David Cash.
|
|
|
|
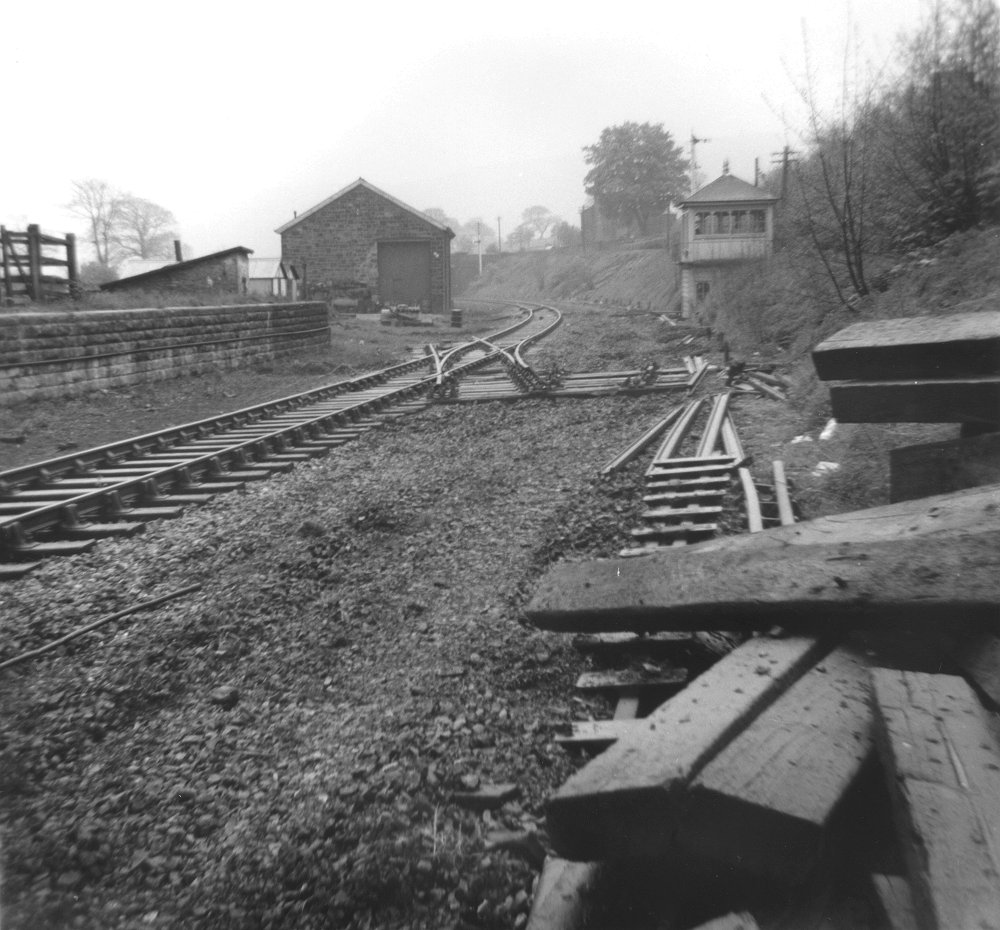
Looking back towards Ilkley through the goods yard. Compare this picture with an earlier view
from further up the page to see how things have changed. A current view is also available.
(c) David Cash.
|
|
|
|
Continuing past the goods yard and the stone station buildings (which were a mirror image of those at Embsay) are reached.
Note the LMS green they still retain in 1966.
(c) YDRMT Collection.
|
|
|
|
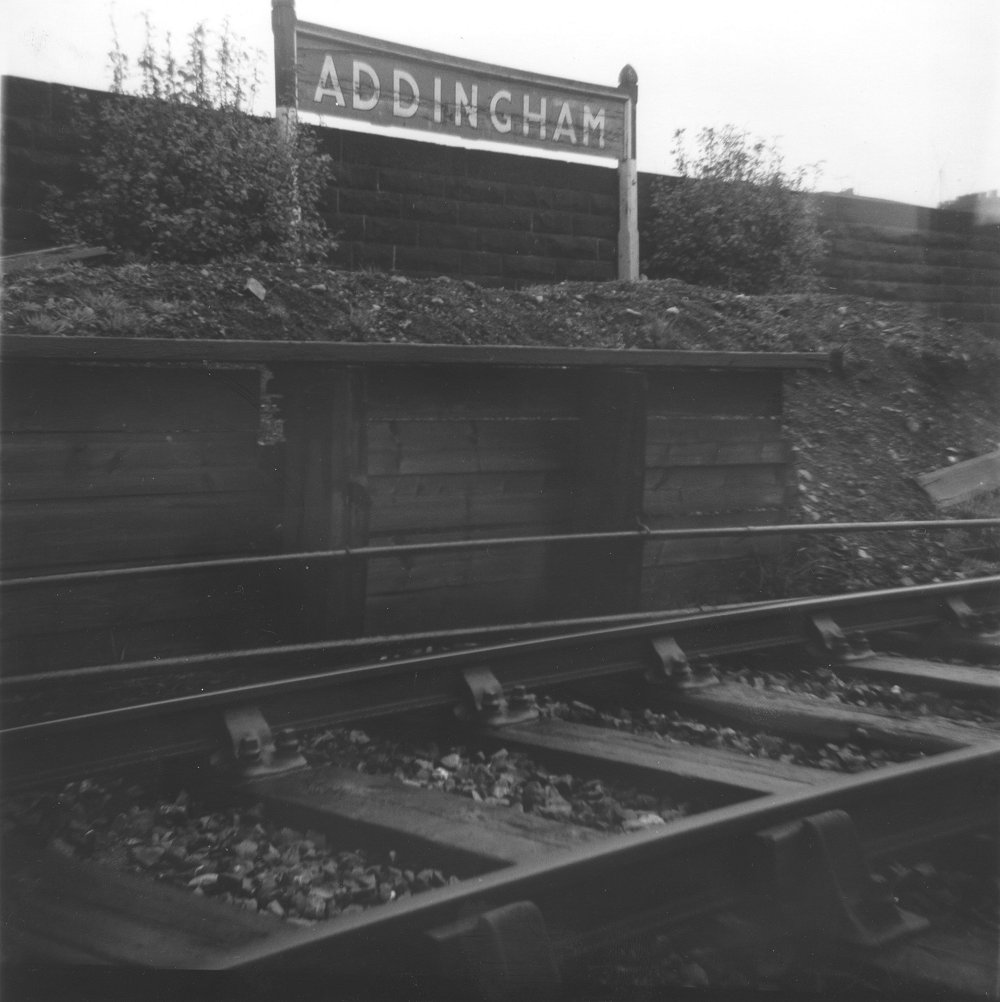
The running-in board for the Down platform. The area behind the running-in board is now houses, and the terrace visible in
the background is still visible.
(c) YDRMT Collection.
|
|
|
|
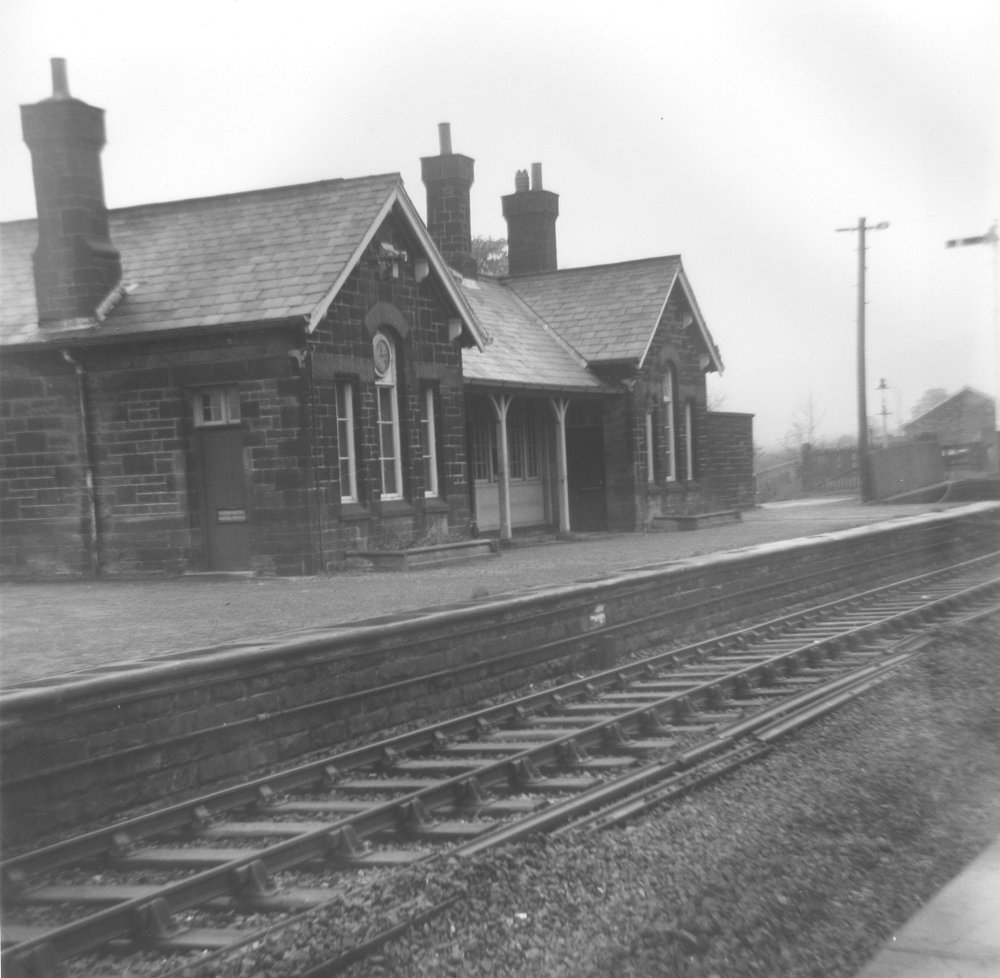
Looking back towards Ilkley and the relatively good condition of the station building can be seen - by contrast the building
at Embsay was in a worse state when taken over by the Railway.
(c) David Cash.
|
|
|
|
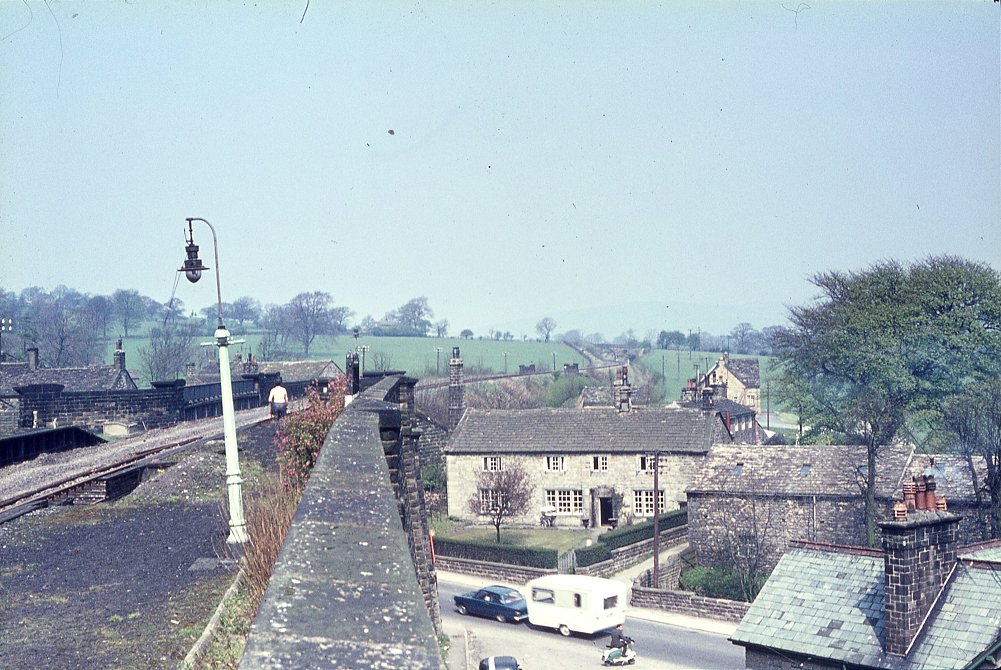
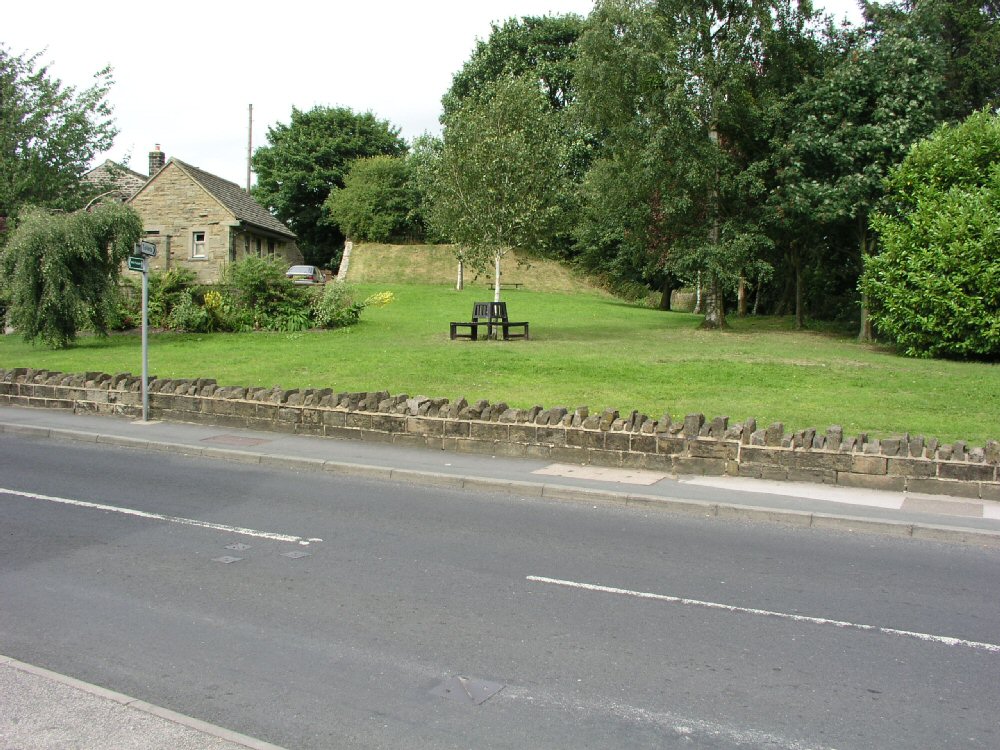
Looking back towards Bolton Abbey and beyond from the Up platform, and the main street is clearly visible. A
current view is available showing how much is missing! See also this
view of the station house in its current form, taken from the other side of the main road.
(c) YDRMT Collection.
|
|
|
|
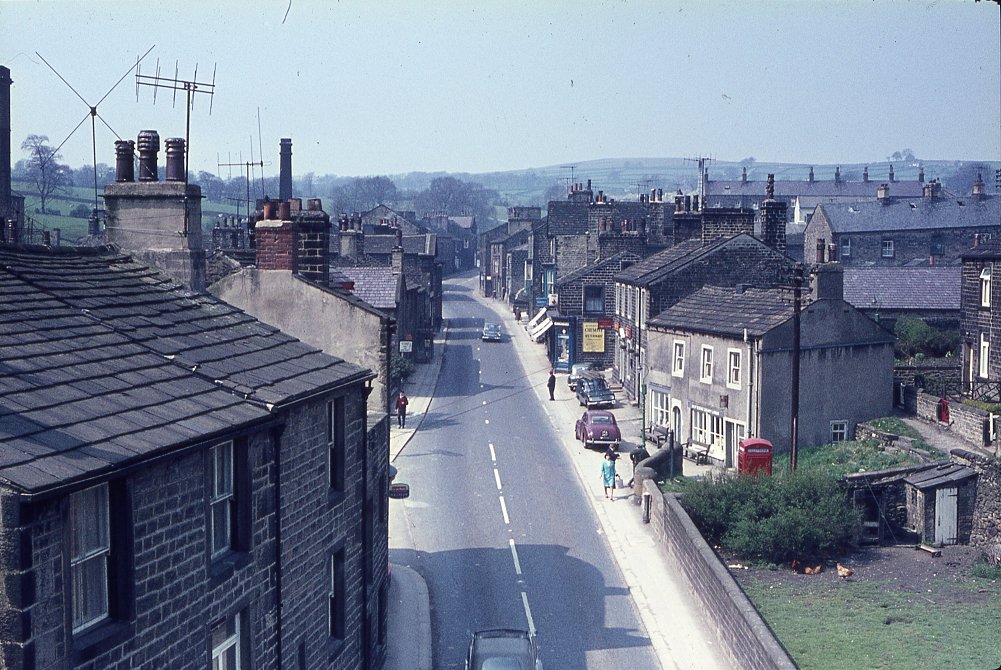
Addingham's main street as viewed from the railway bridge. The photo below was taken from the right hand side of this photo,
presumably on the little path.
(c) YDRMT Collection.
|
|
|
|
The running-in board for the Up platform (visible on the above photo) also showing the section of platform that has been dug
out for whatever reason.
(c) David Cash.
|
|
|
|
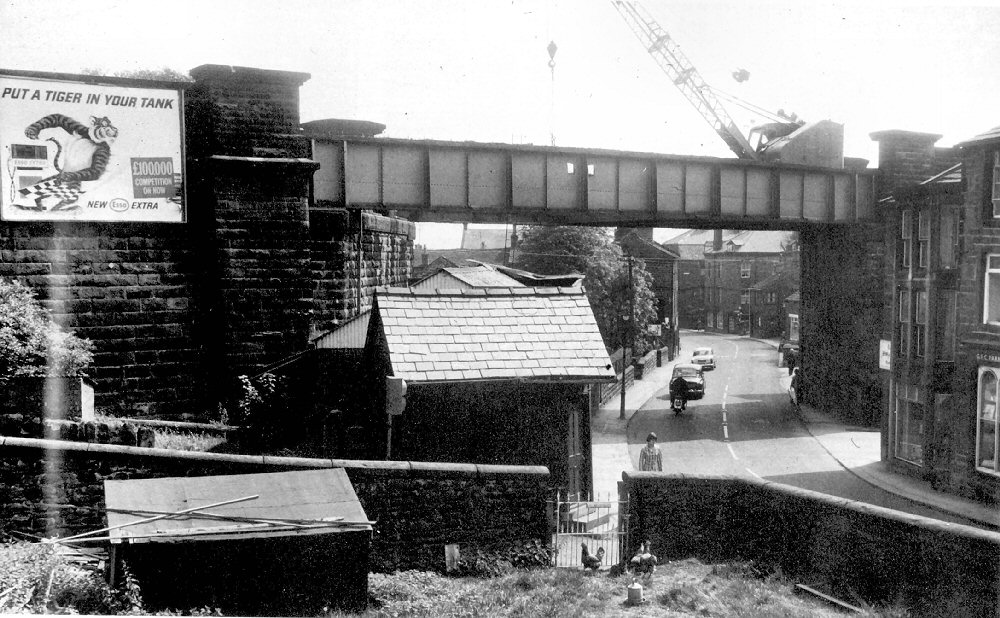
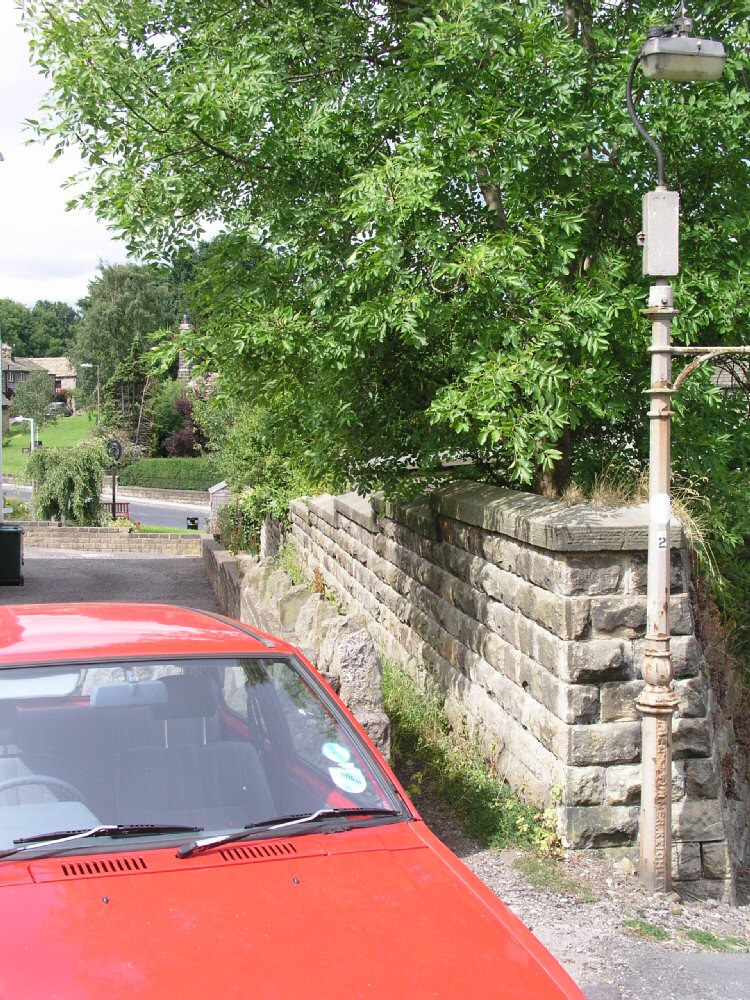
Prior to the removal of the girders, the decking of the bridge is removed. This bridge, its parapets and the embankment
retaining walls on both sides have been removed apart from a small section which can be seen in the next photo. A
similar current view is available, which was taken from slightly further back. Refering to the
view from the bridge (above), the modern view was taken from approximately where the maroon car is parked.
(c) Addingham Electronic Archive.
|
|
|
|
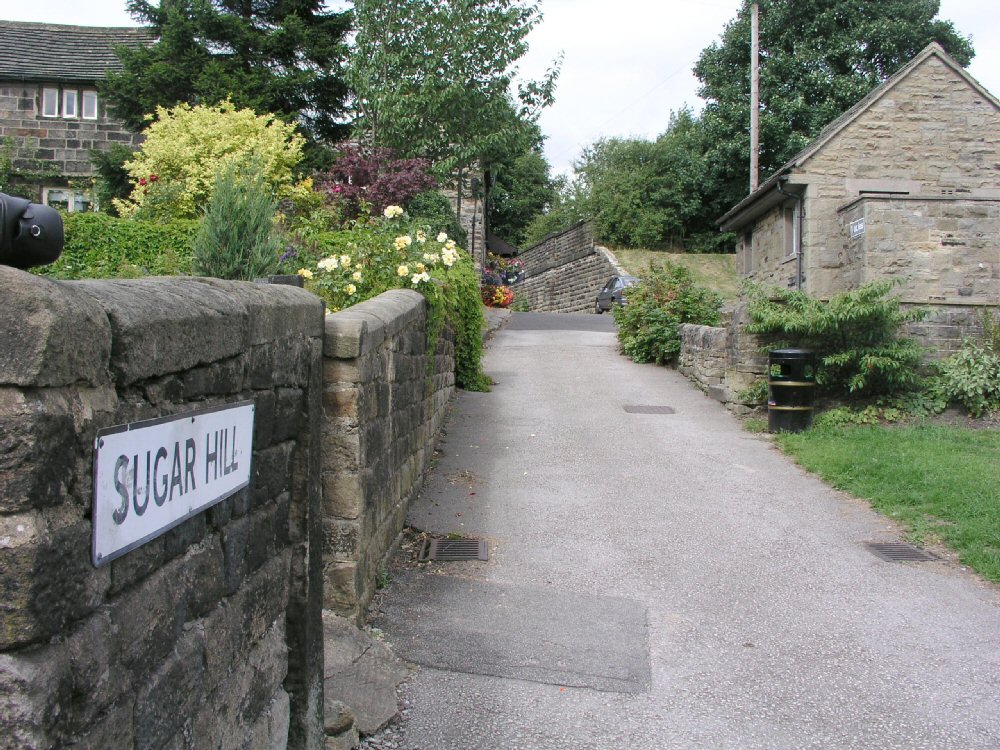
The surviving section for the retaining wall for the embankment is located just off the main street, heading back towards
Bolton Abbey. From this point back towards Bolton Abbey the trackbed is pretty much intact.
(c) Tim Warner.
|
|
|
|
Taken from the end of the remaining embankment, looking along the former route of the line towards Ilkley. The line used to
curve to the left as it crossed over the main road and into Addingham station.
(c) Tim Warner.
|
|
|
|
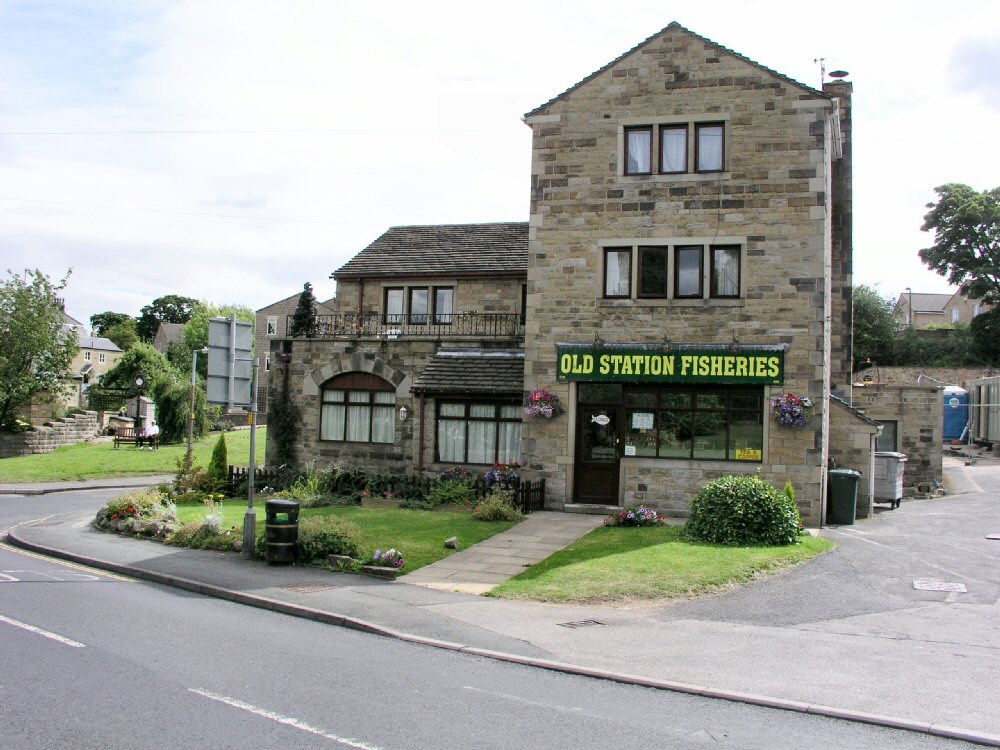
Visible in the prvious photograph is this modern shop - 'Old Station Fisheries' which lies on the course of the line and
shares its foundations with the former bridge and retaining walls. At least the railway's presence is acknowledged in the
name.
(c) Tim Warner.
|
|
|
|
Looking back across the road from outside the 'Old Station Fisheries', and the stub of the embankment is visible along with
the remaining piece of retaining wall.
(c) Tim Warner.
|
|
|
|
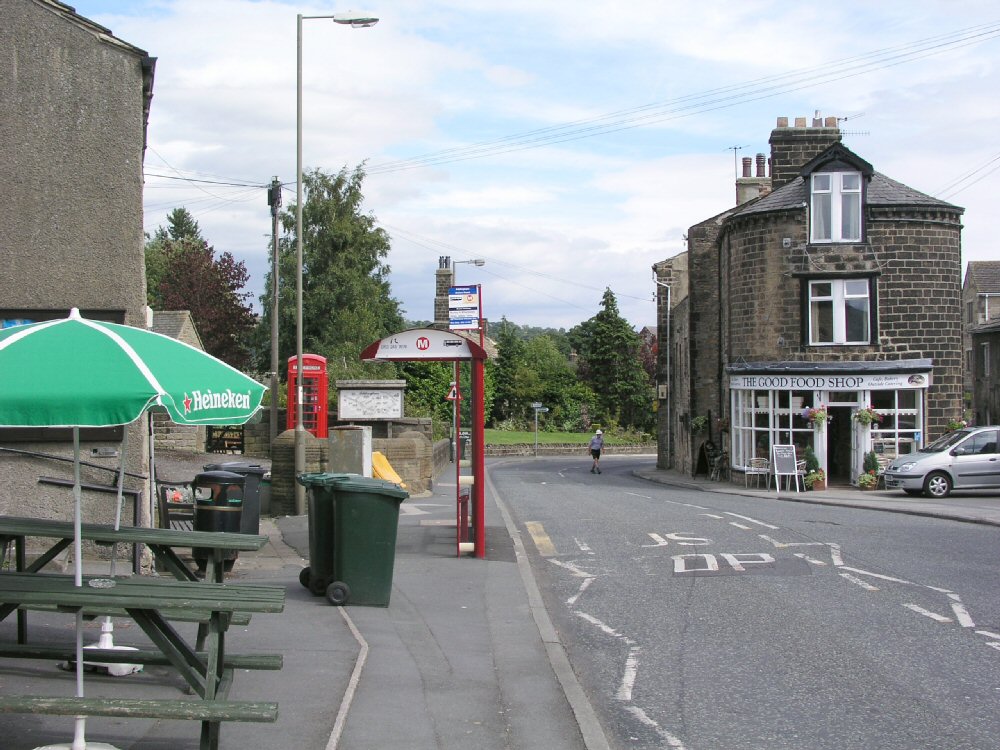
Looking down the main street towards where the railway bridge used to be. An older view is
available, although taken from a slightly different location.
(c) Tim Warner.
|
|
|
|
Addingham's station house still stands and provides a useful reference point when looking around the area and trying to recognise
the remaining railway features.
(c) Tim Warner.
|
|
|
|
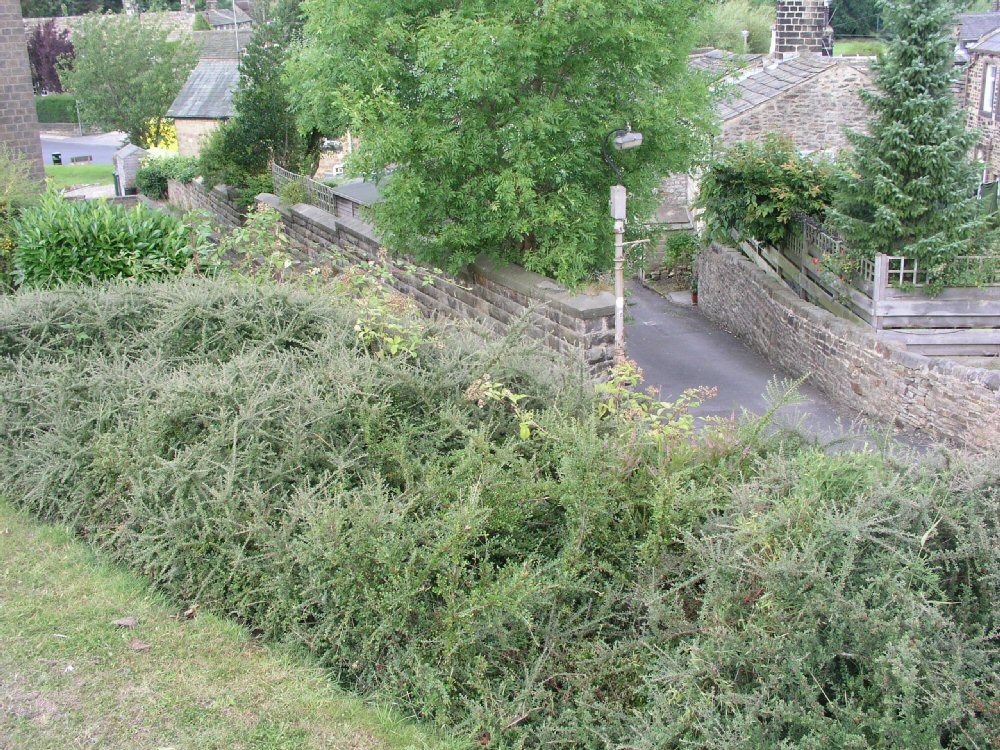
The yellow ring surrounds the station approach in the aerial photo, and the remnants of the walls pictured in this view are
recorded below, working from the bottom of the road (to the left of the yellow ring, hidden behind the embankment) up to the
entrance to the goods yard.
(c) Addingham Electronic Archive.
|
|
|
|
This is the view back down to the road. The wall featured is the one that marked the edge of the drive past station house.
(c) Tim Warner.
|
|
|
|
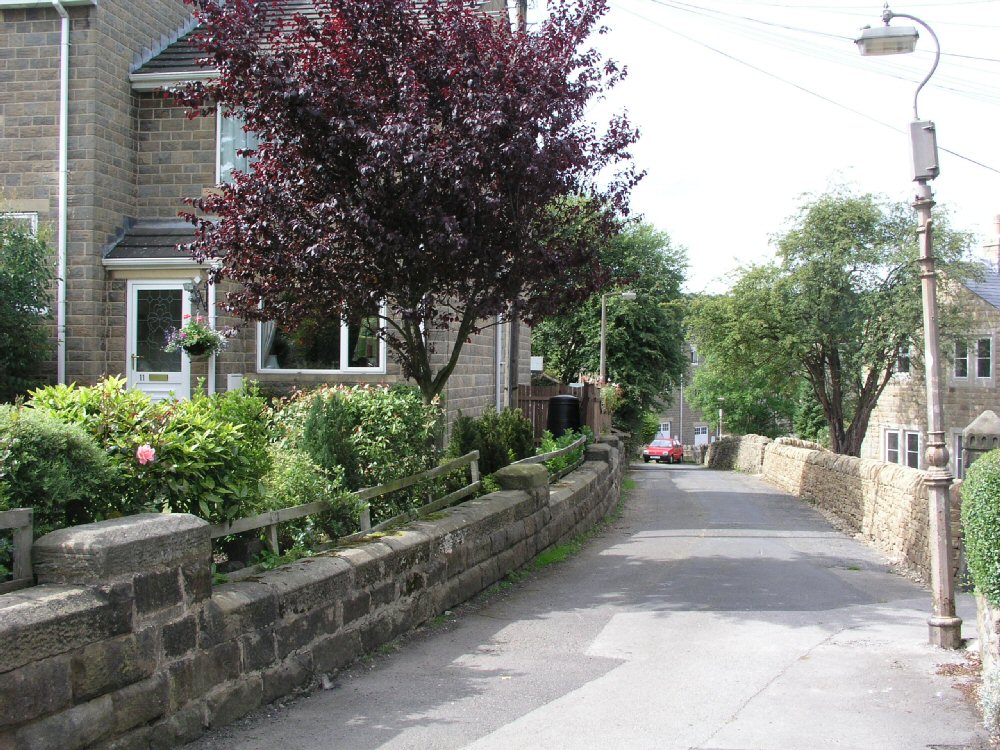
The same area taken from the approximate height of the embankment, clearly showing how the station drive (to the left, heading
past station house on the main road) begins to run parallel to the access road up past the houses. The two roads were separated
by a wall which still exists most of the way up. This can be seen on the old aerial view.
(c) Tim Warner.
|
|
|
|
The end of the wall shown in this picture could possibly have marked the entrance to the subway linking the two platforms
together and providing access onto the platform. The rest of the wall up to the right of the picture is the dividing wall
between the public road and the station drive, as shown in the aerial photograph.
(c) Tim Warner.
|
|
|
|
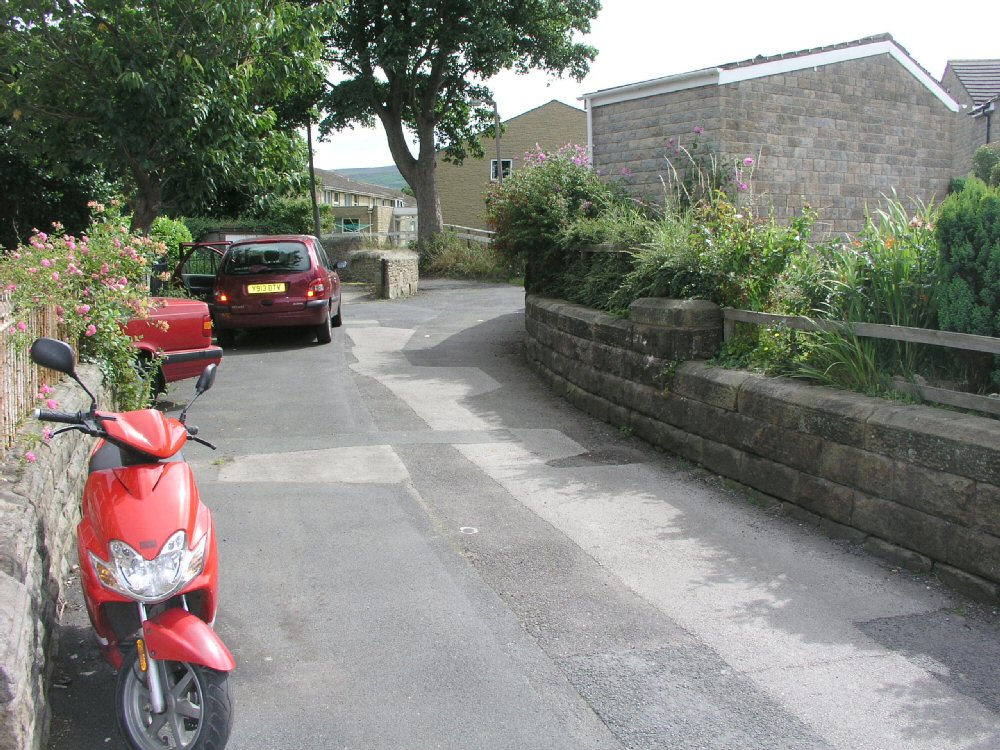
Looking back down the road as the wall curves round from the yard entrance as was.
(c) Tim Warner.
|
|
|
|
This is the end of the wall marking the yard entrance which was accessed from the station drive which ran parallel to this
road but on the other side of the wall pictured. More old pictures of this area would make things a lot easier to understand!!
(c) Tim Warner.
|
|
|
|
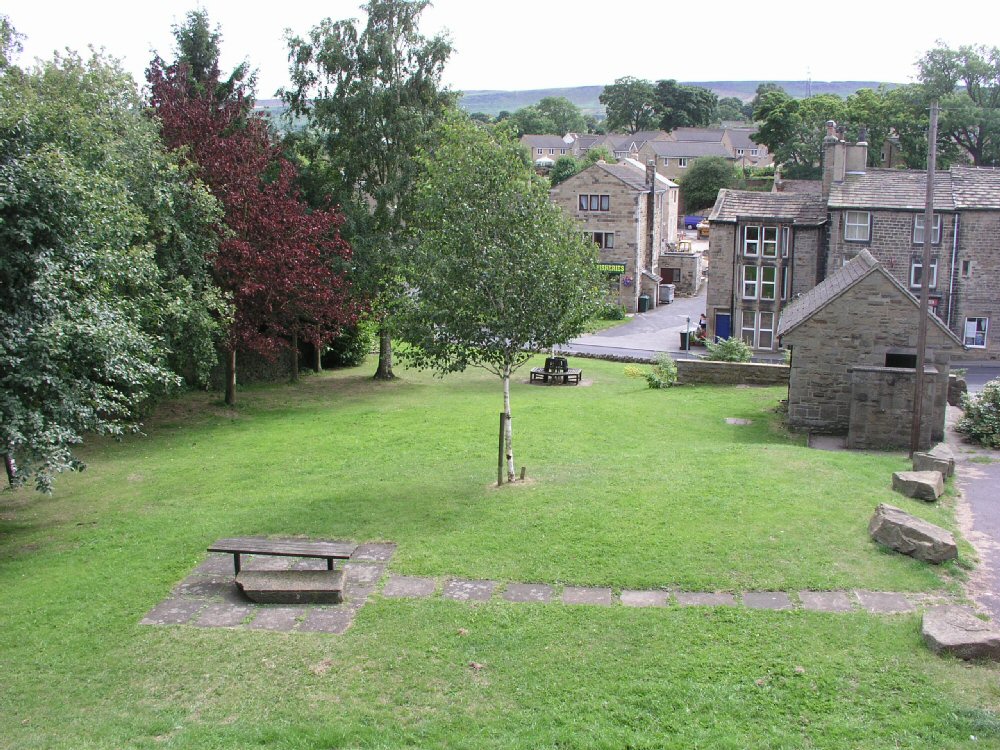
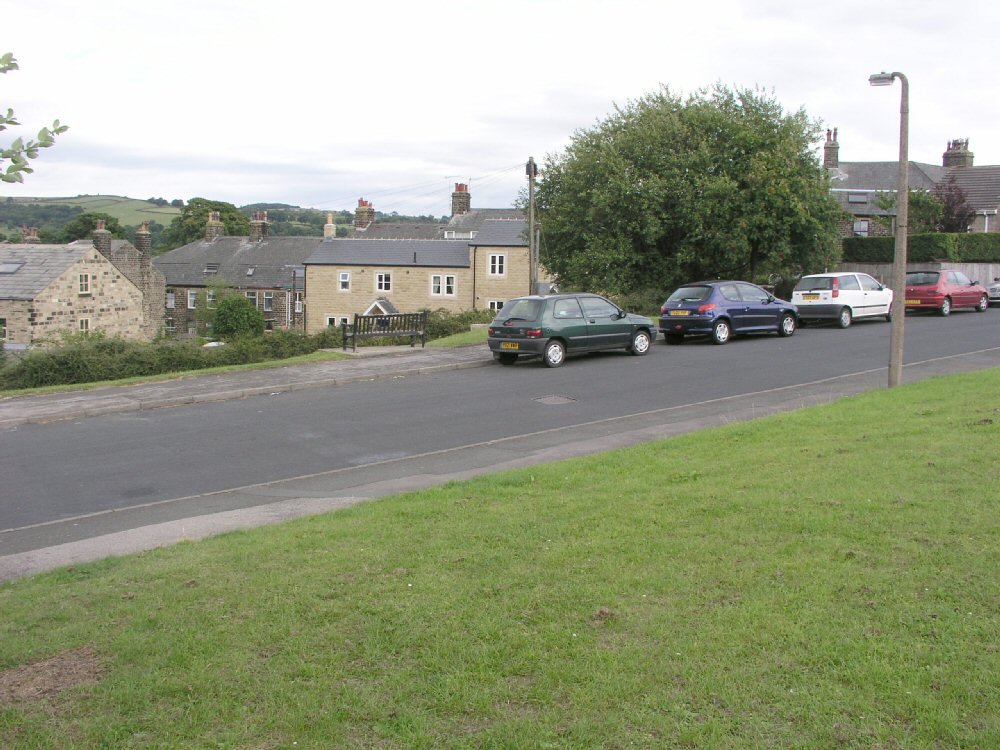
This view is roughly of where the old station used to be in Addingham. When compared to this
view, a point of reference is the chimney on the building in the background, which would suggest that despite the
difference in angle of the shot it is a close match. It would appear that the new road through the site follows the course of
the line.
(c) Tim Warner.
|
|
|
|
This view looks towards Ilkley through the old goods yard site. The signalbox would have been located on the right, with the
goods shed on the left of the view. This picture roughly lines up with two archive views earlier on this page showing a
passenger service and during lifting.
(c) Tim Warner.
|
|
|
|
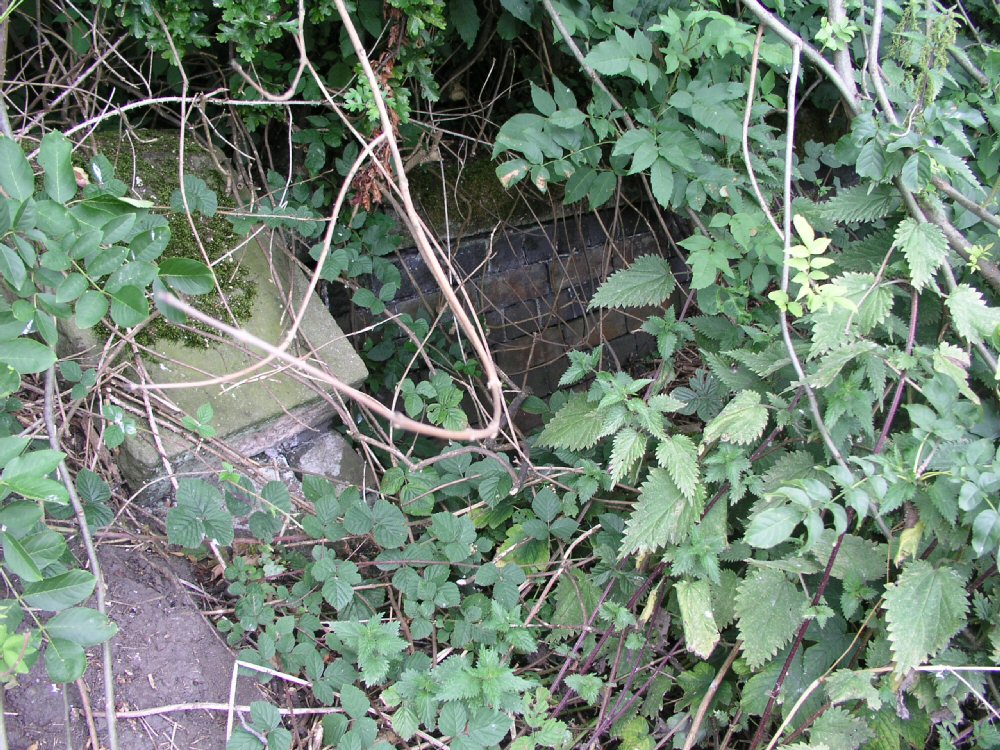
With all the redevelopment of Addingham's station site it is very difficult to get any sort of a feel for the original layout,
however poking about in the weeds revealed a possible location for the signalbox, shown in this picture. A
close up reveals a blue brick retaining wall set into the embankment which could well have
surrounded the signalbox, as pictured here shortly after closure (see behind the steps).
(c) Tim Warner.
|
|
|
|
These two views (L+R) show the approximate line of the railway from the platforms (where the photo was taken from) across the
road to the remaining stub of embankment, visible as a line in the centre of the picture - the retaining wall shown earlier.
I suppose this view roughly corresponds to this one of a diverted express.
(c) Tim Warner.
|
|
|
|
The main road can just be seen from this picture, passing the fisheries, and station house is just off the picture to the
right, so some comparison can be drawn with this 1966 photo.
(c) Tim Warner.
|
|
|
|
The bridge that crossed the railway at the Ilkley end of Addingham's goods yard is still in existence, pictured here with the
station site to the right of the picture, showing clearly how it has been built upon. Half of one of the abutments has been
demolished, but it would appear that the rest of the bridge is still in situ. An old view can be found
here.
(c) Tim Warner.
|
|
|
|
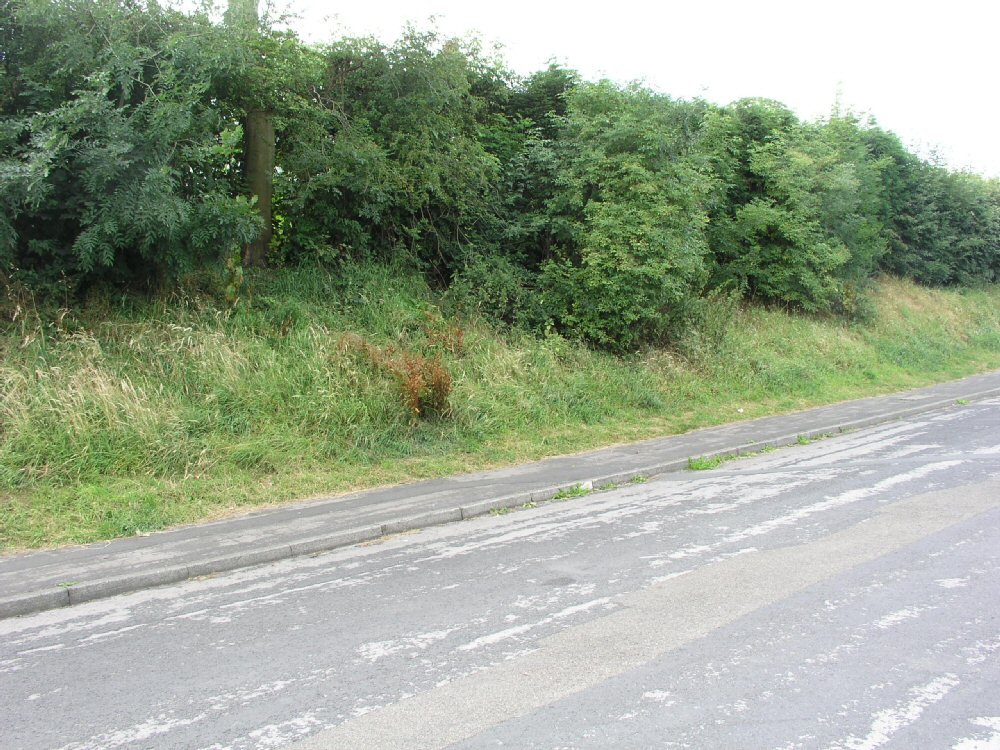
Looking towards Ilkley and away from the station site, te trackbed has been filled in up to the top of the cutting, but is
clearly discernable from the surrounding fields by the hedgeline on one side and weeds on the other. The line of bushes and
fencing in the distance marks Addingham's bypass cutting across the trackbed.
(c) Tim Warner.
|
|
|
|
Looking towards the bridge from Ilkley, and once more the redevelopment of the station site is clear, especially when
this view of the line just after closure is consulted.
(c) Tim Warner.
|
|
|


|


