
|
Embsay Shed Project
A lot has happened since the shed project first took off in the early 1990s. Initially, money was raised, concrete poured
and steelwork purchased and constructed, leaving the shell of a shed waiting to be clad. With the opportunity to acquire
Bolton Abbey station and build the extension in the mid 1990s, the project was put on hold. After Bolton Abbey was opened
in 1997, the Railway was working towards a Lottery bid which would have provided two conservation buildings and the Yorkshire
Industrial Locomotive Museum. Despite very favourable support from the advisors, this was turned down at the final hurdle,
and the Middleton Railway were successful with a very similar project. 2006 saw a turn around in fortunes with the successful
application for European funding for a much simplified shed project which will allow us to clad the entire structure, but not
complete all the interior works just yet. This will continue over the next few years and should see a mezanine floor put into
one section of the building and a fully fitted out workshop.
All being well, the cladding should be finished by Easter 2007. However, before the cladding can take place, the original
Midland Railway goods shed must be dismantled (for reconstruction at Bolton Abbey) and the rest of the steelwork put up, as
well as all the drainage being built, the ring beams being cast and the retaining wall for the yard constructed.
Wiring is underway
Machines are being serviced for installation int he machine shop.
The machine shop and mezzanine floor have been completed
The cladding is COMPLETE!
The doors have been installed
The first sections of the floor have been cast
The second section of retaining wall is COMPLETE
The purlins have been fitted.
The steelwork was completed successfully.
The ring beams have been cast.
The dismantling of the Midland Railway goods shed was completed on 28th January 2007.
The first section of the retaining wall is now complete.
It is hoped to open up the top yard area to the public once the various works are completed so that they can see more of the
rolling stock we have on the line. Ideas are being gathered together to this end and it is hoped that a number of items in
the Railway's collection will be installed here to add to the atmosphere.

This page will provide a pictoral record of the progress being made over the next few months. The previous contents of the
page can be found here for the time being.
Cladding - work has now been completed!
|
|
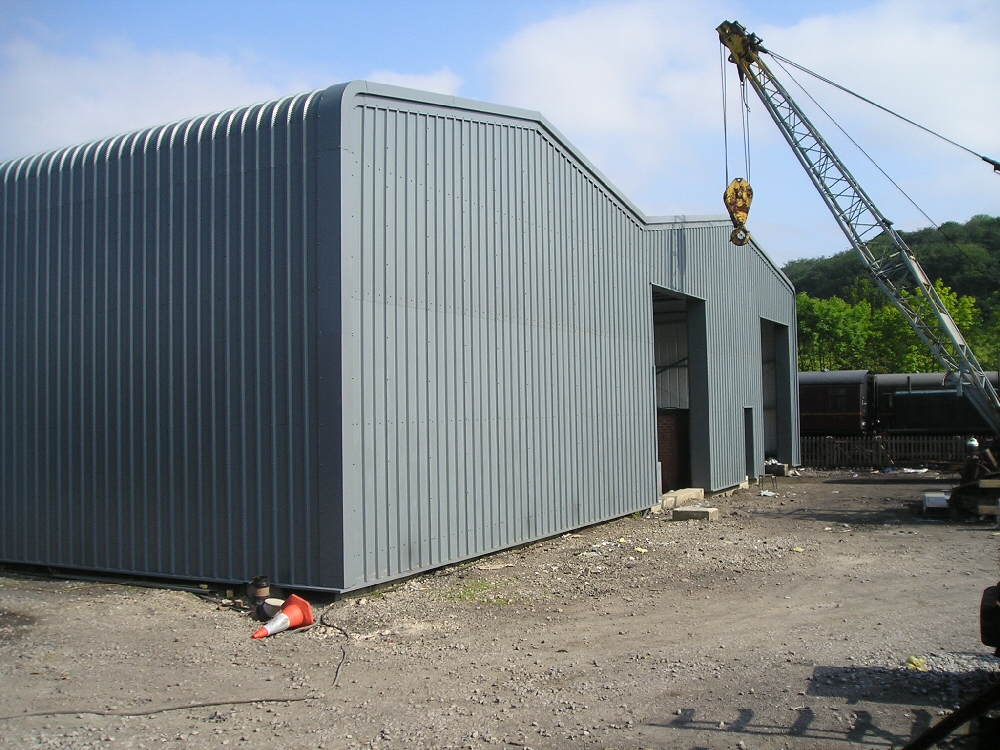
The external cladding is virtually complete in this view, with only the details to finish. The next step will be the installation of the doors.
(c) Tim Warner.
|
|
|
|
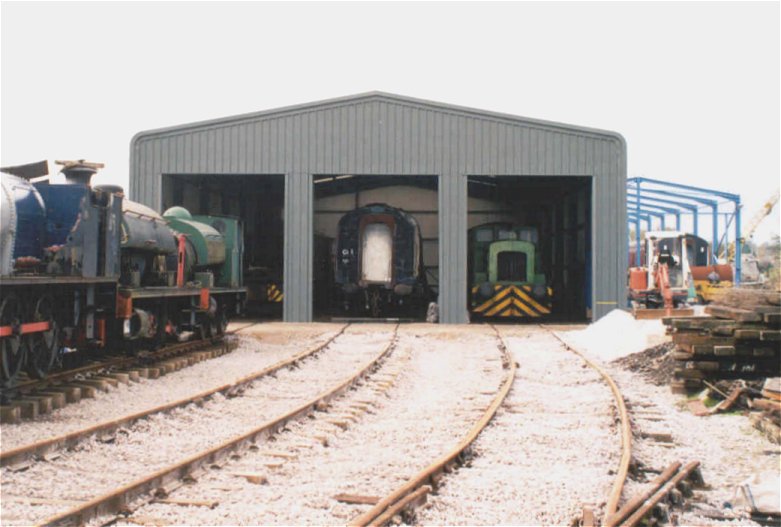
Looking from the corner of the two-road shed across the end - five roads wide in all.
(c) Tim Warner.
|
|
|
|
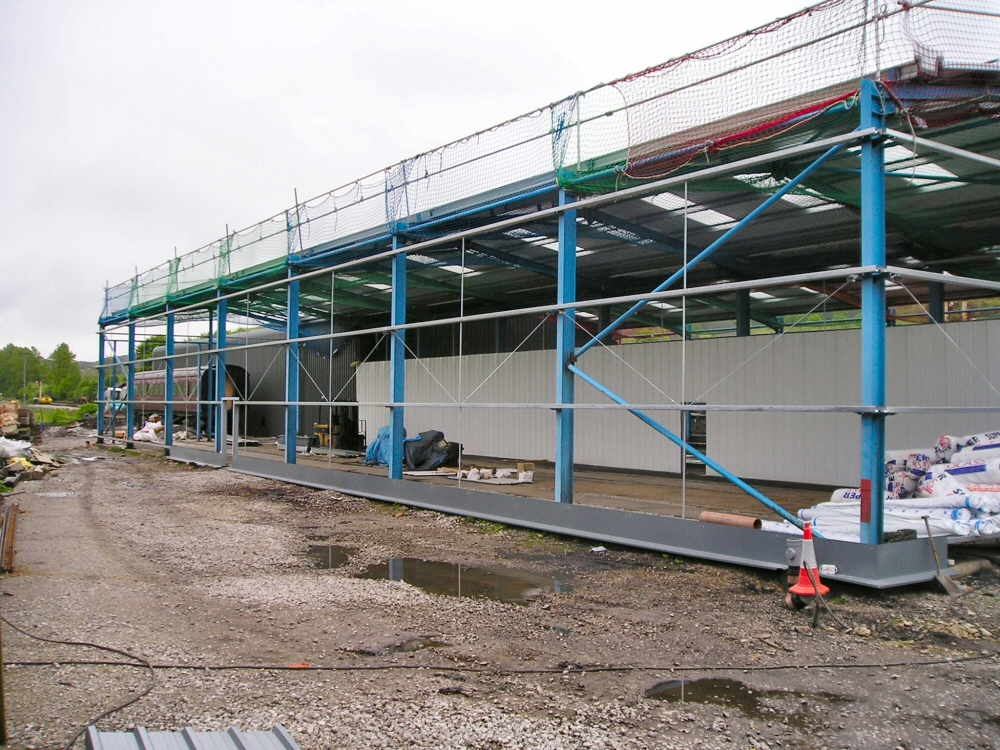
The external cladding is beginning to take shape alongside the main line, with the layer of insulation visible between the two.
(c) Tim Warner.
|
|
|
|
The inner layer of cladding is virtually complete in this view from the signalbox.
(c) Tim Warner.
|
|
|
|
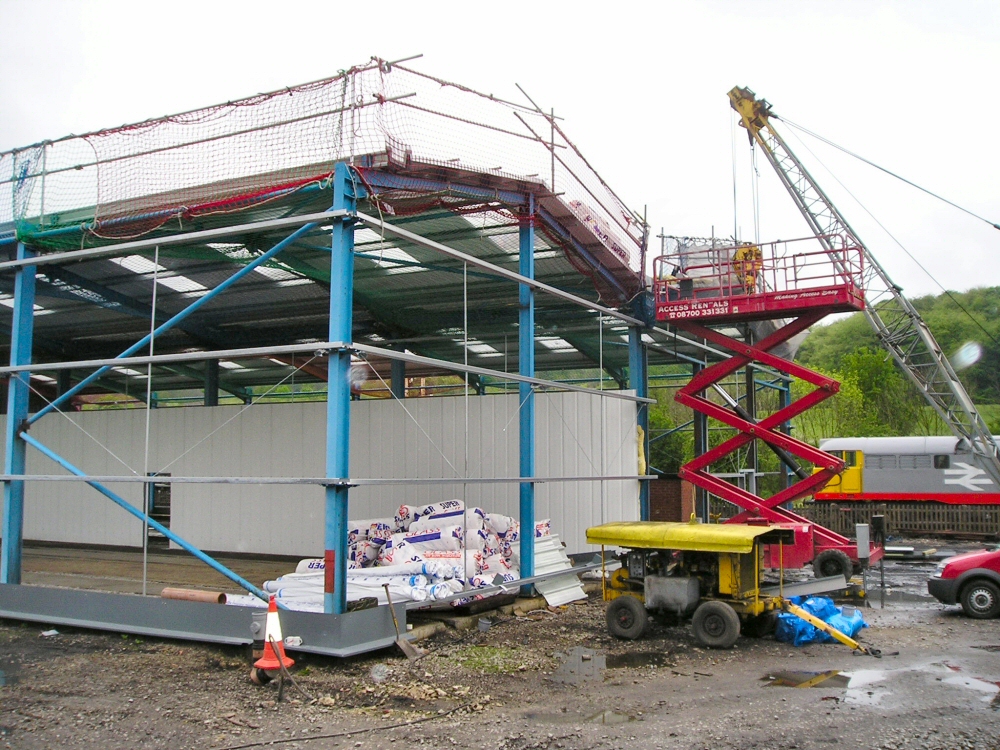
This pair of photos shows the progress made of the last couple of weeks with the shed. This picture shows the purlins in
place around the shed, almost ready for cladding to start.
(c) Tim Warner.
|
|
|
|
The purlins have been completed, entrance / exit door frames installed and cladding started.
(c) Tim Warner.
|
|
|
|
Looking along the 2-road building of the shed showing the roofing well underway and the wall between the two buildings coming
together nicely.
(c) Tim Warner.
|
|
|
|
Another photograph of the corner of the shed, taken from where the '6th road' will eventually be located.
(c) Tim Warner.
|
|
|
|
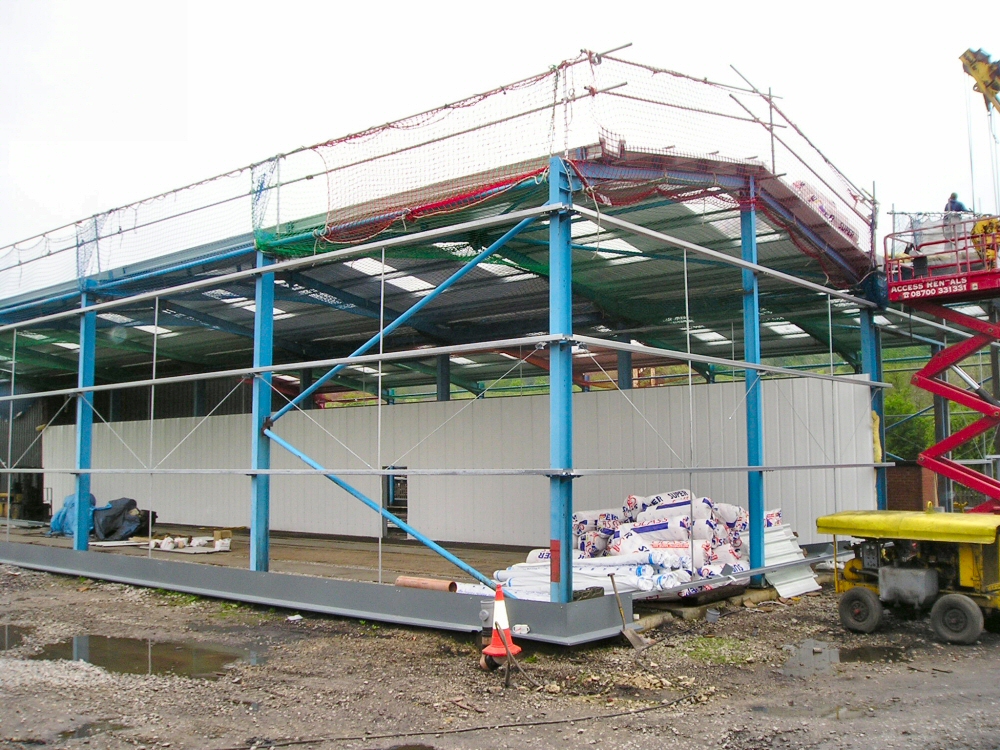
Looking across the carpark end of the shed showing how the cladders have access to the roof.
(c) Tim Warner.
|
|
|
|
The completed purlins are clearly seen here, and the gutters can just about be made out.
(c) Tim Warner.
|
|
|
|
Inside the main part of the shed where the workshop will be located, the floorplan of the goods shed can just about be made
out (the concrete on the floor). Holes have been cut through the cladding of the older part of the 'new shed' so that the
purlins can be joined up and attached to the rest of the steelwork.
(c) Tim Warner.
|
|
|
|
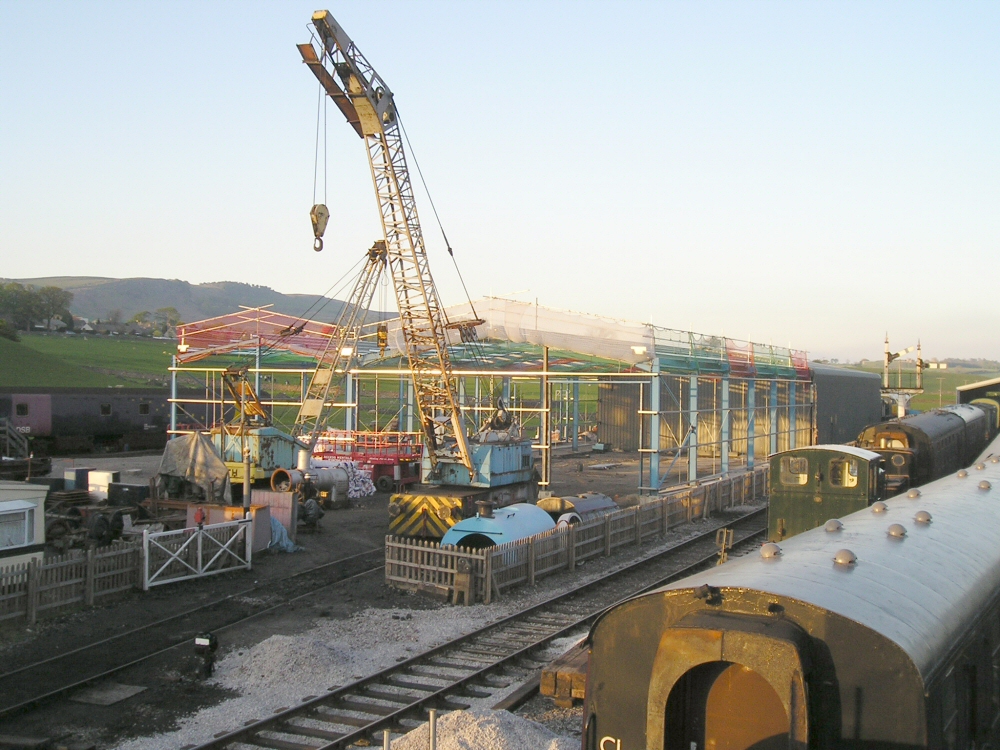
Although not strictly cladding, this photo shows the near-completion of the blue steelwork with just minor adjustments and
the rest of the wind bracings being required before the structure is ready for cladding.
(c) Tim Warner.
|
|

Dismantling the Goods Shed - Most recent photos first
|
|
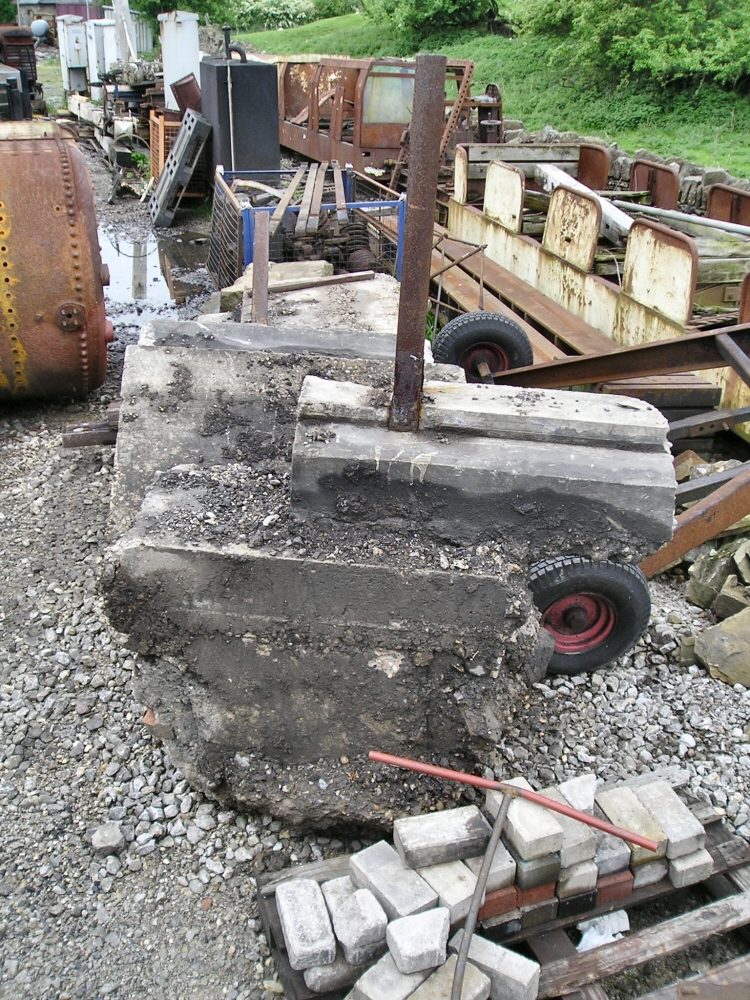
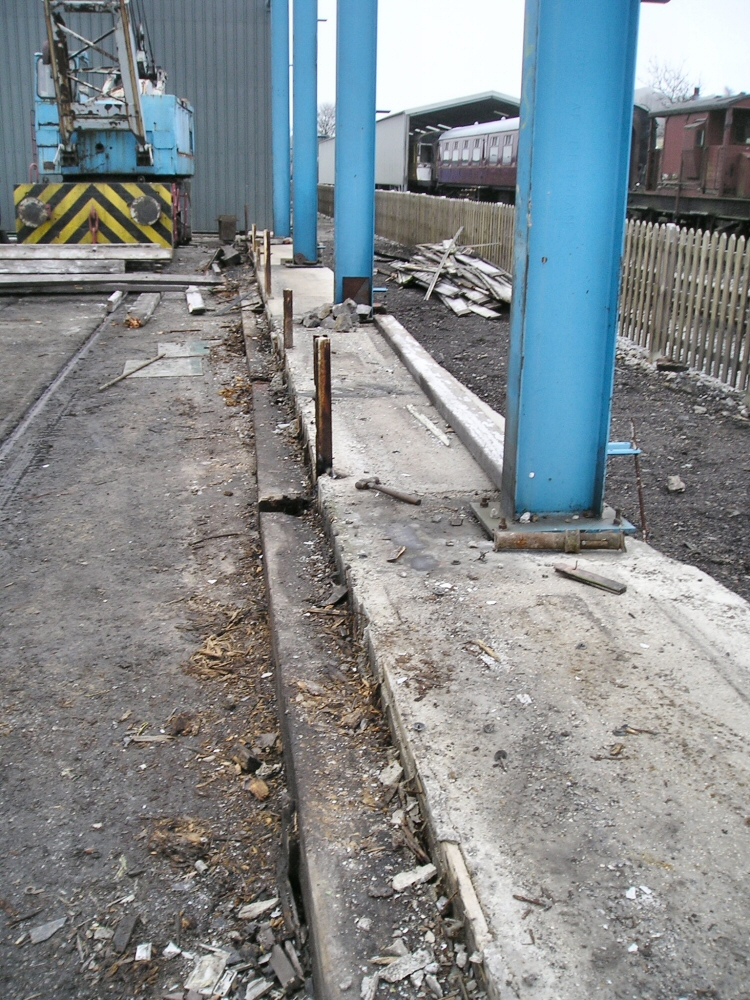
The BR repairs to the shed proved to be far more substantial than anyone thought - these are the concrete foundations hidden
under the flimsy ring beam for the sections of rail which latterly supported the wooden uprights.
(c) Tim Warner.
|
|
|
|
|
It's down!
(c) Tim Warner.
|
|
|
|
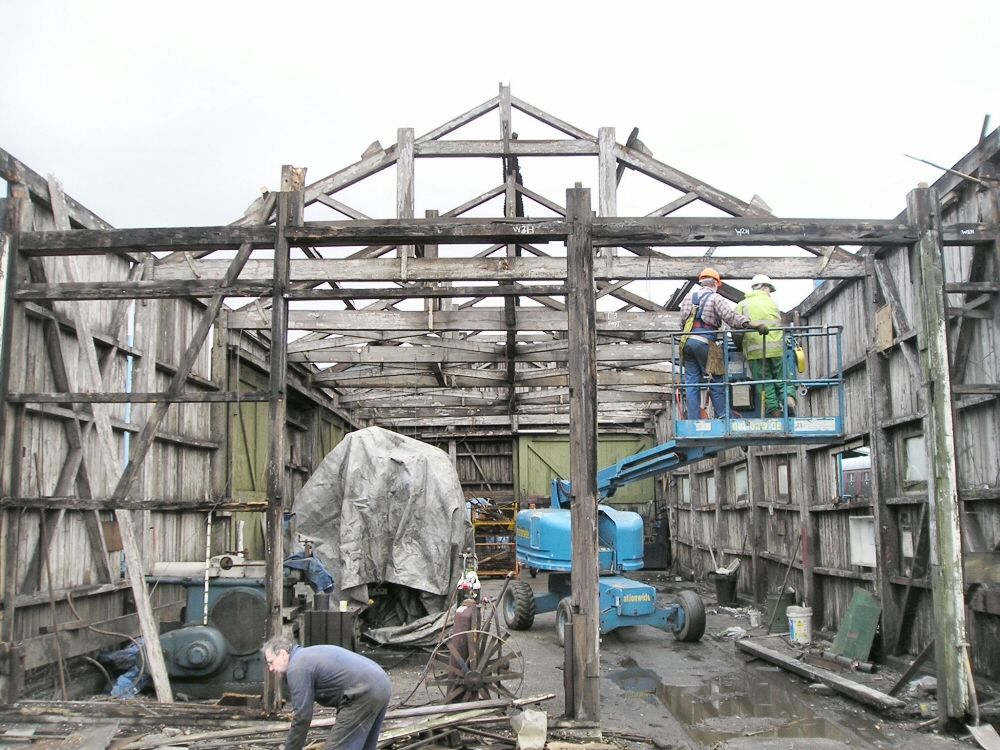
The goods shed has gone! Looking through the former location of the goods shed reveals the end wall of the 'new' shed.
(c) Tim Warner.
|
|
|
|
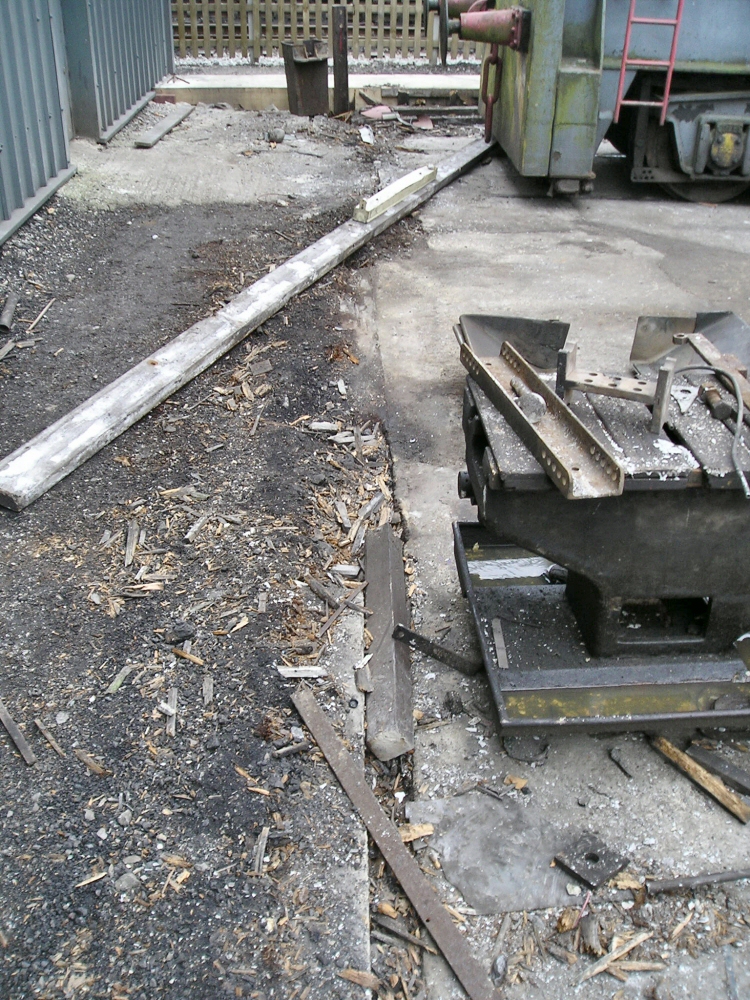
A closeup of the South side of the old shed showing the remains of the wooden framing that joined the bases of the uprights,
as well as the lengths of rail that used to strengthen the uprights after they had rotted off below ground level!
(c) Tim Warner.
|
|
|
|
The location of the (East) end wall of the shed with the new shed's end wall also visible.
(c) Tim Warner.
|
|
|
|
The concrete footings (1950s BR repairs) for the North West corner of the shed with the last remnant of the internal platform
also visible. This will be dismantled as well and moved to Bolton Abbey for reuse in the rebuilt structure.
(c) Tim Warner.
|
|
|
|
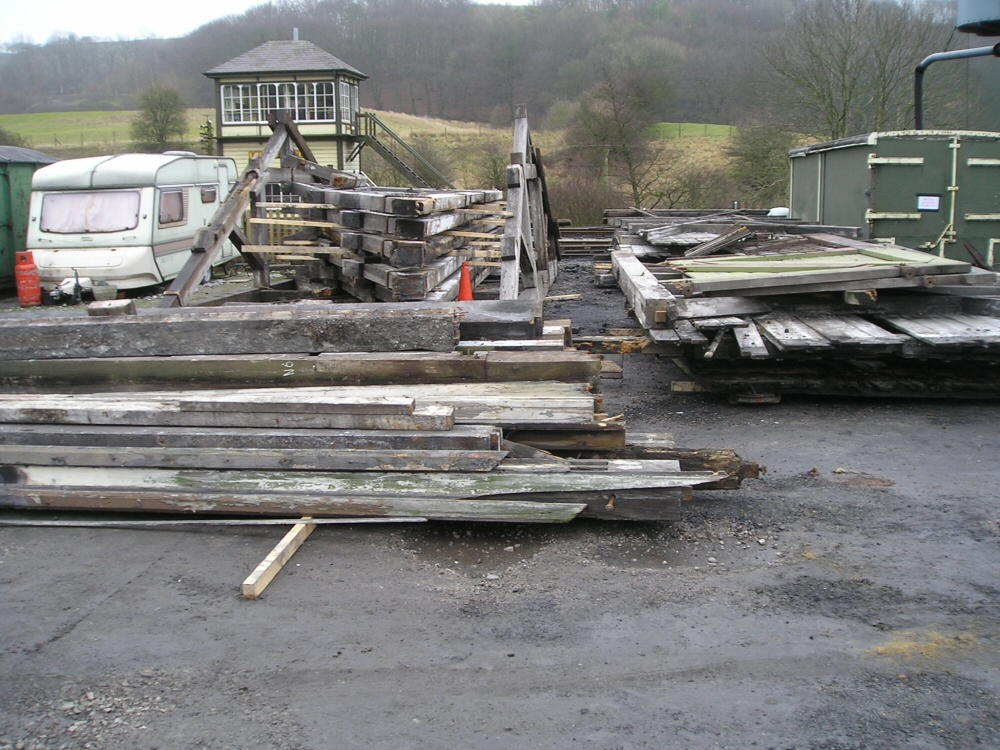
Some of the components stacked up in the car park waiting to be loaded up for transport to Bolton Abbey by rail.
(c) Tim Warner.
|
|
|
|
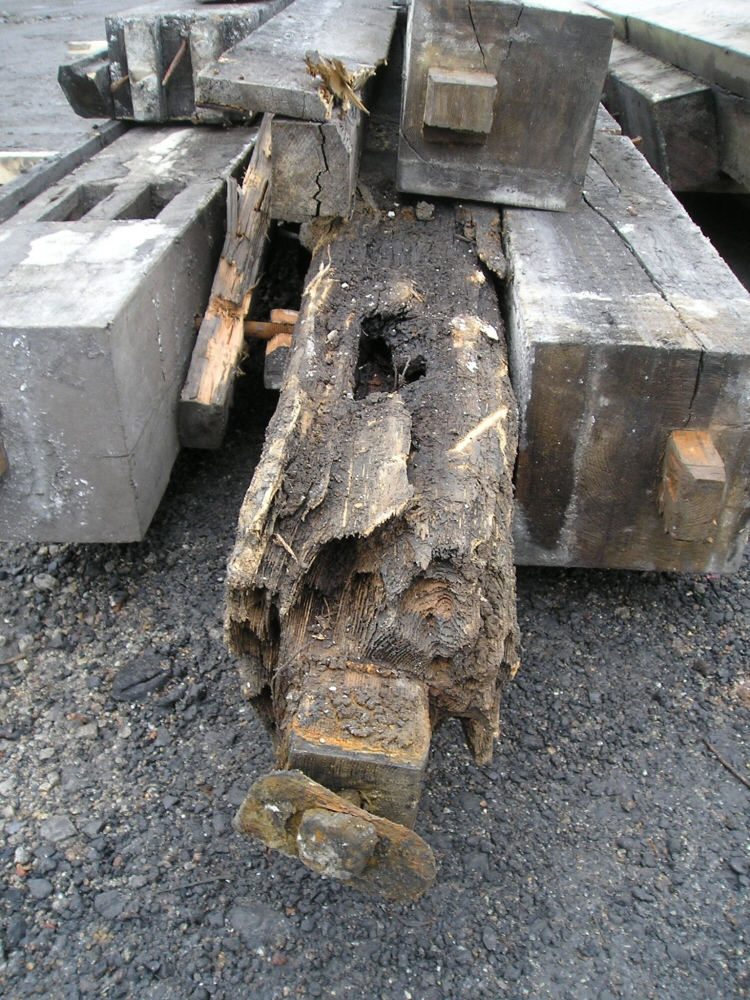
A close up of some of the uprights showing the contrast in conditions. The tops are all excellent, but the bottoms are another
story where they were buried in the ground. The one bottom visible is probably the most complete one found! The rebuilding
will see the shortened uprights supported on another structure...
(c) Tim Warner.
|
|
|
|
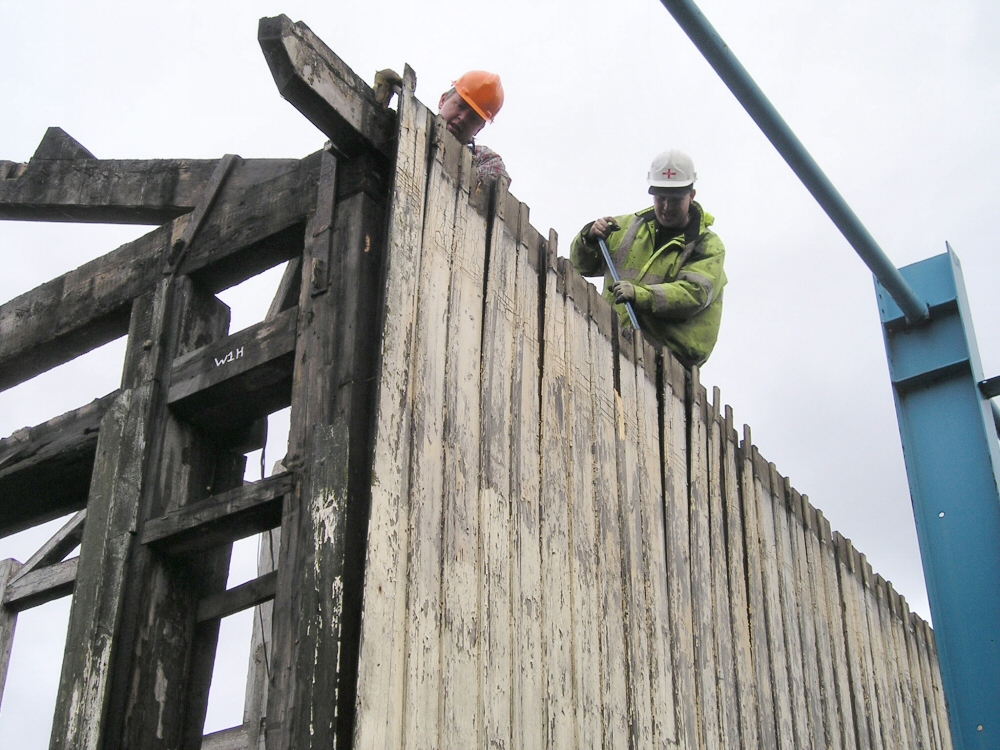
The initial way of dismantling the sides was to lift out panels whole, but as we continued a quicker method was found: to
strip off the cladding and lift out the crosspieces. As these are all identical there is no need to worry about exactly
where they go back. It also means the components stack down in a smaller space - useful when they are to be transported by
rail!
(c) Tim Warner.
|
|
|
|
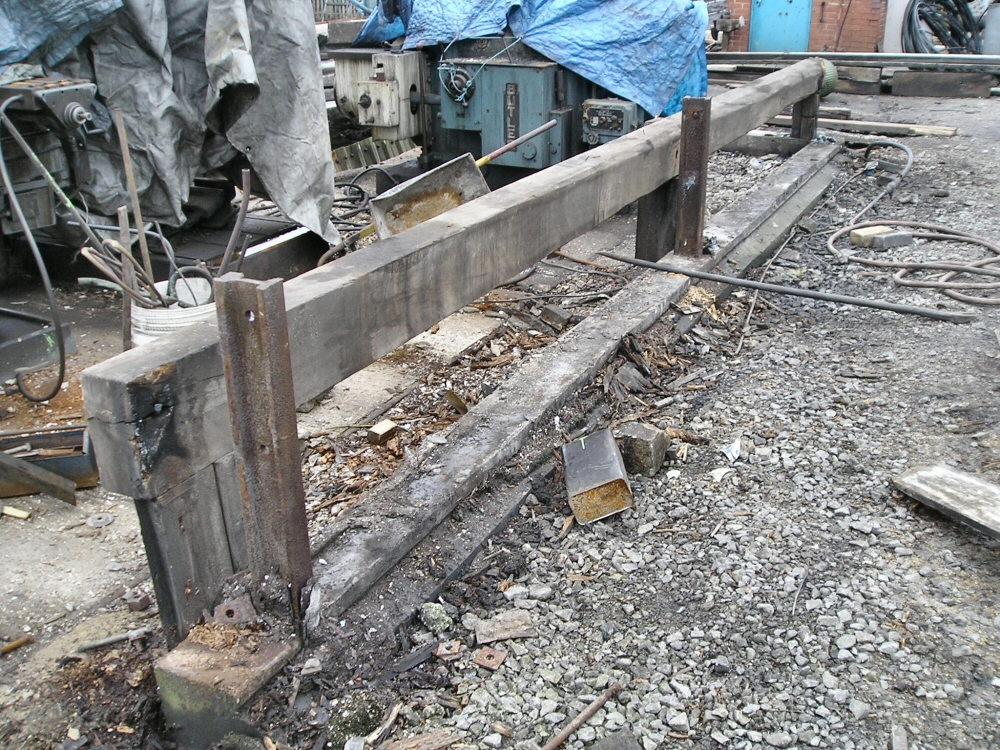
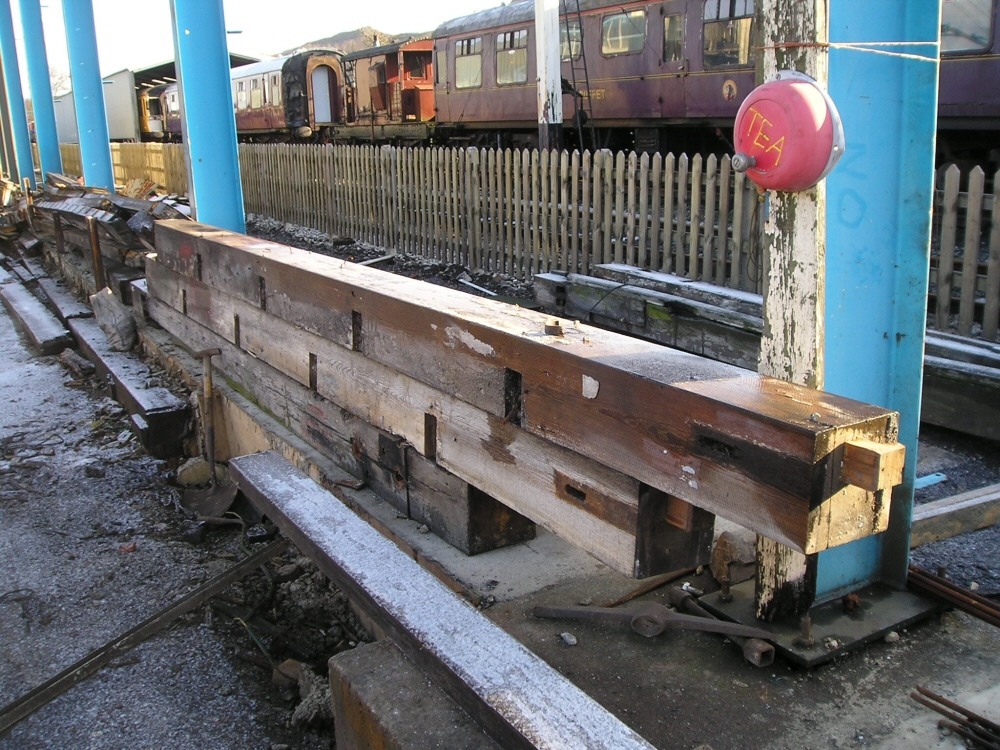
The uprights stacked on one of the new ring beams beside the 'tea' bell(!) - made redundant from its original role with this
project!
(c) Tim Warner.
|
|
|
|
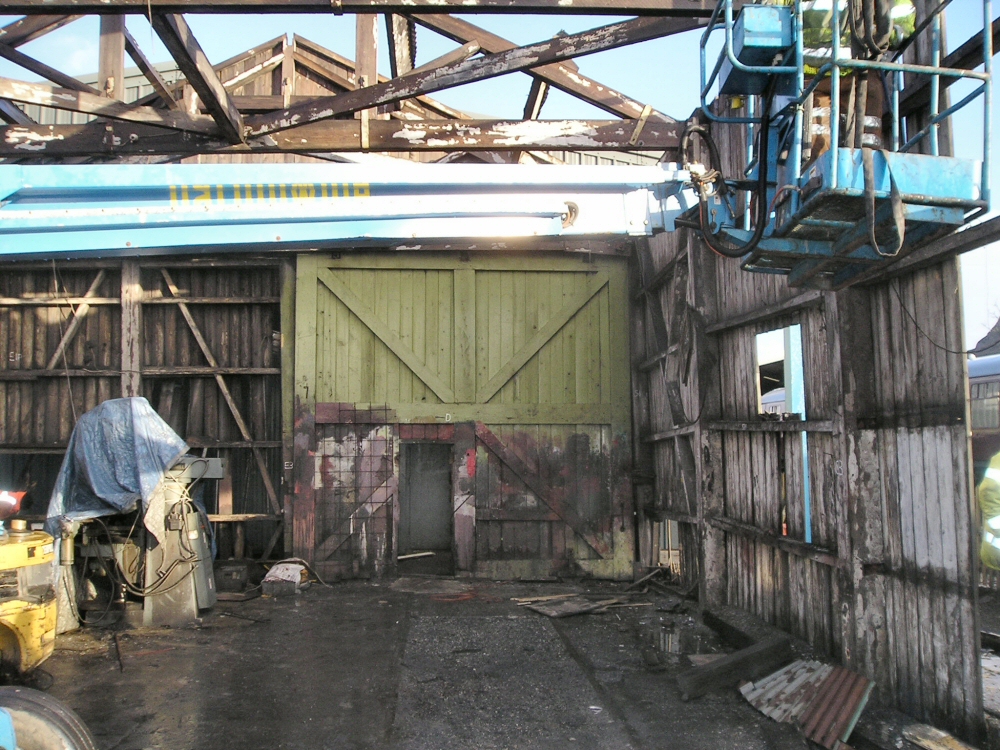
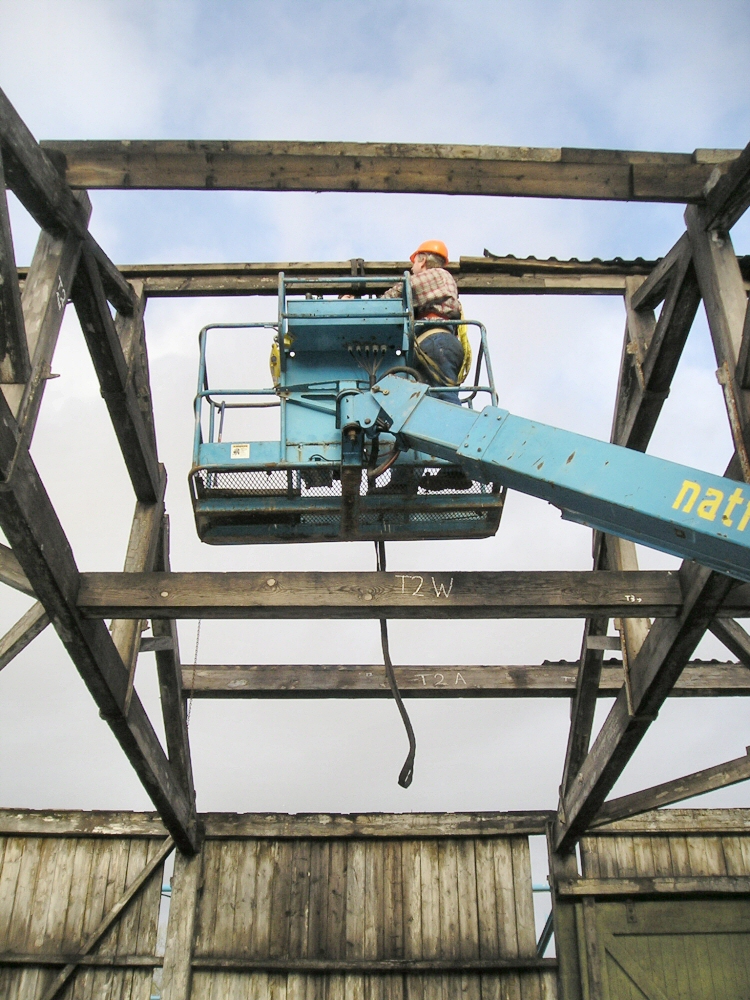
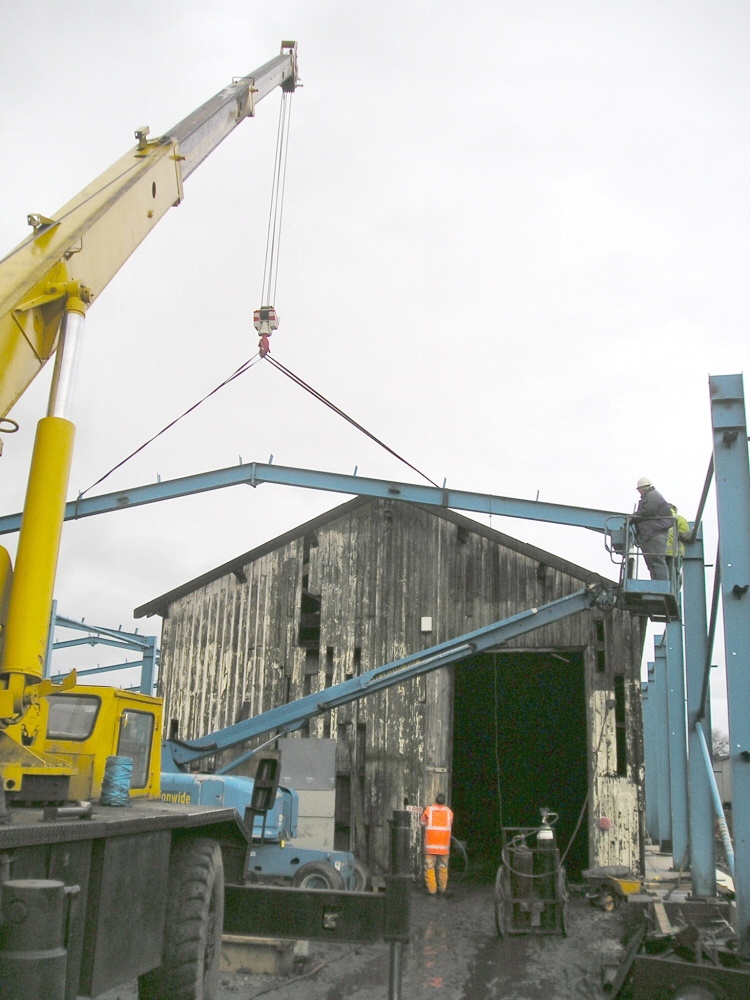
The cherry picker's reach is used to good effect getting across to dismantle the panels and prepare the next upright for
lifting out. The pit has been filled in with compacted ash to allow contractors' vehicles (and ours) safe passage when
cladding (and dismantling). The white patches on the woodwork are the remains of paint - possibly whitewash?
(c) Tim Warner.
|
|
|
|
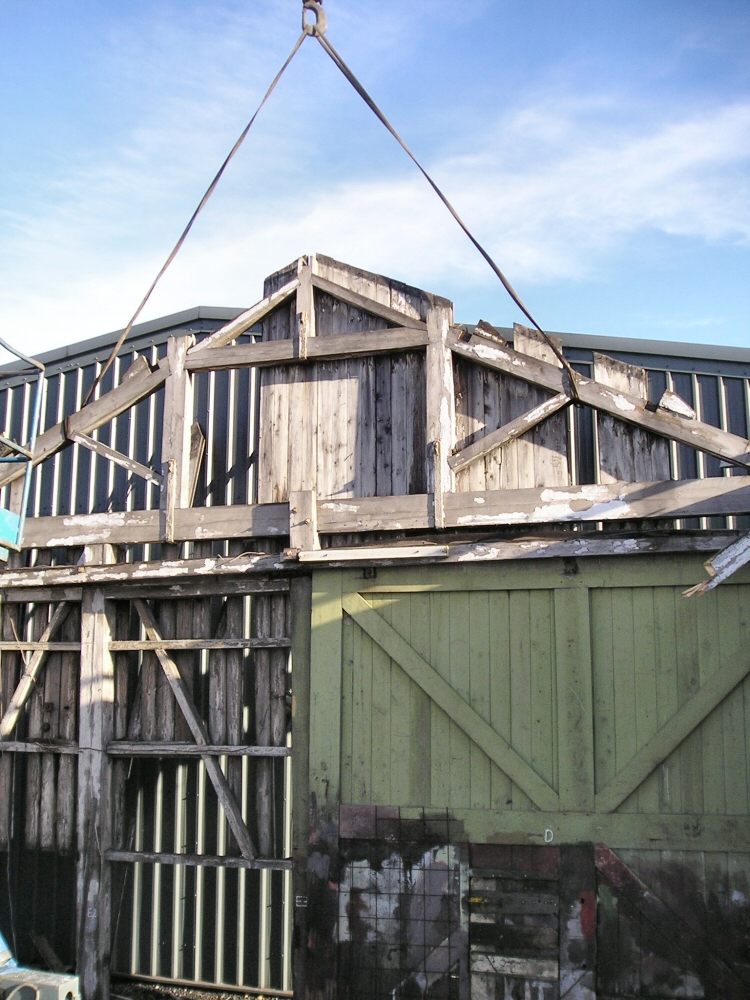
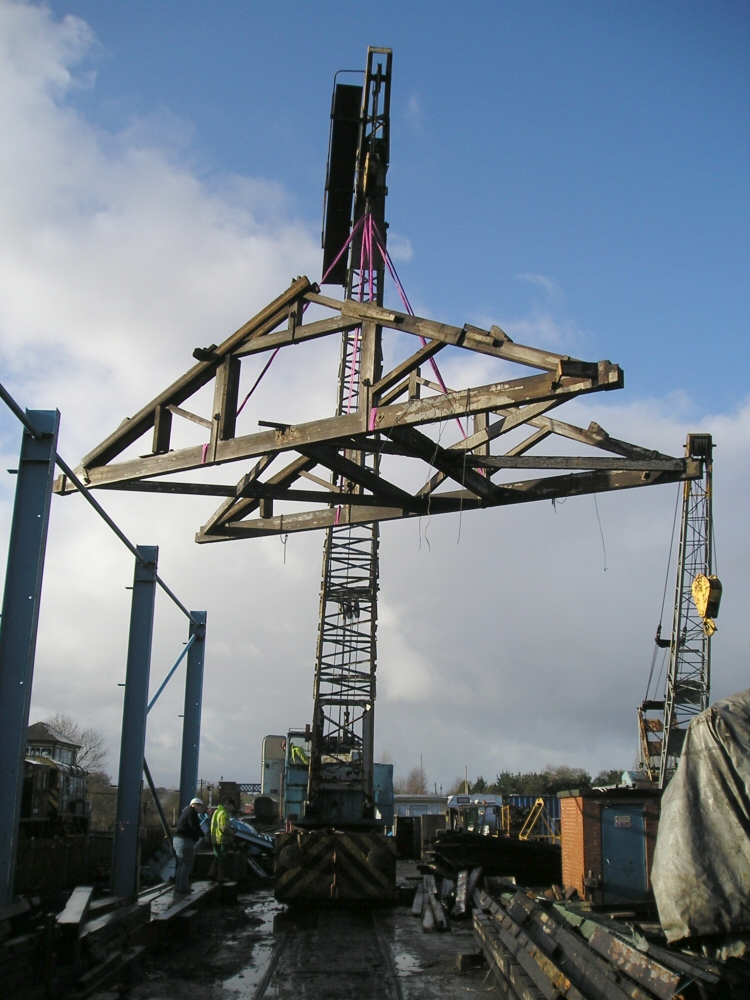
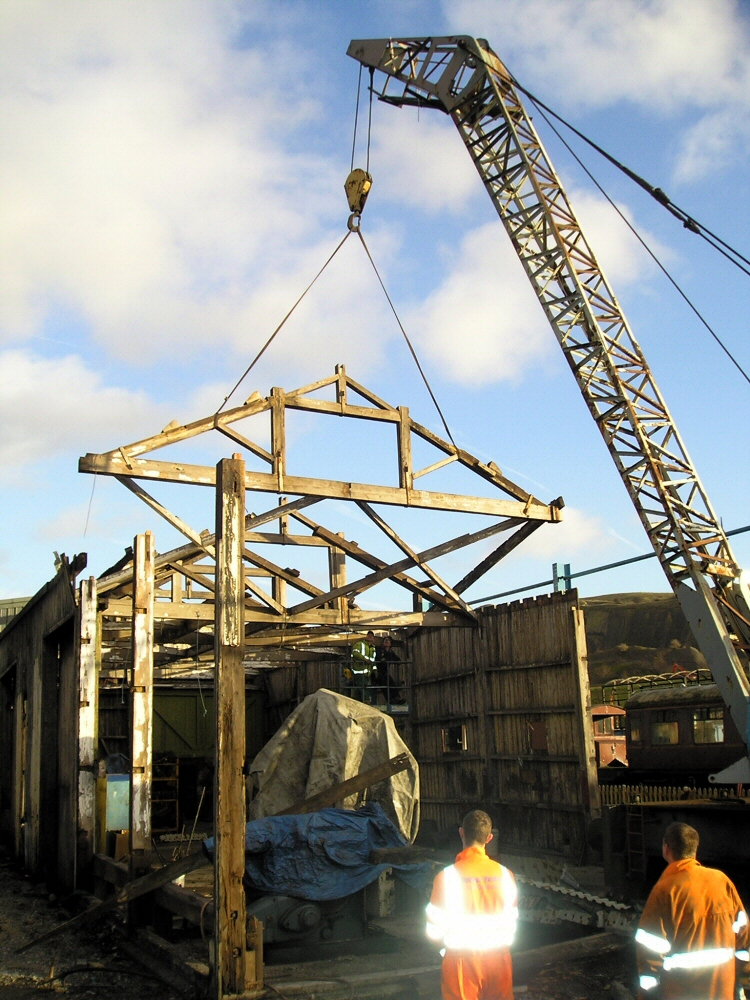
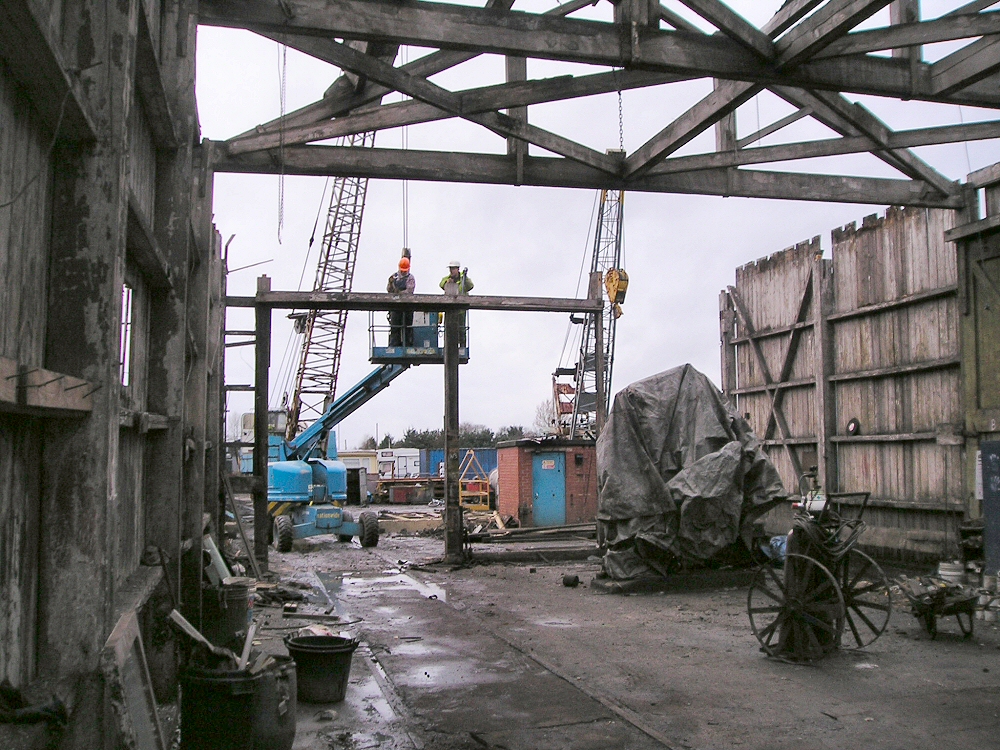
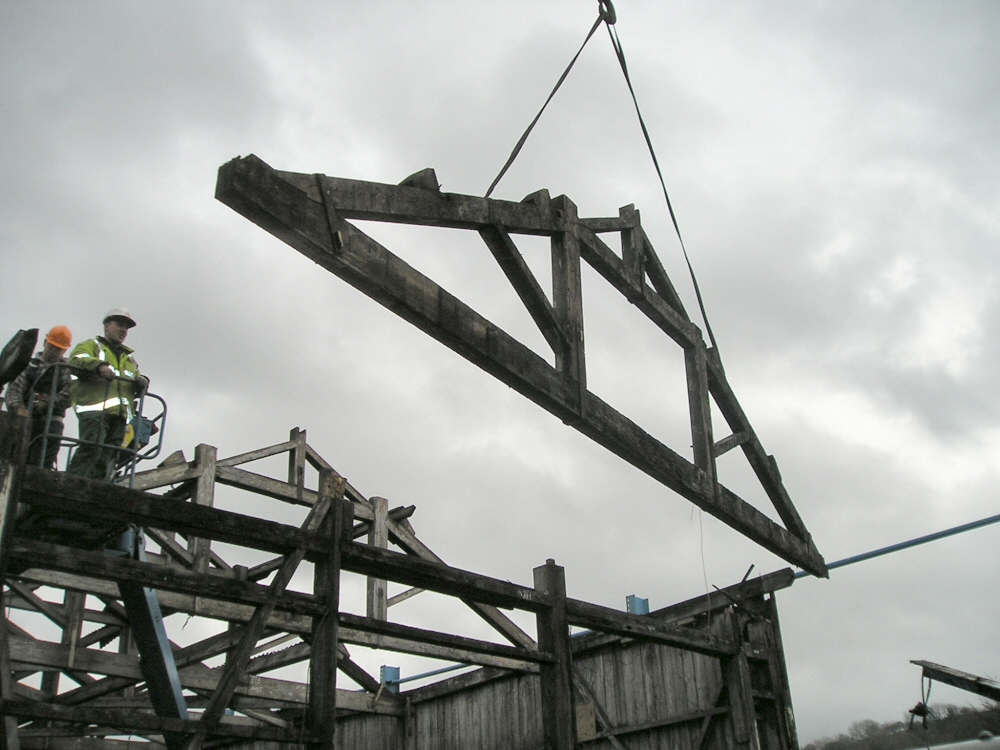
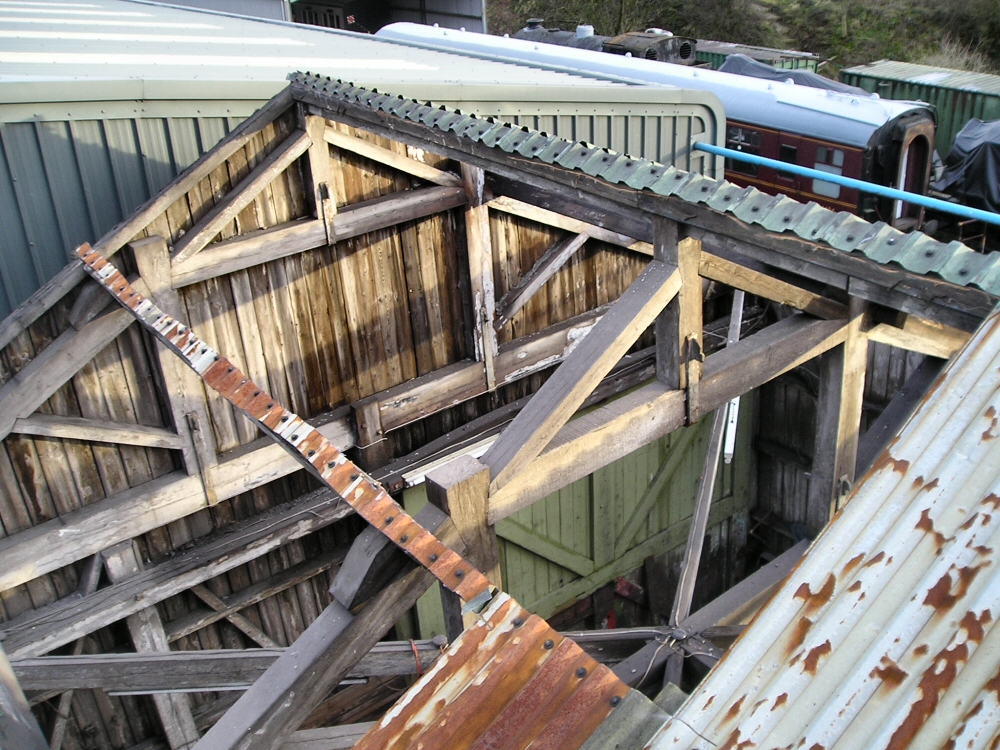
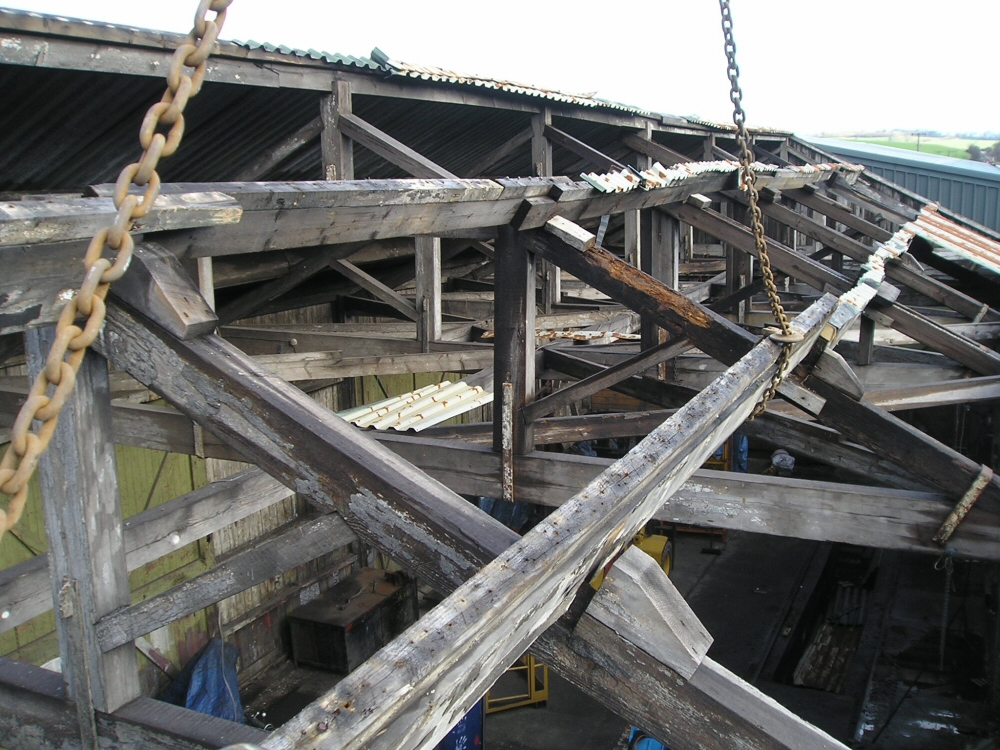
From the previous picture almost all the rest of the roof timber has been removed, with the last truss being supported by
the crane for stability. A lot of the wooden cladding has been removed for re-use from the end revealing the new shed.
(c) Tim Warner.
|
|
|
|
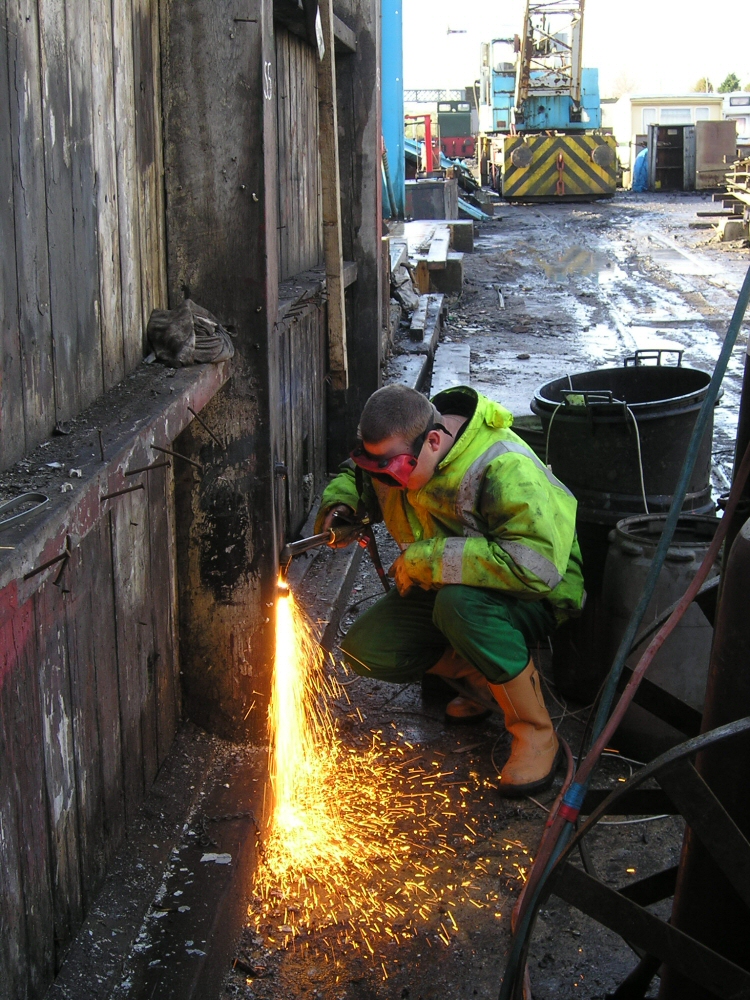
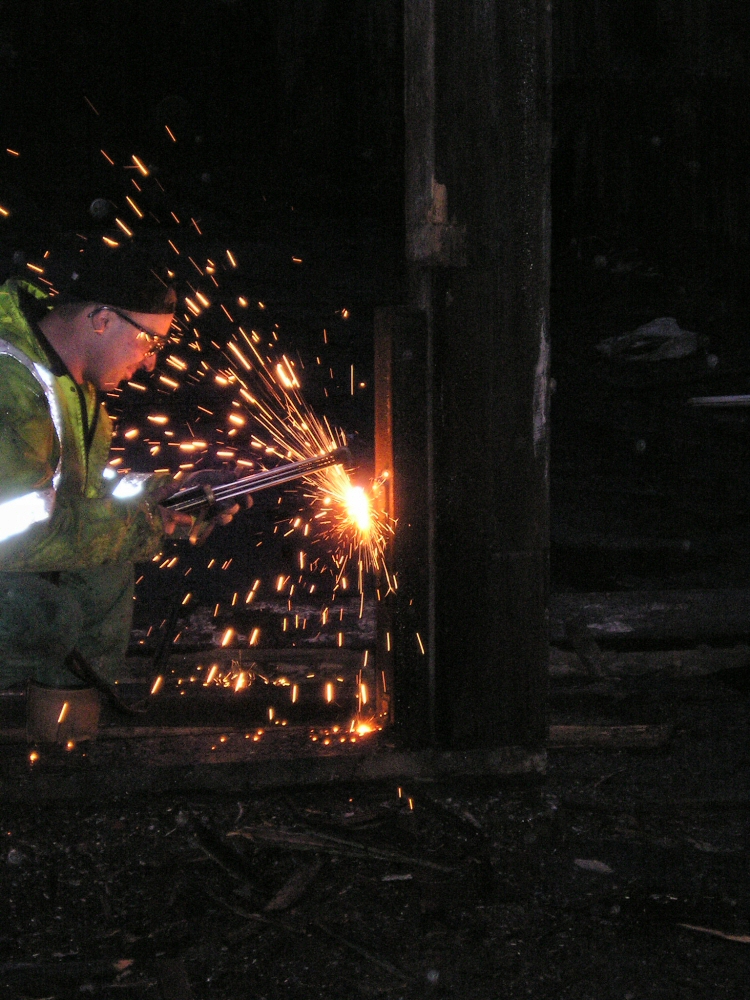
Burning through more nuts before drifting out the bolts holding the uprights to the supporting lengths of rail.
(c) Tim Warner.
|
|
|
|
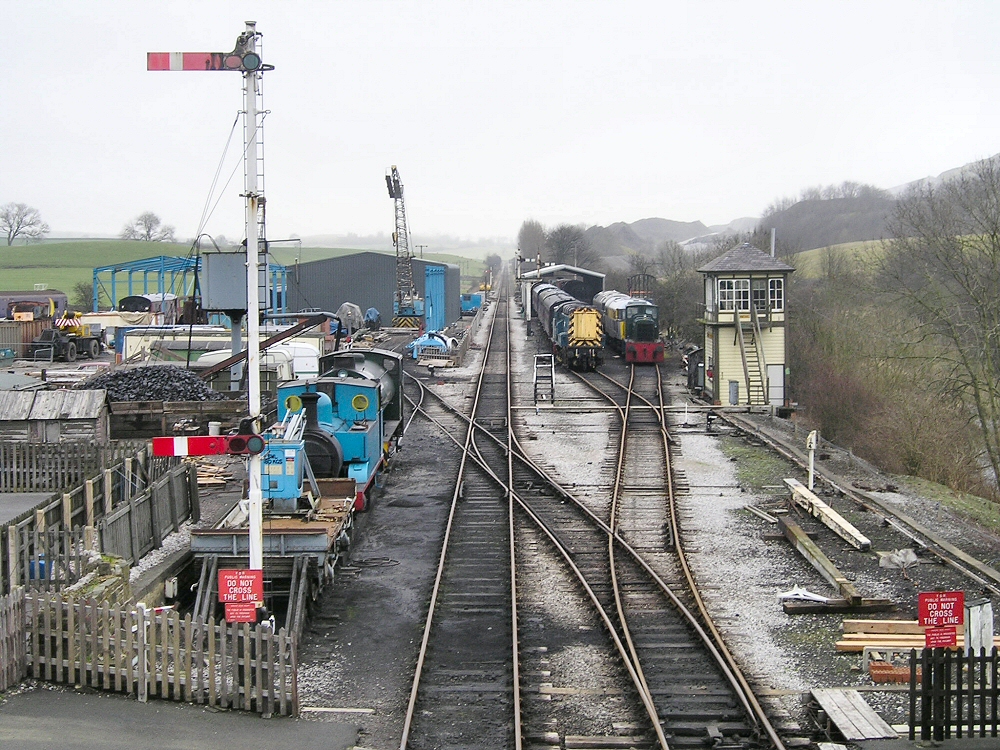
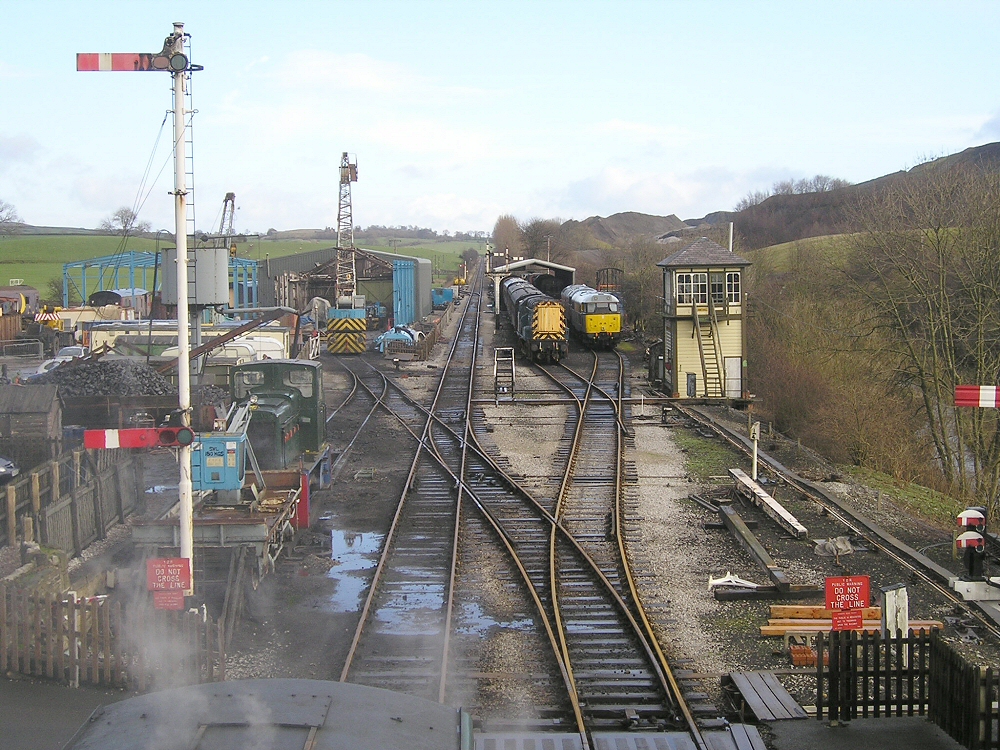
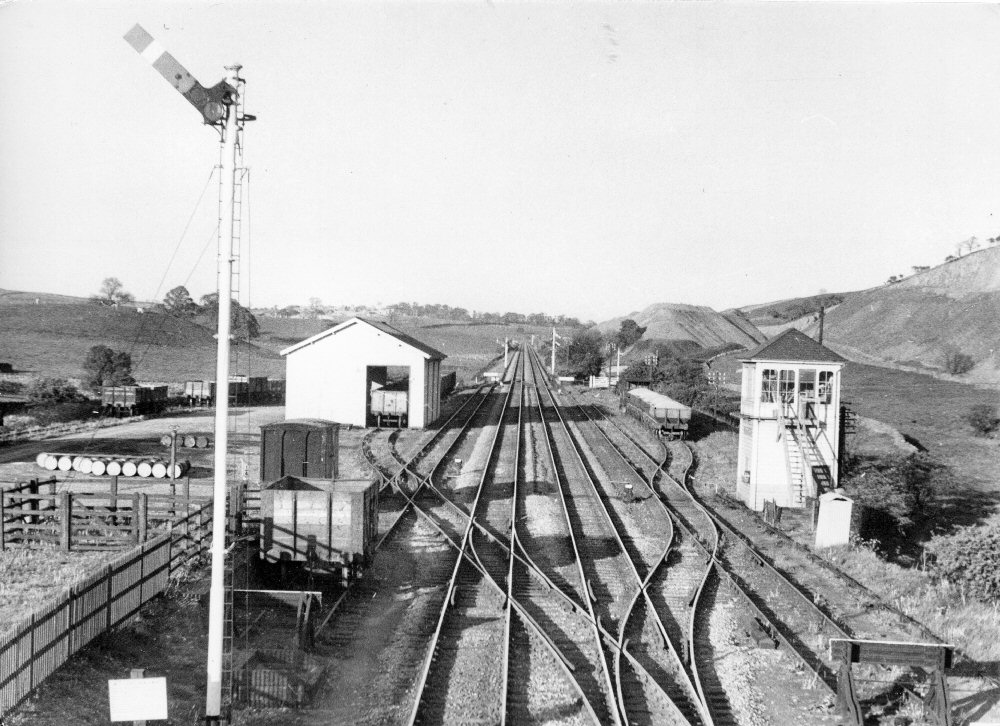
A view from the footbridge taken for comparison with THIS ONE from 1959.
(c) Tim Warner.
|
|
|
|
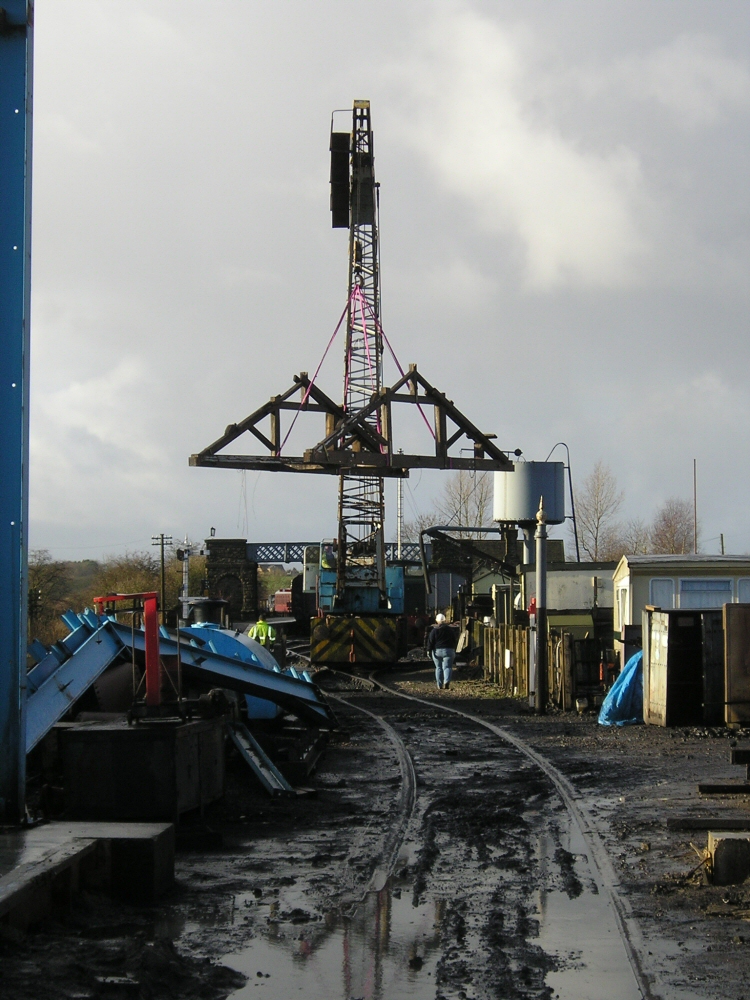
The pair of trusses either side of where the crane was formerly located were lifted out as a pair with all their bracings
intact to save time trying to dismantle them up in the air.
(c) Tim Warner.
|
|
|
|
They were then taken down to where the rest of the trusses were being stacked.
(c) Tim Warner.
|
|
|
|
Another truss comes out...
(c) Tim Warner.
|
|
|
|
...and one of the two side doors is lowered safely to the ground with the aid of a fork truck.
(c) Tim Warner.
|
|
|
|
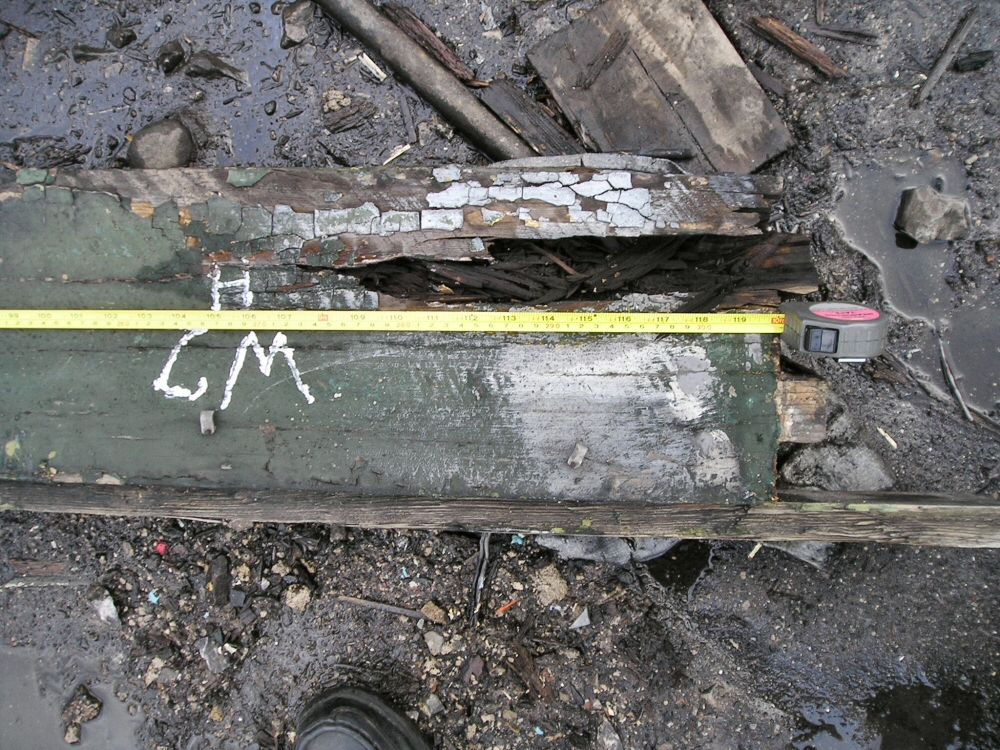
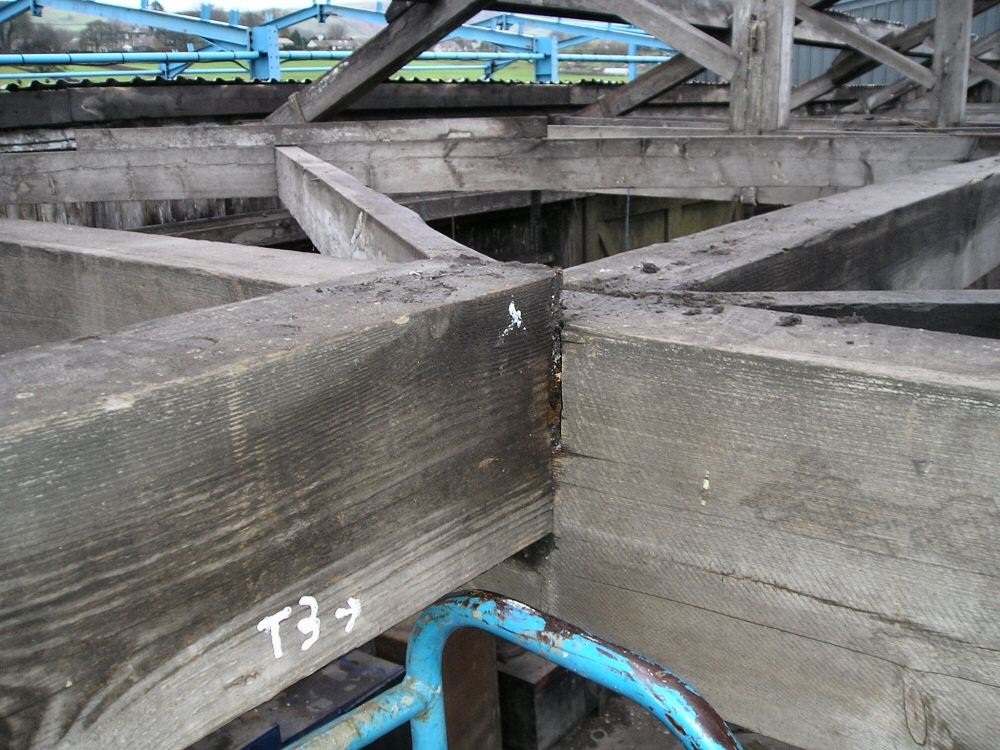
When some of the woodwork was lifted down it became obvious that it would not be suitable for re-use, as can be seen with
this piece "W2H" which was measured and recorded.
(c) Tim Warner.
|
|
|
|
Looking along the top of the building towards the new shed during the dismantling process.
(c) Tim Warner.
|
|
|
|
Although it IS a wooden shed, the main uprights were attached to lengths of rail. The bolts on one such upright are being cut
through whilst the timber was supported from the crane. Originally the uprights were long lengths buried in the ground, but
with time they rotted somewhat, hence the BR modification!
(c) Tim Warner.
|
|
|
|
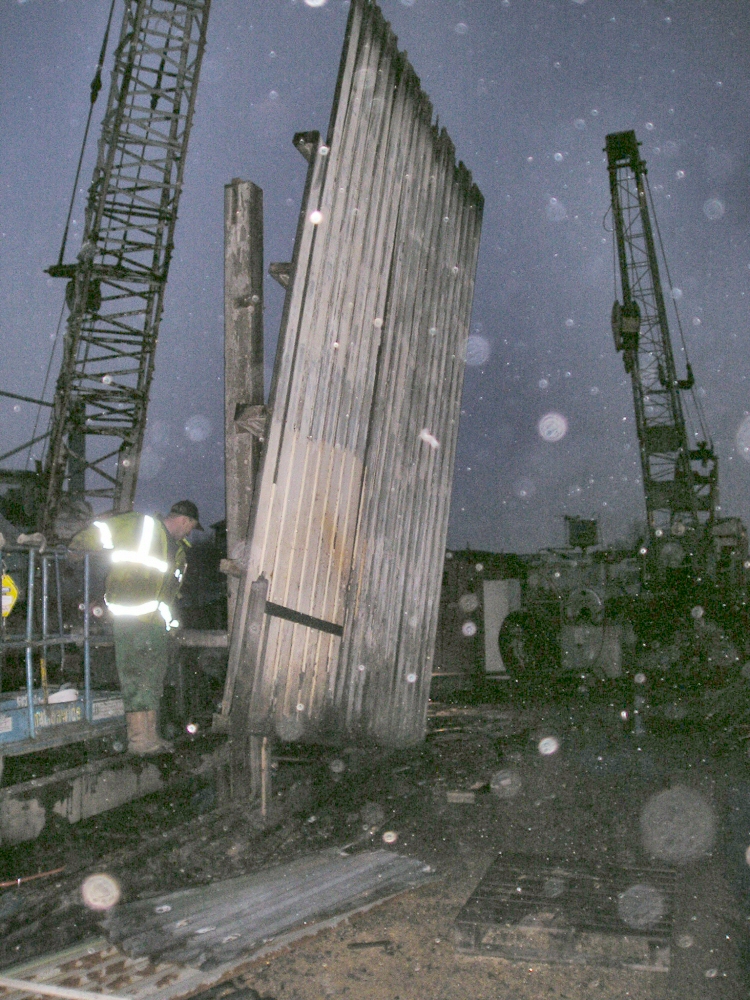
Last thing the panels on one side for the first two bays of the shed were lifted out after they had been separated from the
uprights.
(c) Tim Warner.
|
|
|
|
A view from the North side with the second truss about to be lifted out. The gaps in the side are where the cladding has been
removed to get at the joints where the side panels are attached to the uprights.
(c) Tim Warner.
|
|
|
|
Removing the door runner channel showing that the West end has very little structure remaining. When dismantling this, it
became apparant that BR (?) had carried out some replacement of timbers at this end as they didn't match up with anything
else. A concrete plinth had also been built upon which the shed stood.
(c) Tim Warner.
|
|
|
|
The first truss lifts away from the building - just before lunch!
(c) Tim Warner.
|
|
|
|
With the first truss out of the way and the cladding removed from the West end of the shed, progress is being made. The West
end has been subjected to most of the weather, and consequently was in the worst condition of any part. Most of the timber
from here is unfit for reuse.
(c) Tim Warner.
|
|
|
|
Making sure everything is ready move - slinging the central ridge timber ready for lifting to release the first truss...
(c) Tim Warner.
|
|
|
|
...and making some minor adjustments to the plan to get the trusses out from under the eaves of the building!
(c) Tim Warner.
|
|
|
|
The start of the second day of the dismantling using hte railcrane, and another purlin is lifted out.
(c) Tim Warner.
|
|
|
|
During the numbering process we discovered that some of the bracings were held in place by gravity!
(c) Tim Warner.
|
|
|
|
Attached to the basket with relevant fall-protection and a harness, Dave tackles the rather rusty roof sheets with one of
his 'toys'!
(c) Tim Warner.
|
|
|
|
Working back the other way, on solid roof, the next sections are removed.
(c) Tim Warner.
|
|
|
|
After craning out the first door, work turned to removing the rest of the roofing (on the North side). Seen here from the
basket of the cherry picker looking West towards the station...
(c) Tim Warner.
|
|
|
|
...and East towards the rest of the shed complex.
(c) Tim Warner.
|
|
|
|
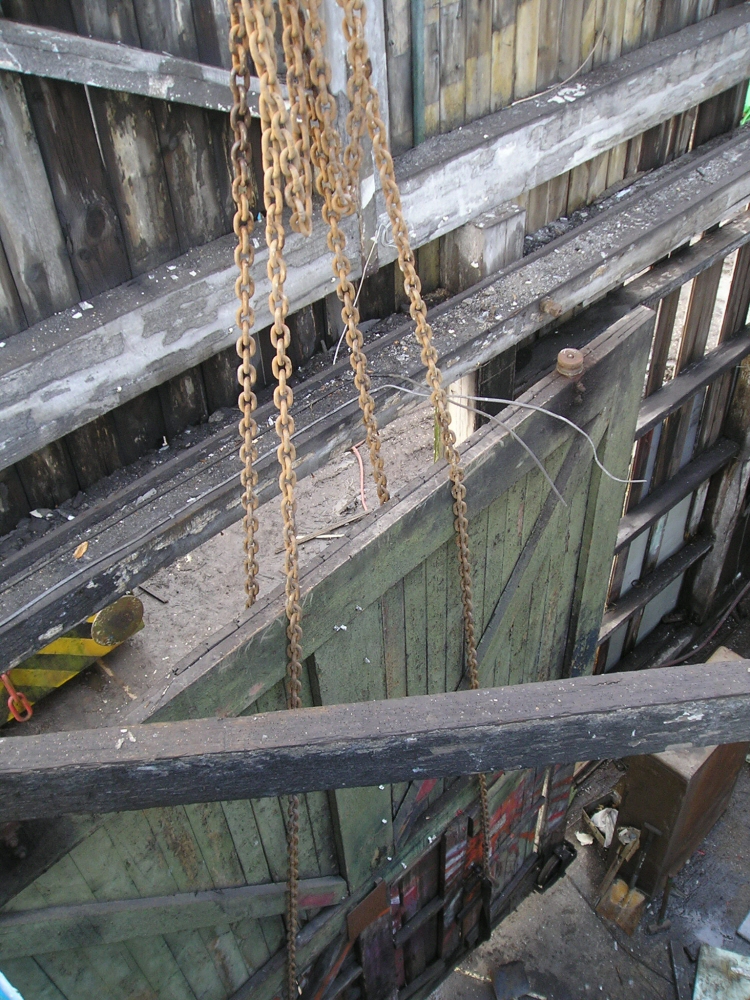
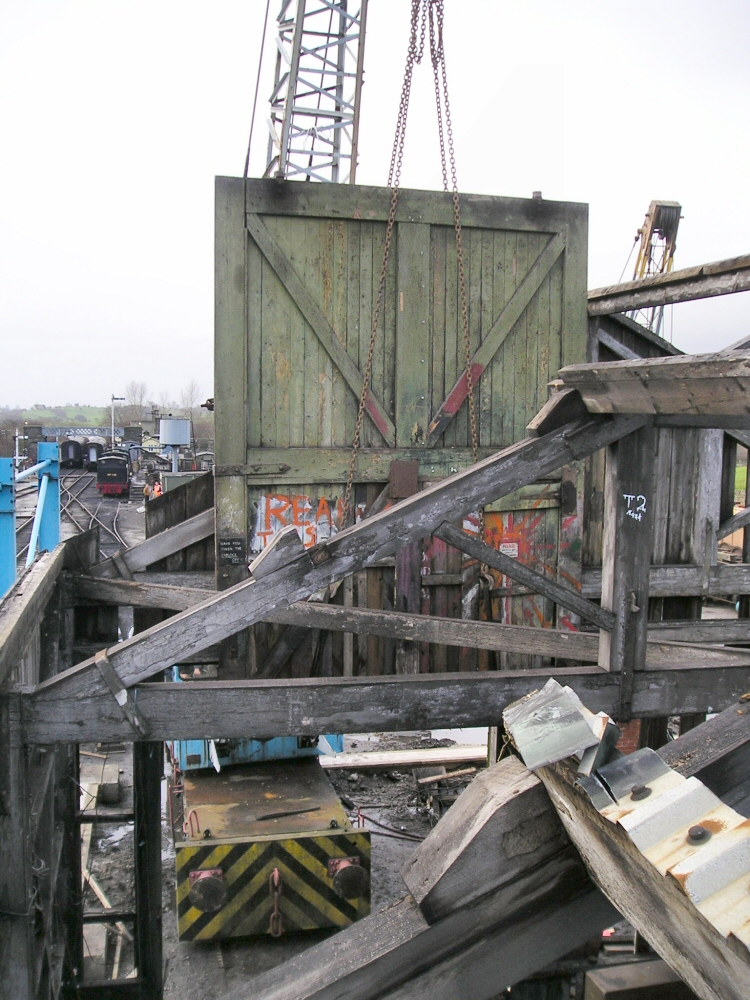
The main door at the West end was the next thing to be removed - the plan was to lift it out from inside the shed through
the gap made by removing the purlins. The channel that the runners formerly ran in was removed while the door was supported
on the chains...
(c) Tim Warner.
|
|
|
|
...and then it was lifted out by the rail crane. Everything has been carefully numbered up so that it can be identified when
it comes to replacement (where required) and rebuilding.
(c) Tim Warner.
|
|
|
|
The first section to be craned out was one of the roof purlins, seen here from the basket of the cherry picker after slinging.
The optimum method for removing the cladding was to cut through the sheets along each of the purlins and worry about the nails
when the wood was lowered to the ground.
(c) Tim Warner.
|
|
|
|
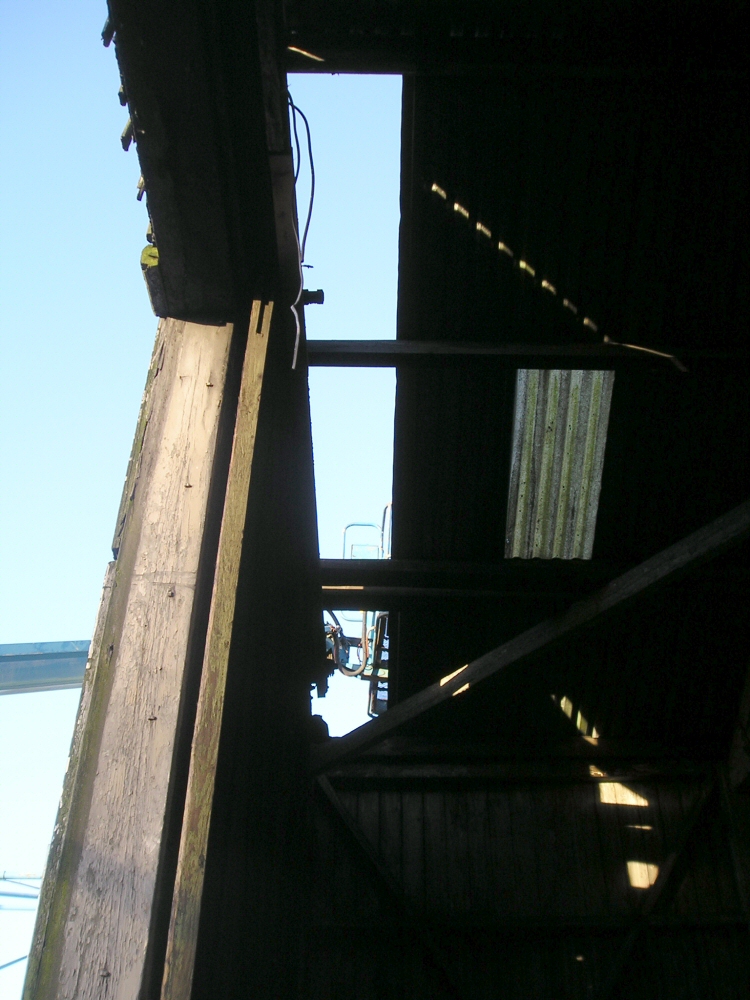
The first panels of roofing were removed by a variety of methods until we found the fastest. Light appears through the roof
for the first time in 30 years using a cherry picker from outside the building.
(c) Tim Warner.
|
|
|
|
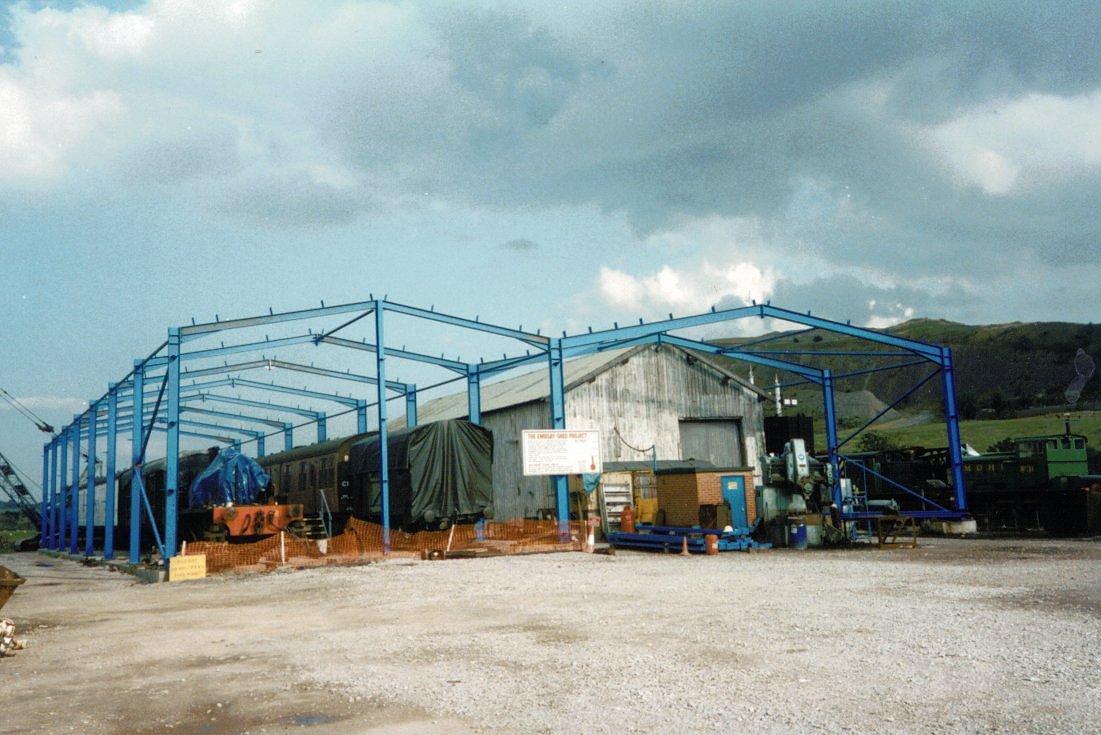
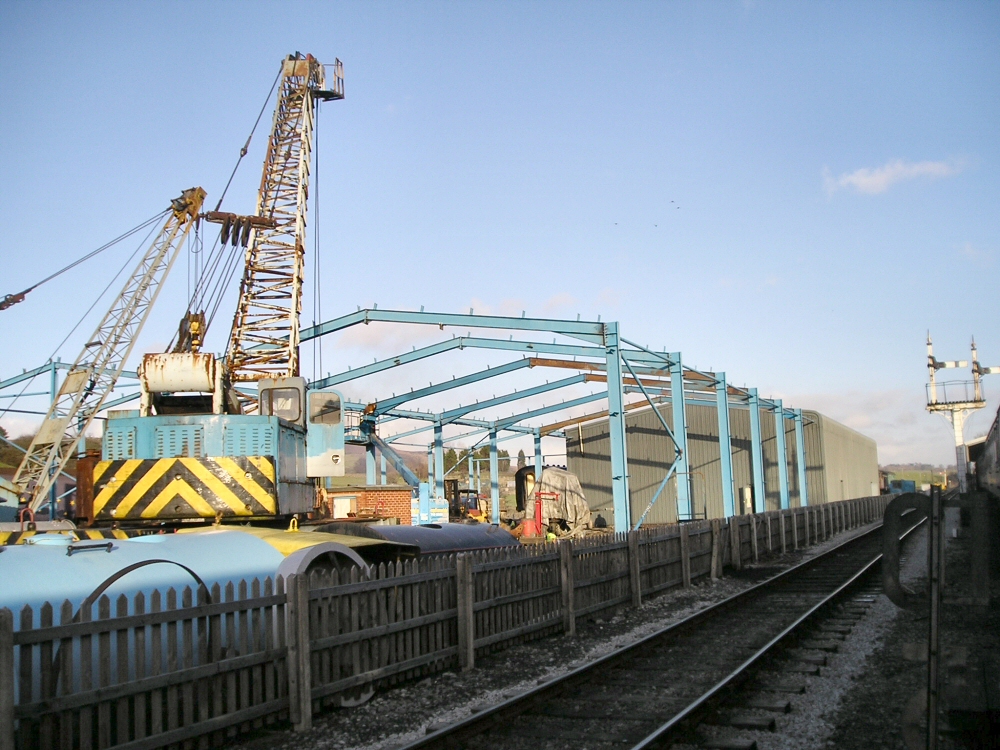
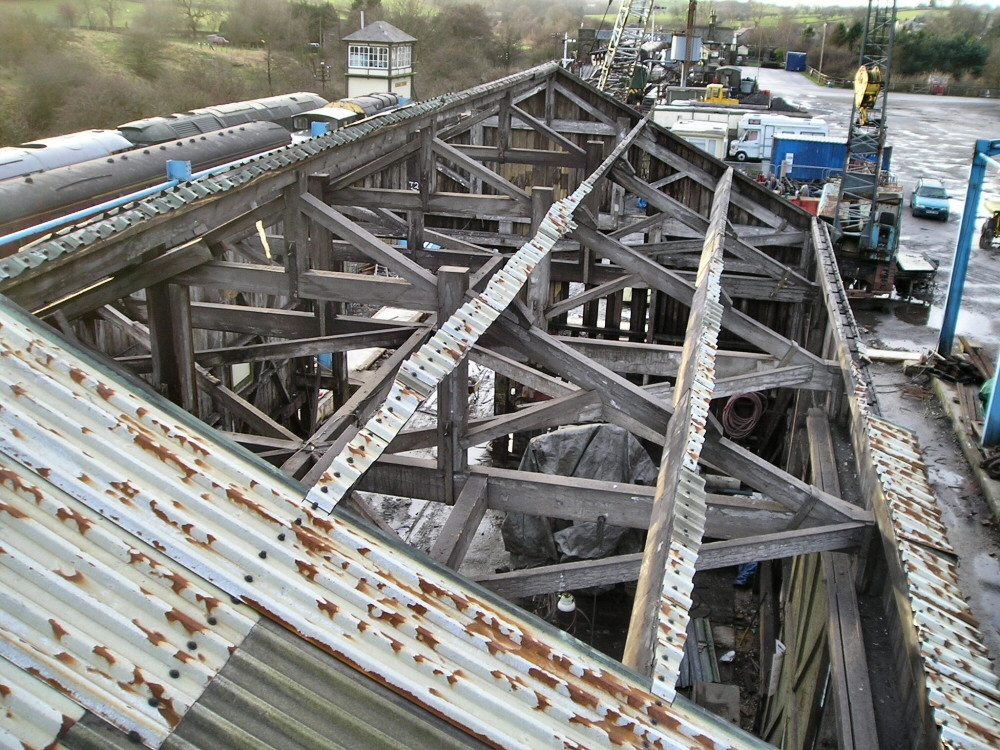
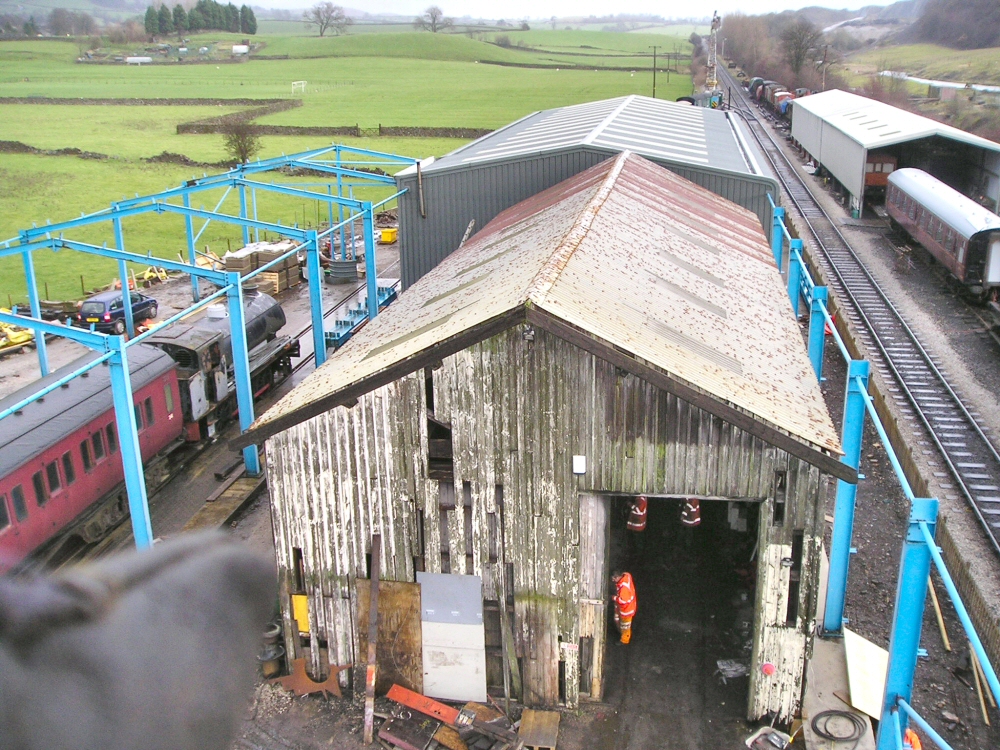
A view from the cherry picker of the shed complex as it currently stands (December 2006). The first section of the project
(fully clad an operational) can be seen to the rear of the goods shed in the foreground. The section to the left was to have
been the Yorkshire Industrial Locomotive Museum.
(c) Tim Warner.
|
|
|
|
Two of the steel rafters were removed in order to gain better access to the goods shed for dismantling. With the aid of a
cherry picker, the original bolts were removed whilst the crane supported the steelwork.
(c) Tim Warner.
|
|
|
|
First thing to be emptied and removed was the old van body at the West end of the shed. Unfortunately, its condition was not
particularly good, and whilst some items were saved for re-use on other vehicles, most was fit only for burning.
(c) William Lister.
|
|
|
|
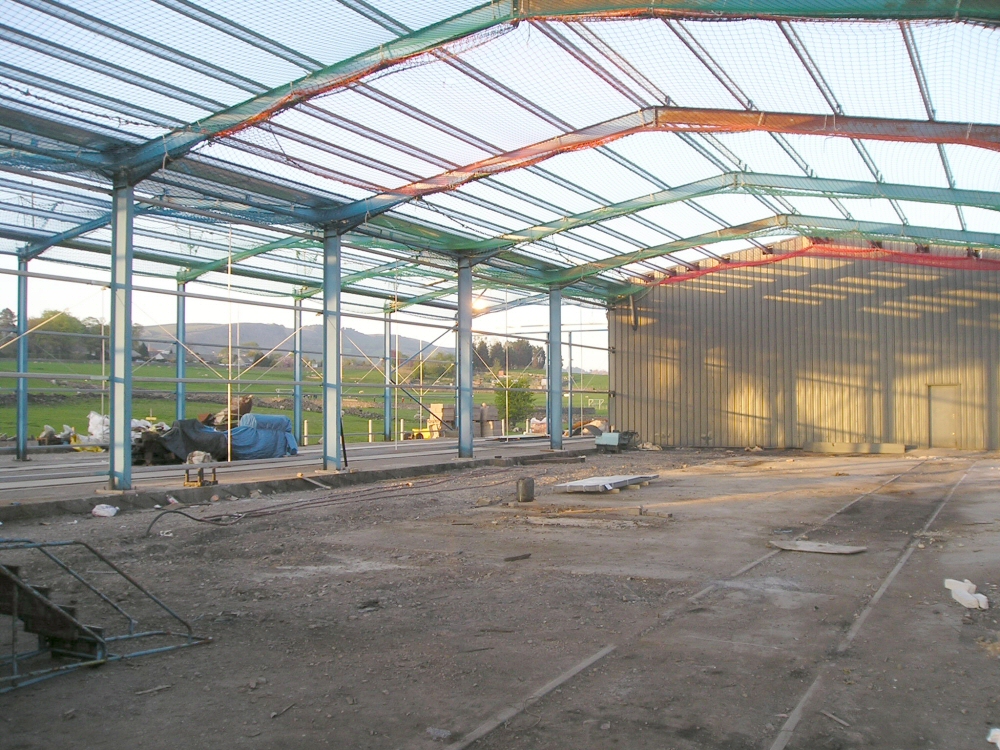
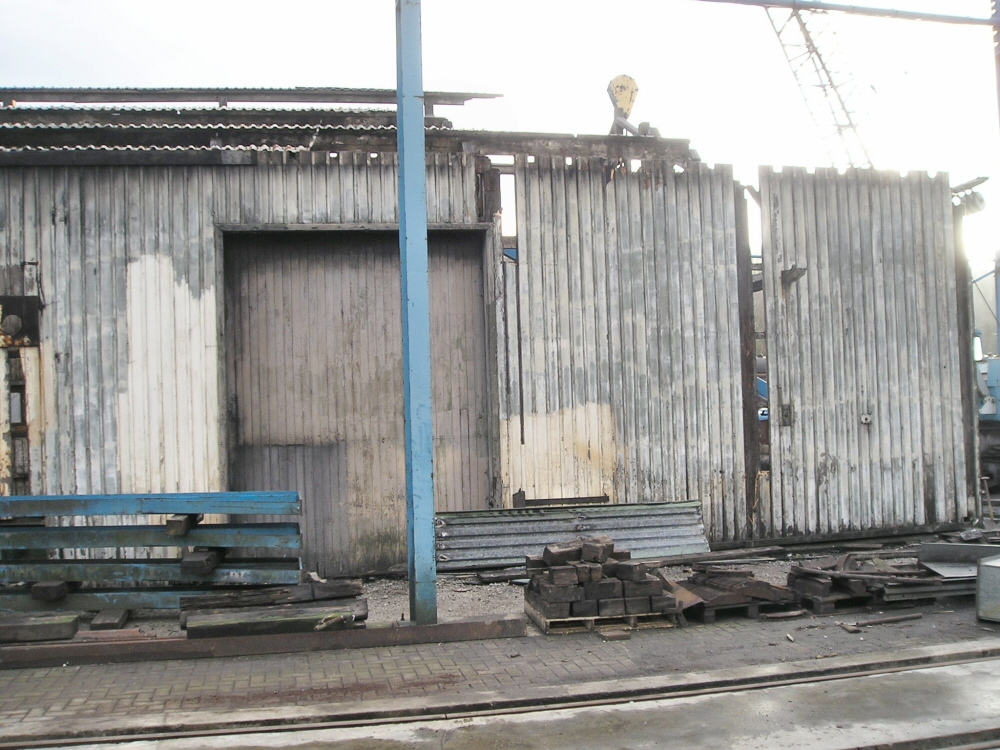
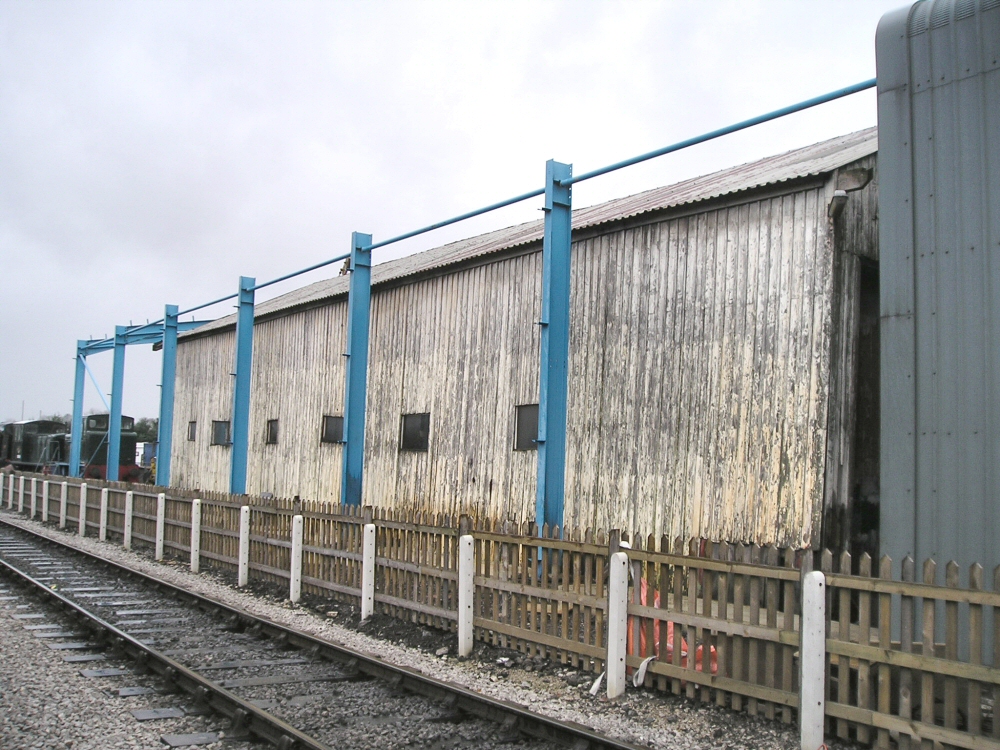
A general view of the South-facing side of the shed showing the new steelwork that surrounds it. The windows are not original - they
were installed in the 1980s to allow some light to enter the shed so that members could see what they were doing (they will
be removed when the shed is rebuilt!)
(c) Tim Warner.
|
|
|
|
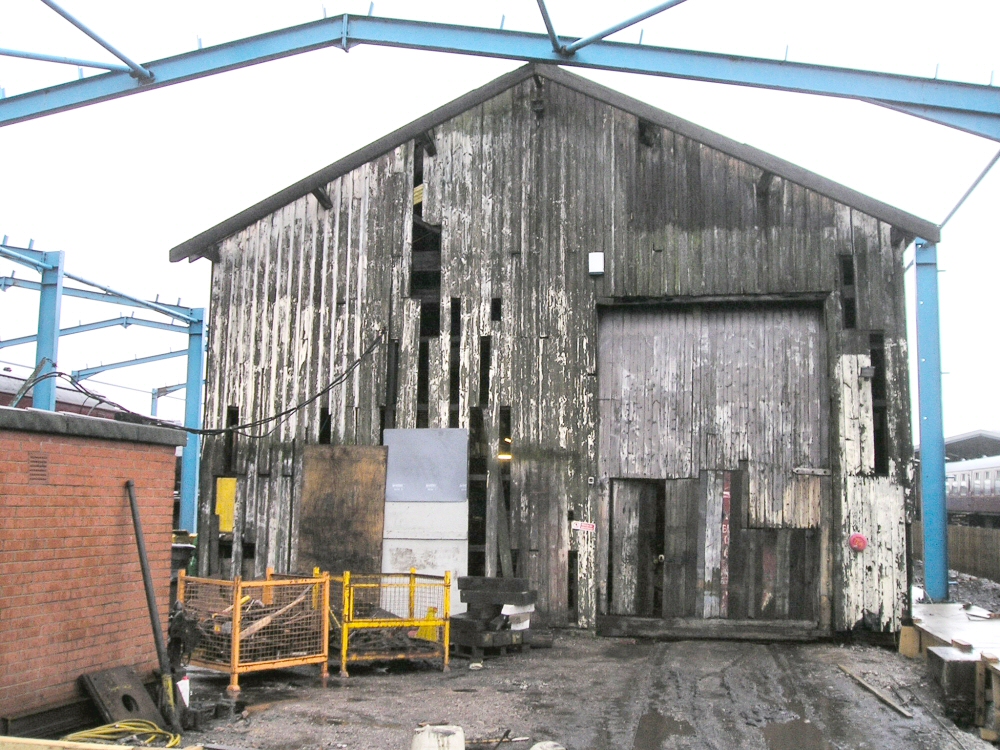
The West facing end of the shed has taken most of the force of the weather, and consequently is in poorer condition, although
the main structure is pretty sound and it is the weatherboarding that has suffered most. The area covered by the van body until
recently is clearly visible here.
(c) Tim Warner.
|
|
|
|
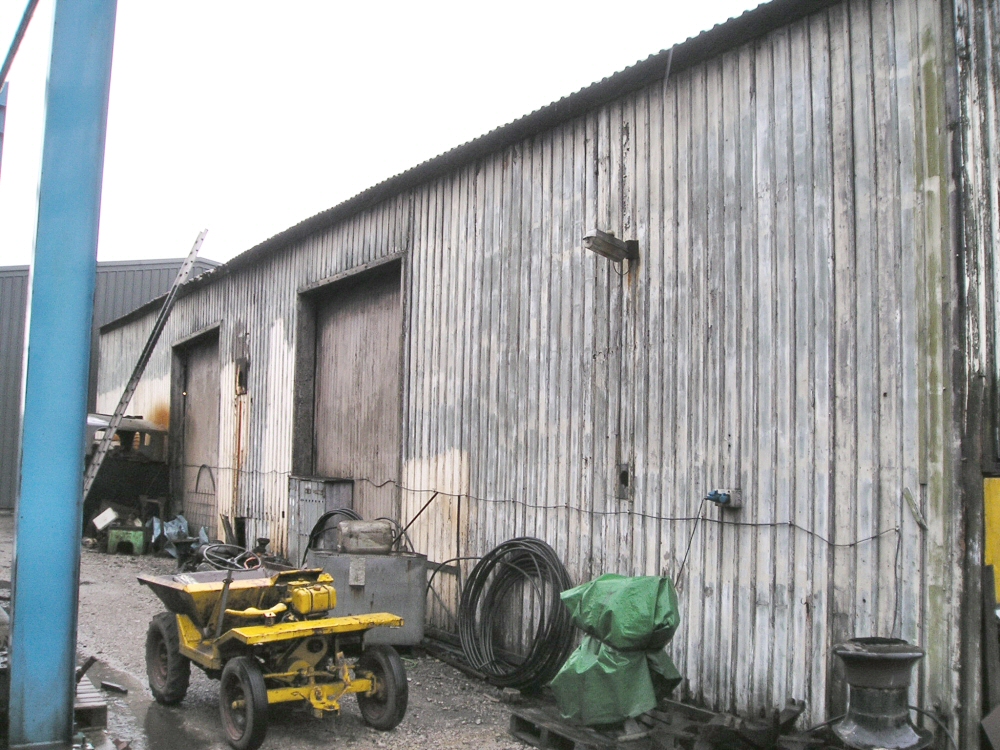
The 'road' side of the shed, or North-facing side, as viewed from the edge of the 'museum' section. The two doors, although
not opened for many years, seem to be in excellent condition. Road vehicles would have been able to be backed into the shed
and unloaded with the crane for trans-shipment into railway vehicles.
(c) Tim Warner.
|
|
|
|
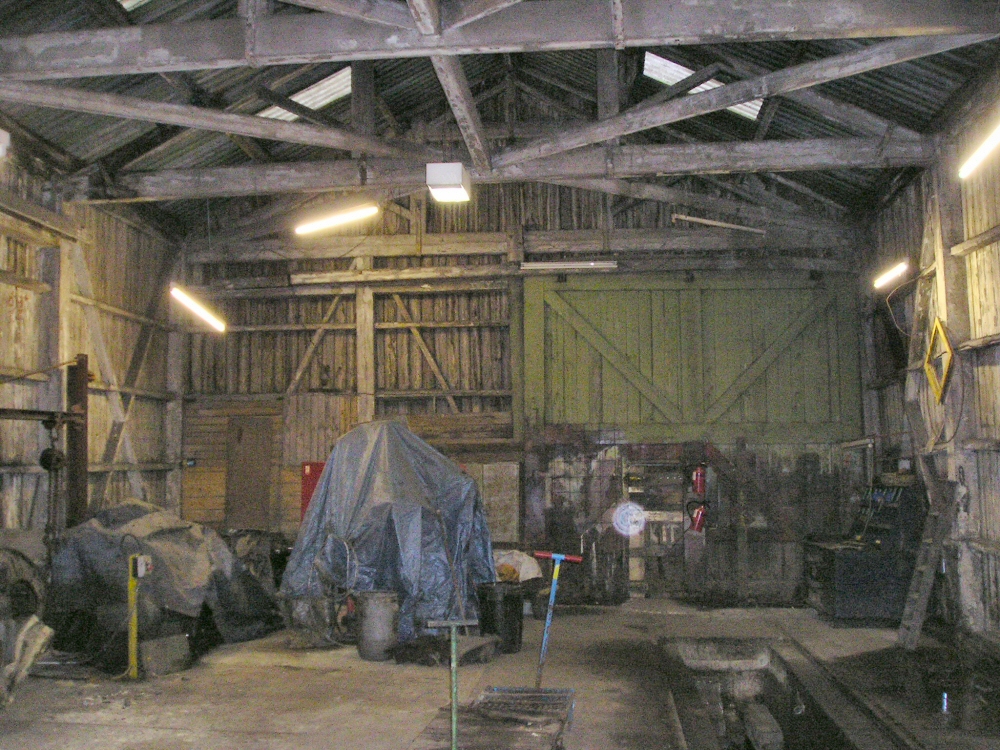
Inside the shed, looking to the East end. There would have been a platform inside the shed, made of wood. The pit in the floor
was built in the early days of the society.
(c) Tim Warner.
|
|
|
|
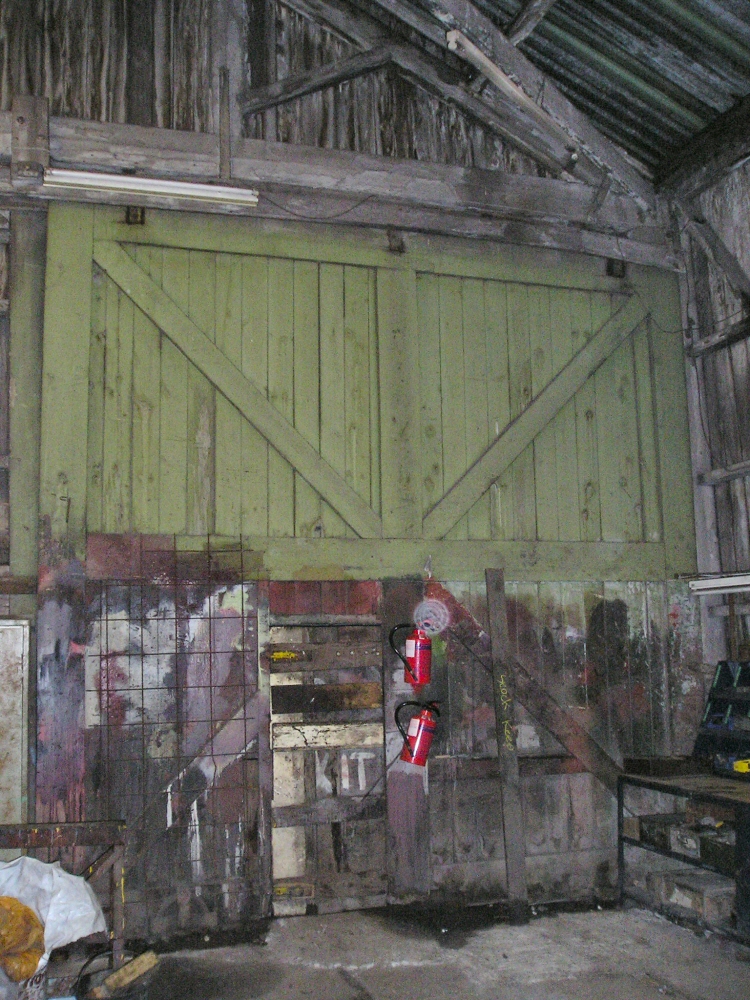
The door at this (East) end is wider than at the other end, and has not been used for many years. However, its condition is
really far sounder than the door we do use! This leads through into the 'new shed'.
(c) Tim Warner.
|
|
|
|
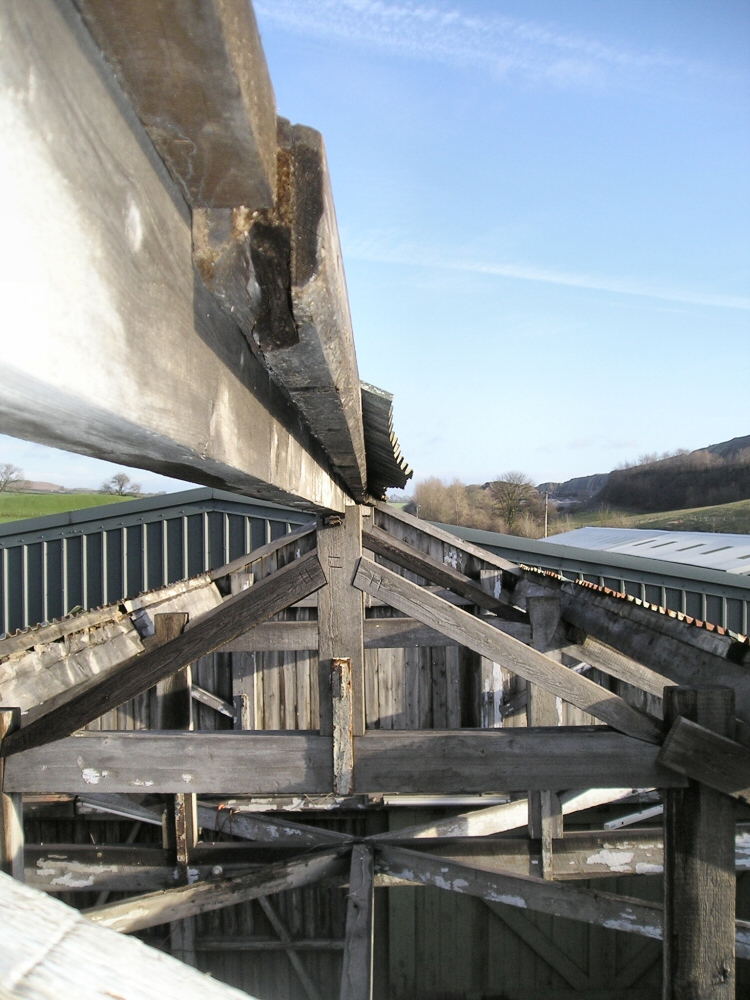
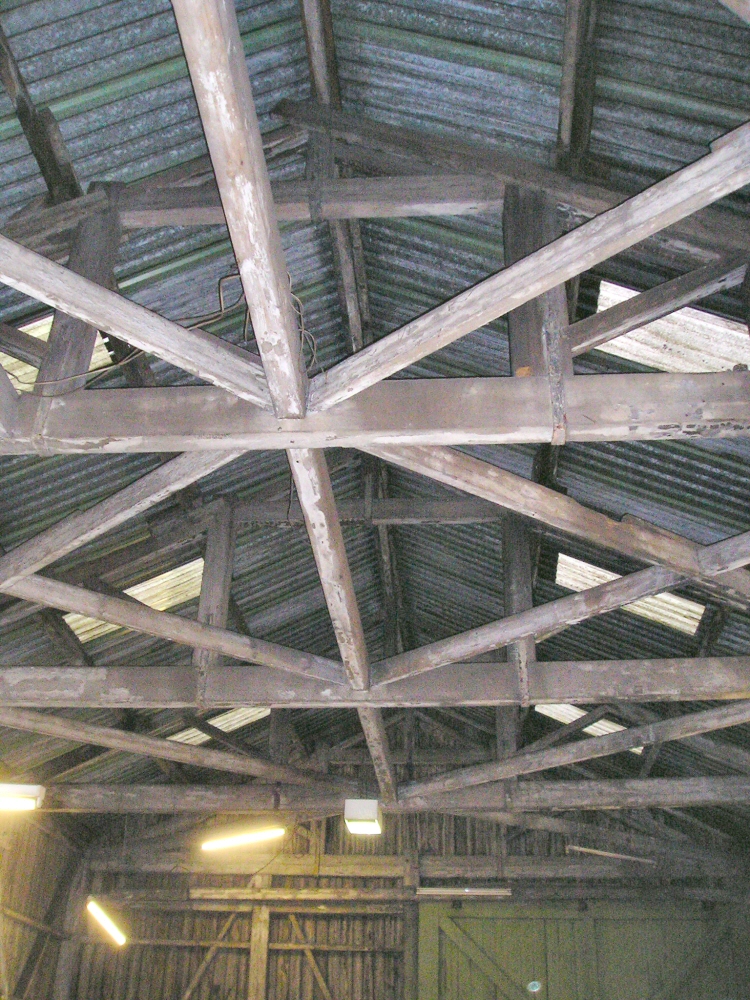
A view of the structure of the roof. The very leaky slate and glass roof was replaced in the 1970s for a corrugated steel
roof, which has proved to be weather tight. At the same time, some repairs were carried out to the woodwork which has
prevented much subsequent deterioration.
(c) Tim Warner.
|
|
|
|
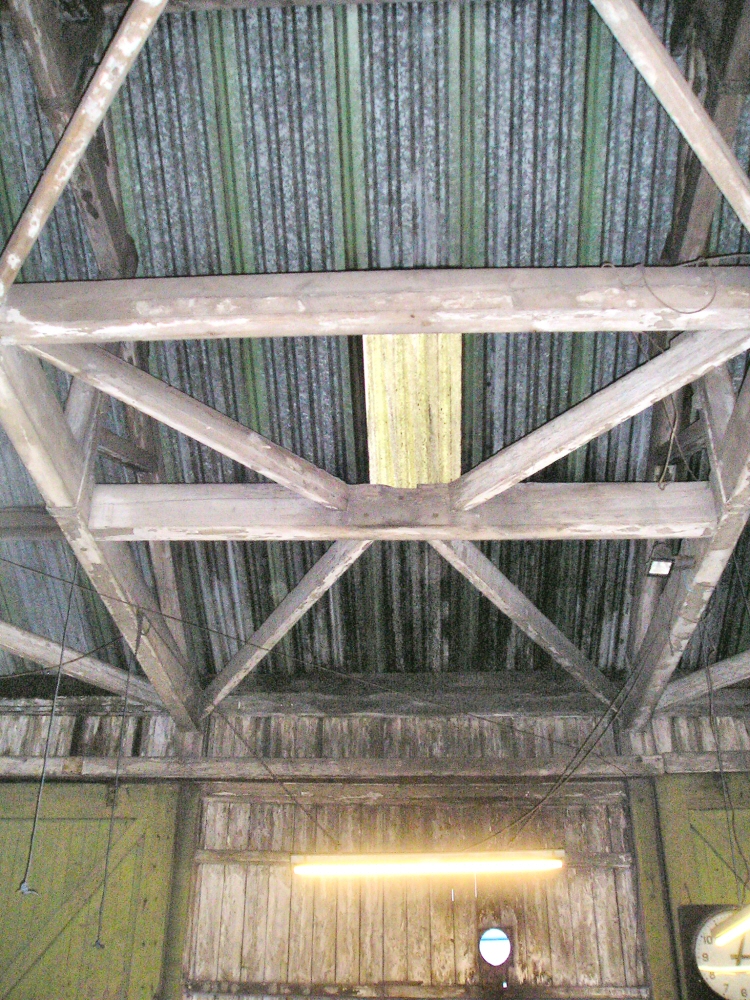
Another shot of the roof structure showing the position of the crane that was formerly installed in the shed. Its position
was such that it was able to unload vehicles from either door on the 'road' or North-facing side, as well as reaching across
to the wagons. When the shed is rebuilt, we will hopefully be able to build a replica crane as well.
(c) Tim Warner.
|
|
|
|
A view of the interior from the South East facing corner of the shed showing the pit, as well as the size of the building to
good effect. This was taken after much of the contents had been removed.
(c) Tim Warner.
|
|
|
|
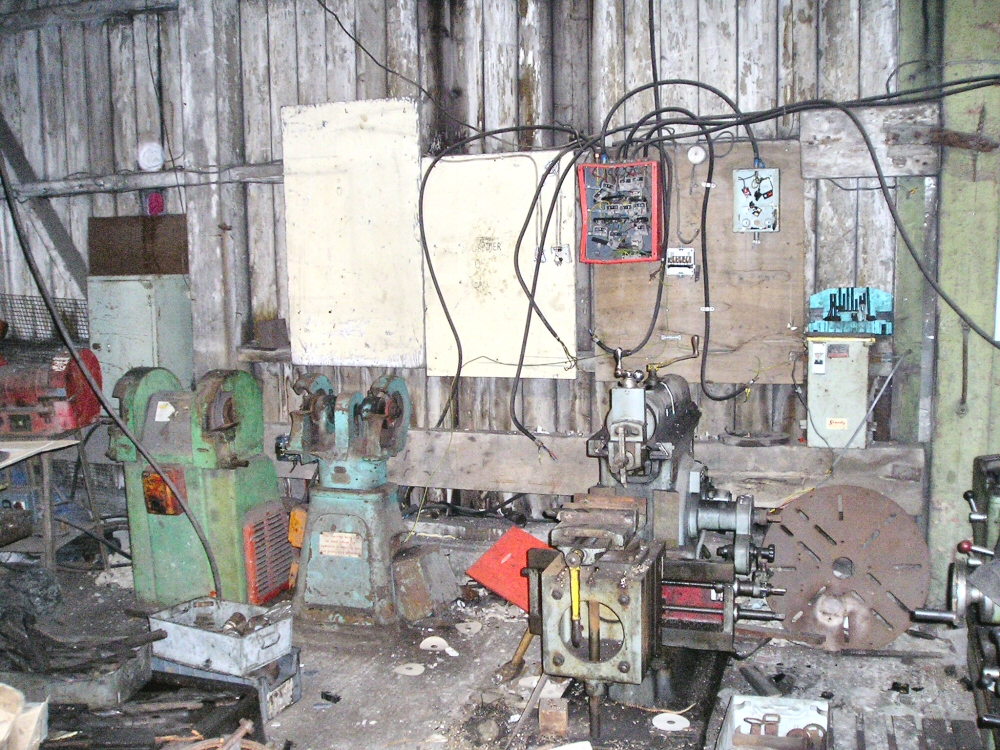
With the wiring and machinery in the process of being removed after the power was cut off, an original length of timber that
formerly supported the platform became more visible. (The horizontal beam at the very back)
(c) Tim Warner.
|
|
Building the retaining wall - Most recent photos first
|
|
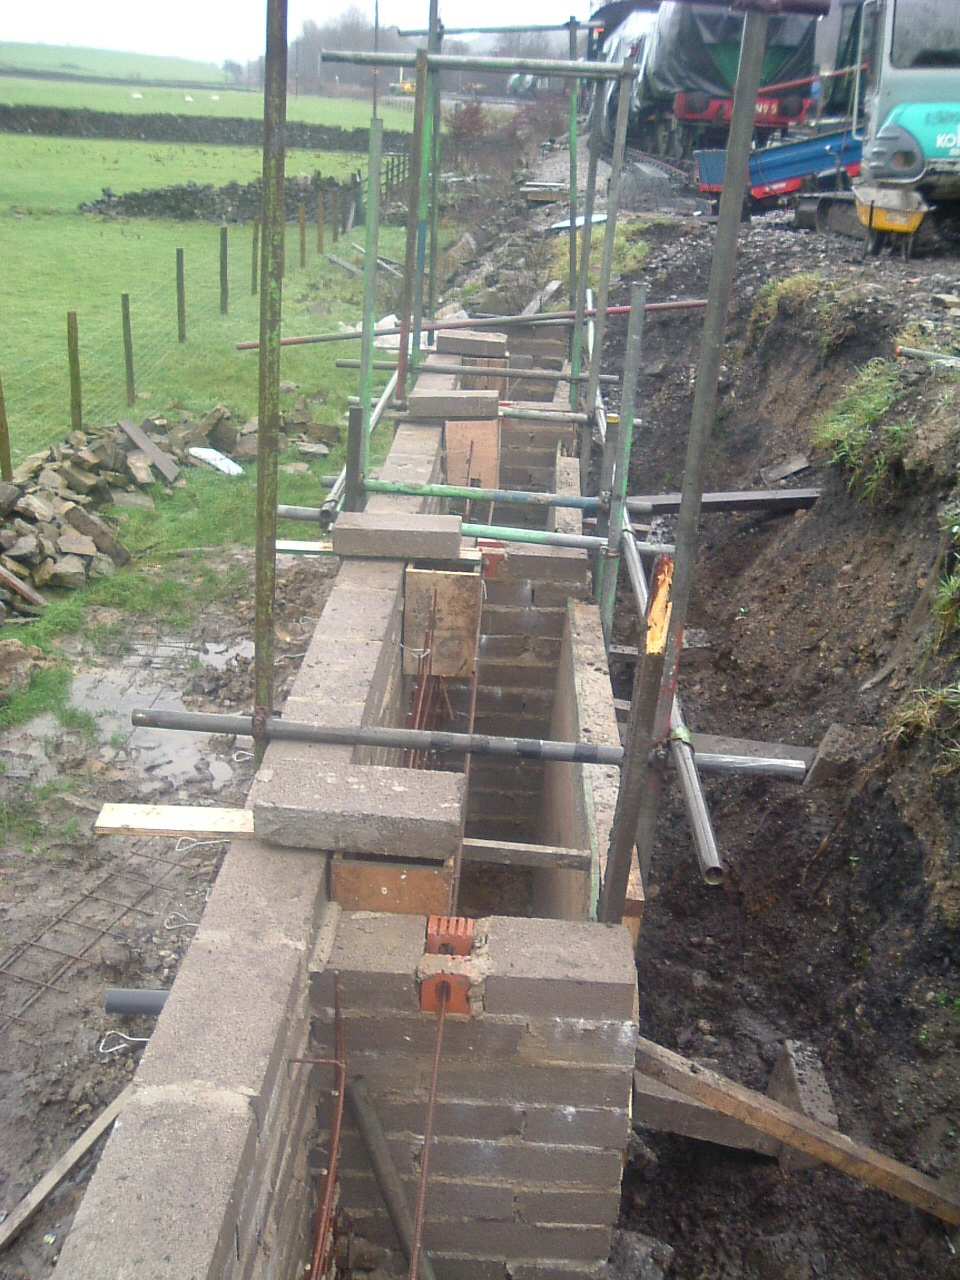
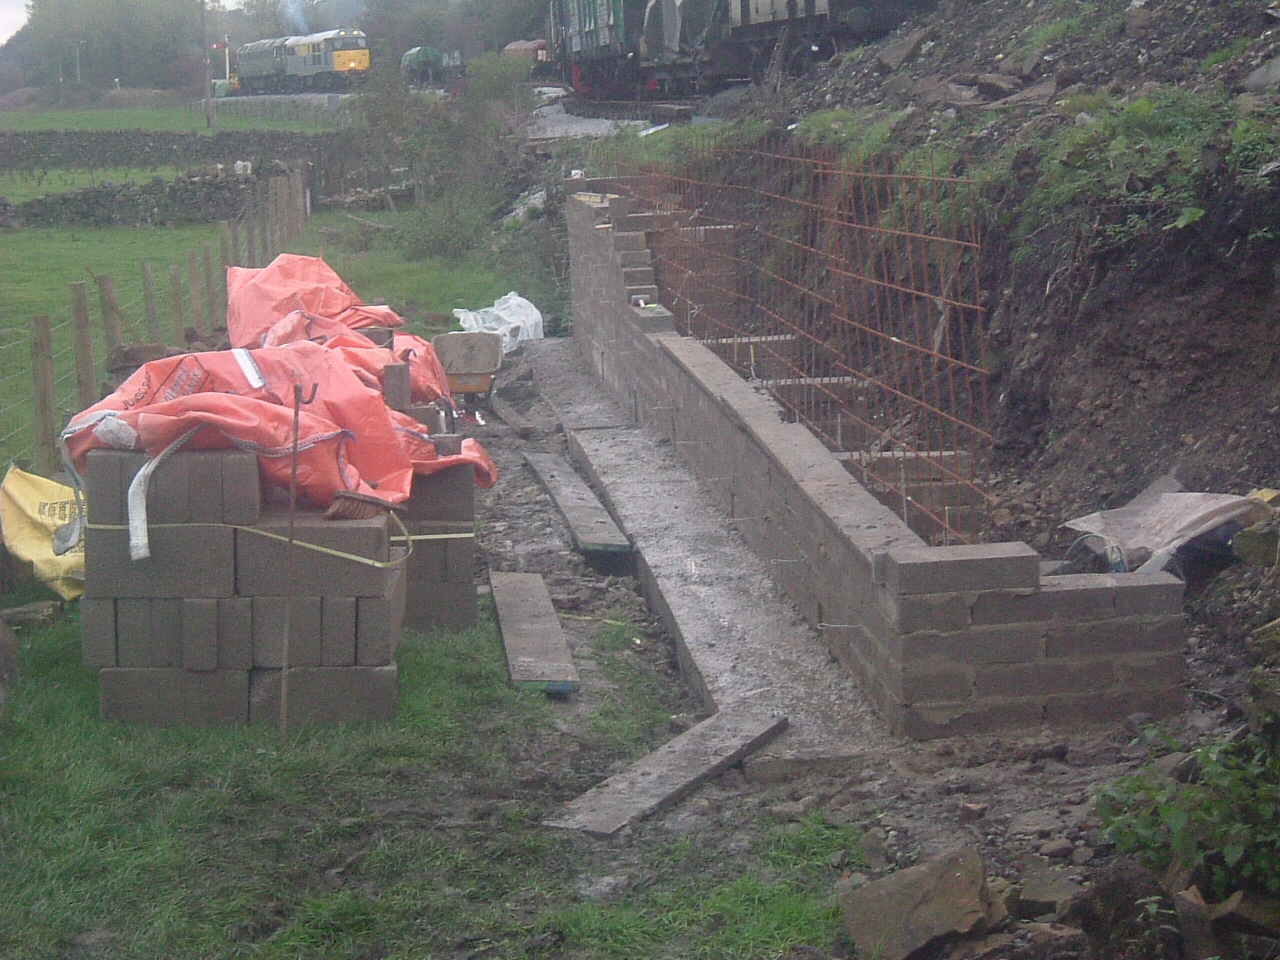
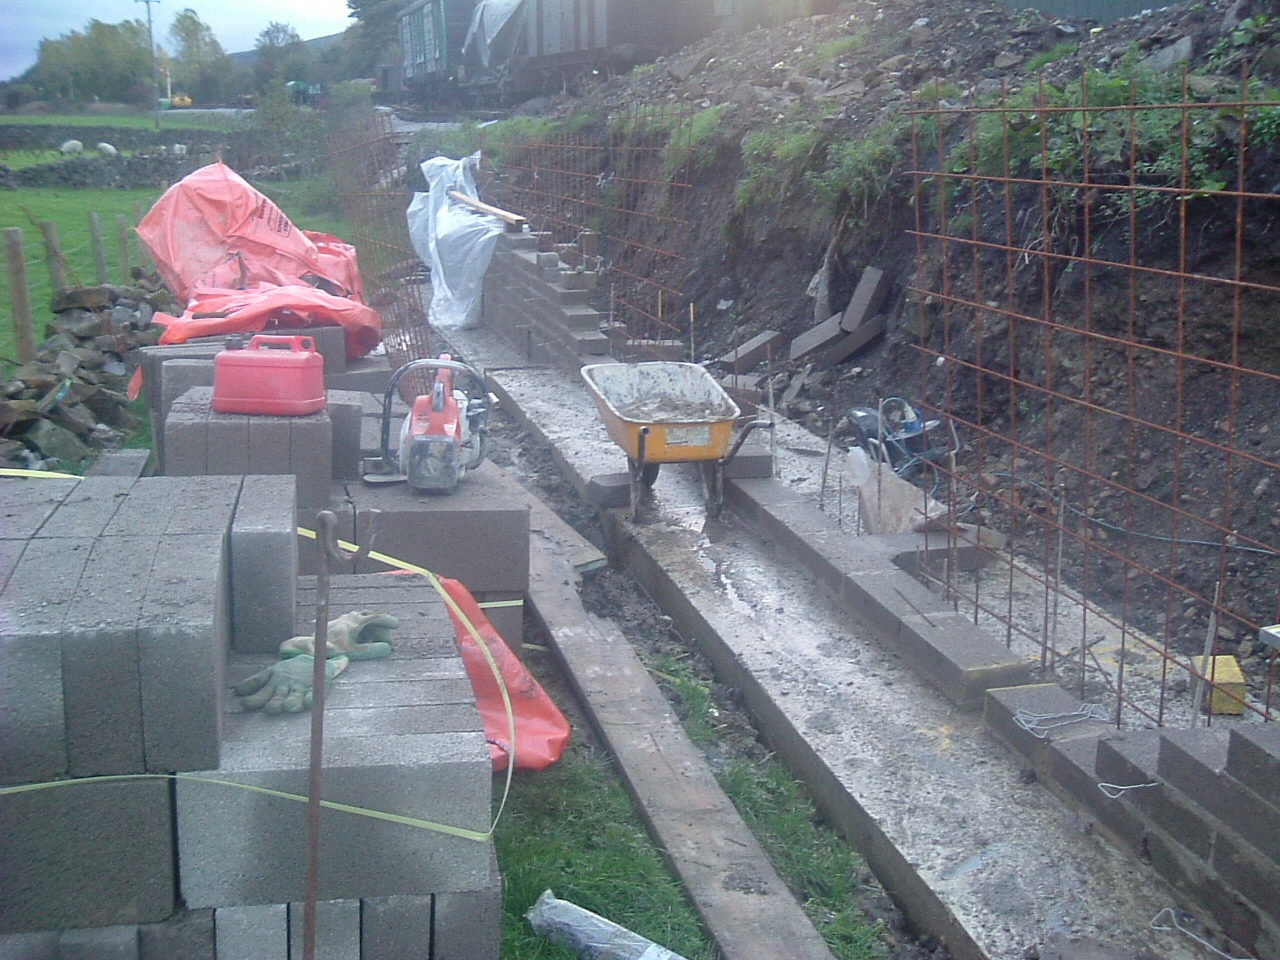
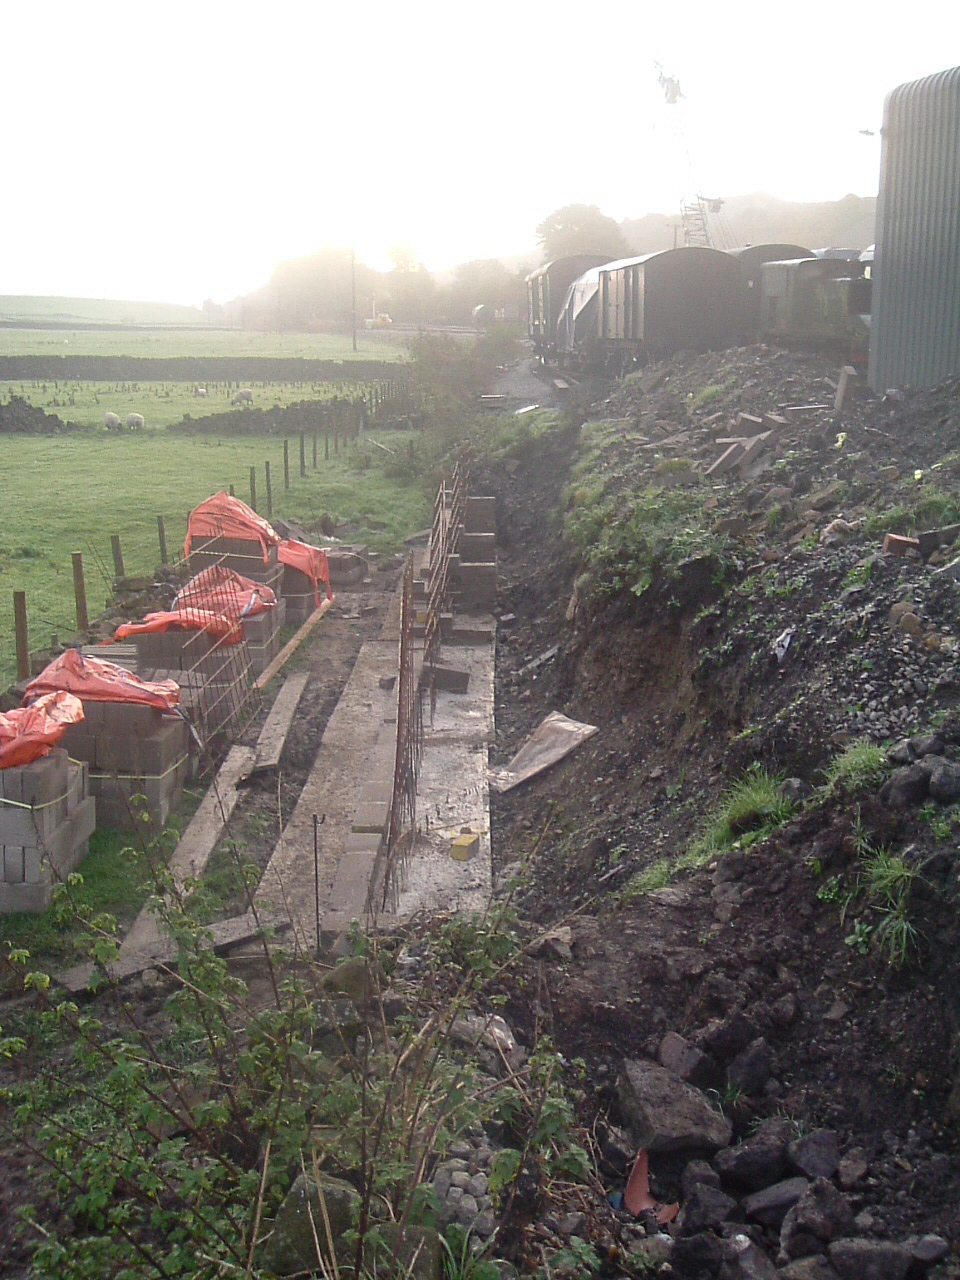
The second section of wall is seen with the concrete foundation complete and a start made on the blockwork. This wall will
help support the 6th road along the side of the shed.
(c) Tim Warner.
|
|
|
|
|
The next section of wall is seen here with the foundations dug out ready of concrete pouring.
(c) Tim Warner.
|
|
|
|
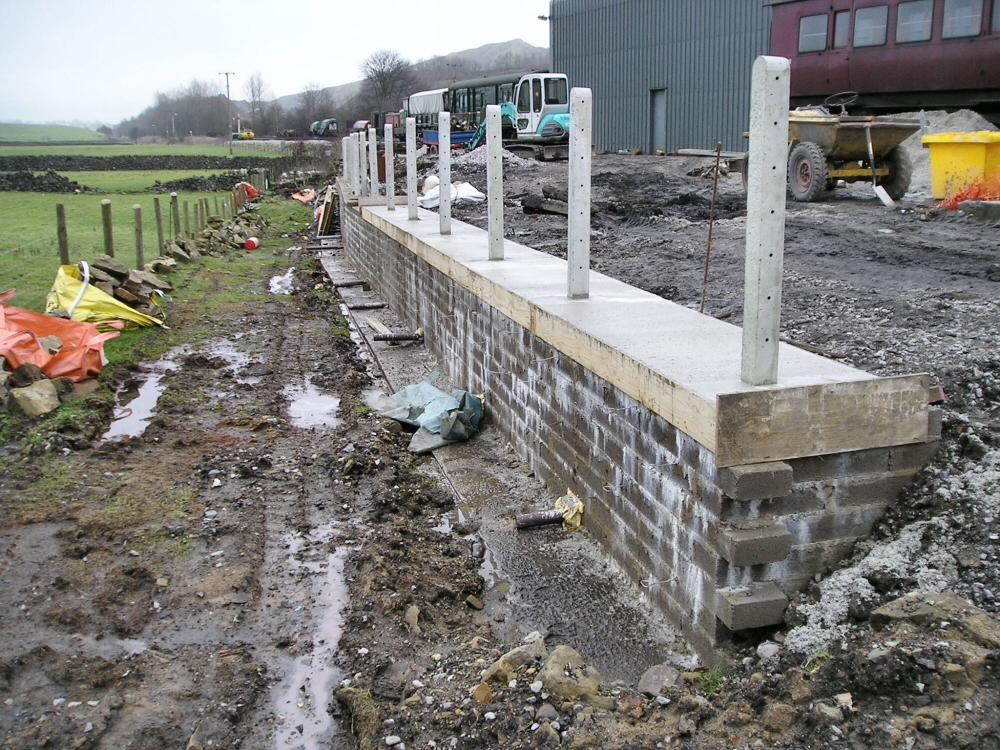
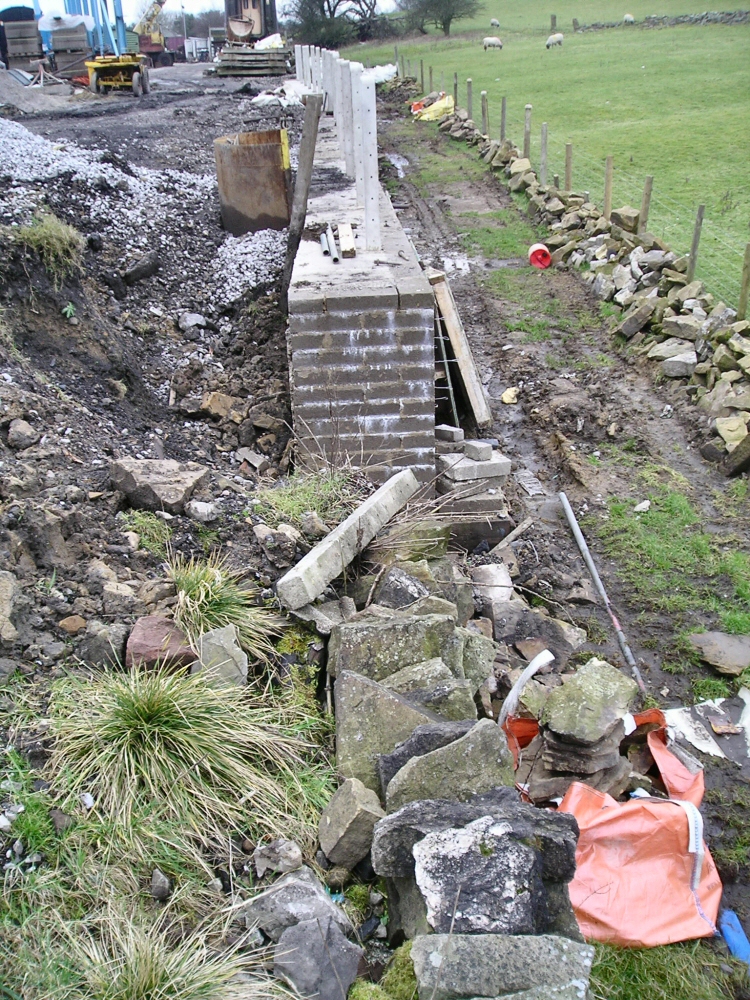
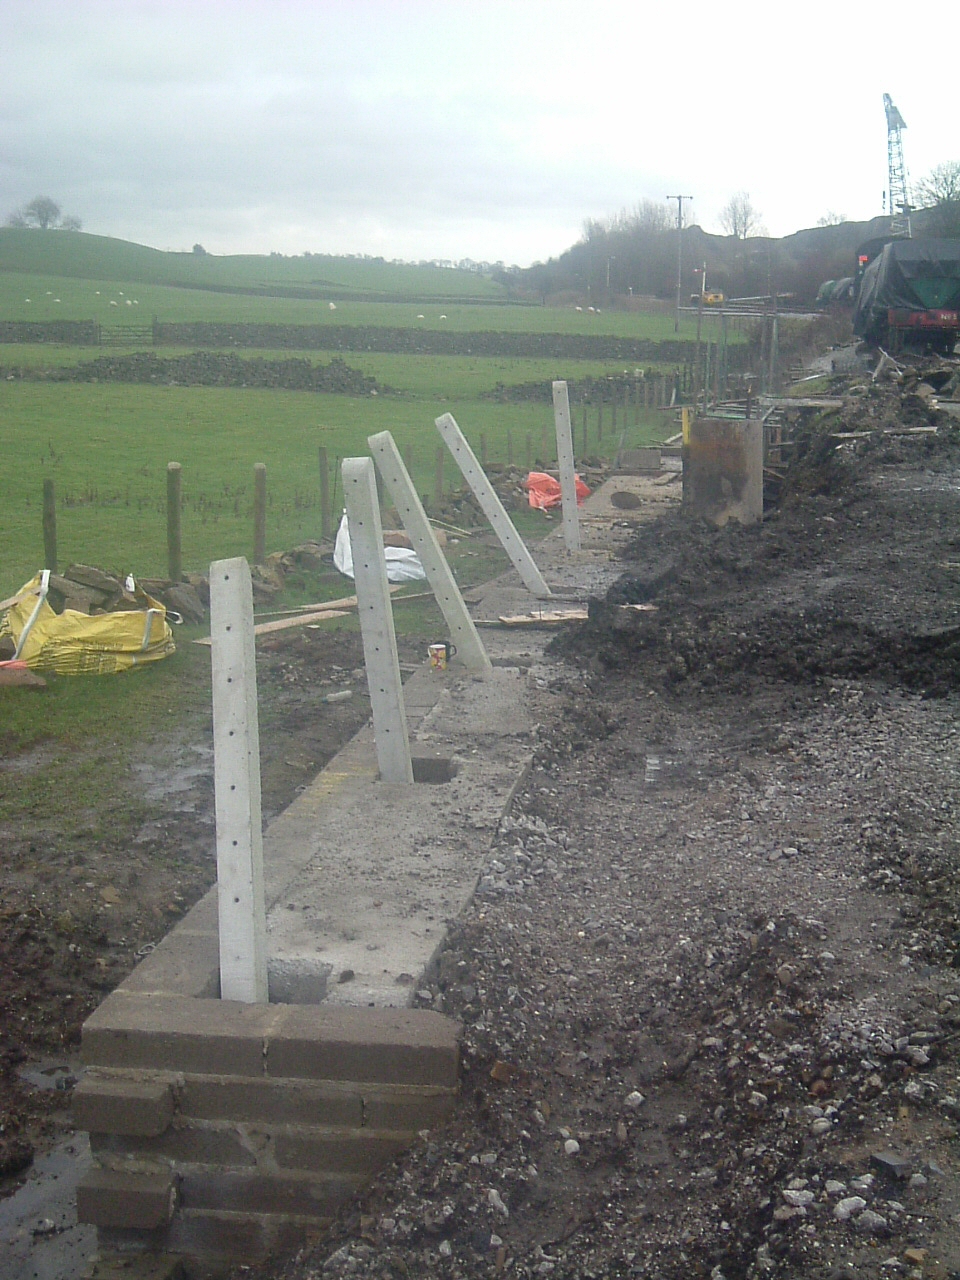
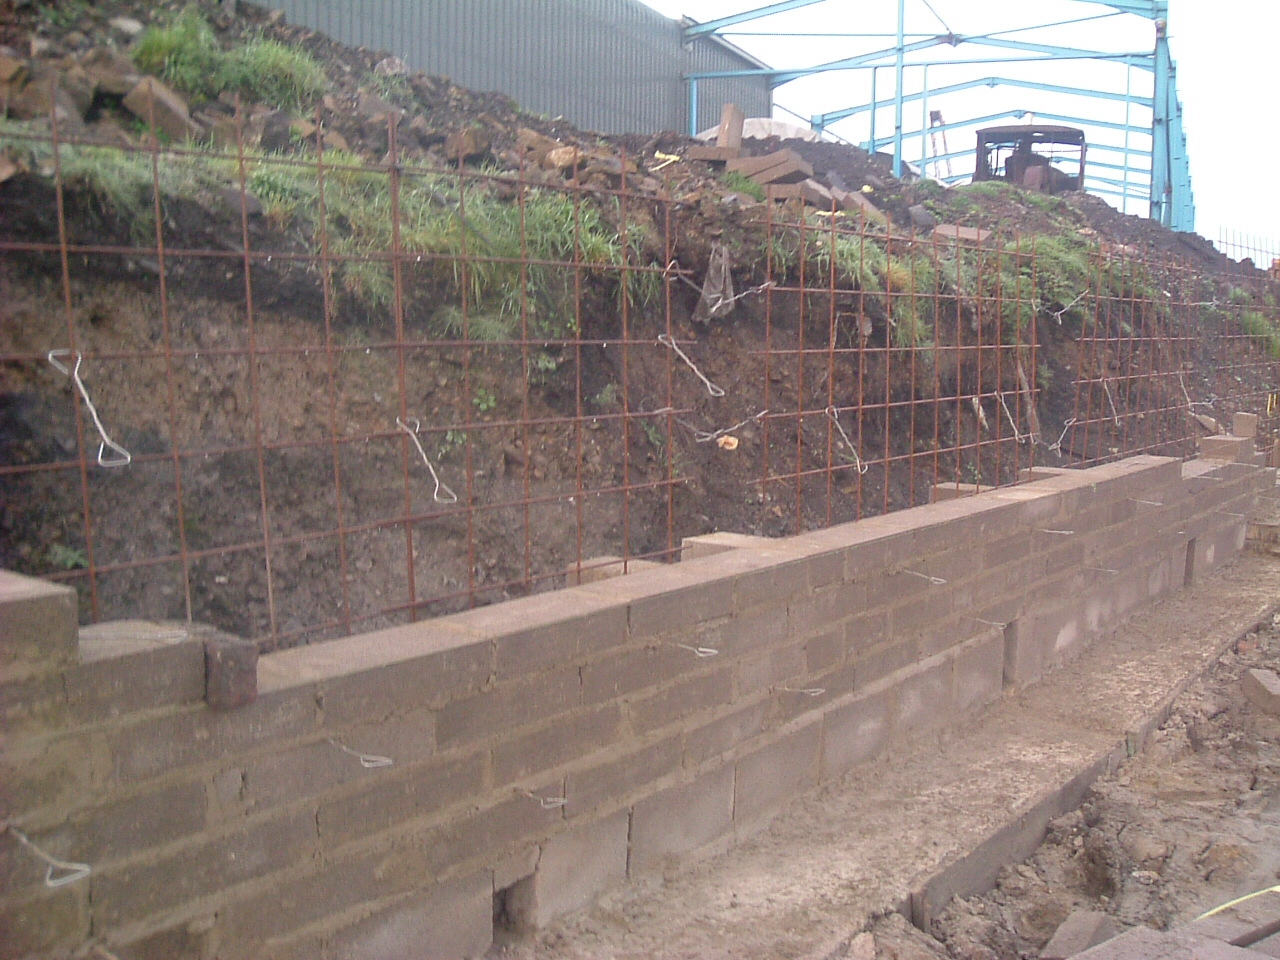
The completed section of the wall with fence posts now in concreted in position. On the base at the bottom of the wall will be
a dry stone wall to improve the appearance from the field (and from the village).
(c) Tim Warner.
|
|
|
|
Looking back at the completed section of wall from the top yard.
(c) Tim Warner.
|
|
|
|
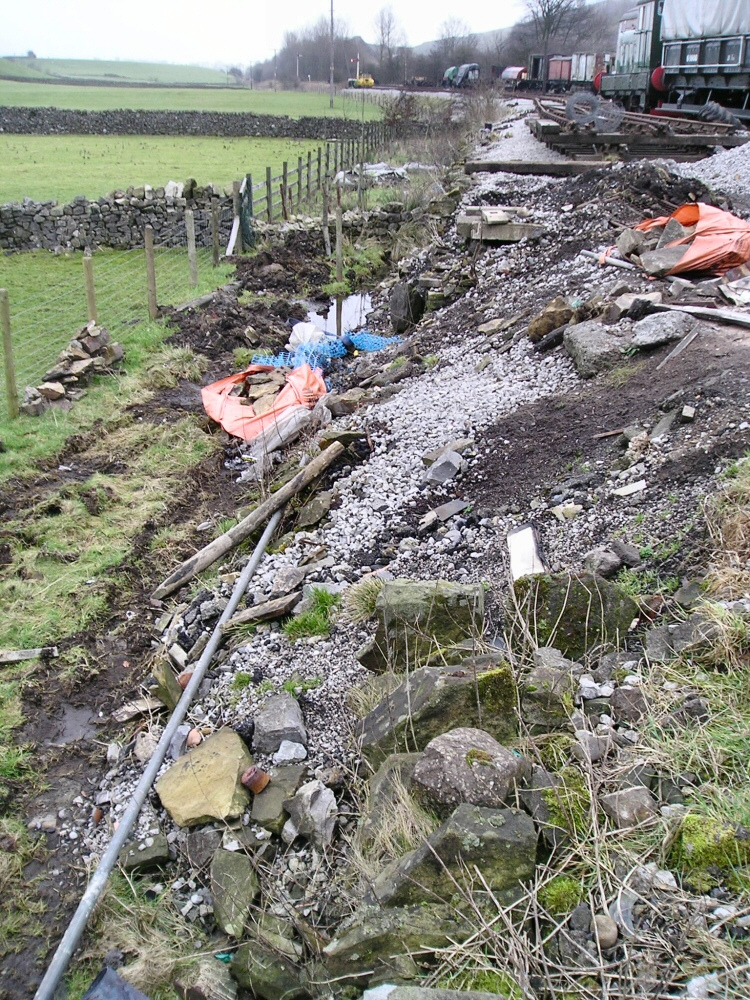
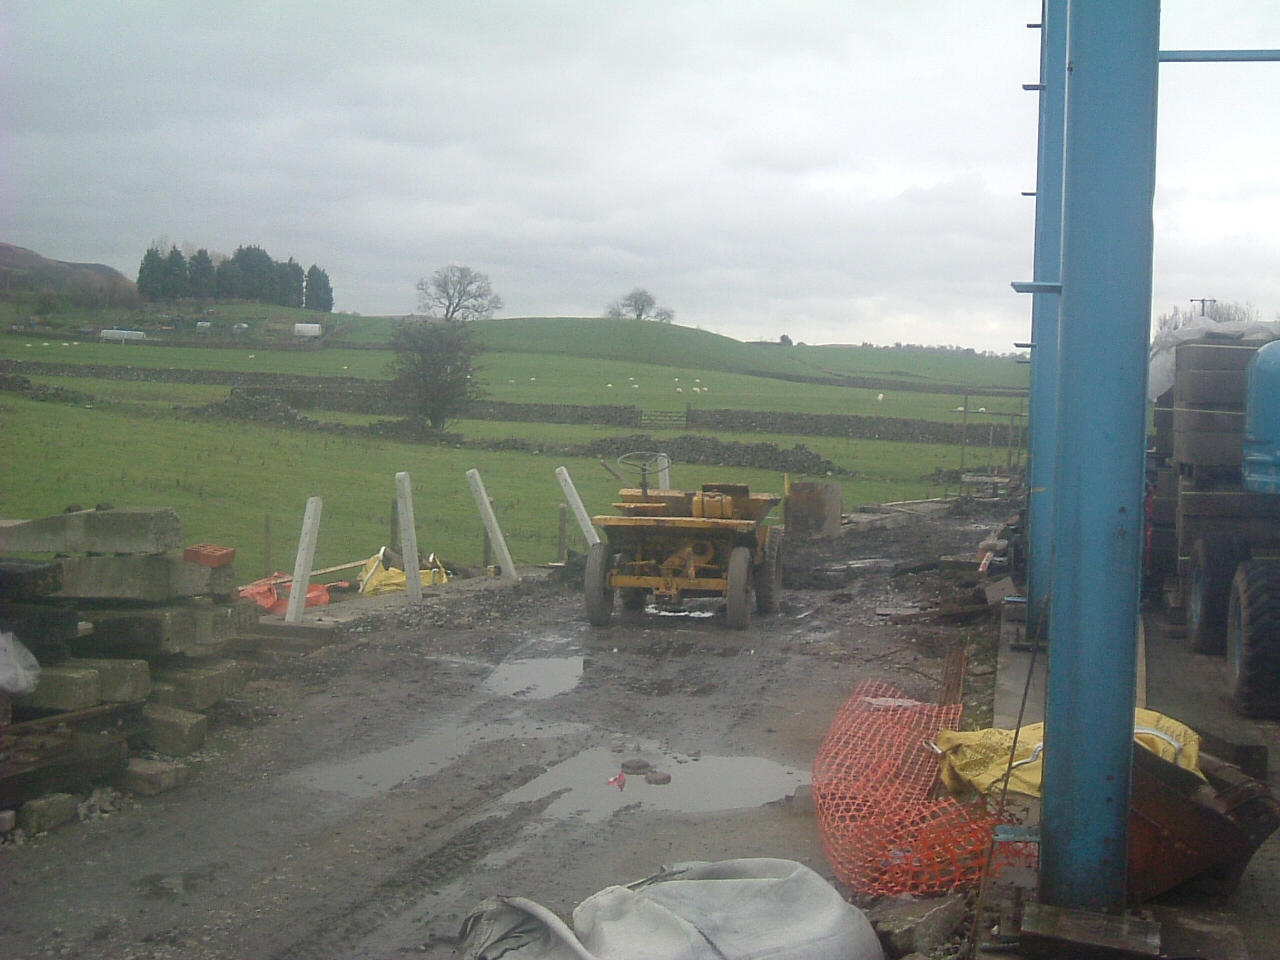
Looking the other way to the 'next' section of the wall as the first little bits of ground work have been carried out.
(c) Tim Warner.
|
|
|
|
The last section of the wall awaiting its concrete being poured. The scaffolding supports the shuttering for the concrete. The
gap behind the shuttering will be filled in with earth once the concrete has set and the scaffolding has been removed.
(c) Dave Anderson.
|
|
|
|
A view from the top of the cherry picker (see the shadow) showing the extent of the walling completed so far beyond the
2-road shed. The walling will have to be extended further in both directions over the coming months to support the trackwork
for the sixth road.
(c) Dave Anderson.
|
|
|
|
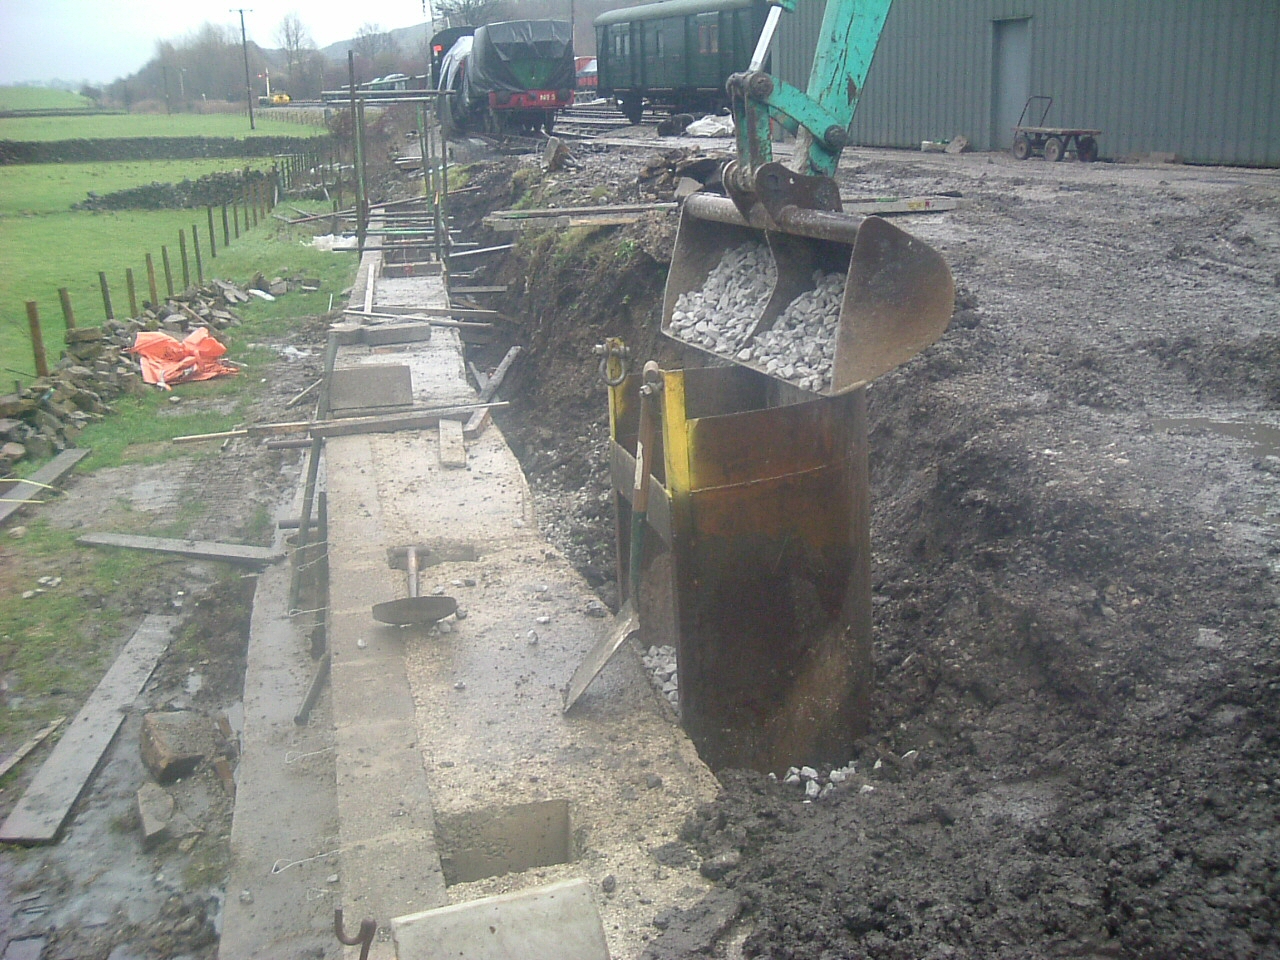
'Daisy' and a cunningly attached trailer filled with ballast put the finishing touches to the drainage system before the very
back of the block / concrete wall is infilled. The next section of the wall still requires its concrete infill.
(c) Dave Anderson.
|
|
|
|
The metal 'former' around the stone was designed to be craned out once the area around it has been filled in.
(c) Dave Anderson.
|
|
|
|
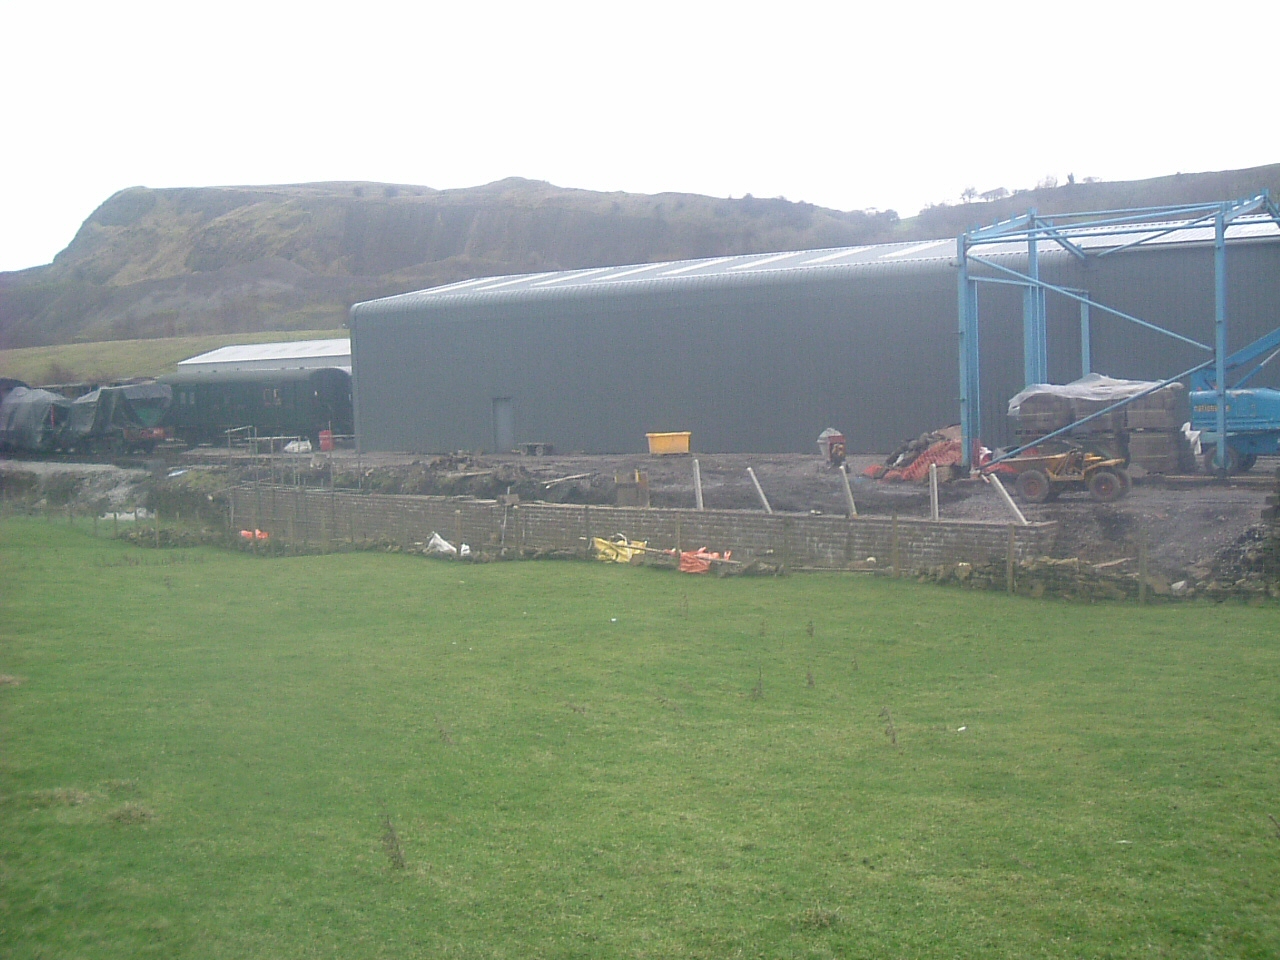
Viewed from the field the nearly-completed block wall is seen against the shed. The clad section is the 3-road part of the
shed that has already been completed.
(c) Dave Anderson.
|
|
|
|
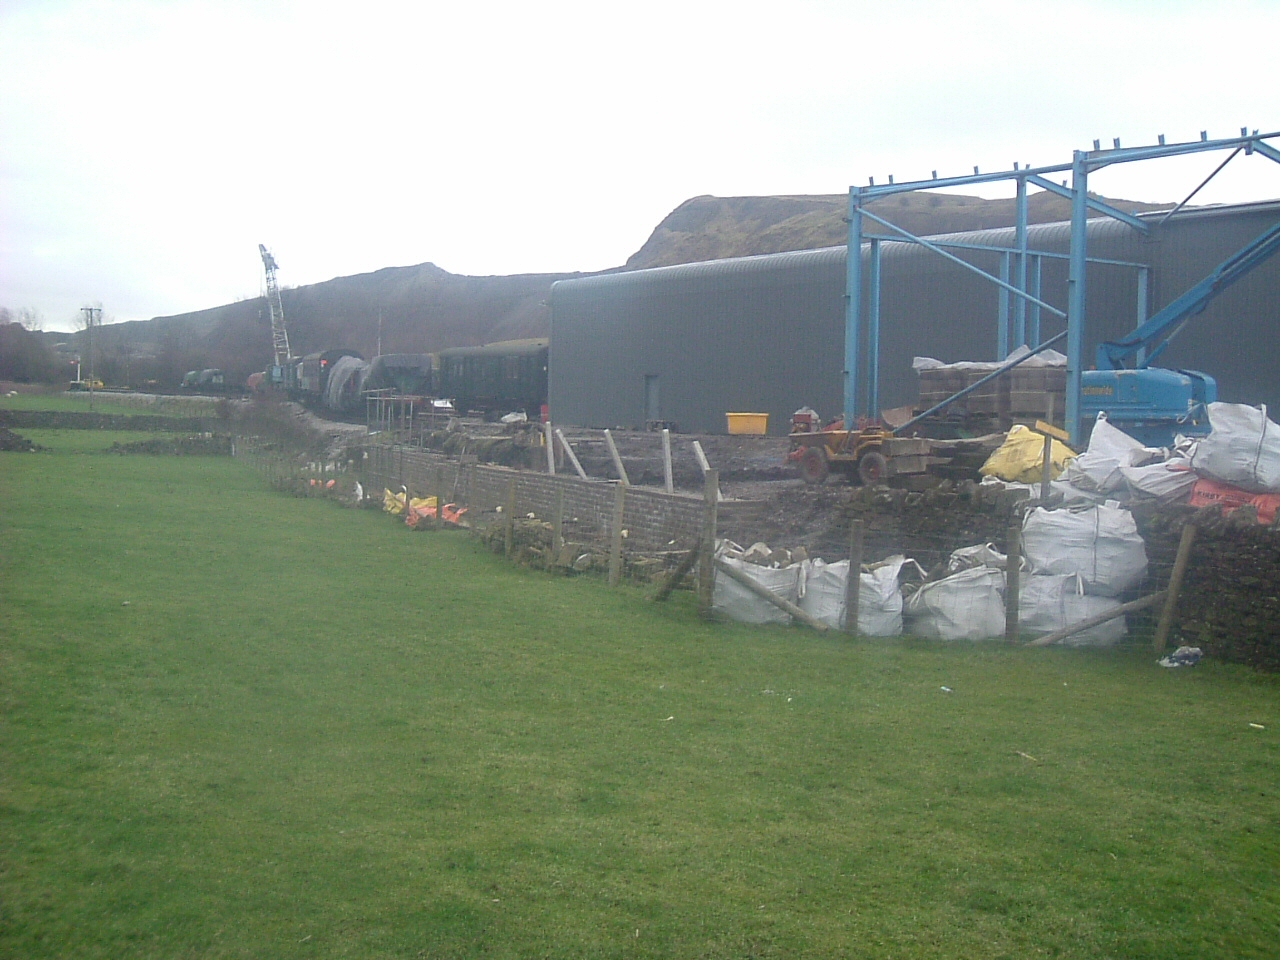
The blue girders visible to the right represent the 2-road shed which will be clad as part of the current phase of work and
be a separate shed from the rest, whatever its final use.
(c) Dave Anderson.
|
|
|
|
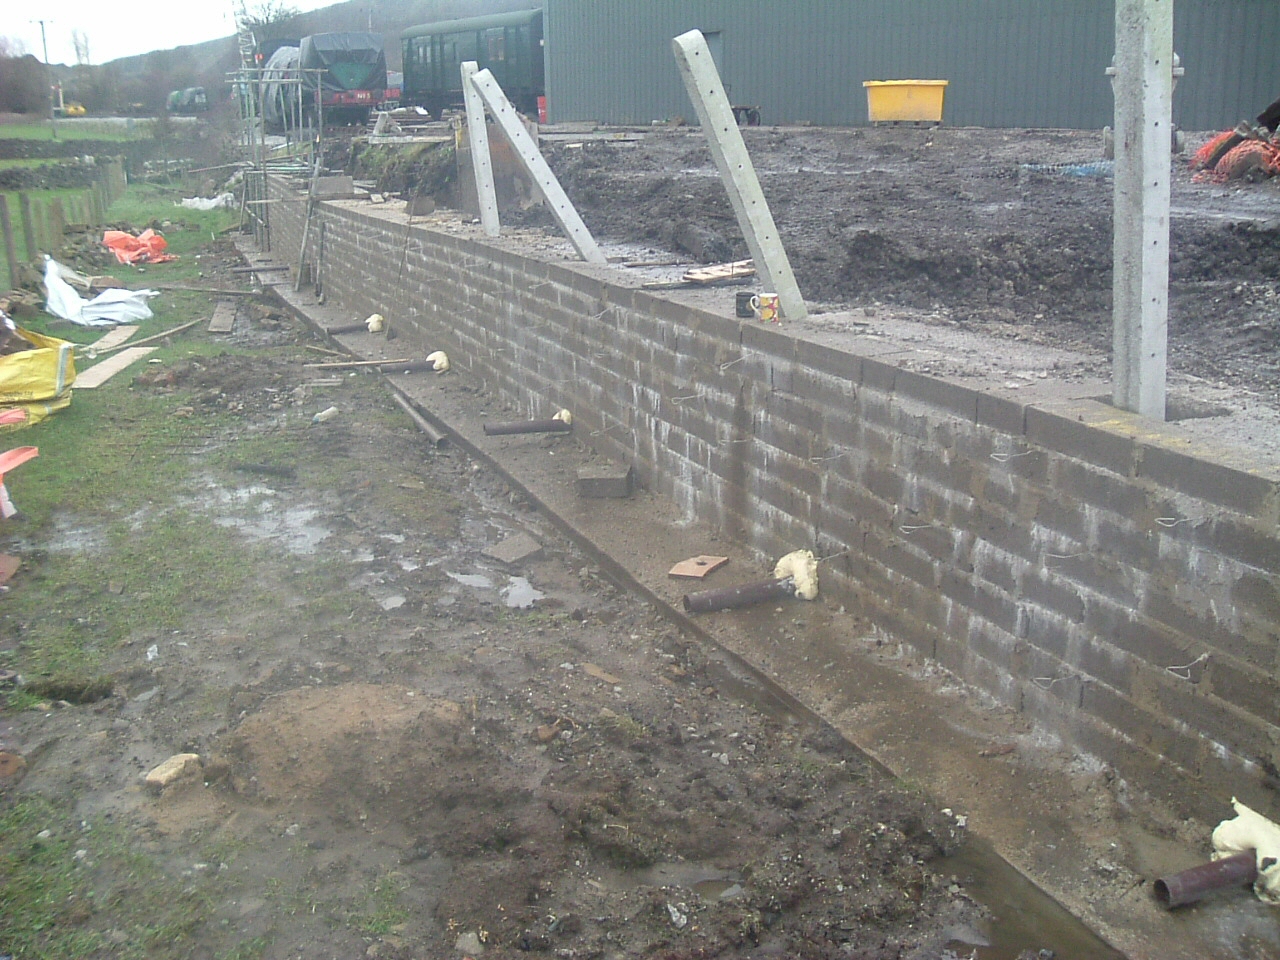
The wall viewed from the field side showing the fence posts waiting to be concreted into the wall and the drainage pipes
which run through the wall and the concrete behind.
(c) Dave Anderson.
|
|
|
|
The expanding foam around the pipes prevented the concrete spilling through and gaps when it was poured in place.
(c) Dave Anderson.
|
|
|
|
The now-supported roadway which will also carry the sixth road past the corner of the 2-road shed.
(c) Dave Anderson.
|
|
|
|
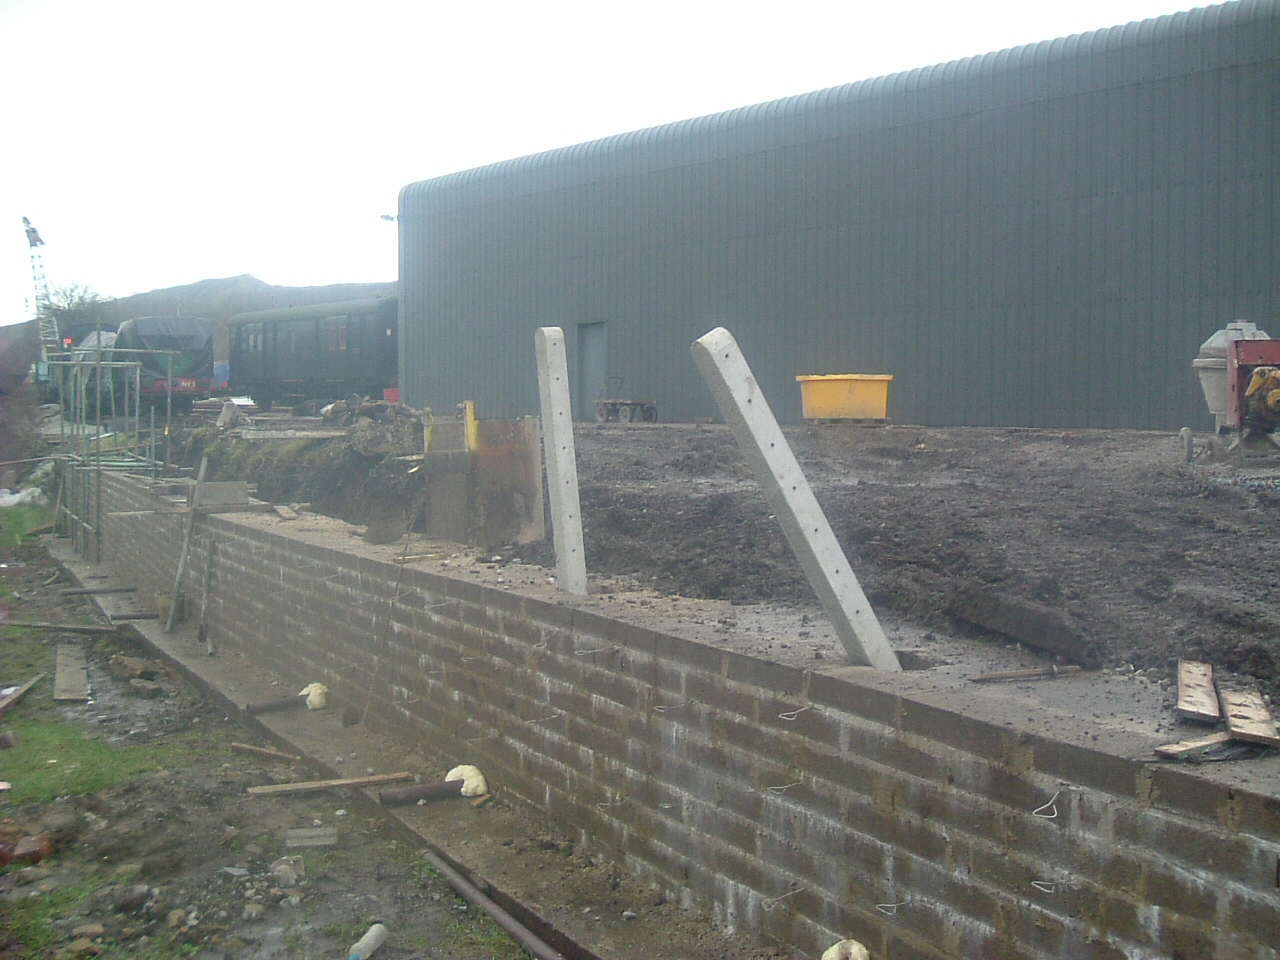
The back edge of the wall has now been infilled with concrete and fence posts are ready to be set into the top of the wall.
(c) Dave Anderson.
|
|
|
|
The wall continues to grow as the Class 31 and the Class 47 sit in the headshunt. The structure of the wall is also apparent.
(c) Dave Anderson.
|
|
|
|
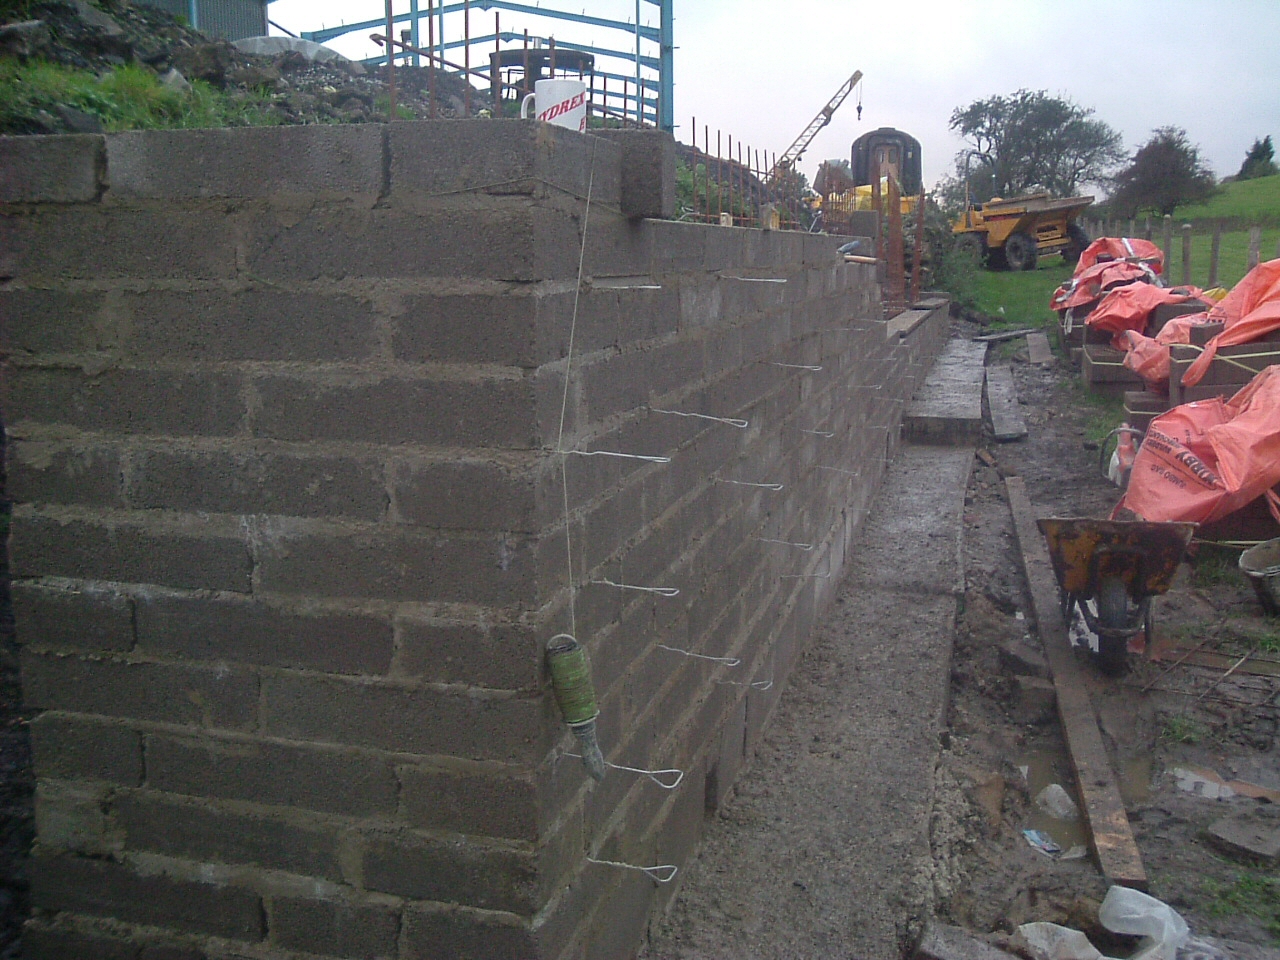
The ties for the drystone wall which will be built in front of the block wall are clearly visible in this shot.
(c) Dave Anderson.
|
|
|
|
Further progress on the wall ...
(c) Dave Anderson.
|
|
|
|
... and more of the same!
(c) Dave Anderson.
|
|
|
|
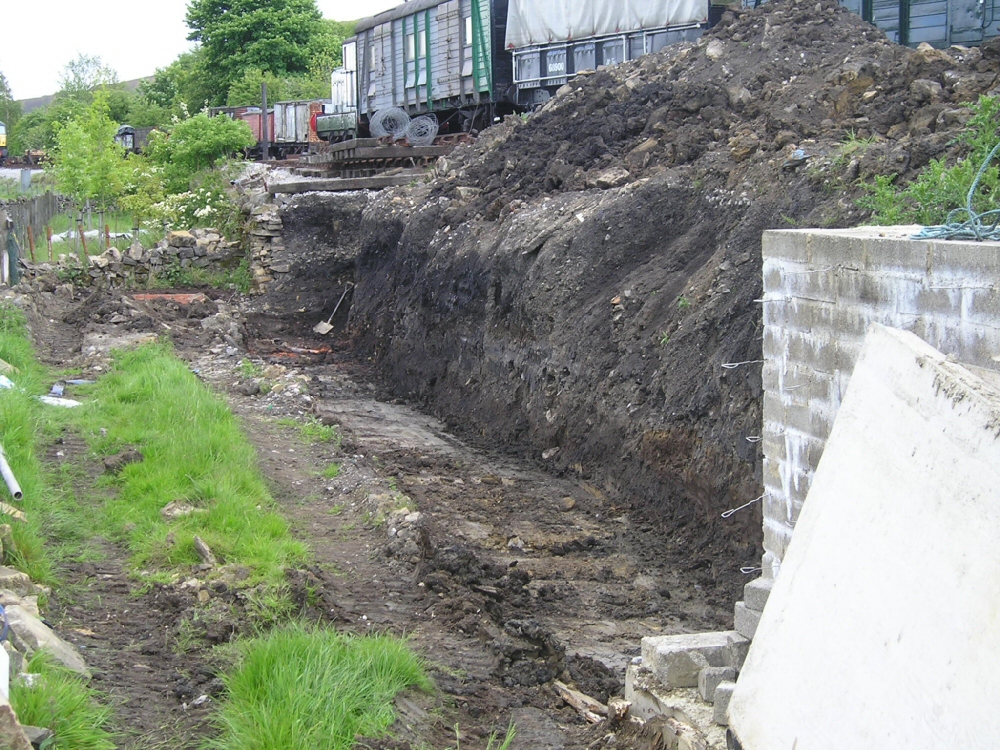
Digging out foundations for the next section of the wall.
(c) Dave Anderson.
|
|
|
|
The alignment of the sixth road is visible here (the sleeper is parked on it, having been moved along before the wall was
started), as is the old dry stone wall and the beginnings of the new wall's foundations (under Daisy the digger).
(c) Dave Anderson.
|
|
|
|
Excavations for the next section of the wall are well under way in this view.
(c) Dave Anderson.
|
|
|
|
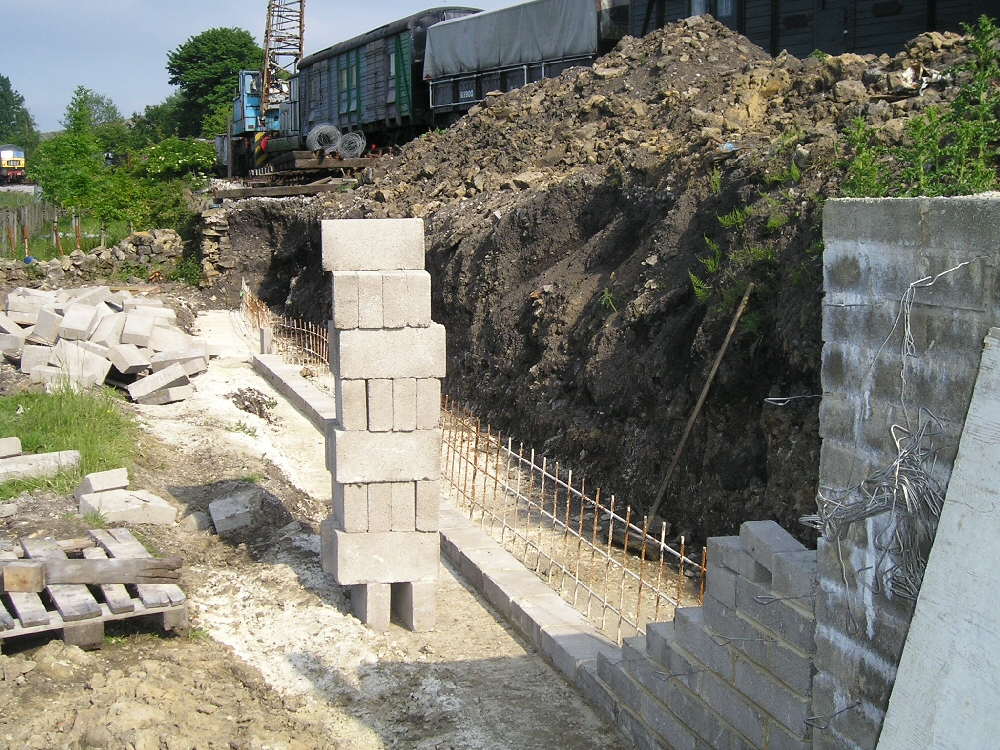
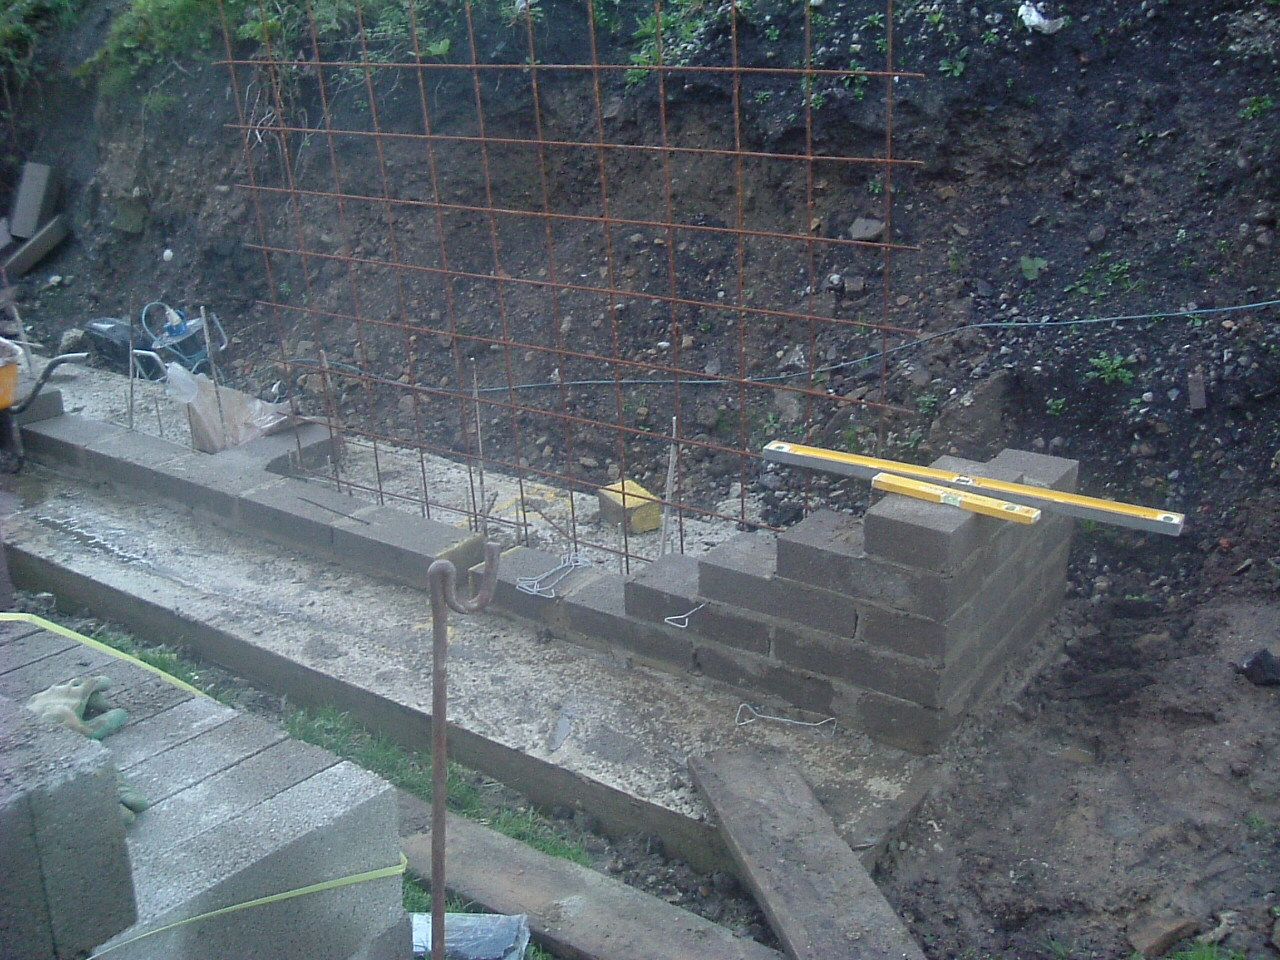
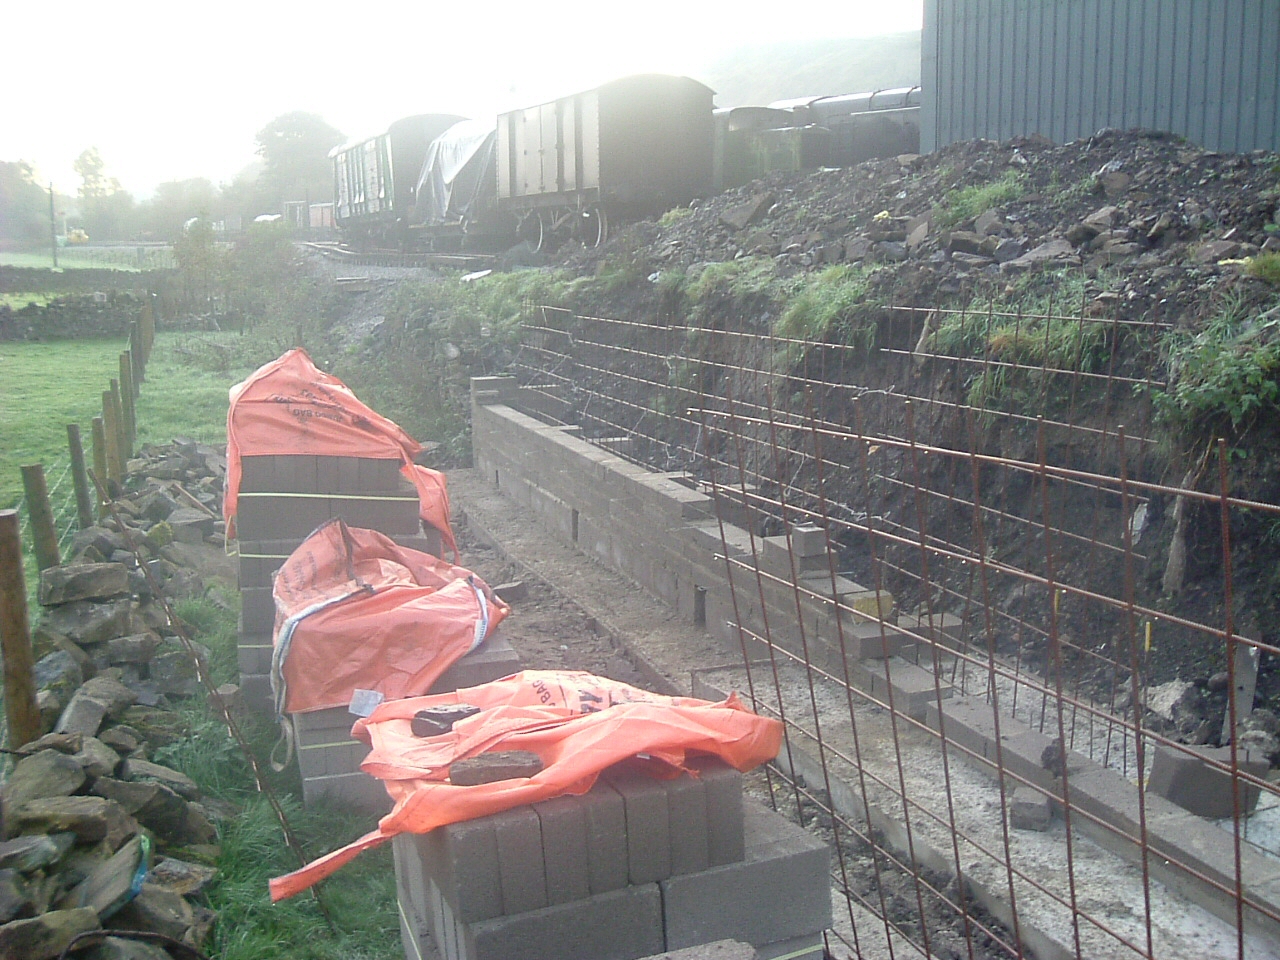
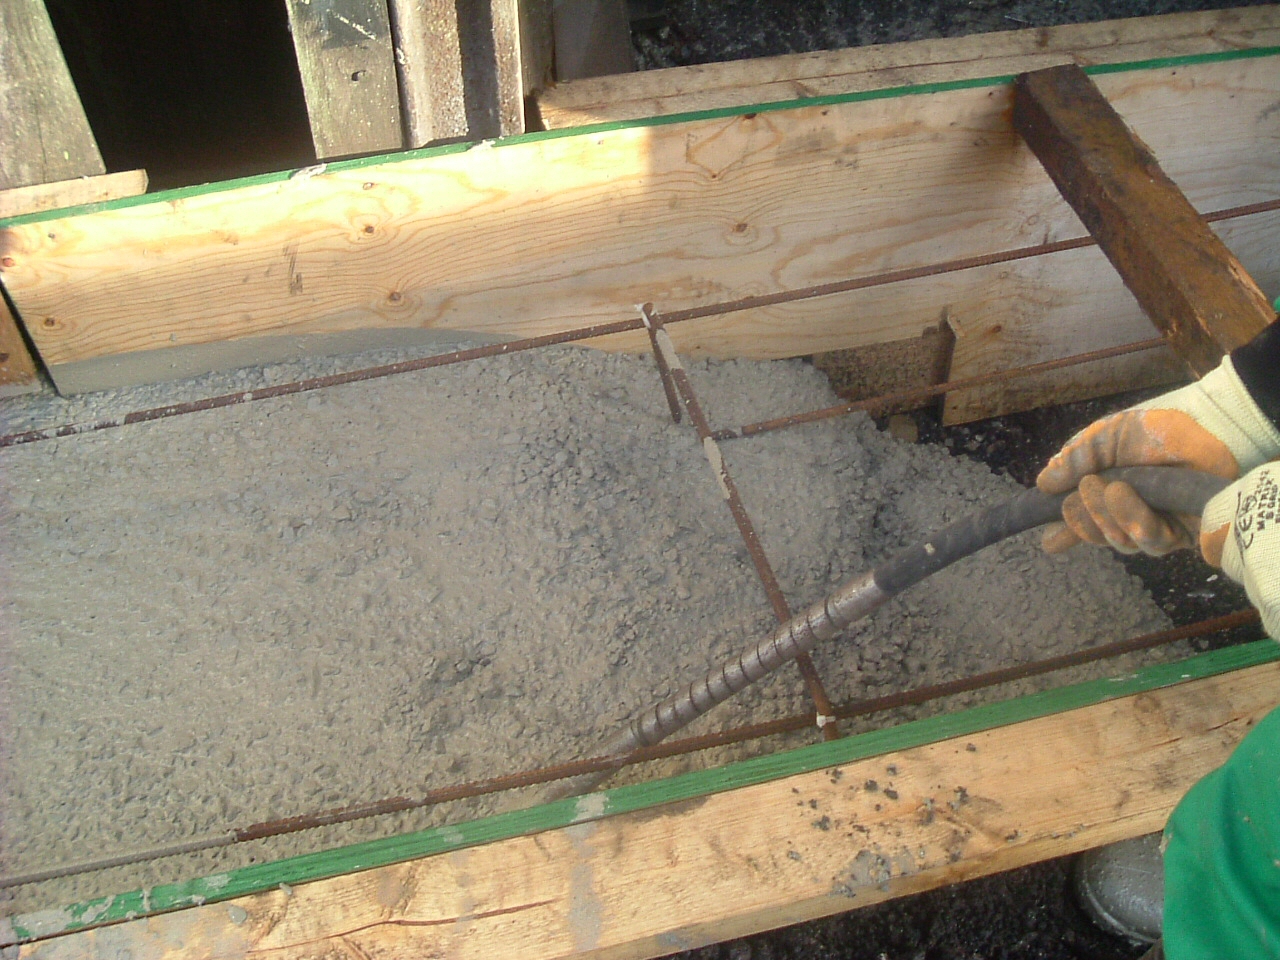
The wall is growing up from its foundations with the reinforcing mesh clearly visible.
(c) Dave Anderson.
|
|
|
|
The corner of the shed is visible in this picture as is the Iron Mink on the track leading to the fourth road.
(c) Dave Anderson.
|
|
|
|
Looking down the line of the wall.
(c) Dave Anderson.
|
|
|
|
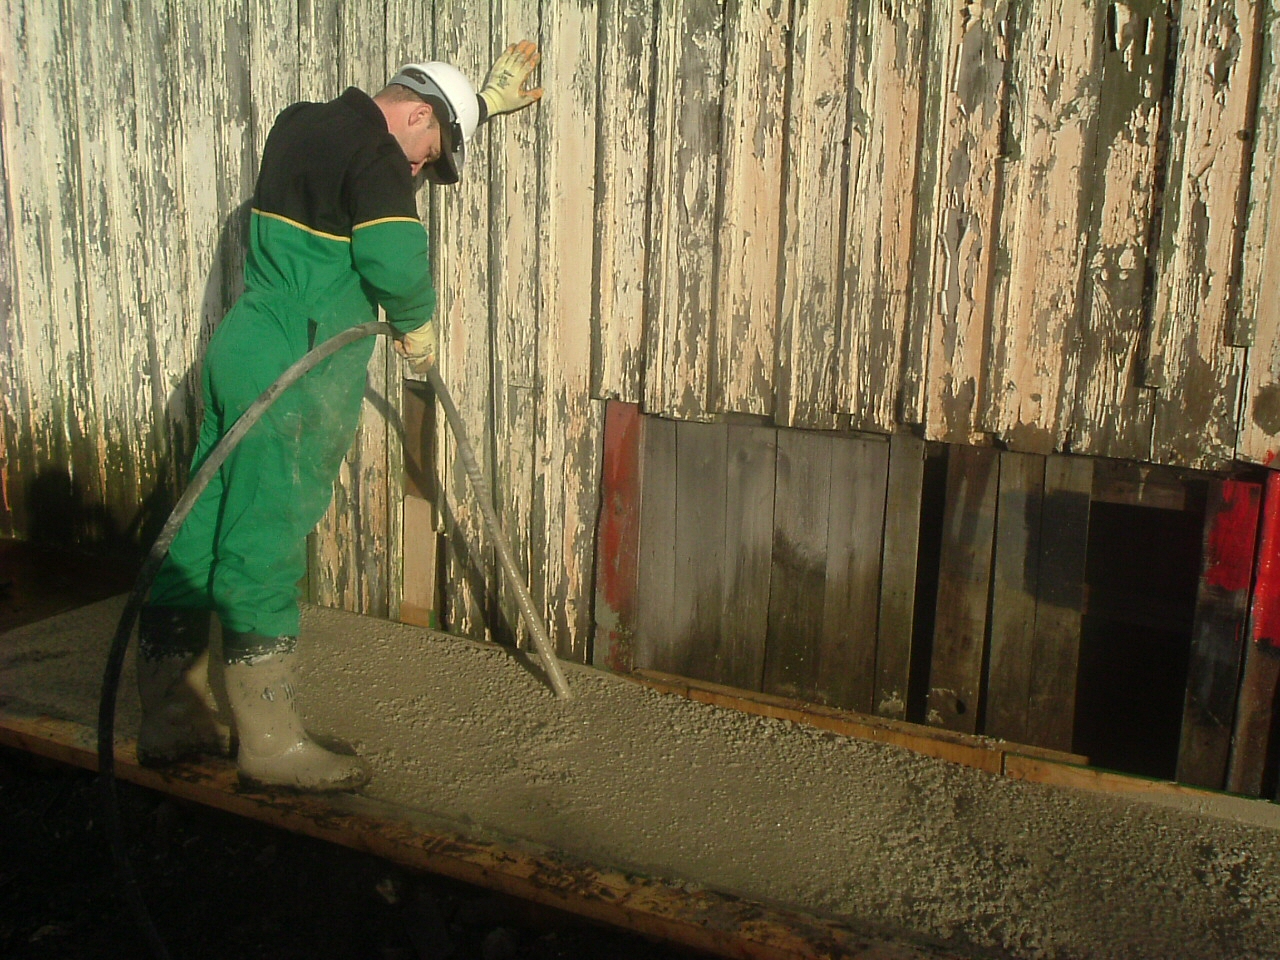
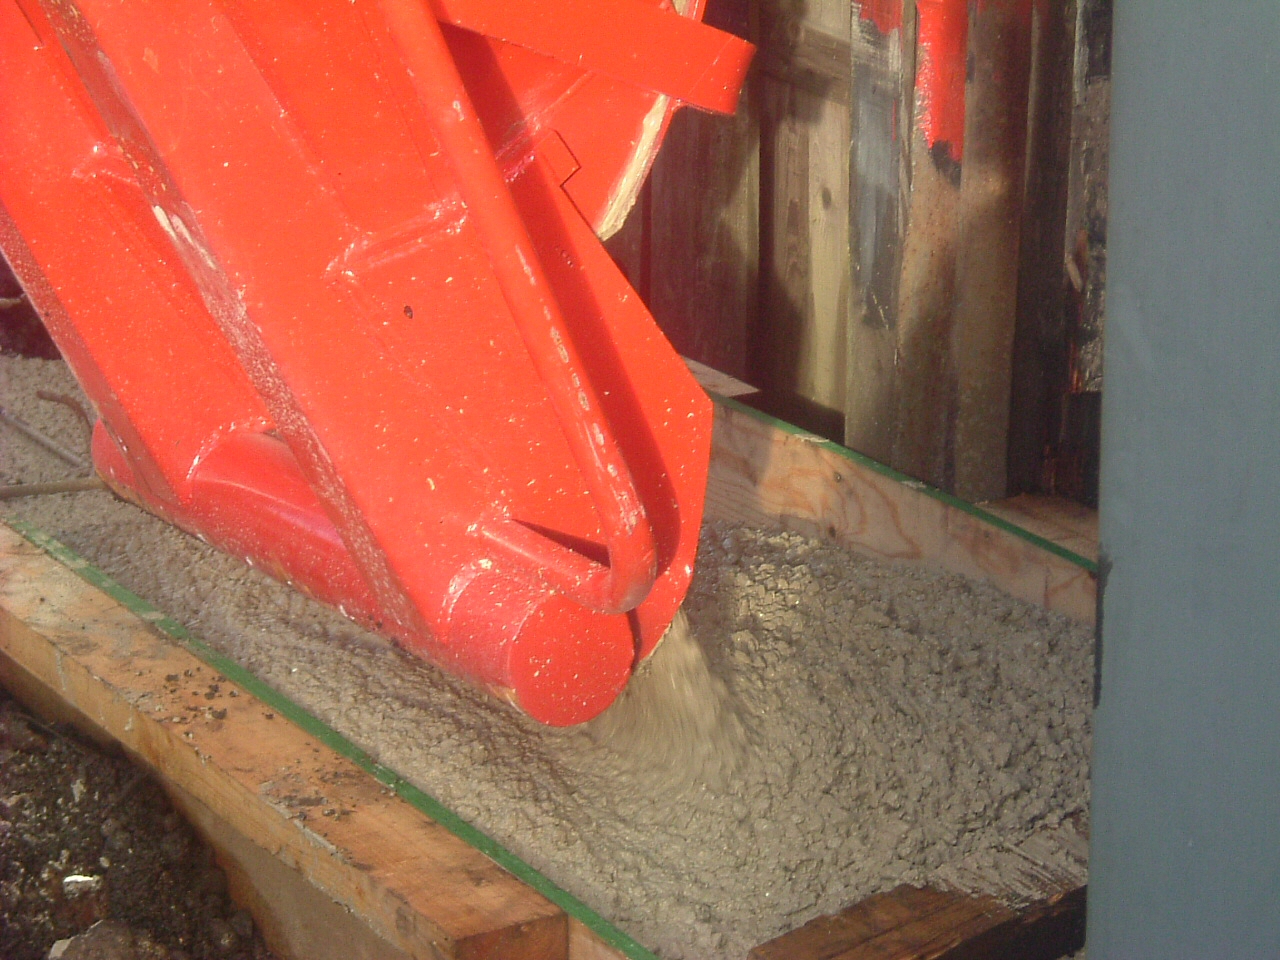
Pumping the concrete into the shuttering.
(c) Dave Anderson.
|
|
|
|
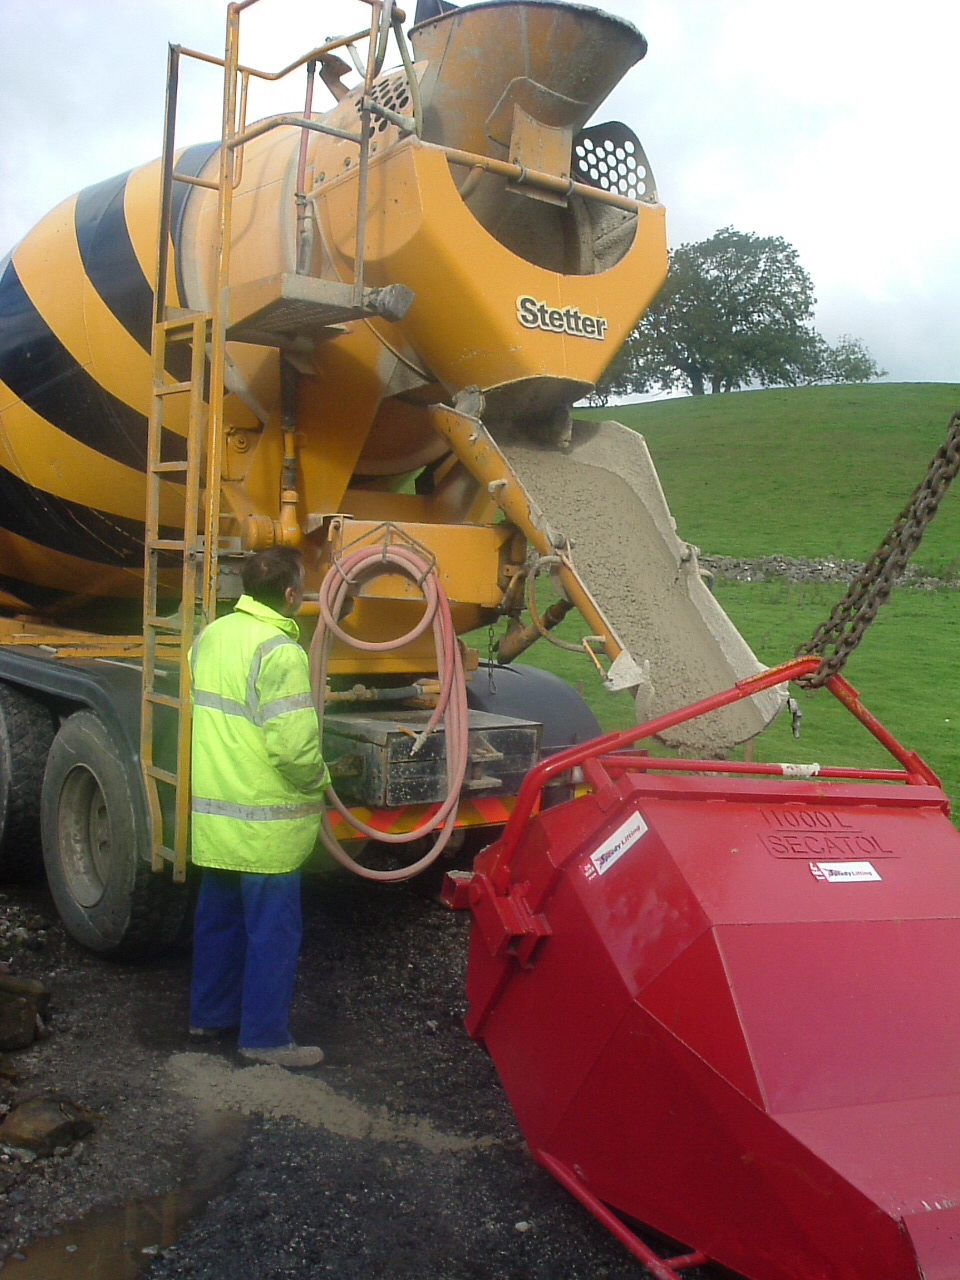
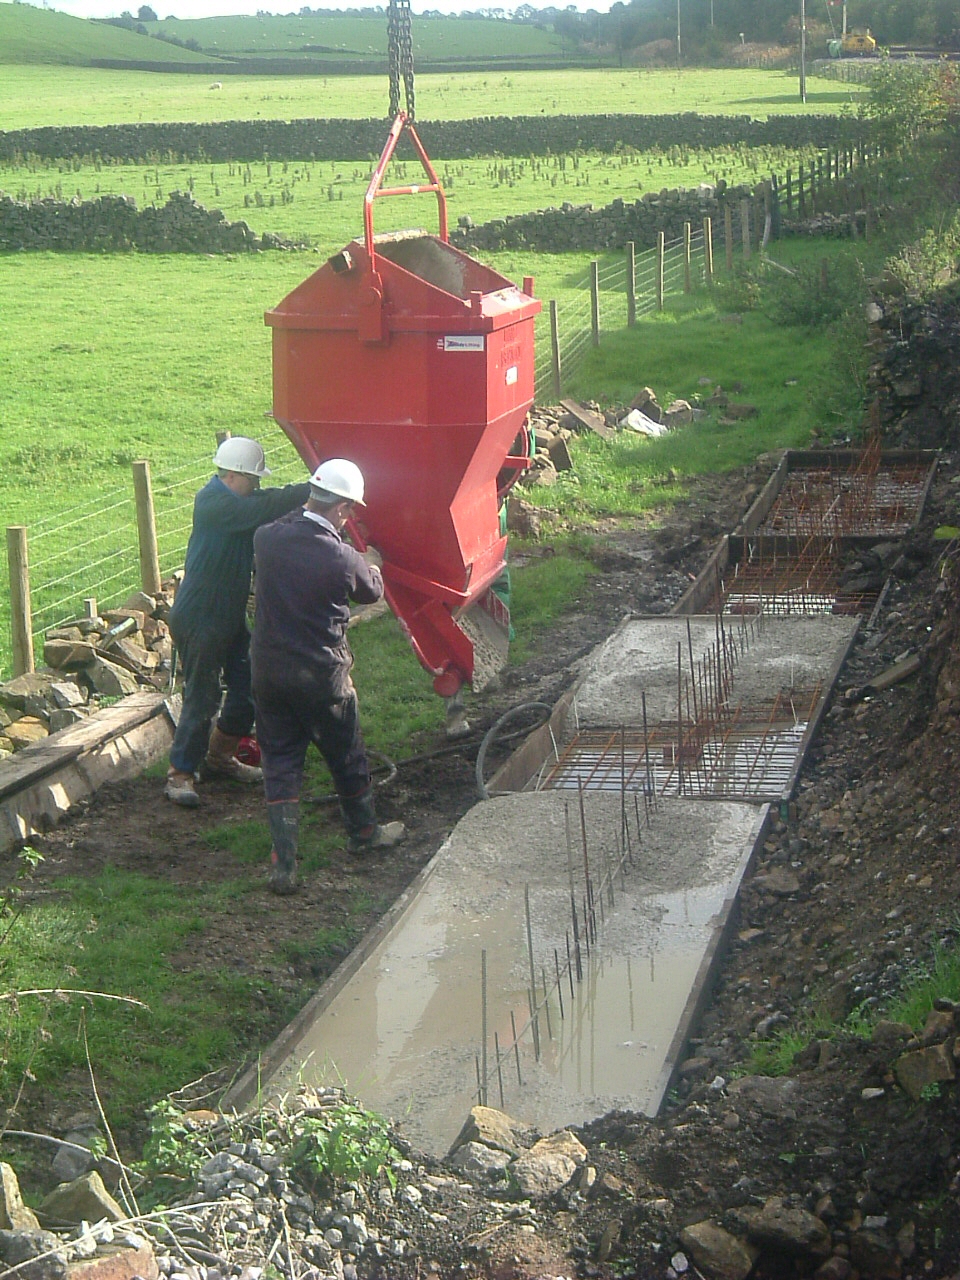
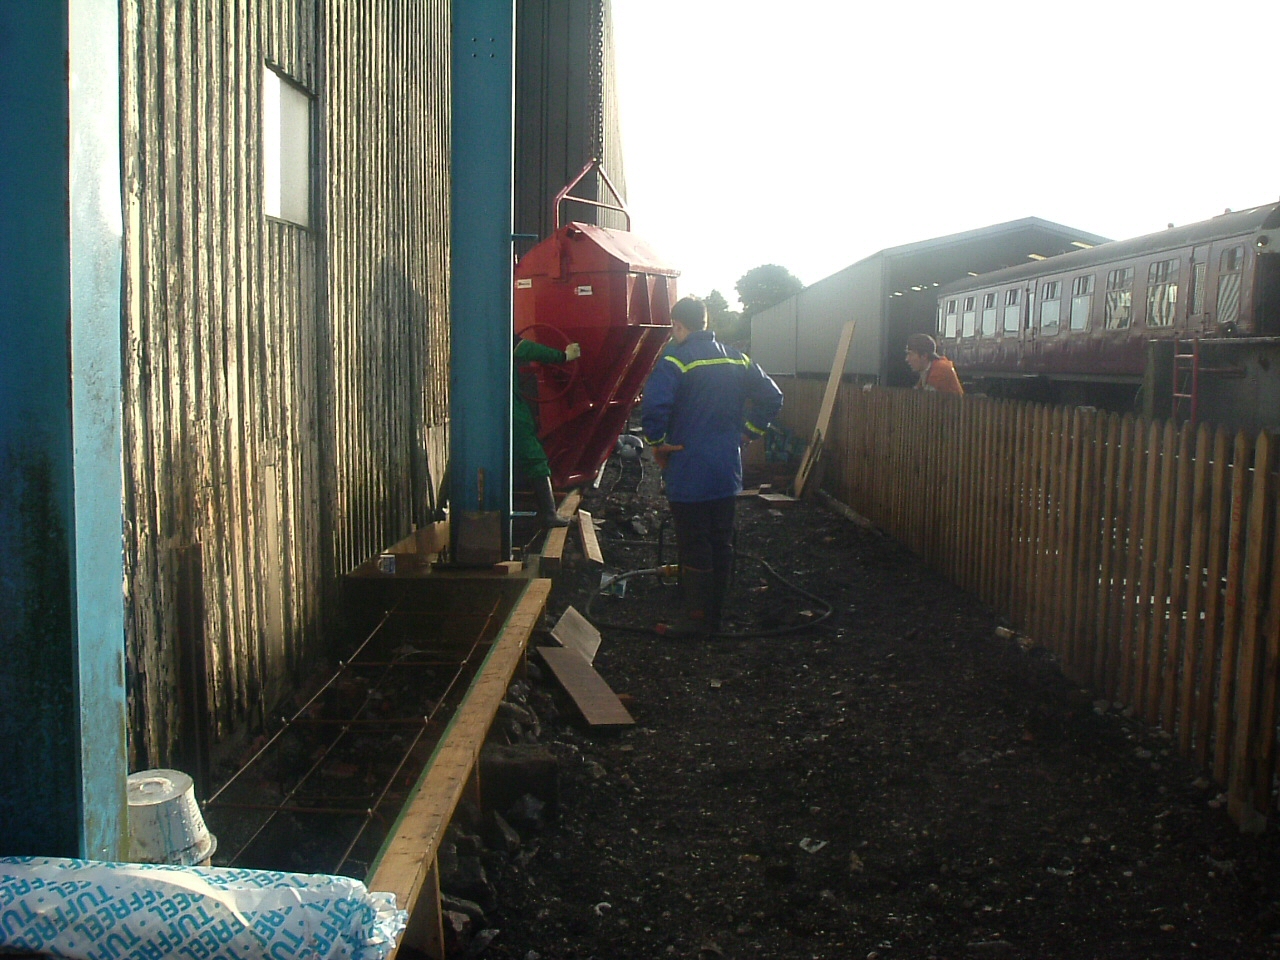
Unloading the concrete from the truck into the hopper on the end of the road crane.
(c) Dave Anderson.
|
|
|
|
With the shuttering in place, concrete is delivered and moved around into the right places.
(c) Dave Anderson.
|
|
|
|
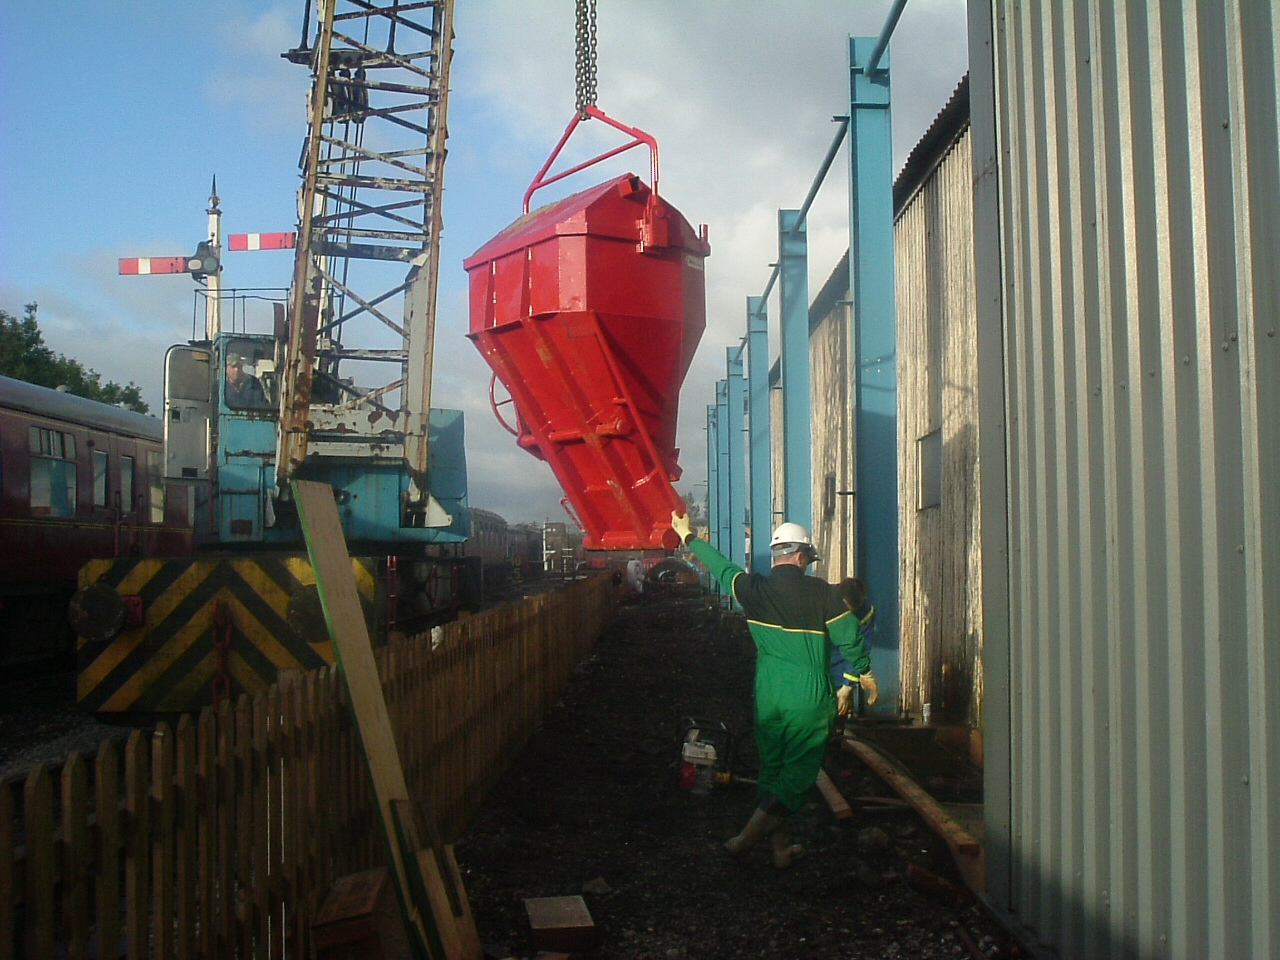
Moving the concrete was made much easier with the use of the road crane and what equates to a large bucket!
(c) Dave Anderson.
|
|
|
|
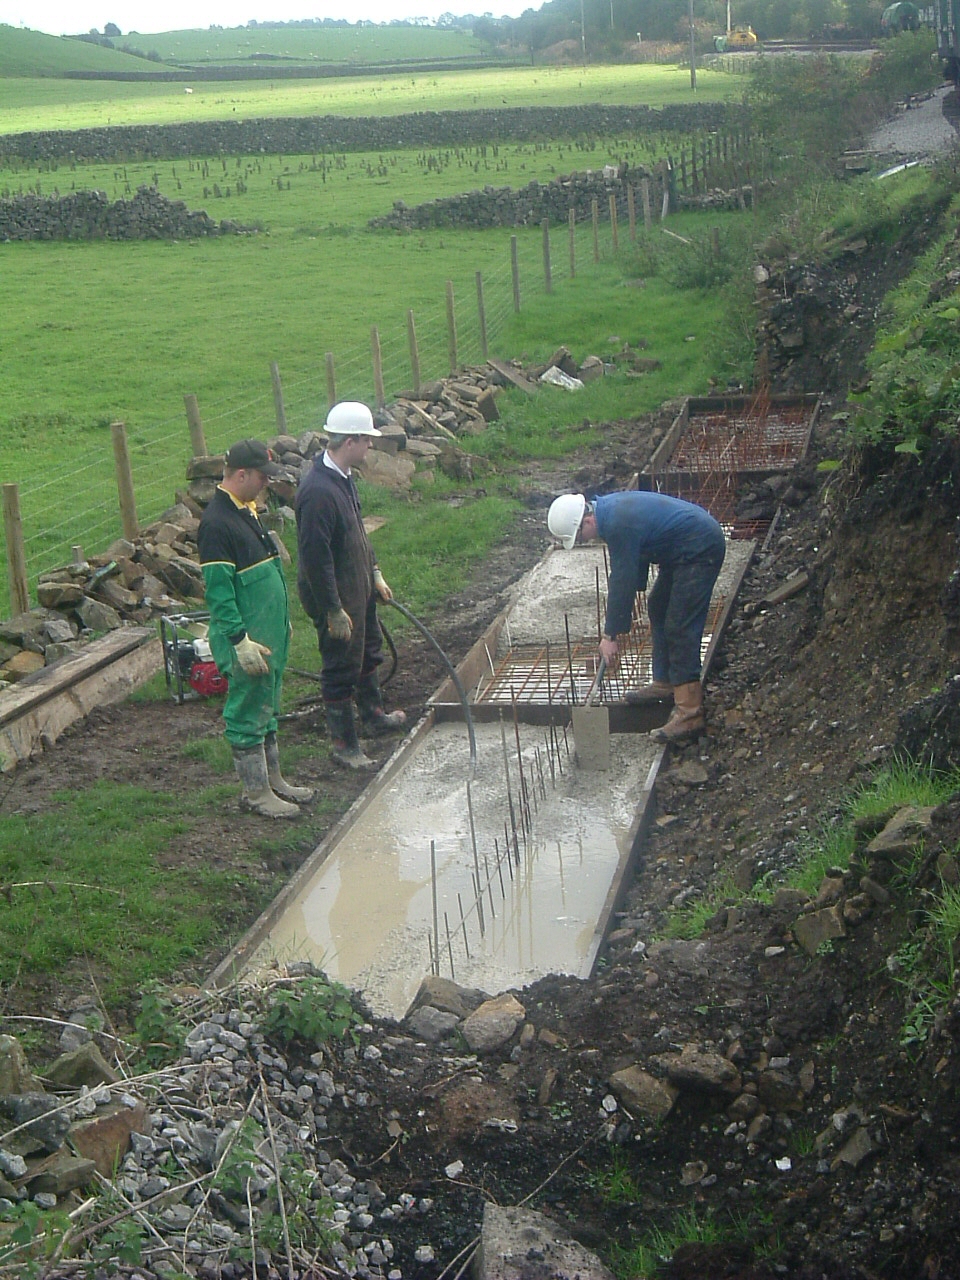
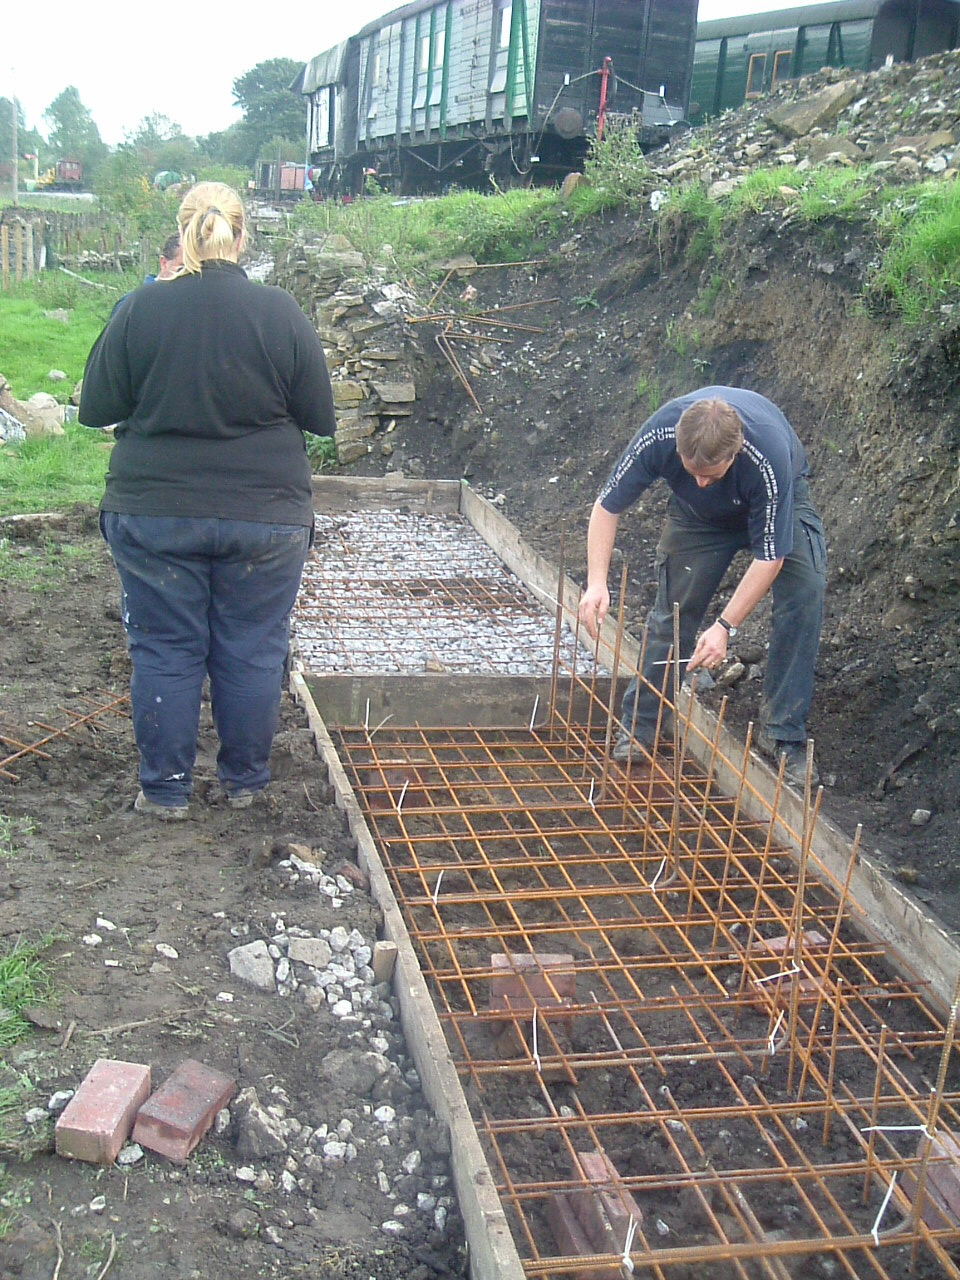
Once the area was dug out as required, shuttering was put together and reinforcing bar inserted to strengthen the concrete
foundations for the wall.
(c) Dave Anderson.
|
|
|
|
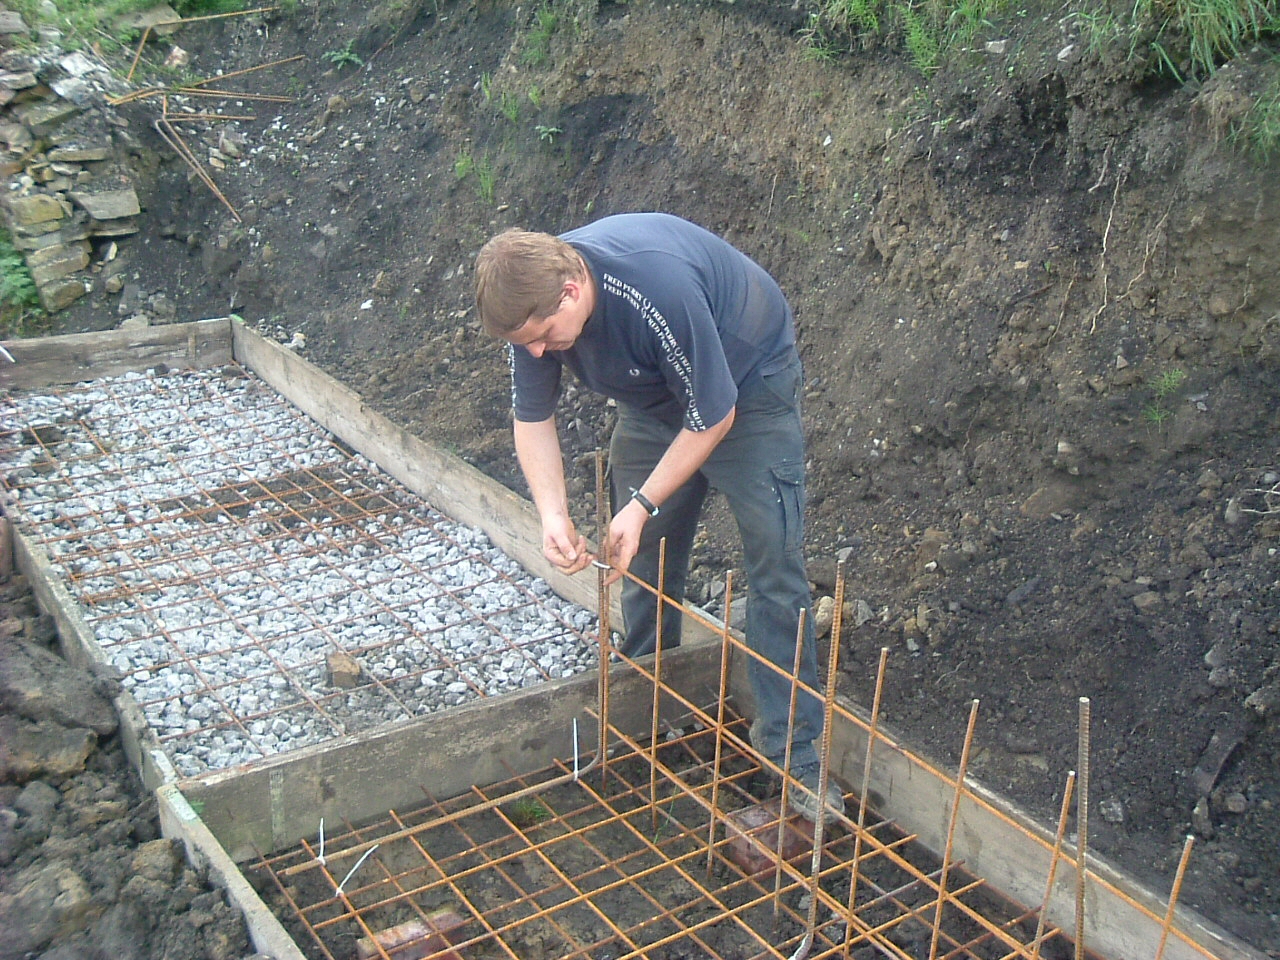
Chris continues to tie wrap the reinforcing bar together in the required fashion prior to concrete pouring.
(c) Dave Anderson.
|
|
|
|
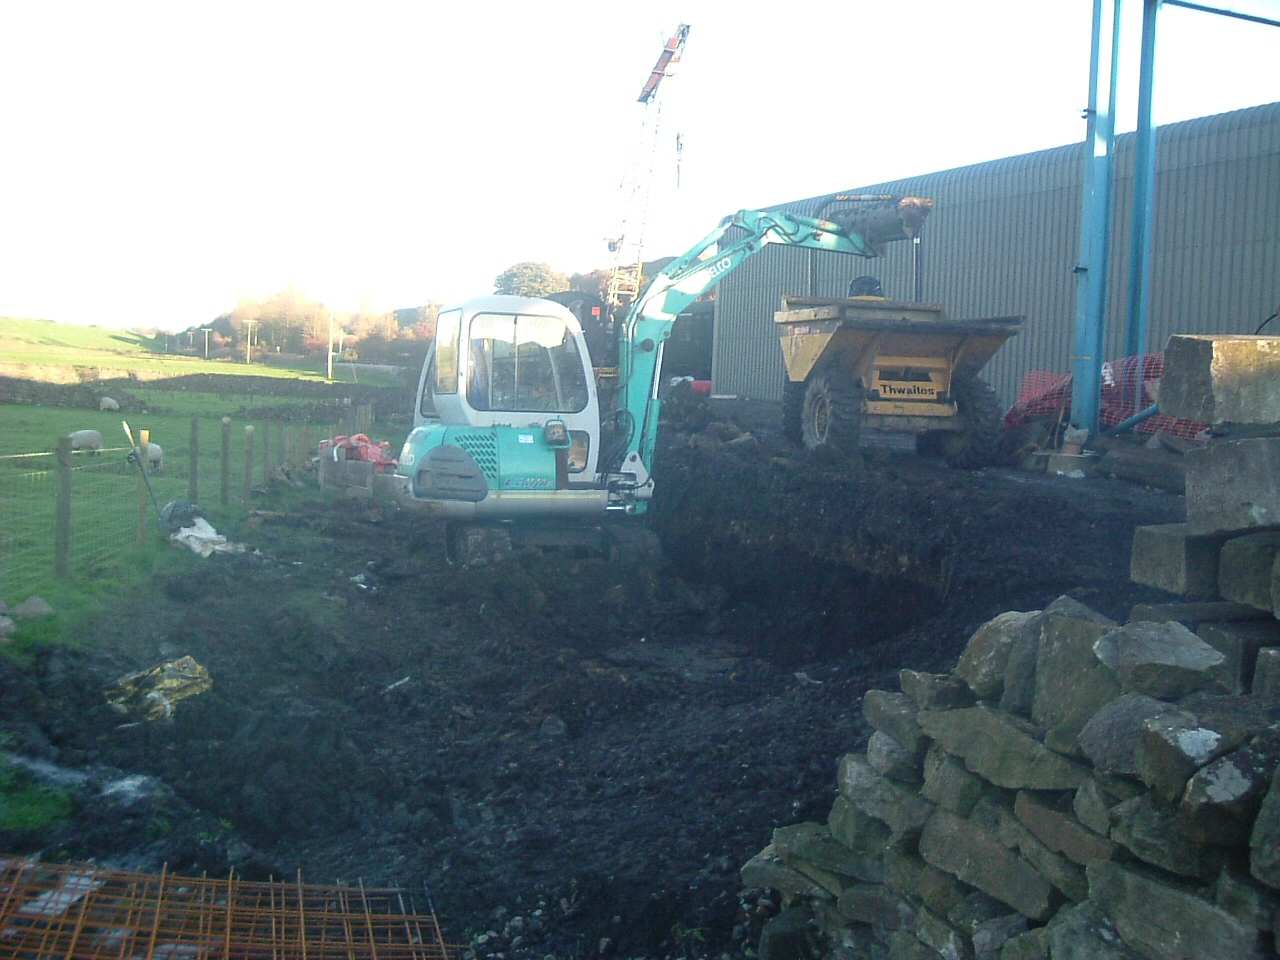
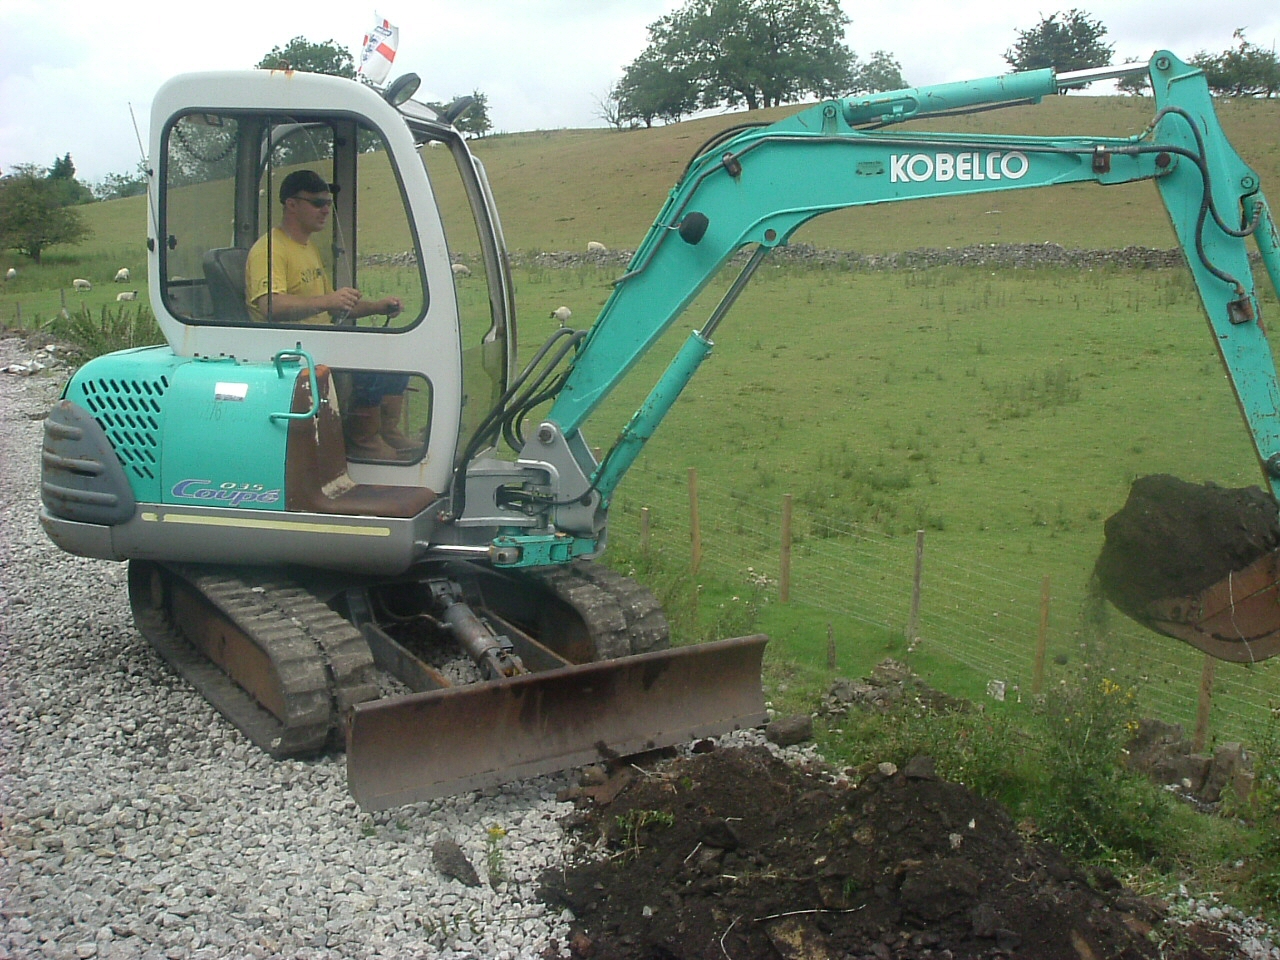
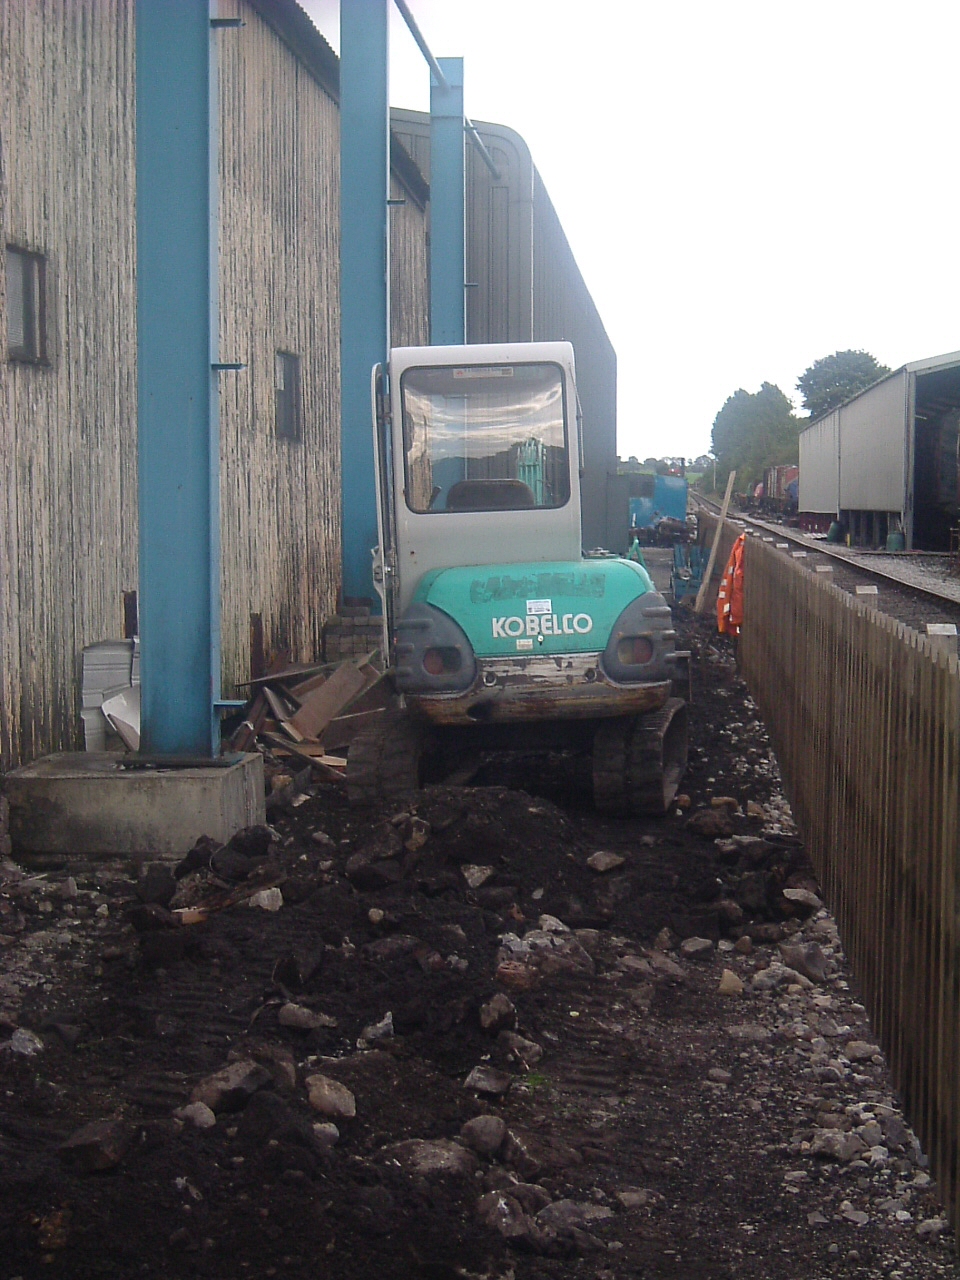
Making use of the Railway's mini-digger, sections of the embankment are dug out to allow the foundations to be laid for the
first part of the retaining wall.
(c) Dave Anderson.
|
|
|
|
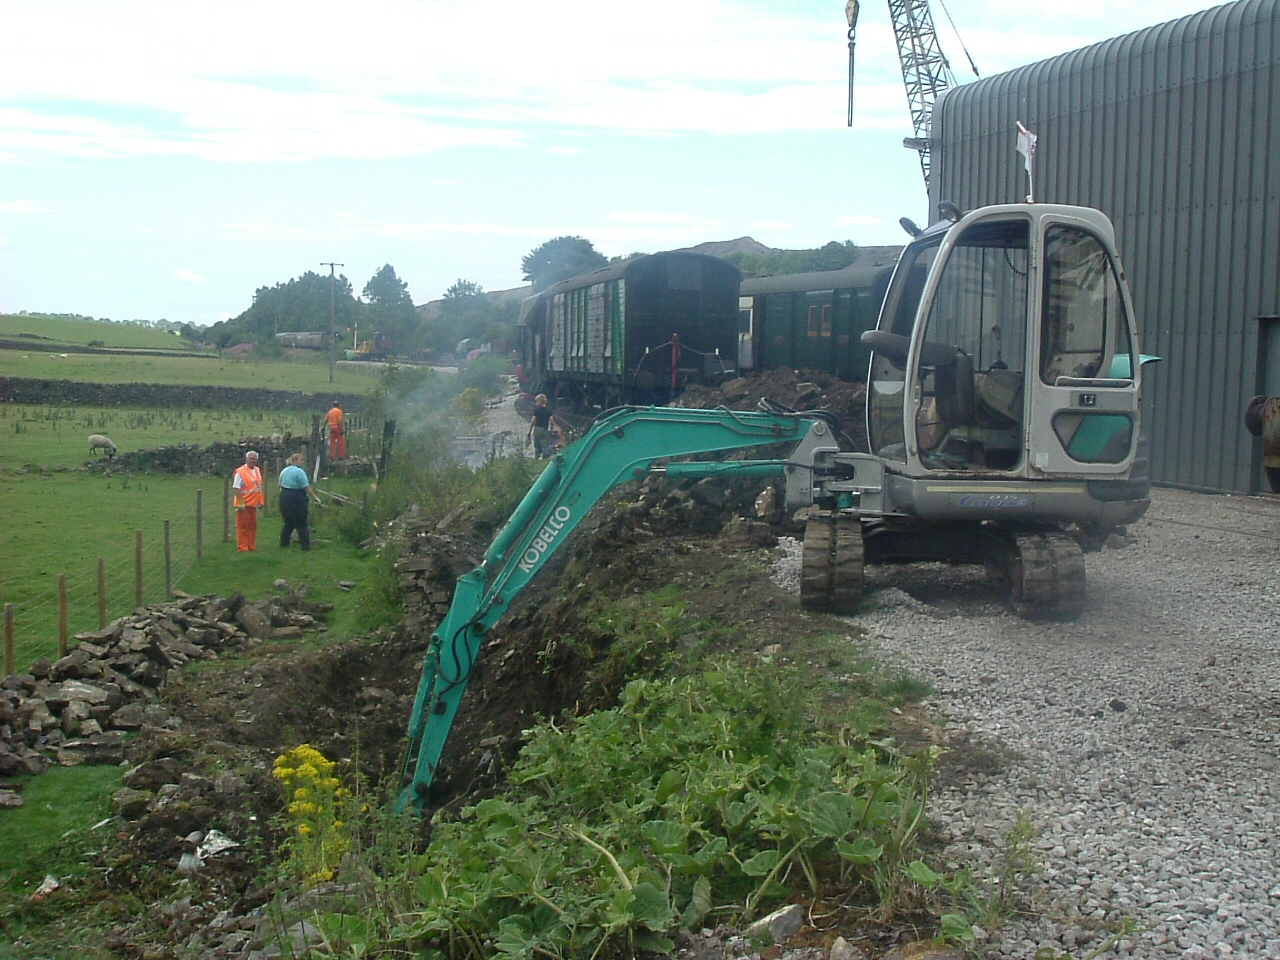
Dave gets stuck into digging out behind the location of the old dry stone wall.
(c) Dave Anderson.
|
|
|
|
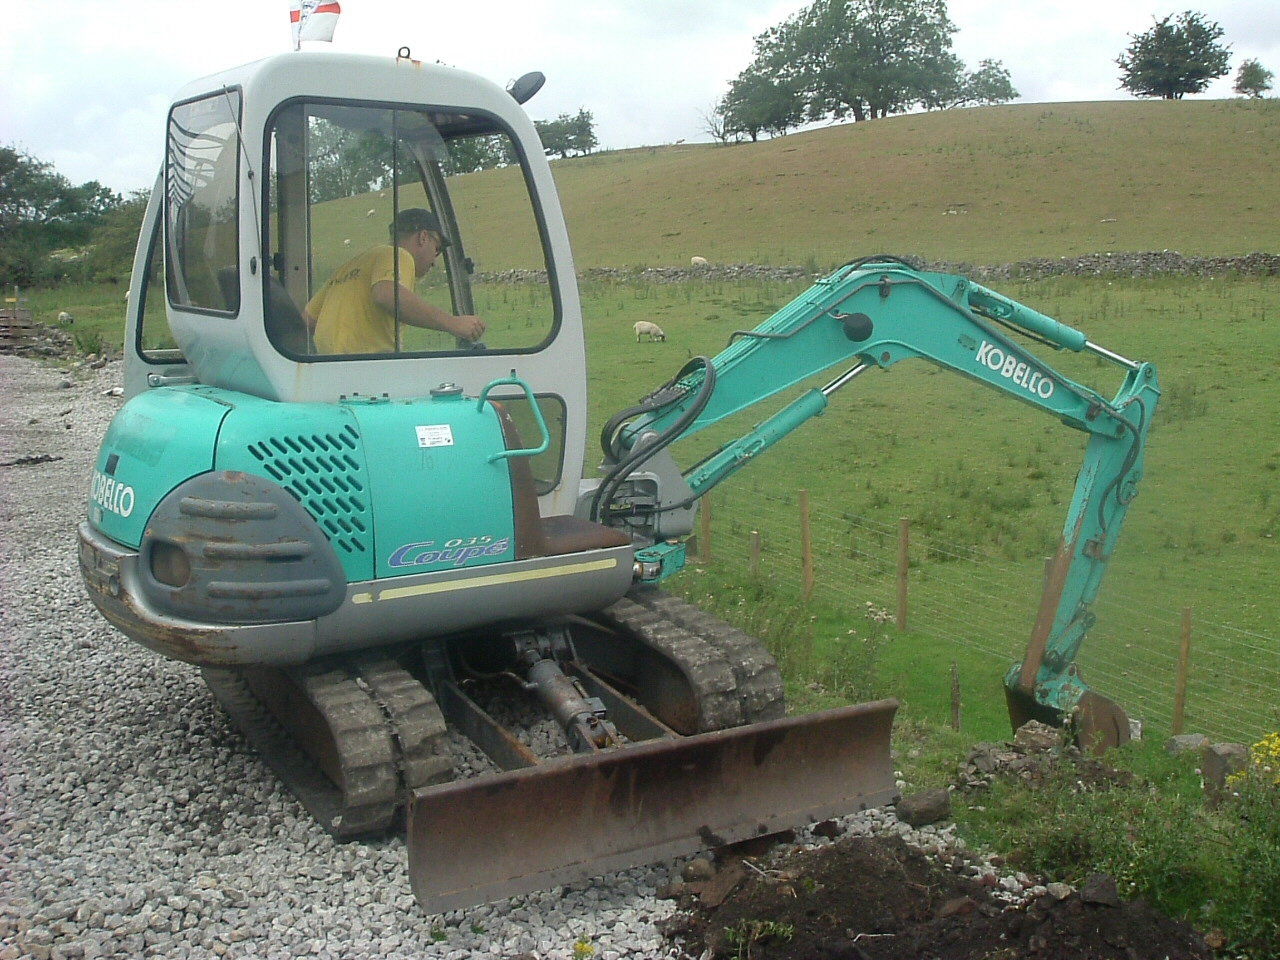
'Daisy', the mini digger, has quite a reach from the track level to the base of the embankment.
(c) Dave Anderson.
|
|
|
|
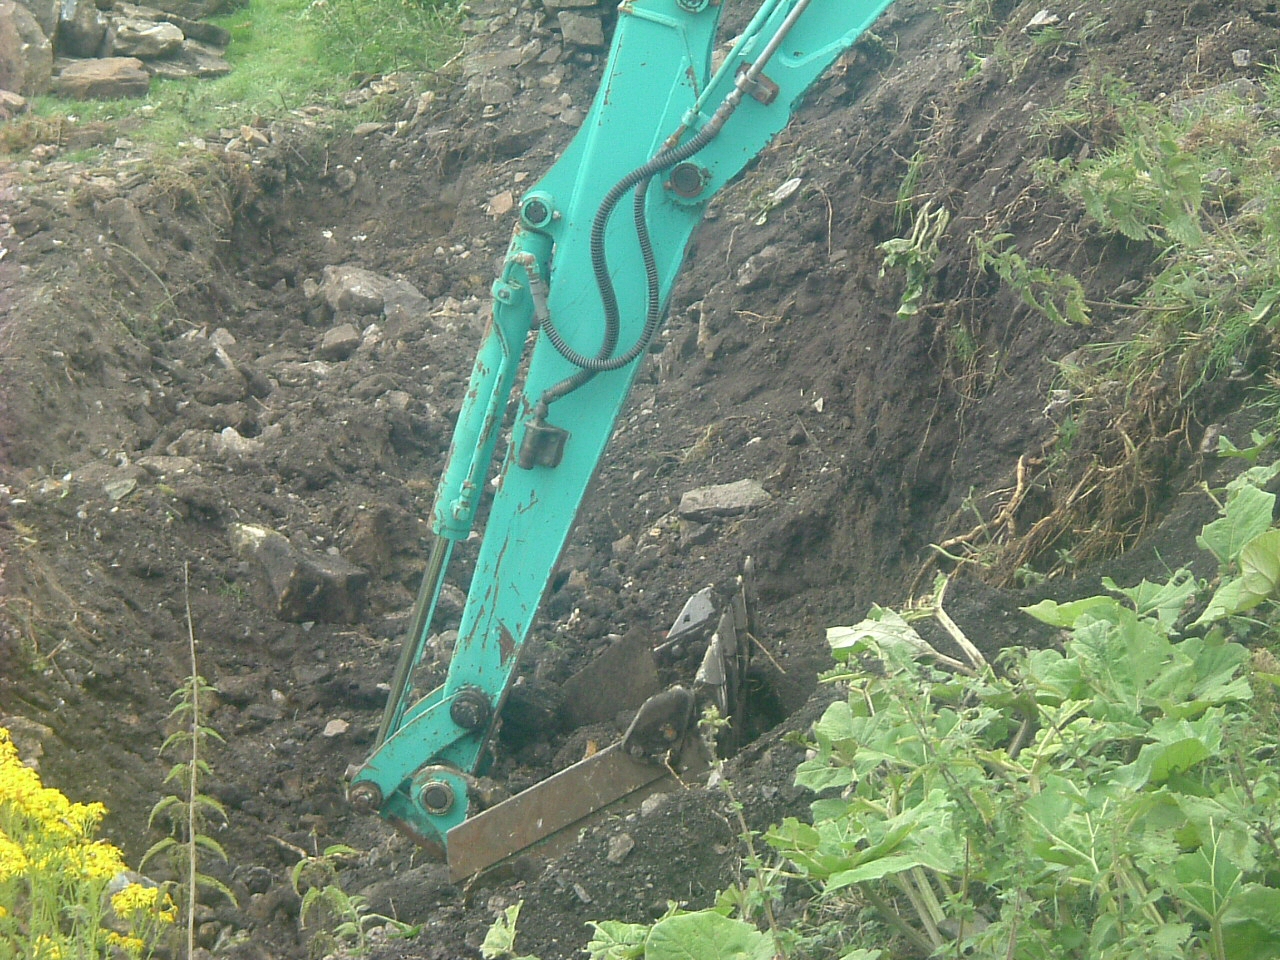
A close up of the works in progress. The old dry stone wall will be re-built in front of the concrete block wall which
actually does retain the embankment as opposed to the old wall which didn't!
(c) Dave Anderson.
|
|
Other groundworks - Most recent photos first
|
|
Viewed from the top of the cherry picker, work is underway to build the shuttering for the final couple of ring beams
required. To the bottom right, a team have been re-inforcing the shuttering, ready for pouring the concrete. The reinforcing
bar has already been put in place. To the bottom left, the shuttering for the end wall is being built and levelled (mainly
off the edge of the photo!)
(c) Tim Warner.
|
|
|
|
More work involved in pouring the concrete into the shuttering for the ring beams...
(c) Dave Anderson.
|
|
|
|
...and more!
(c) Dave Anderson.
|
|
|
|
Delivering concrete to the site of the ring beams made use of the concrete hopper and the rail crane once more.
(c) Dave Anderson.
|
|
|
|
Dave guides the hopper to the righ location with Tony at the controls of the rail crane.
(c) Dave Anderson.
|
|
|
|
Tony driving the railcrane with the (soon to be replaced) ex-L&Y bracket signal behind.
(c) Dave Anderson.
|
|
|
|
Pouring the concrete into the shuttering.
(c) Dave Anderson.
|
|
|
|
'Daisy' was used to dig out the foundations for the ring beams. Here 'she' is seen alongside the old goods shed part way
through preparing the foundations.
(c) Dave Anderson.
|
|
Moving stock from the shed base
|
|
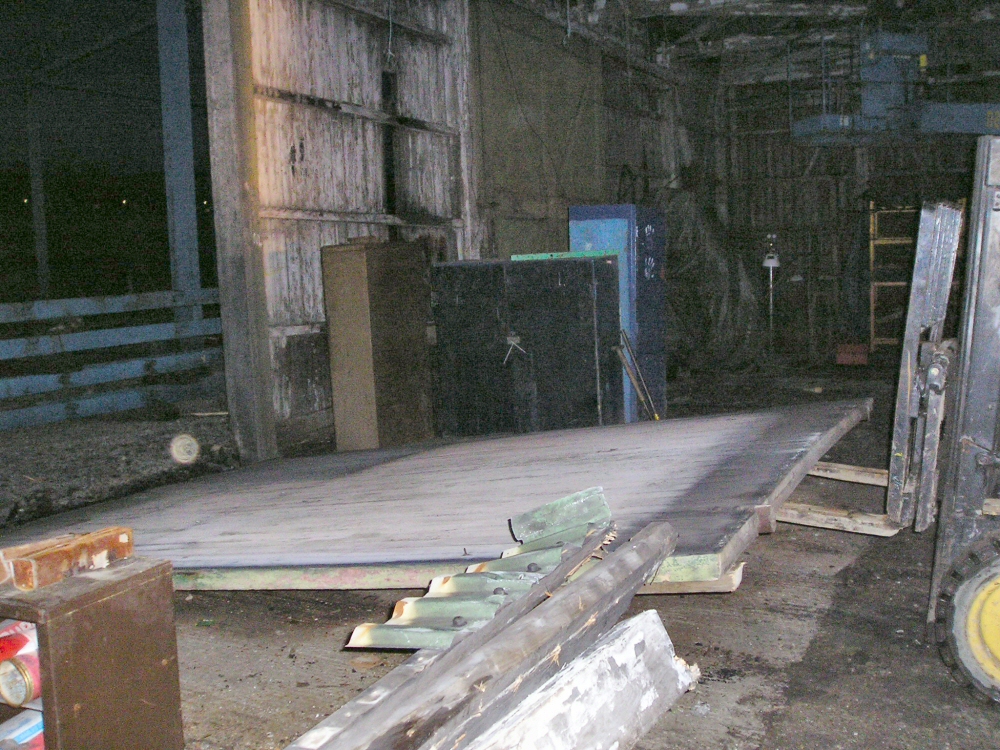
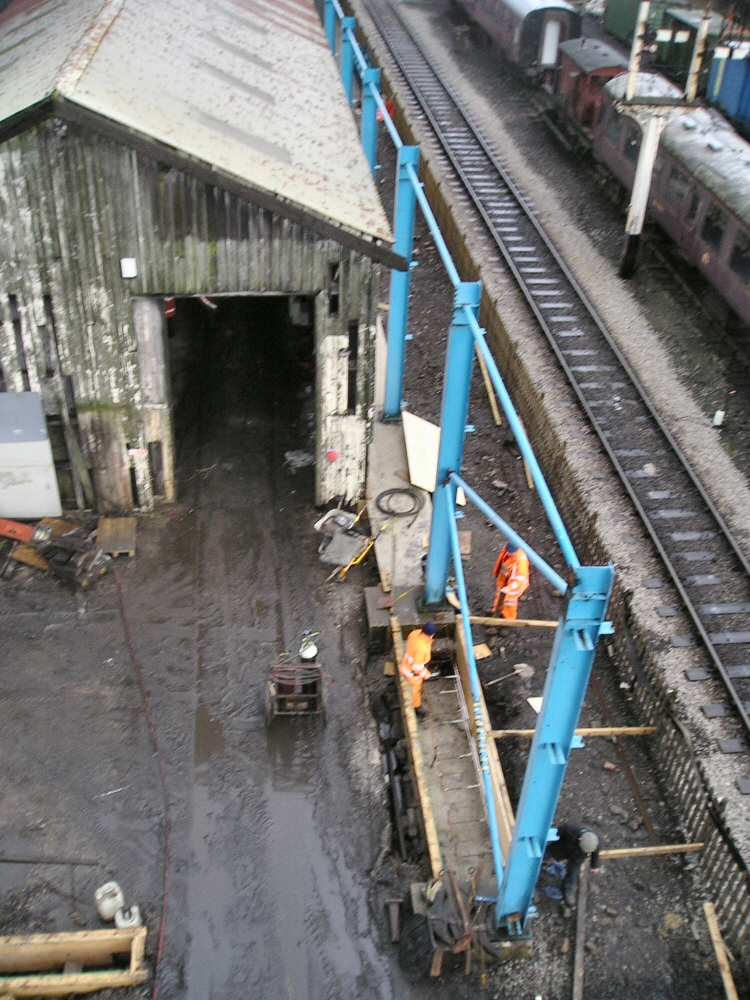
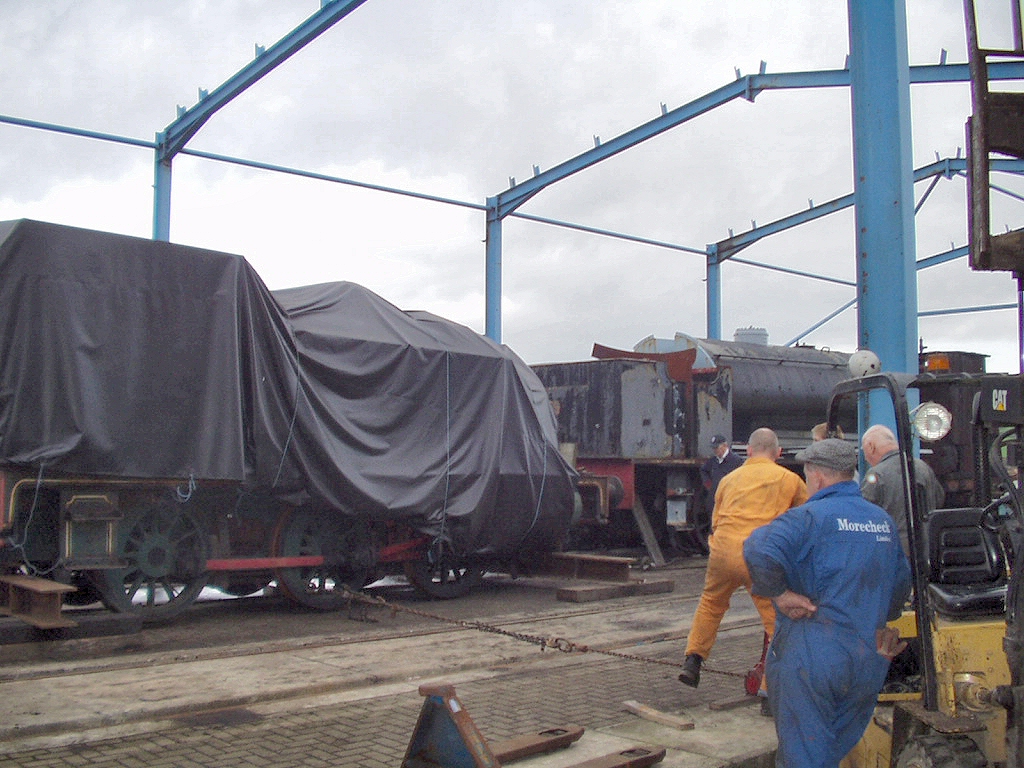
The aim of the exercise was to clear Road 5 of the shed base which contained 'dead' locos, but wasn't actually connected to
the top yard! Slough Estates No.5 is seen here having been jacked up and placed on a skate on top of
two girders. It is being slid along the girders towards Road 4 using a ratchet and a length chain.
(c) Tim Warner.
|
|
|
|
The loco was moved slowly with the chain being checked every few feet and adjusted as required.
(c) Tim Warner.
|
|
|
|
Locos moved from Road 5 were York No.1, Slough Estates No.5 and 69.
These have now been shunted across to the carriage sidings until the shed is clad, trackwork installed and decisions made as
to their eventual location and restoration.
(c) Tim Warner.
|
|
|
|
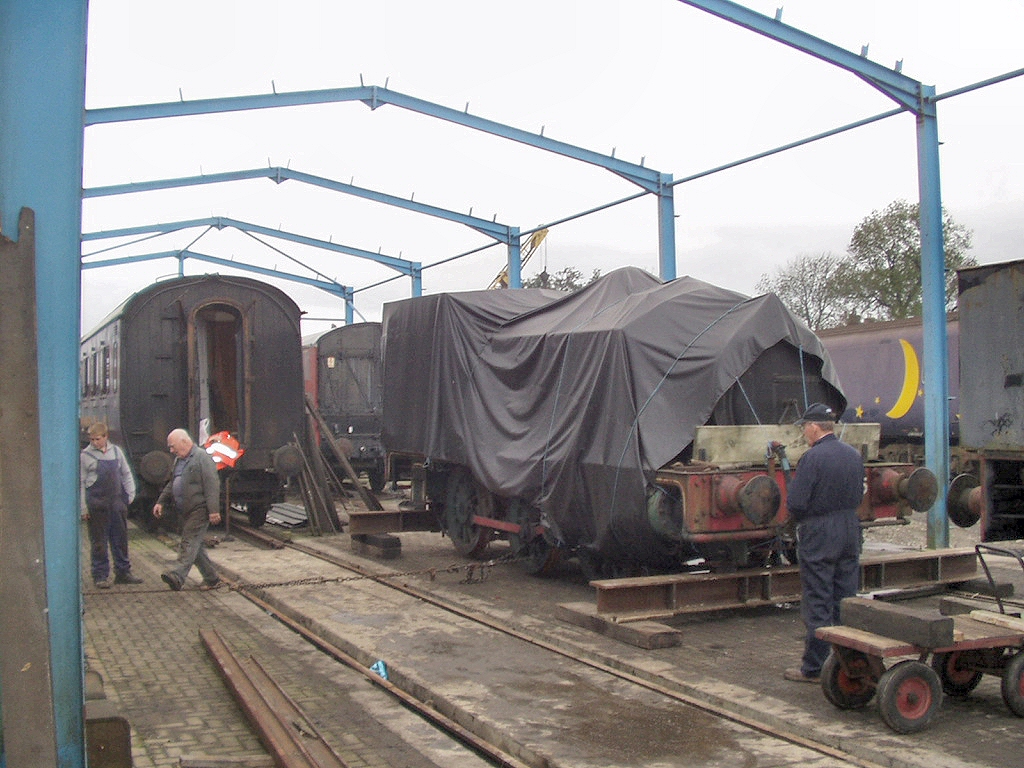
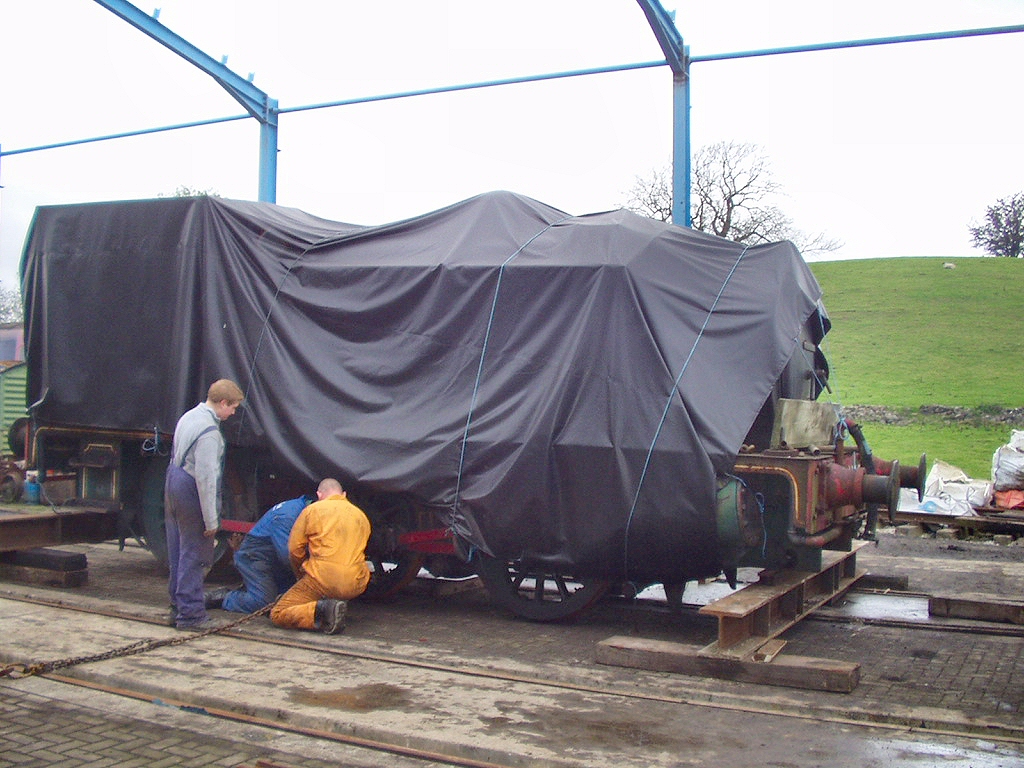
The small steam crane (pictured to the right of the picture on the left!) has been reassembled and is due to move to a new
home where hopefully it can be fully restored and put to good use. No.69 has since been reassembled and the MR coach pictured
has been temporarily re-bogied with standard gauge bogies to allow it to be shunted. It will receive appropriate bogies as
and when they become available.
|
|
|


